For most standard patio umbrellas, you want a hole that is about 1/4 inch (6mm) wider than the outside diameter of your pole. That clearance lets the pole slide in and out smoothly without rattling around. The most common pole sizes run 1.5 inches (38mm), 1.75 inches (44-45mm), 2.0 inches (51mm), and 2.25 inches (57mm), so in practice you're usually drilling or fitting a hole somewhere between 1.75 inches and 2.5 inches depending on your exact setup. But here's the thing: the hole size alone is only half the answer. Whether you're drilling through decking, fitting a sleeve into a poured concrete mount, or dropping a pole into a table base, you need to measure your specific pole first, then match the hole to it with the right clearance and any needed adapter. The steps below walk you through exactly that. If you are still choosing the umbrella itself, start with these guidelines on how to buy a patio umbrella so the pole and mounting match your setup.
What Size Hole for Patio Umbrella Pole Fit and Drill Guide

Step 1: Identify your umbrella type and mounting style
Before you pick up a drill or order anything, figure out which kind of setup you're working with. This matters because the hole requirements are genuinely different depending on how the umbrella attaches to your space.
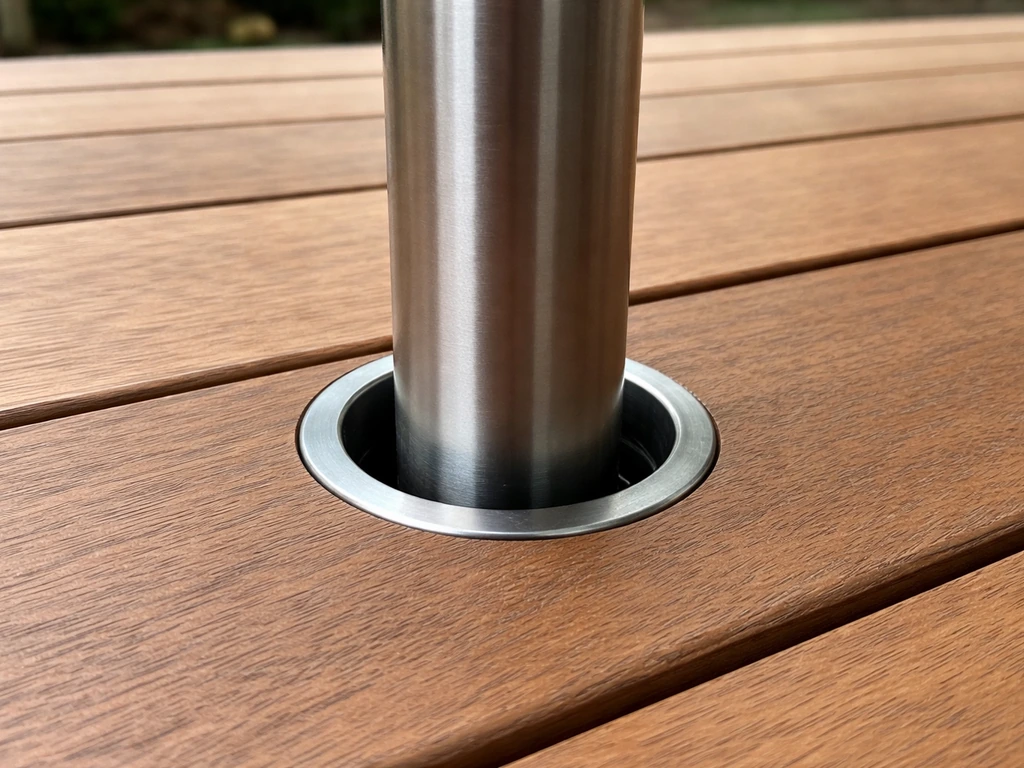
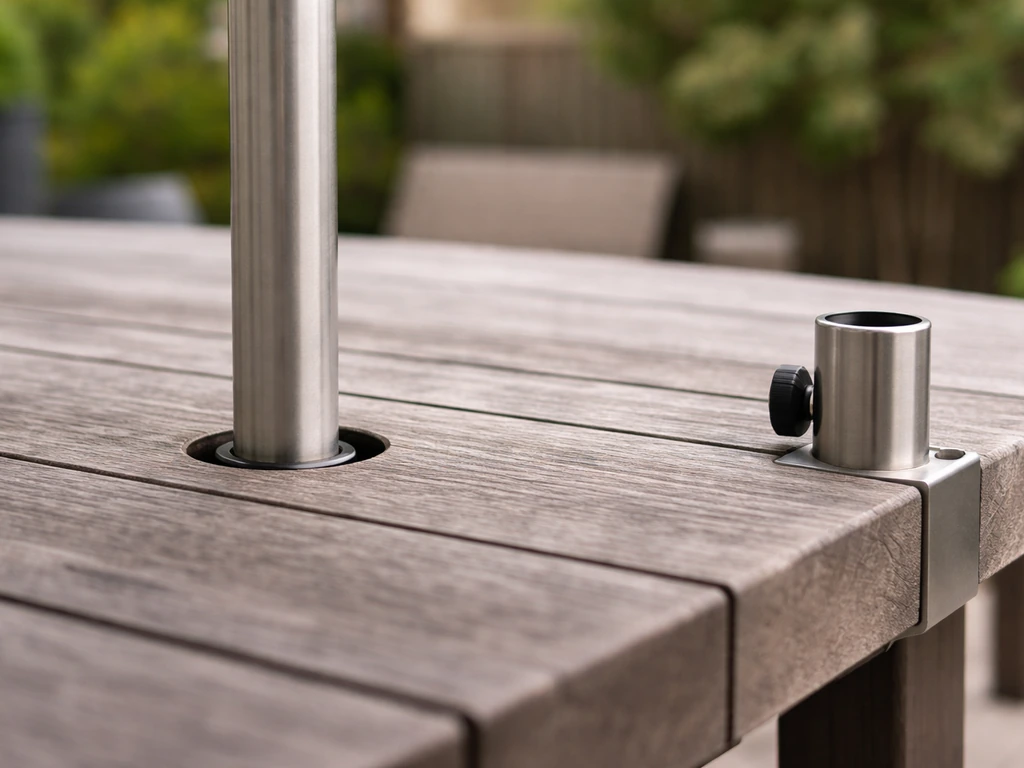
- Table hole mount: The umbrella pole drops through a pre-drilled hole in a patio table (usually about 1.5 to 2 inches in diameter) and sits in a freestanding base underneath. You're not usually drilling anything here, just matching the pole to the table's existing opening.
- Deck sleeve mount: A metal or plastic sleeve is permanently installed through your decking boards and into the framing below. The umbrella pole slides into the sleeve, and the sleeve does the work of stabilizing the fit. You drill the hole for the sleeve, not the pole directly.
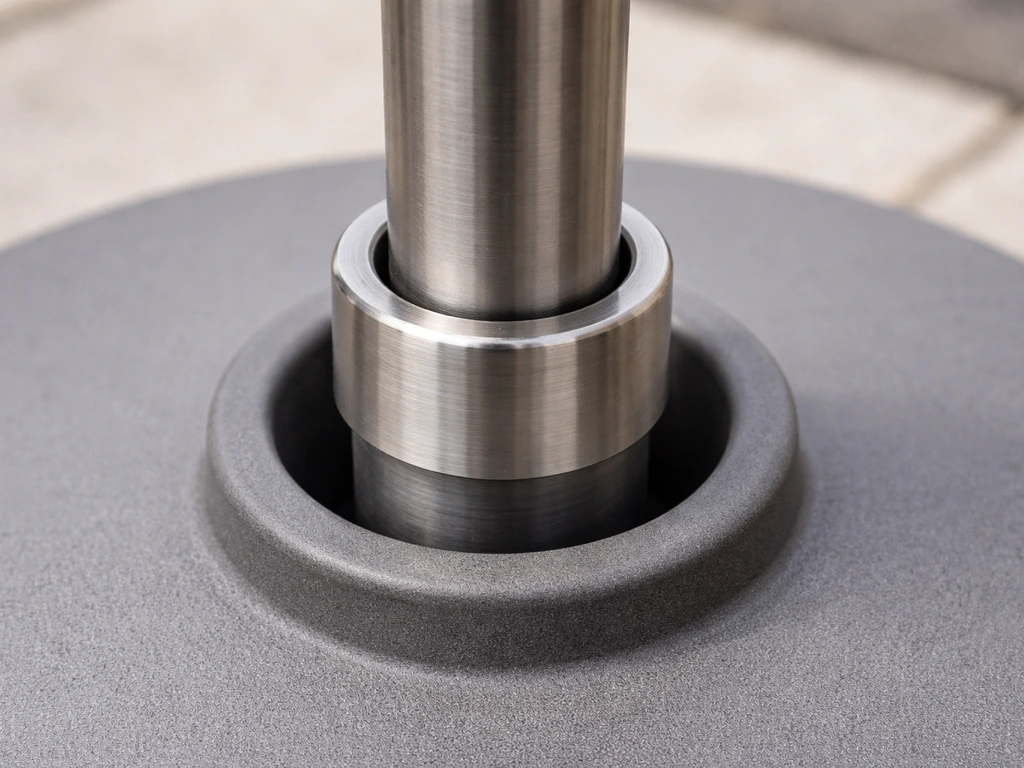
- In-ground concrete mount: A socket and spigot assembly gets set into a concrete pour. This is common for offset (cantilever) umbrellas and heavy commercial-style center poles. The hole you dig or core out is larger than the final socket, because concrete fills the gap.
- Freestanding weighted base: No drilling at all. The pole drops into a weighted base (filled with sand or water), and fit is handled by the base's insert or collar.
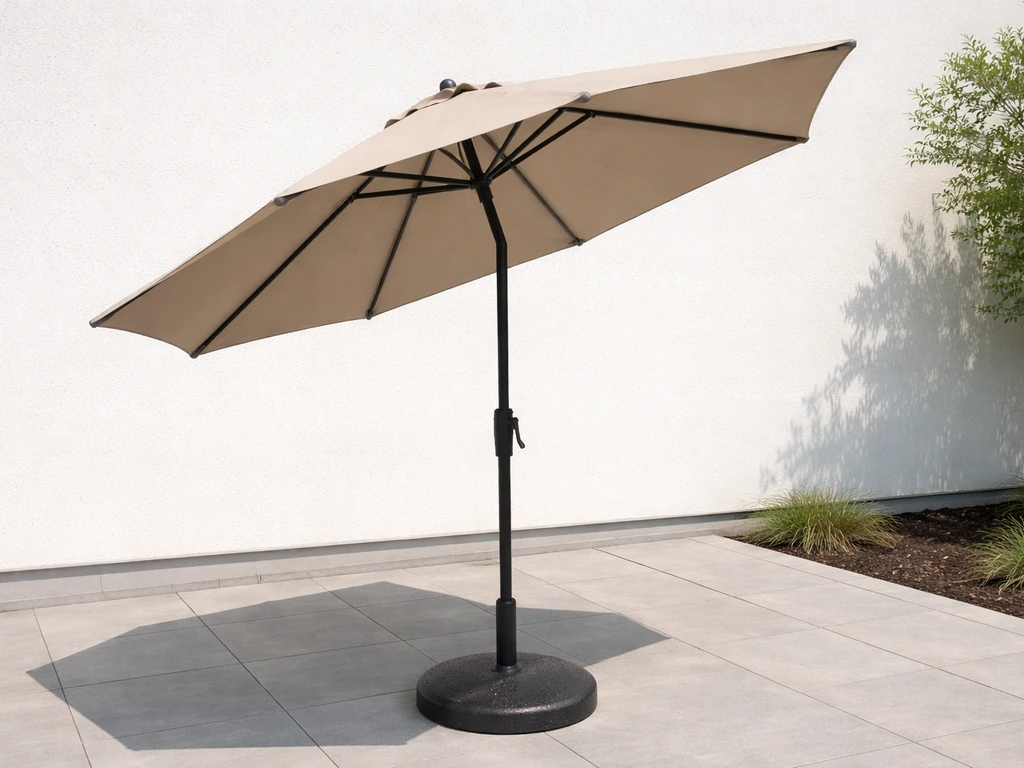
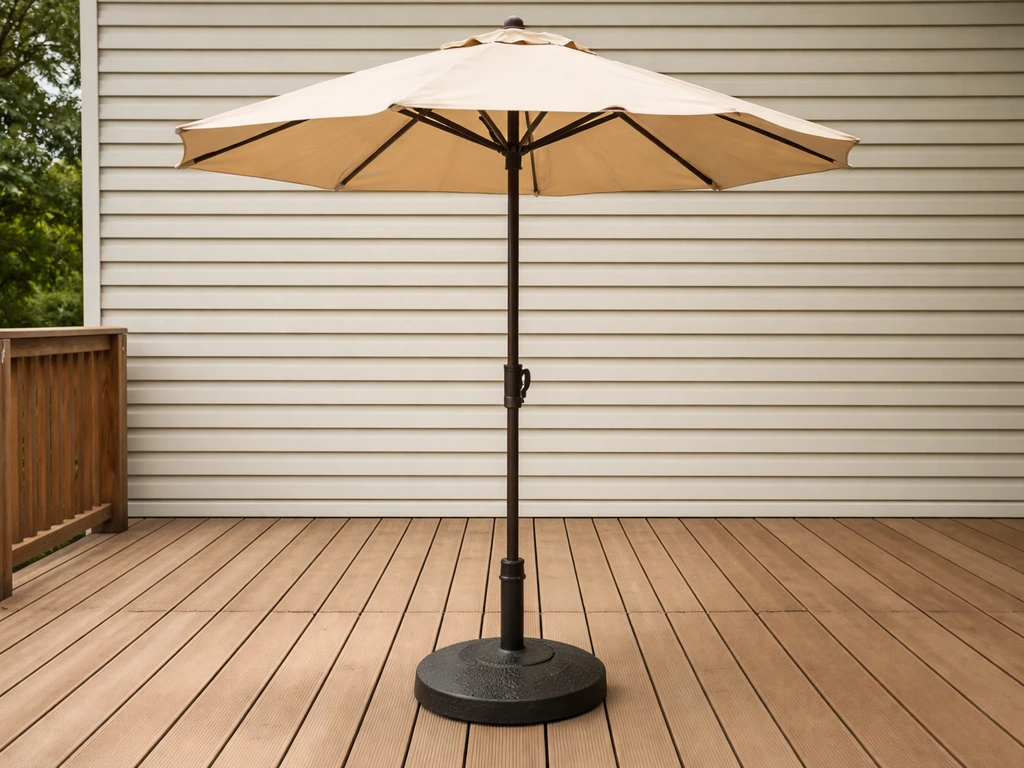
Center-mast umbrellas (the kind with the pole running up through the middle of the canopy) are the most forgiving when it comes to hole sizing, since they only need a clean pass-through and a snug collar at the top of the sleeve. Offset or cantilever umbrellas mount from the side and the torque from wind gusts is much more demanding, so the fit between pole and mount needs to be tighter and the hardware more robust. If you're setting up an offset model, pay extra attention to the manufacturer's installation manual rather than relying on generic sizing.
Step 2: Measure the umbrella pole correctly
The number you need is the outside diameter (OD) of the lower section of the umbrella pole, measured at the widest point you'll be inserting into the hole or sleeve. Do not measure the canopy hub at the top, do not measure a tapered section, and do not rely on the diameter printed on the box without double-checking it yourself. Here's how to do it right.
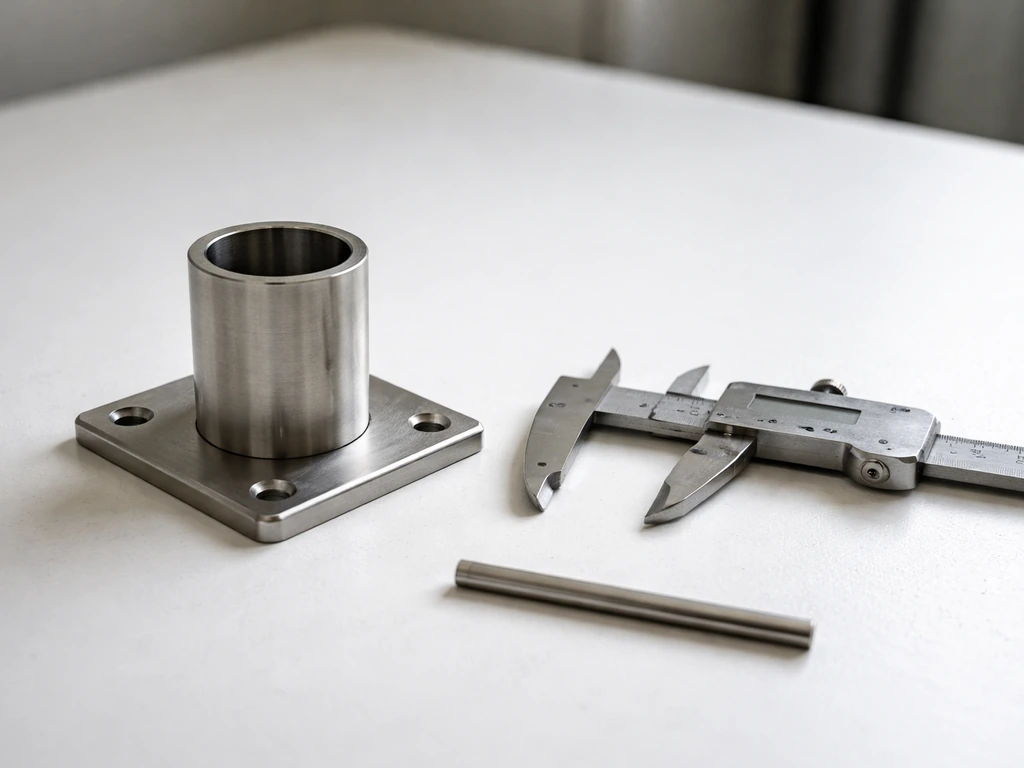
- Use calipers if you have them. A set of digital calipers gives you an exact reading in millimeters or inches and removes any guesswork. You can pick them up for under $15 at any hardware store.
- If you only have a tape measure, wrap it snugly around the pole and measure the circumference, then divide by pi (3.14159) to get the diameter. For example, a circumference of 6.28 inches means the pole is 2.0 inches in diameter.
- Check for a collar or stop ring. Many umbrella poles have a raised collar or lip partway down that acts as a depth stop when the pole seats into the base. Note where that collar sits, because it determines how deep the pole actually goes and whether your sleeve needs to be a specific length.
- Check for a spigot or insert sleeve at the base of the pole. Some higher-end umbrellas (common in Australian and European brands like Shade Australia's Sunranger series) use a separate spigot that screws or slides into the bottom of the pole. The spigot often has a different diameter than the pole itself, so measure both.
- Write down the measurement in both inches and millimeters. Hardware is sold in inches in the US and millimeters in most other markets, so having both saves you a frustrating store trip.
One thing I see trip people up constantly: the sleeve or holder in a pool deck or existing patio mount is not always a uniform diameter all the way through. It may be wider at the top and taper inward, or it may have an internal ridge. If you're trying to fit a new umbrella into an existing sleeve, measure the inside diameter (ID) at the top of the sleeve, not just at the bottom. That's where the fit matters most.
Step 3: Choose the right hole size
Once you have your pole OD, add clearance to get your target hole diameter. For a sleeve-style deck mount, your hole needs to accept the sleeve's outside diameter, not the pole itself. For a direct-pole-through-table situation, you're sizing the hole to the pole directly. This same approach to selecting and fitting the correct opening is also key when learning how to use a patio umbrella in day-to-day operation.
| Pole OD (common sizes) | Recommended hole/sleeve ID | Notes |
|---|---|---|
| 1.5 in (38mm) | 1.75 in (44mm) minimum | Reducer ring typically needed in 2.0in sleeves |
| 1.75 in (44-45mm) | 2.0 in (51mm) | Reducer ring needed in 2.25in sleeves |
| 2.0 in (51mm) | 2.25 in (57mm) | Often fits directly in standard deck sleeves |
| 2.25 in (57mm) | 2.5 in (63mm) | May need custom or heavy-duty sleeve |
| Spigot/cone system (38mm spigot) | 30mm minimum pass-through in decking + cone reducer into spigot | Follow manufacturer reducer sleeve spec |
When drilling through wood decking for a sleeve mount, the minimum hole through the deck boards should be at least 30mm (about 1.25 inches) for a spigot-style system, but in practice most standard sleeves need a pass-through hole of 2 to 2.5 inches. Use a hole saw, not a standard twist drill bit, for anything over 1 inch in wood. For concrete mounts, size the core-drilled hole about 20% larger than the socket's outside diameter so the concrete fill locks it in place. Treasure Garden’s AMK Mount Kit Assembly Guide PDF provides the official concrete mount instructions for sizing the core-drilled hole to match the socket for proper fit before installing the umbrella and mount kit Treasure Garden AMK system uses a concrete-mount sizing approach. For small hardware bolt holes on bracket-style deck mounts (like the Treasure Garden AMK system), use a 5/16-inch drill bit for the lag bolt pilot holes into the decking or joist framing.
Clearance tolerance in practical terms: tight enough that the pole doesn't rock more than a few millimeters side to side when seated, but loose enough that you can insert and remove the pole by hand without forcing it. If it takes two hands and a grunt to pull the pole out, you've gone too tight. If it shifts noticeably in a light breeze without any lateral stabilization, it's too loose and you need a reducer or bushing.
Step 4: Mark, drill, test-fit, and seat the pole
- Mark the center point of your hole on the deck board or mount surface. Use a pencil and a straightedge, and double-check the position is clear of joists below (you need access for the sleeve flange or bracket bolts).
- Drill a pilot hole first. Even when using a hole saw, a small center drill bit (usually built into the hole saw mandrel) keeps the saw from wandering.
- Cut the main hole with the correctly sized hole saw. Keep the drill at low RPM in wood to avoid splintering. For composite decking, use a sharp blade and go slow to prevent melting or cracking the surface.
- Deburr and clean the hole. Any splinters, burrs, or rough edges will scratch the pole finish and cause sticking over time. A quick pass with sandpaper or a file solves this.
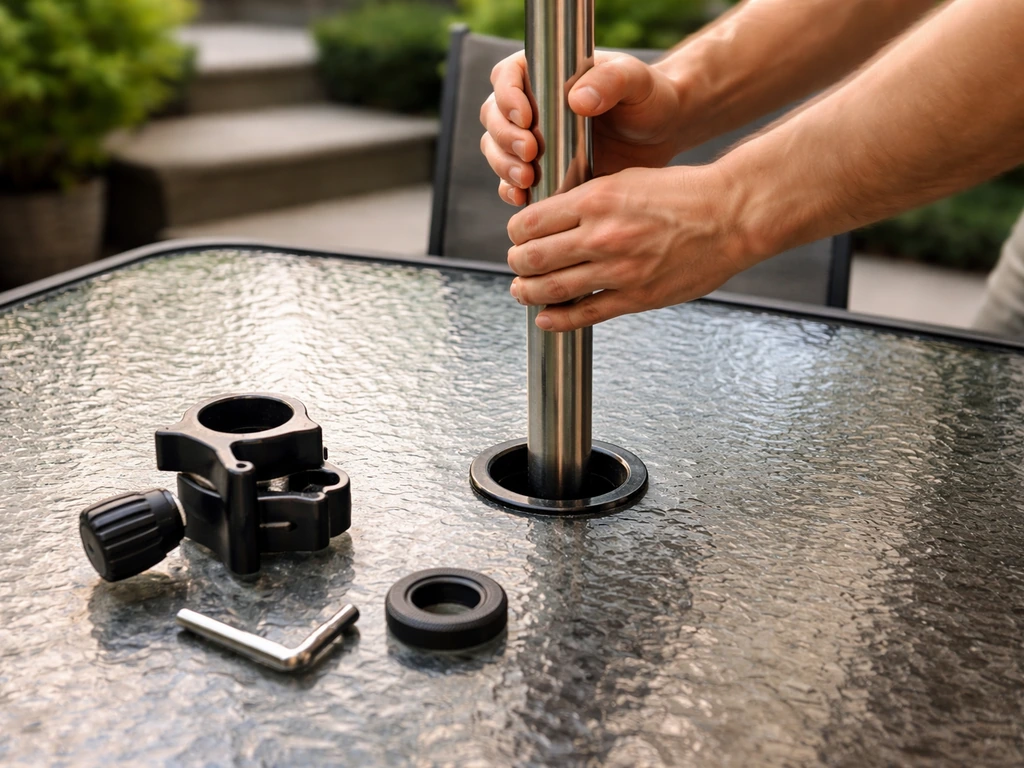
- Drop the sleeve (if using one) into the hole and confirm it sits flush or slightly below the deck surface. The flange should rest flat on the deck boards.
- Test-fit the pole before bolting anything permanently. The pole should slide in smoothly, the collar or stop should seat at the top of the sleeve, and the umbrella should open and tilt (if it has a tilt mechanism) without binding.
- Once satisfied with the fit, secure the sleeve bracket to the joists below using the manufacturer's specified hardware. On spigot-style systems, fit the reducer sleeve or cone into the top of the spigot body before inserting the pole for the final time.
Do the test-fit step every time, even if you're confident about the measurements. I've seen plenty of cases where a pole measured exactly 2.0 inches but had a seam weld or a slight oval shape that made it bind in a perfectly round 2.25-inch sleeve. Catching that before everything is bolted down saves a lot of grief.
Between sizes? Use a bushing, reducer, or adapter
This is the most common real-world problem: you have an existing sleeve or table hole that's slightly too large for your pole, or you're replacing a lost umbrella and the new one has a different pole diameter than the old one. You don't need to re-drill or buy a new table. You need an adapter.
Reducer rings and bushings are available in plastic and aluminum versions. Plastic versions (the kind that come with cheap umbrella bases or pool decks) work, but they crack over time from UV exposure and thermal cycling, and once they crack they produce the wobbly, clunking fit that drives people crazy. Aluminum reducer rings and sleeves are a meaningful upgrade if your umbrella is heavy or you live somewhere with strong afternoon winds. Systems like BajaMate's aluminum deck sleeve with reducer rings are specifically designed so that 1.5 to 1.75-inch poles get a reducer ring, and 2.0 to 2.25-inch poles fit the sleeve directly.
- Pole is 1.5 or 1.75 inches, sleeve is 2.0 inches: add a reducer ring rated for that pole OD. This eliminates side-to-side wobble and centers the pole properly.
- Pole is smaller than 1.5 inches: look for a universal umbrella table grommet or a rubber insert, often sold at home improvement stores in the patio hardware section.
- Pole is larger than the existing hole: you'll need to re-drill or use a larger sleeve. There's no safe way to force an oversized pole into an undersized hole.
- Spigot-style systems: use only the reducer sleeve or cone specified by the manufacturer. Mixing brands on these can cause the pole to sit crooked or not lock at all.
Troubleshooting problems after installation
Umbrella wobbles or rocks in the hole

Wobble almost always means the pole-to-sleeve gap is too large. If you cannot use a table mount, the same reducer, grommet, and fit-tolerance checks help you hold the pole steady in a sleeve or base hold up patio umbrella without table. First, check if a reducer ring or rubber grommet is missing or has worn out. Replace it. If you went straight through a table hole without any insert, add a rubber umbrella grommet sized to your pole. If the sleeve itself is loose in the deck (the whole sleeve shifts when you push the pole), the bracket bolts underneath have worked loose and need to be re-tightened or replaced with longer hardware that catches solid joist wood.
Pole sticks or is hard to remove
A pole that's difficult to pull out is either slightly too tight in the sleeve (common when a powder-coated pole swells slightly in heat or the sleeve deforms after years of weight loading), or debris and grit have packed into the gap between the pole and sleeve wall. Pull the pole out completely, clean out any dirt or leaves, and wipe the lower section of the pole with a silicone-based lubricant. Avoid petroleum-based products on painted or powder-coated surfaces. If the sleeve itself has deformed inward, you may need to replace it.
Loose fit that gets worse in wind
A fit that feels fine on a calm day but causes the whole umbrella to lean and flap in gusts is usually a combination of too-large a gap in the sleeve plus an umbrella that's too large for the mount. A 9 to 12-foot canopy generates significant torque in wind, and a mount that wasn't engineered for that load will struggle even with a snug sleeve fit. Add a reducer ring to tighten the pole-to-sleeve contact, make sure the umbrella is fully closed before any significant wind event, and verify the bracket below is bolted into actual joist lumber, not just the decking boards.
Water pooling in the hole or sleeve
If water sits in the sleeve when the umbrella is removed, the sleeve either lacks drainage holes or they've clogged with debris. Drill a small 1/4-inch drain hole at the base of the sleeve (if it's a hollow tube design) to let water escape. Some premium sleeves include a flush aluminum cap with a rubber O-ring that covers the opening when the umbrella is stored, keeping debris and rainwater out entirely. That cap-and-O-ring design is worth seeking out if your umbrella spends significant time removed from the mount.
Maintenance and seasonal tips to protect the mount hole
The mount hole is one of those spots that nobody thinks about until it causes a problem. A little routine attention keeps it working cleanly for years.
- At the start of each season: pull the pole fully out, inspect the sleeve interior for debris, cracking, or corrosion, and wipe the pole's lower section clean before reinserting. Check that the mounting bracket bolts underneath are still tight.
- Before winter storage: remove the pole and cap the sleeve opening. A purpose-made cap with an O-ring is ideal, but even a tight-fitting rubber plug from a hardware store works. This keeps water from freezing inside the sleeve and cracking it.
- Check the reducer ring or grommet annually: rubber and cheap plastic parts degrade from UV and thermal cycling. If you see cracking or the ring feels stiff and brittle, replace it before the season starts, not after the umbrella starts wobbling.
- For wood decking around the hole: apply a small bead of exterior wood sealant around the hole edge once a year. Exposed end grain at the hole perimeter is a moisture entry point that can cause the boards to soften over time and loosen the sleeve bracket.
- For concrete in-ground mounts: inspect the concrete collar around the socket annually for cracking. Small hairline cracks let water in, which freezes in winter and widens the gap, eventually causing the socket to rock. Fill any cracks with a concrete patching compound before winter.
- Secure the umbrella before any storm or high-wind event regardless of how good the mount fit is. No sleeve system is a substitute for closing and storing the canopy when weather threatens.
If you're also thinking through how to set up the umbrella itself after the mount is sorted, or figuring out how to position the umbrella on your patio for maximum shade coverage, those questions follow naturally from getting the hole and hardware right. The mount is the foundation, and once it's solid, everything else is much easier to dial in.
Quick checklist before you call it done
- Pole OD measured at the widest point of the lower section (not the hub, not a tapered section)
- Hole or sleeve ID is approximately 1/4 inch wider than pole OD for smooth operation
- Reducer ring or bushing in place if pole is smaller than sleeve ID
- Pole slides in and out by hand without forcing
- Collar or stop seats at the correct depth in the sleeve
- Canopy opens and closes fully without binding against any part of the mount
- Umbrella does not rock or shift more than a few millimeters when pushed laterally by hand
- Bracket hardware tight against joist or solid structural support (not just decking boards)
- Sleeve cap or plug ready for when the umbrella is stored
FAQ
Can I use the hole diameter for the canopy instead of the umbrella pole?
No. The hole must match the outside diameter of the lower pole section you insert, not the canopy hub or tapered top sections. Measuring the wrong part is a common reason the pole binds or leaves a gap, even when the umbrella looks “about right” on a label.
What if my sleeve is tapered or has an internal ridge, which diameter should I use?
Measure the inside diameter (ID) at the insertion point that actually controls the fit, usually near the top of the sleeve. If there is an internal ridge, the reducer ring or bushing you choose should be sized to that narrowest ID, not the wider bottom.
My umbrella fits fine with the pole inserted, but it wobbles at the canopy level. What does that mean?
Wobble at the top usually means the pole-to-sleeve clearance is too large, or the umbrella mount cannot handle the torque. Check for a missing or worn reducer ring or grommet, then confirm the mount brackets are tight into real joist lumber, not just the decking.
What clearance is “right” if I do not have calipers?
A practical test is hand-fit only, the pole should slide in and out without forcing it, and it should not rock more than a small amount once seated. If you need two hands and force to remove it, it is too tight, if it noticeably shifts in a light breeze, it is too loose.
Do I drill the hole to the pole size, or to the sleeve size?
It depends on your setup. For a sleeve-style deck mount, drill so the sleeve outside diameter fits the hole or pass-through, then the pole is later matched to the sleeve using clearance and any reducer or grommet. For direct pole-through table or base holes, size the opening to the pole.
Should I use a twist drill bit or a hole saw for a large patio umbrella hole?
For wood holes over about 1 inch, use a hole saw to get a cleaner, more dimensionally consistent opening. Twist drills can wander and produce a rough cut that makes sleeves harder to seat and increases wobble.
Concrete mount sizing seems different, what is the key rule there?
For concrete core drilling, size the core hole about 20% larger than the socket outside diameter so the concrete fill locks and holds it. If you drill the core too close, the socket may not set plumb and could loosen over time as loads transfer.
What can cause a pole to feel stuck even though I drilled the “correct” hole size?
Common causes are debris packed between pole and sleeve, sleeve deformation from years of loading, or slight oval shape and seam weld effects on the pole. Clean the sleeve and pole, wipe the pole with silicone-based lubricant, and only then decide whether a replacement sleeve or reducer is needed.
My umbrella is loose in the mount, but I do not want to re-drill. What are my options?
Use a reducer ring or bushing to tighten the pole-to-sleeve contact, or add a correctly sized rubber umbrella grommet if you have a direct pole-through hole without an insert. If the whole sleeve shifts in the deck, re-tighten or replace the bracket hardware with longer fasteners that bite into joists.
Are plastic reducer rings a good choice, or should I choose aluminum?
Plastic can work initially, but it often cracks with UV exposure and thermal cycling, and cracked inserts usually lead to a clunking, wobbly fit. Aluminum reducer rings and sleeves are a better choice for heavier umbrellas or windy locations because they typically hold their shape longer.
Water pools inside the umbrella sleeve after I remove the umbrella. Is that normal?
No, it is usually a drainage issue. Check whether drainage holes are clogged, and if your sleeve design is a hollow tube, drilling a small 1/4-inch drain hole at the base can help. Some sleeves include a cap with an O-ring, which keeps out debris and rainwater when stored.
How should I verify the fit before I fully commit to installation?
Do a test-fit with the pole inserted before bolting or fastening everything. If the pole binds in a “perfect” measurement, it can be due to pole ovality, seam weld interference, or sleeve internal features. Fix it before the mount is locked in place.
Step-by-step how to use a patio umbrella: assemble, open close, tilt setup, fix crank issues, and ensure wind-safe stabi
Step-by-step ways to hold a patio umbrella upright without a table, with bases, setup, troubleshooting, and maintenance.
Step-by-step guide to install a patio table umbrella, align the pole, secure the clamp, and troubleshoot wobble and tilt