Installing a patio table umbrella comes down to three things: getting the pole seated correctly in the table hole or base, making sure the canopy hardware is assembled in the right order, and confirming everything locks before you walk away. Most people run into trouble because they skip the dry-fit step or try to force the tilt mechanism before the umbrella is fully open.
How to Install a Patio Table Umbrella Step by Step

Luca Morrison
2 Jun 2026
If you still need to assemble and mount your umbrella correctly, follow our step-by-step guide on how to set up a patio umbrella. Do those two things right and you'll be set up in under 20 minutes. If you want the full step-by-step for opening, tilting, and locking it correctly, see our guide on how to use a patio umbrella.
What you need before you start
Grab everything before you head outside. There's nothing more annoying than running back inside three times because you forgot a tool.
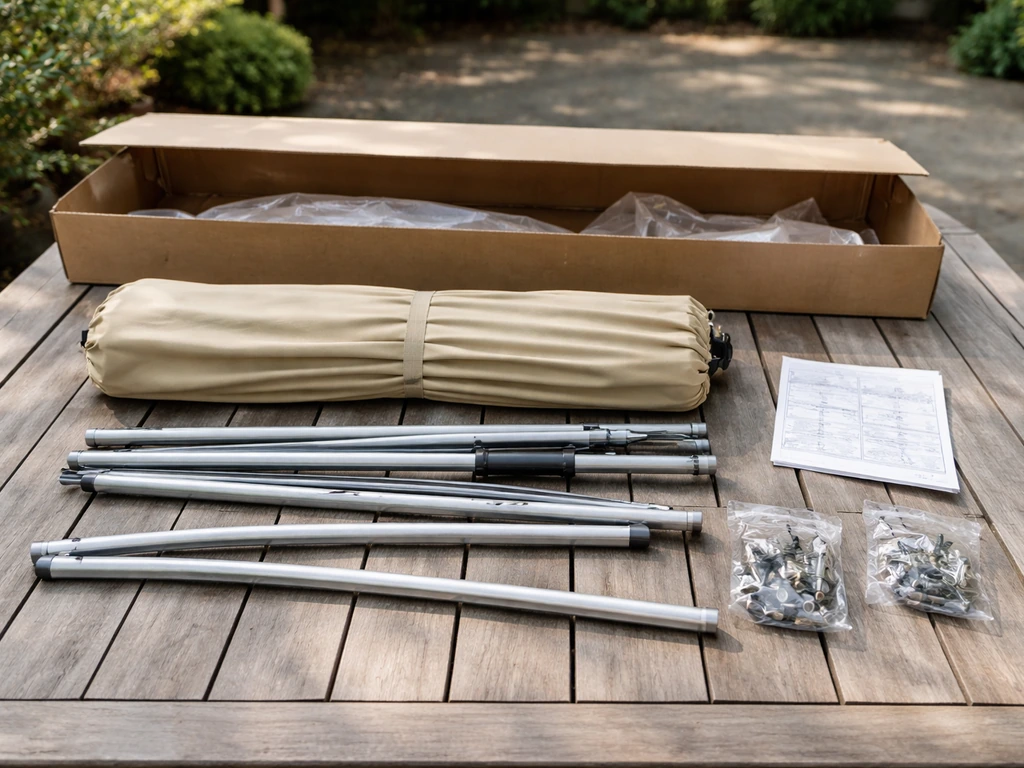
- Your umbrella box (all parts, including any loose hardware bags)
- The assembly manual for your specific model (download a PDF if yours is missing)
- A flat, clean surface to lay out and identify all the parts before assembly
- A rubber mallet or soft hammer (optional but helpful for stubborn pole joints)
- A tape measure if you're not sure whether the pole fits your table hole (most standard patio table holes are 1.5 inches in diameter; umbrella poles are typically 1 inch to 1.75 inches)
- A rag and a small amount of mild soap and water to clean the pole before inserting it
- A marker or piece of tape to mark pole orientation if your umbrella has a push-button snap
If you're using a freestanding base instead of a table, check the base weight before you do anything else. If you're also wondering how to measure a patio umbrella, start by confirming the height and footprint needs match the base setup so you don't end up with an under- or oversized install check the base weight.
If you do not have a table hole, focus on using the right freestanding base and setup so the umbrella stays stable and upright hold up a patio umbrella without a table. Treasure Garden's guidelines specify a minimum of 80 lbs for larger models and 50 lbs minimum for their UM800 series. Those numbers aren't just suggestions, an underweight base is the single most common reason a newly installed umbrella tips over in the first breeze.
If your base feels light when empty, fill it with sand or water before you even assemble the pole.
Identify your umbrella type and how it attaches
Before you touch a single bolt, figure out which of these two setups you have. They install differently, and mixing up the steps is where most first-timers waste time.
Table-mount (pole through the table hole)
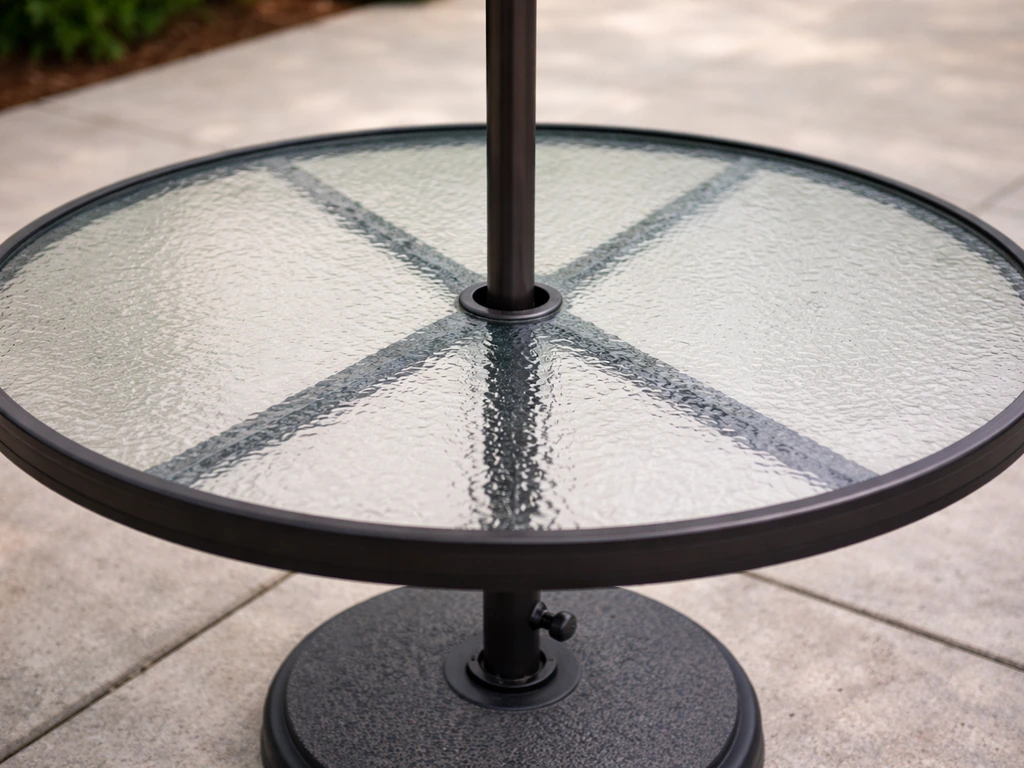
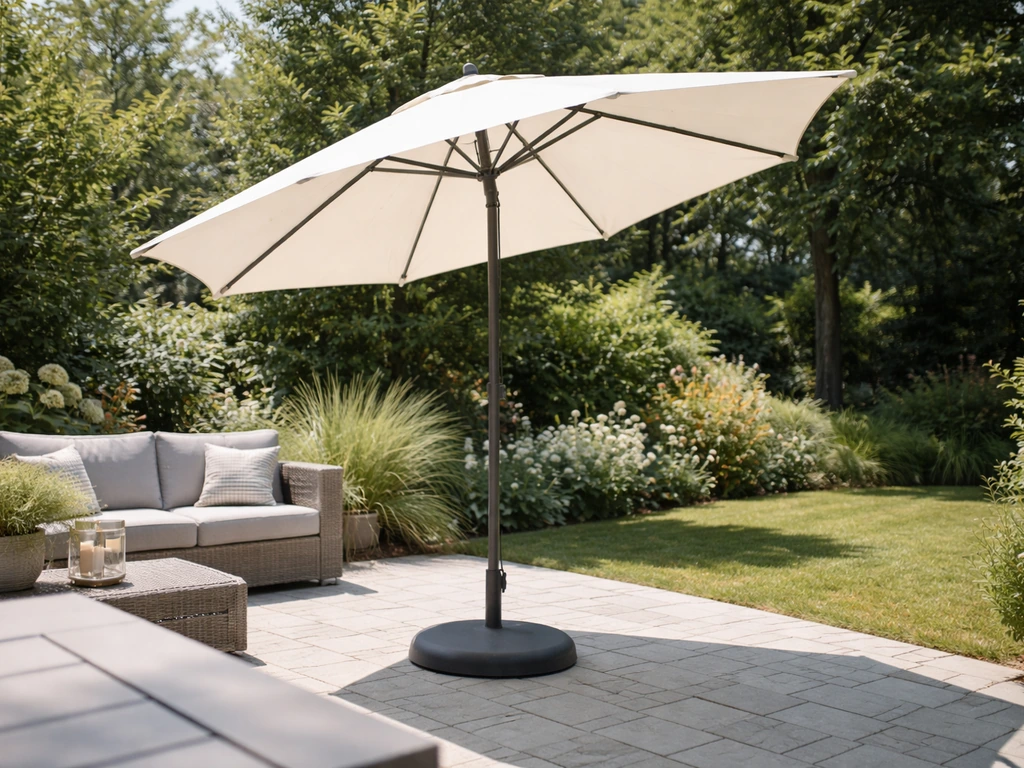
This is the most common setup. Your patio table has a hole in the center, and the umbrella pole drops straight through it into a weighted base sitting on the ground underneath. The table itself doesn't clamp or grip the pole, it just keeps it centered. The base does all the stability work. If this is you, make sure the base fits under your table and that the pole length is long enough to clear the tabletop and still open the canopy above head height.
Clamp or sleeve mount (no table hole required)
Some umbrellas attach to the table edge using a clamp bracket, or the base has a sleeve that the pole slides into and locks with a pin or bolt. These are common on offset or cantilever umbrellas and on smaller cafe-style setups where the table has no center hole. If your table doesn't have a hole and you're working with a clamp, you'll tighten the clamp bracket first, then insert the pole.
Know your canopy parts
Lay everything out flat before you start. A typical market umbrella has: the main center pole (often in two sections), a canopy with ribs and a hub at the top, a finial (the decorative cap that screws onto the very top), a crank handle, and depending on the model, a collar tilt mechanism or a push-button tilt.
Treasure Garden’s Collar Tilt umbrella manual specifies that the setup starts by snapping/assembling the finial and inserting the bottom pole into the canopy or mainframe pole, then aligning the snap “button with hole. ” [finial (the decorative cap that screws onto the very top)](https://www. treasuregarden. com/upload/pdf/TGCollarTIltUmbrellaManual_060823.
pdf). If your umbrella has a collar tilt, it's the rotating ring near the top of the lower pole section. If it has a push-button tilt, there's a button you press to release the angle. Know which one you have before you start because the tilt testing step is different for each.
Step-by-step: how to mount the umbrella on your patio table
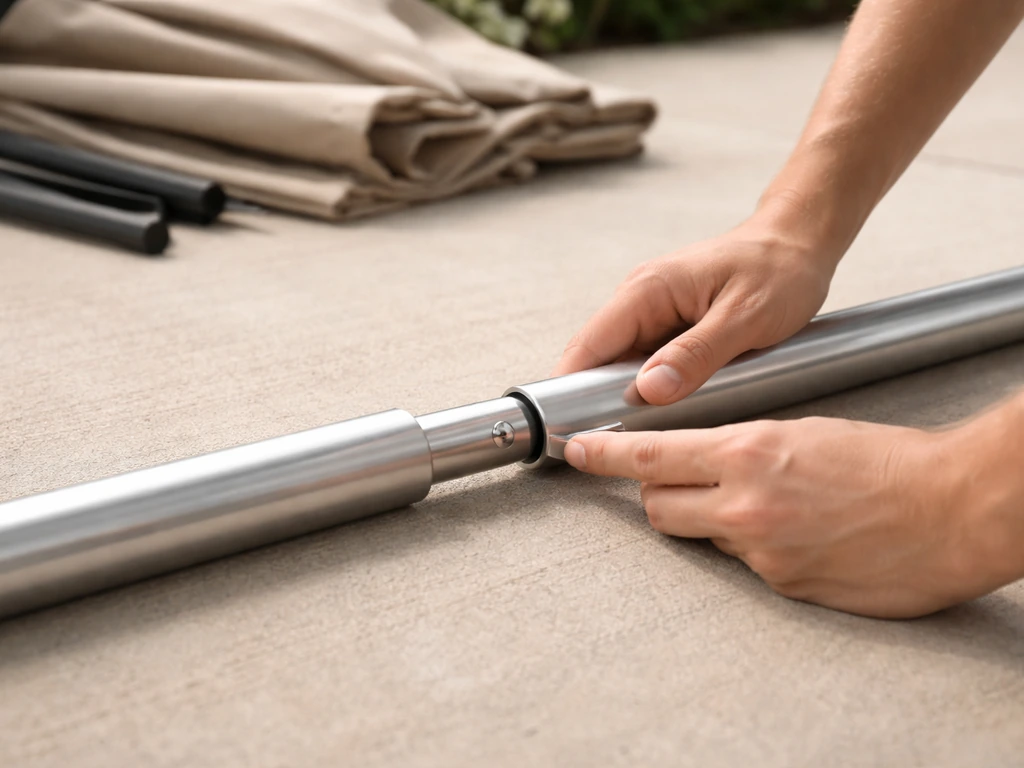
- Assemble the pole sections first, on the ground. Slide the lower pole into the upper pole (or the canopy hub assembly, depending on your model) and align the snap button with the corresponding hole. You'll hear or feel a click when it seats correctly. On Treasure Garden models, the manual specifically calls out lining up the snap button with the hole before proceeding — don't skip this.
- Attach the finial. This is the cap that goes on the very top of the pole, through the canopy peak. Screw it on hand-tight. It holds the canopy in place on the pole, so if it's loose, the canopy can slide and bunch.
- Feed the pole through the canopy. If your canopy attaches from the top down (common on market-style umbrellas), drape the canopy loosely over the assembled pole with the hub centered on the top section, then secure the finial.
- Position your base directly under the table hole or in the spot where you want the umbrella to stand. Center it carefully — a base that's off-center by even a few inches will put sideways stress on the pole over time.
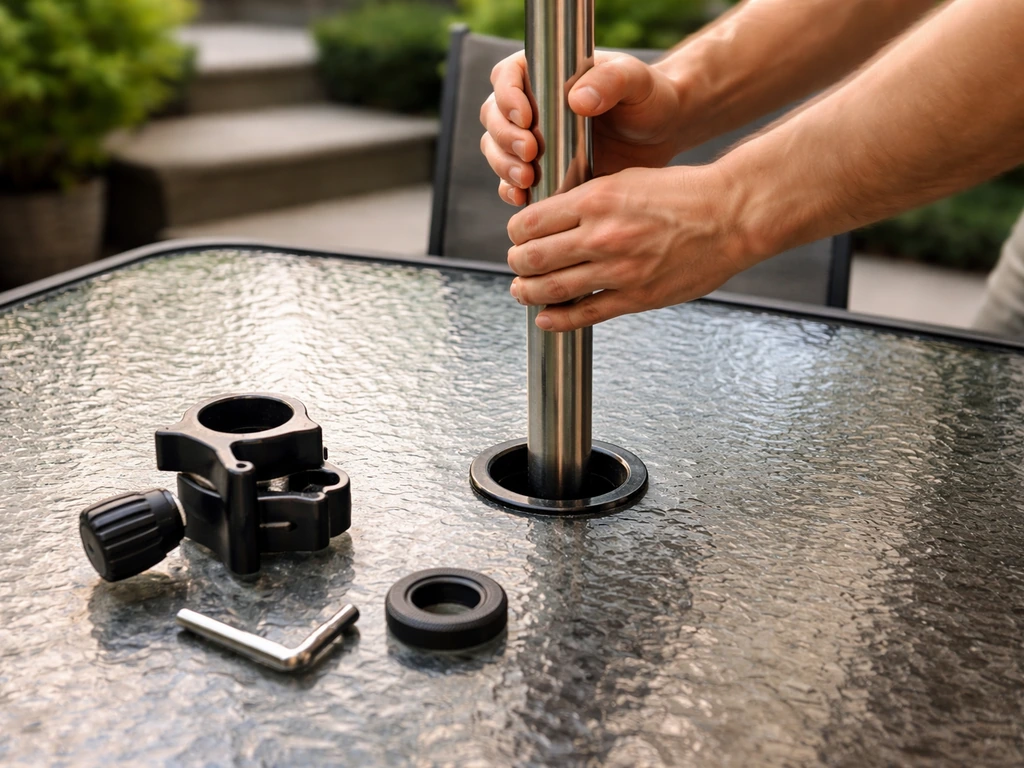
- Lift the assembled pole and canopy together and slide the bottom of the pole through the table's center hole. Let it drop slowly into the base sleeve below. Don't drop it — lowering it gently keeps the pole straight.
- Seat the pole in the base fully. It should feel solid with no rocking. If your base has a locking bolt or pin, thread it in hand-tight now — you'll check the final tightness after you open the canopy.
- If you're using a clamp mount: attach the clamp to the table edge first, tighten it until it grips without wobbling, then insert the pole into the clamp sleeve and secure the locking pin or bolt.
Align and test: opening, tilting, and locking
This is the step most people rush, and it's where you'll catch problems before they become permanent. Do each check in order.
Opening the canopy
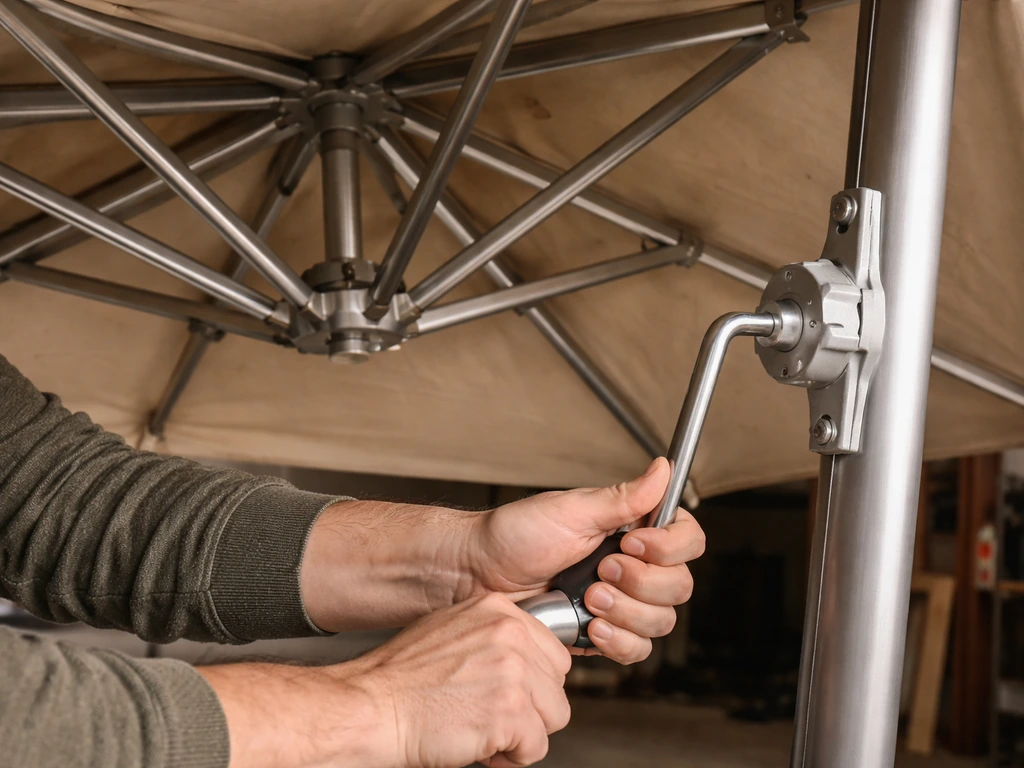
Turn the crank handle clockwise in smooth, steady rotations until the canopy is fully open. Don't force it, if it stops or catches, stop cranking and check whether a rib is stuck or a cord is tangled. On Coolaroo models, the manual specifically warns to use the crank rather than manually pulling the canopy open. Forcing it can bend a rib or strip the crank gear. Once fully open, the canopy should be taut with no sagging panels.
Testing the tilt
For collar tilt models (like Treasure Garden's Collar Tilt series): once the umbrella is cranked fully open, twist the collar clockwise to tilt the canopy to your desired angle. The collar is the ring section on the upper pole, just below the canopy hub. It should rotate smoothly. If it feels stiff, don't crank harder, check that the canopy is actually in the fully open position first, because collar tilt mechanisms don't engage correctly if the ribs aren't fully extended. To return to vertical, twist the collar counter-clockwise back to the horizontal (neutral) position before closing.
For push-button tilt models: press the button on the pole, then push the upper pole to the angle you want. Release the button to lock it. If the button doesn't pop back out and lock cleanly, the pole sections may not be aligned correctly, pull the pole sections apart slightly, re-align, and try again.
Closing and locking for storage
Twist the collar back to neutral (counter-clockwise to horizontal) first if you tilted it, then crank the handle counter-clockwise to close the canopy. Once closed, tie the canopy string (if your umbrella includes one) snugly around the folded fabric to keep it from flapping open. If you have a protective cover, put it on now to keep the fabric clean between uses. This habit alone will dramatically extend how long your canopy looks good.
Troubleshooting common installation mistakes
Here are the problems I see come up the most, and how to fix them without starting over.
The umbrella wobbles in the base or table hole
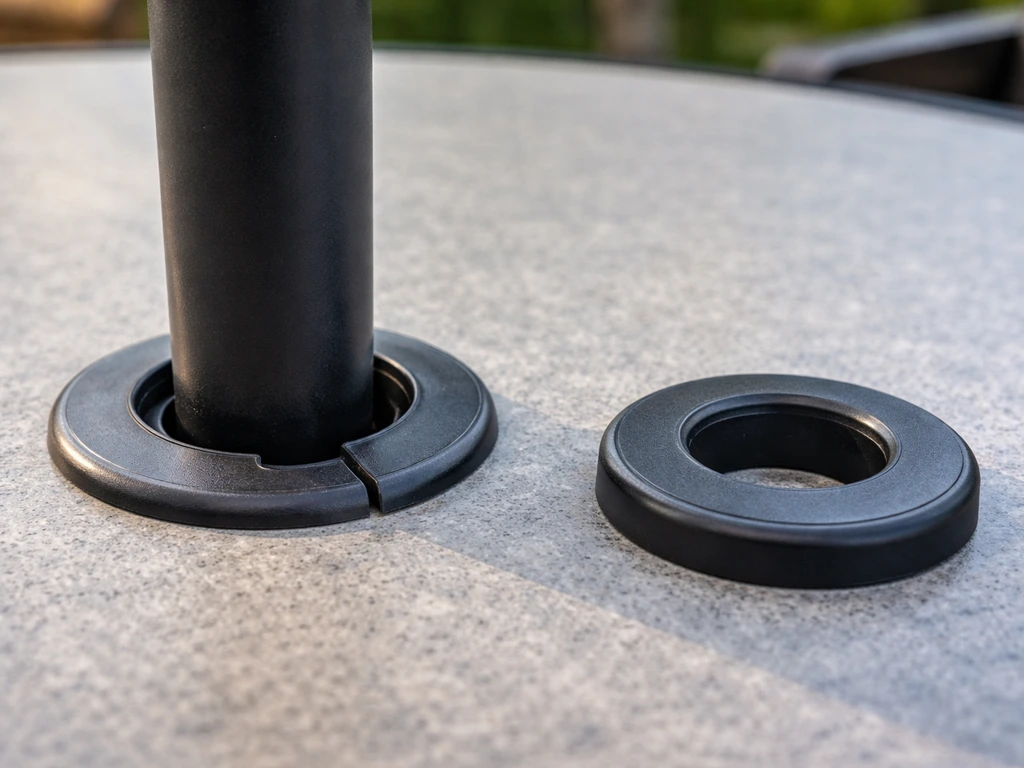
A small amount of play is normal, but if the pole rocks noticeably, you have one of three problems. First, the base isn't heavy enough, add more sand or water if it's a fillable base, or swap it for a heavier model. Second, the table hole is too large for the pole diameter. Fix this with a plastic umbrella hole ring insert (sold for about $5 at most home improvement stores) that reduces the opening and centers the pole. Third, the base locking bolt is not tight. Go back and snug it down.
The canopy won't open smoothly or gets stuck partway
Stop cranking immediately. The most common cause is a rib that has slipped out of its hub pocket, look at the top hub where each rib connects and reseat any that have popped out. Second cause: the pull cord inside the pole is twisted. Close the umbrella fully, then slowly re-open while watching each rib extend. If one lags behind the others, the runner (the sliding ring the ribs connect to) may be catching on a rough spot on the pole. A thin wipe of silicone spray on the inside of the pole shaft usually fixes this.
The pole is crooked or leans to one side
Pull the pole out of the base and check that the base itself is sitting level on the ground. If the base is on uneven pavers, shim it with a thin rubber mat. Also check the pole sections, if the snap button didn't engage properly when you joined them, the two sections won't be perfectly aligned. Disconnect, re-align the snap button with the hole, and rejoin.
The collar tilt won't twist or feels locked
The collar tilt on models like Treasure Garden's only engages when the canopy is cranked to the fully open position. If you're trying to tilt before reaching that endpoint, it will feel seized. Crank all the way open first, then try the collar. If it's still stiff after that, the collar threads may need a light wipe of silicone lubricant, do not use WD-40 on plastic collar components.
The pole fits too loosely in the table hole
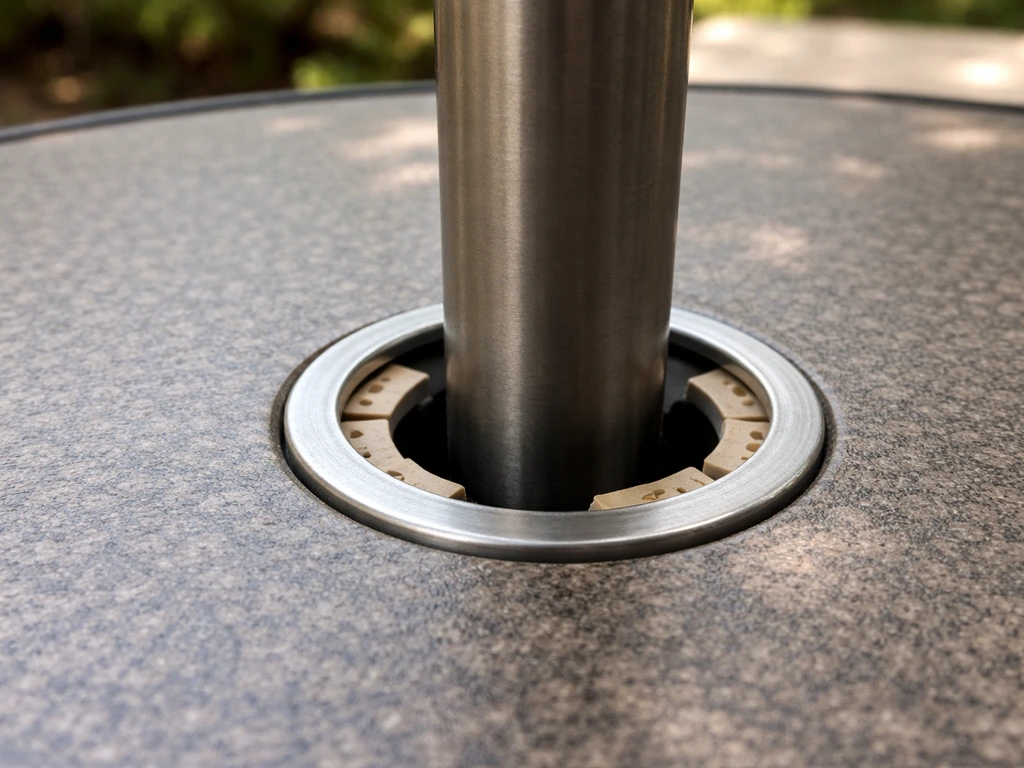
This is a sizing mismatch. Standard patio table holes are 1. 5 inches, but some imported tables run larger. Use a hole ring insert to fill the gap, or wrap a few layers of marine-grade tape around the pole at the table contact point.
Choosing the right pole diameter for your table hole is worth researching before you buy, that's a topic worth digging into separately when sizing your umbrella. If you are still figuring out what to buy, this guide on how to buy a patio umbrella will help you match the right umbrella to your space and setup Choosing the right pole diameter for your table hole.
For the correct fit, the table hole size needs to match your umbrella pole diameter, and you can use a hole ring insert if it is off table hole size vs umbrella pole diameter. If you still need help, follow a dedicated guide on how to size a patio umbrella to match your table and seating.
Securing the umbrella in wind and staying safe day-to-day
Even a perfectly installed umbrella can become a projectile in a sudden gust. Here's how to keep it safe and protect your investment. California Umbrella advises that you blank" rel="noopener noreferrer">close the umbrella during strong winds or storms even if the product is rated for higher wind conditions. Putting the umbrella in the right spot on your patio also helps reduce wind drag and keeps the base from shifting keep it safe.
- Close the umbrella whenever you leave the patio, even if it looks calm. This is the single most effective thing you can do to prevent frame damage. Wind damage is one of the most common reasons umbrella frames break prematurely, and it usually happens when no one is watching.
- Know your umbrella's actual wind rating. Coolaroo's Ceduna market umbrella, for example, is lab-tested to withstand winds up to 60 km/h when in a fixed mount base — but that's in a fixed mount, not a standard fillable base. Most fillable bases offer less stability than fixed mounts.
- Even if your umbrella is rated for higher wind, California Umbrella recommends closing it during strong winds or storms. A rating is a structural test, not a guarantee it won't tip.
- If you live in a consistently windy area, consider adding additional base weight beyond the minimum, anchoring the base to the patio surface using non-permanent adhesive base pads, or placing the table itself around the base to add ground contact.
- Never leave a tilted umbrella unattended in any wind. A tilted canopy acts like a sail and multiplies the lateral force on the base significantly.
- Before strong storms, Coolaroo's manual specifically says to take the umbrella down entirely, not just close it. Closing reduces risk; taking it down eliminates it.
Quick maintenance to keep it working after installation
You don't need a complicated maintenance routine. Just a few simple habits will keep your umbrella operating smoothly for years and save you from repairs.
Cleaning the canopy and frame
Mild soap and warm water is all you need for both the fabric and the frame. Treasure Garden's care guidelines recommend this approach, and it works for virtually every brand. Avoid bleach on colored fabric, it fades the pigment fast. For the frame, rinse and dry after cleaning to prevent water spots and surface rust. If you notice rust seeping from crevices or joints (common on powder-coated frames), touch those areas up with a matching exterior paint pen or clear rust inhibitor. Catch it early and it stays cosmetic; ignore it and the corrosion goes deeper.
Seasonal care and storage
At the end of the season, clean the canopy thoroughly before storing so you're not trapping moisture and mildew in folded fabric. Store the umbrella closed, in a protective cover or sleeve, in a dry place. If you leave it outside over winter, close it and cover it, Consumer Reports specifically recommends using a slipcover when leaving an umbrella out for the season. A good cover is cheap insurance against the frame damage that comes from the canopy catching wind while you're not around.
Mechanical checkup at the start of each season
Before you use the umbrella for the first time each year, run through this quick check:
- Open and close the umbrella once slowly, watching each rib for any that stick or lag
- Check the crank handle for smooth operation — any grinding or skipping usually means the gear needs lubrication or a small piece of debris is lodged in the crank housing
- Test the tilt mechanism and confirm it locks in position and releases cleanly
- Inspect all pole joints and the snap button connection — re-seat if anything feels loose
- Check the base weight if it's a fillable base — water-filled bases can leak over winter and lose significant weight
- Look over the canopy fabric for any tears or seam separation and address them before the season puts stress on the fabric
If you catch a mechanical issue early, a sticky crank, a worn tilt collar, a bent rib, it's almost always repairable without replacing the whole umbrella. That's the whole point of doing the check before you need it.
FAQ
Do I need to assemble the umbrella before mounting it in the table hole or base?
Yes for the pole sections, but it helps to mount first once the pole and base are ready. Assemble and verify the crank and canopy hub operation on the ground if your model is easy to handle, then mount. Avoid fully tightening everything until you confirm the canopy opens without binding after the pole is seated and centered.
What if my patio table hole is close in size but not exact, should I use a ring insert or tape?
Start with a purpose-made hole ring insert when the gap is small because it centers the pole and reduces wobble. Use marine-grade tape only as a temporary shim if the insert won’t fit or you need a quick correction, and remove it when you can replace with the right insert. If the pole still rocks after adding material, the umbrella pole diameter may be the wrong match for the table.
My umbrella won’t open all the way, what should I check first?
Stop cranking immediately. Confirm a rib isn’t stuck in the hub pocket, then check for a tangled cord inside the pole. Next, inspect the runner and look for any rough spot that could snag during opening. For crank systems, don’t switch to pulling the canopy by hand, forcing can bend ribs or strip the crank gear.
How do I know my collar tilt is actually engaging?
Collar tilt should only work when the canopy is fully cranked open to its endpoint. If the collar feels seized, do not force it, close the umbrella and reopen slowly while watching that all ribs extend fully. After it is fully open, twist the collar clockwise to tilt and return it to the neutral position (before closing) to prevent misalignment.
For push-button tilt umbrellas, what if the button won’t lock at the desired angle?
That usually means the pole sections are not aligned or fully seated. Release the button, separate and re-align the pole sections, then reinsert and try again. If the button still won’t pop back, re-check that the umbrella is fully closed or fully extended as required by the mechanism before attempting a tilt.
Should the umbrella pole be able to move a little after it’s installed?
A small amount of play can be normal, but noticeable rocking usually indicates a stability issue. Common fixes are adding sand or water to a fillable base, using a hole ring insert to reduce the table opening, or tightening the base locking bolt. If wobble continues after these, re-check that the base is level and the pole is fully seated.
Can I install a patio table umbrella on uneven pavers?
Yes, but you need the base to sit level. Pull the pole out and check the base itself for rock, then shim under the base with a thin rubber mat so it doesn’t shift when you crank or tilt. Never compensate for an uneven spot by over-tightening bolts, it can create misalignment and uneven tilt performance.
What’s the safest way to close the umbrella if a tilt is stuck?
First return the tilt collar to neutral (for collar tilt) before closing with the crank. For push-button tilt, press the release button at the angle it’s stuck, then close while keeping the pole aligned. If you tilted before the canopy was fully open, close completely and re-open correctly, forcing the mechanism can keep it from locking properly.
How much base weight do I actually need for stability?
Use the manufacturer’s minimum spec for your model, and treat it as a hard requirement, not a suggestion. If your base feels light when empty, fill it (sand or water if the base allows) before mounting. Underweight bases are the most common cause of tipping in normal wind.
What tools should I have on hand before installing?
At minimum, have the correct wrench or socket for the base locking bolt or clamp, and keep the canopy hardware parts laid out so you don’t improvise with mismatched pieces. If your system uses snap buttons or pins, test their engagement before installing outdoors. Also keep a soft cloth for wiping and a small amount of silicone lubricant only for the inside pole shaft if ribs or runners snag.
Is silicone lubricant okay for the mechanism, and where should I use it?
Silicone spray is appropriate for the inside of the pole shaft or other plastic interfaces that cause snagging. Apply it sparingly, then re-open slowly to confirm smooth runner movement. Avoid using WD-40 on plastic collar components because it can degrade plastics over time and can attract dirt to the mechanism.
How should I store the umbrella at season end to prevent mildew?
Clean the canopy thoroughly first, then store it closed in a protective cover or sleeve in a dry location. If you must leave it outside over winter, keep it closed and covered, a slipcover helps prevent moisture damage and reduces the risk of wind catching the canopy.
Next Articles
How to Set Up a Patio Umbrella From Start to Ready
Step-by-step how to set up a patio umbrella: pick placement, assemble, open and tilt, secure the base, troubleshoot comm
How to Size a Patio Umbrella: Canopy and Base Guide
Learn how to size patio umbrella canopy and base for your table using simple measurements, coverage, and stability tips.
How Do You Measure a Patio Umbrella for a Perfect Fit
Learn exactly how do you measure a patio umbrella, including canopy, frame size, and pole diameter for perfect replaceme