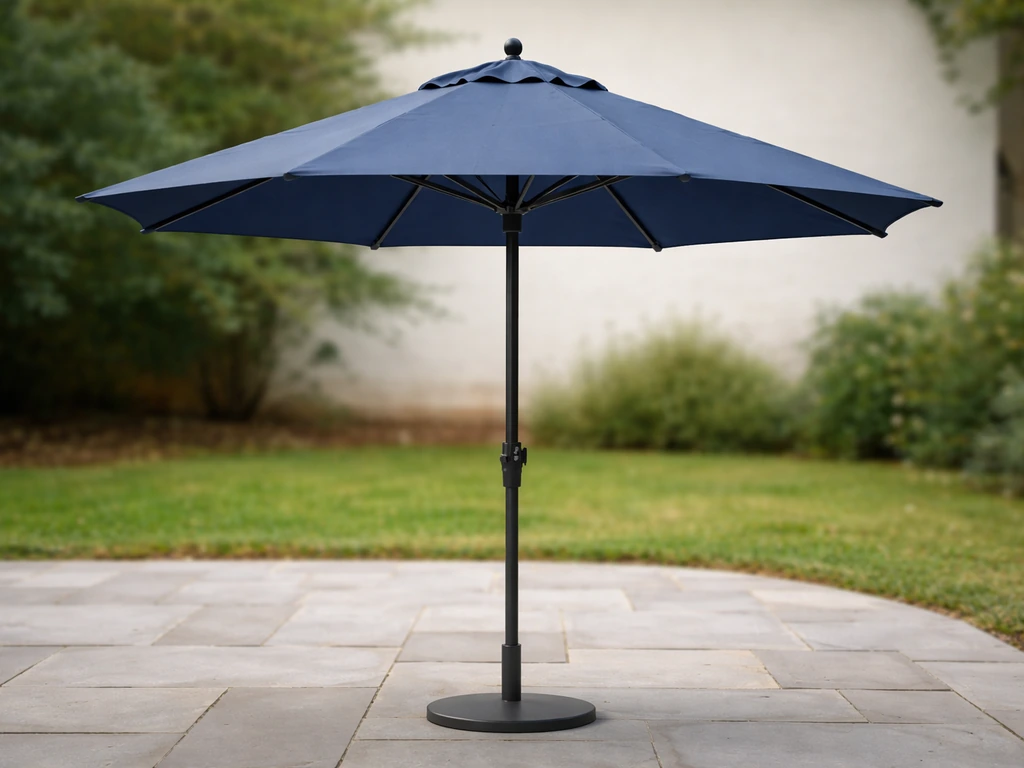
You can build a functional, weather-resistant patio umbrella from scratch using solution-dyed acrylic or marine-grade polyester fabric, a steel or aluminum pole, a basic crank or push-up opening mechanism, and a set of ribs with a central hub. For a standard 9-foot round umbrella you'll work with 8 fabric panels, ribs roughly 52 to 54 inches long, and fabric cut to match that geometry. It takes a weekend, a blank" rel="noopener noreferrer">sewing machine that can handle heavy outdoor canvas, and some patience with the mechanism assembly, but the end result is a canopy that fits exactly your space and holds up to real outdoor use. Once your DIY patio umbrella is built, you can extend its life by adding a few practical upgrades like better weather protection, reinforced seams, and careful storage habits.
How to Make a Patio Umbrella: Canopy to Frame Guide

Materials and Parts You'll Need
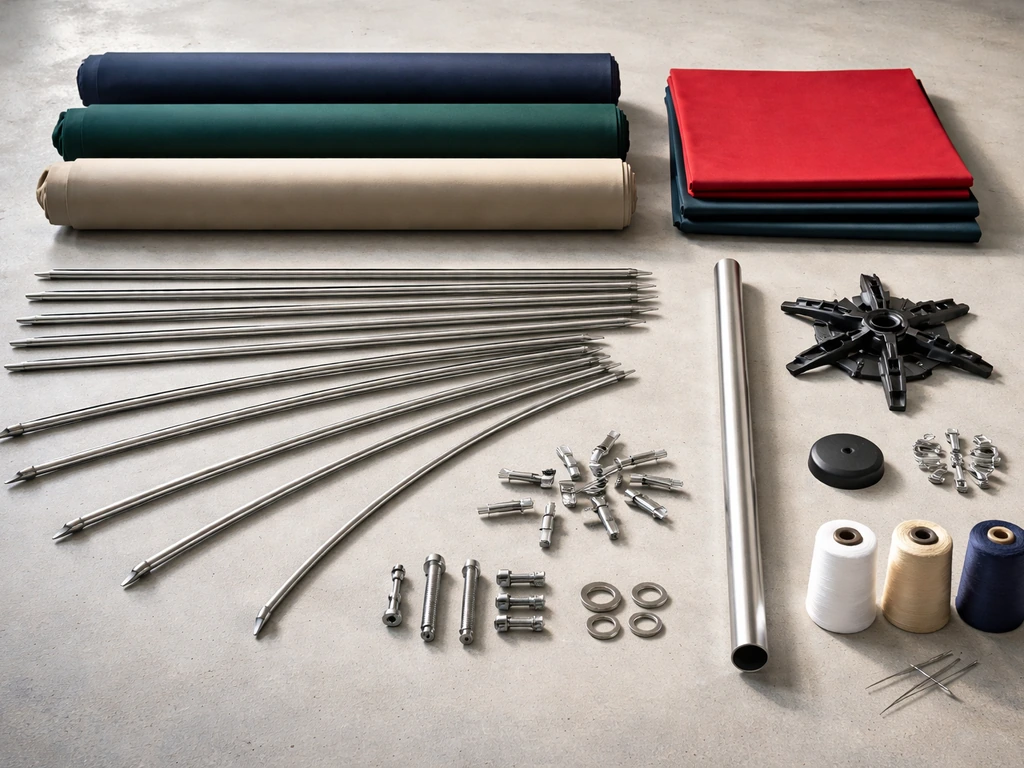
Before you cut anything, get the full parts list together. Missing even one component mid-build will stall you. Here's everything you need for a standard 9-foot, 8-rib market-style umbrella.
Canopy fabric
Your best fabric choice is 100% solution-dyed acrylic, like Sunbrella or a comparable brand such as eTek acrylic (rated around 300 GSM / 9 oz per square yard). Solution-dyed means the color is baked into the fiber before weaving, so UV fading is minimal over years of use. Standard solution-dyed acrylic is water-repellent, meaning rain beads up and rolls off, but it is not fully waterproof unless you choose a version with a waterproof backing like Sunbrella's SeaMark line.
For most backyards, water-repellent is fine. If you expect heavy, sustained rain, go with the waterproof-backed version or plan to seam-seal your stitching lines later. Marine-grade polyester (like Sea Hawk 260, rated at 260 GSM) is a more budget-friendly option with solid UV resistance, but acrylic generally edges it out on long-term colorfastness.
| Fabric Type | Weight | UV Resistance | Water Resistance | Best For |
|---|---|---|---|---|
| Solution-dyed acrylic (e.g., Sunbrella) | ~300 GSM / 9 oz/sq yd | Excellent | Water-repellent (waterproof backing available) | Long-lasting, fade-resistant canopy |
| Solution-dyed polyester (e.g., Sea Hawk 260) | ~260 GSM | Very good | Waterproof | Budget-conscious builds, wet climates |
| Piece-dyed polyester | ~230 GSM | Moderate | Water-repellent | Short-term or covered patio use only |
For a 9-foot, 8-panel canopy you'll need approximately 5 to 6 yards of 60-inch-wide fabric. Buy a bit extra for mistakes and seam allowances.
Frame components
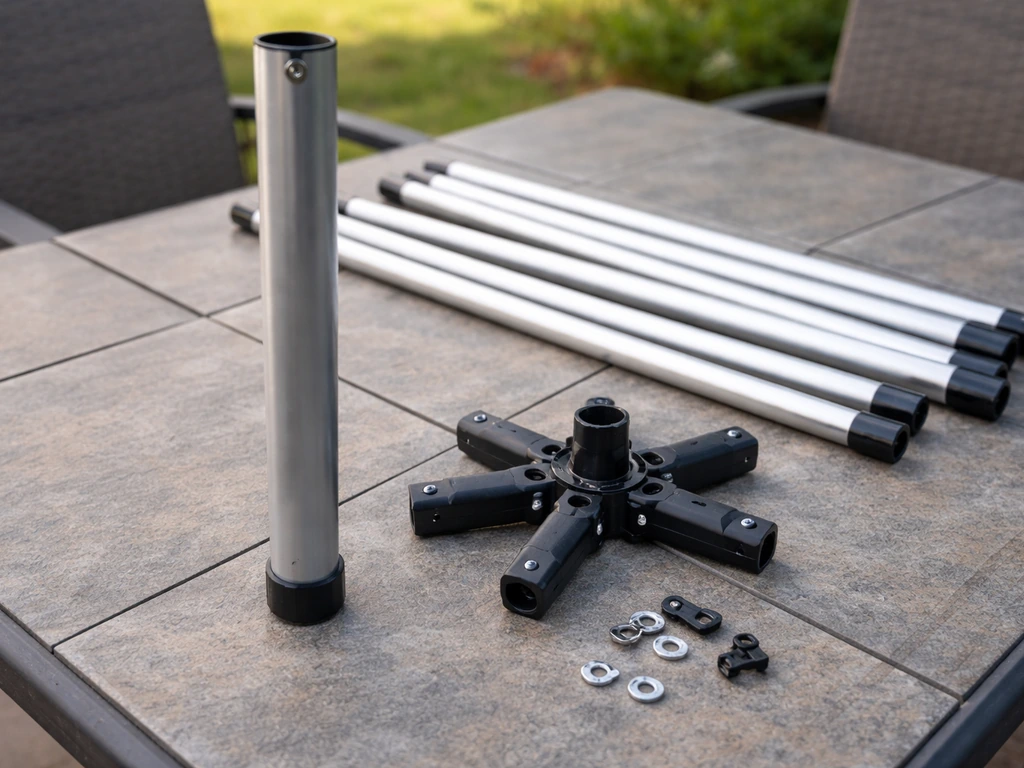
- Center pole: 1.5-inch diameter aluminum or powder-coated steel, approximately 7 to 8 feet tall (two-piece poles with a sleeve joint are easier to source and transport)
- Central hub assembly: upper hub (spider hub) where all ribs attach at the top, plus a lower runner hub that slides up the pole to open the canopy
- 8 ribs: aluminum or fiberglass, 52 to 54 inches long for a 9-foot canopy
- 8 stretcher arms: shorter arms (roughly 24 to 28 inches) that connect the runner hub to the mid-point of each rib, pushing them outward when the canopy opens
- Crank mechanism and worm gear assembly (for crank-style opening) or a simple push-up collar with locking pin
- Tilt mechanism (optional but useful): a collar-style or button-tilt joint that fits just below the upper hub
- Finial cap for the top of the pole
- Pole base or in-ground sleeve rated for your umbrella's diameter
Hardware and sewing supplies
- PTFE (Teflon) or Tex 70 polyester thread (Tex 70 is the heaviest weight most home sewing machines can reliably handle)
- Size 16 to 18 heavy-duty needle for home machines, or size 22 if using an industrial machine with PTFE thread
- Spur grommets (nickel or stainless, #26316 or equivalent) for canopy attachment points and center hole reinforcement
- Grommet setting tool and mallet
- Self-tapping screws or pop rivets for hub/rib attachment (match whatever your hub hardware requires)
- Seam sealer or Sunbrella 303 Fabric Guard for post-construction weatherproofing
- Velcro tie straps or closure ties for the canopy when folded
- Sharp fabric scissors or rotary cutter and cutting mat
- Tailor's chalk or washable fabric marker
- Measuring tape and a long straightedge
How to Build a Durable Umbrella Canopy
Planning the panel geometry
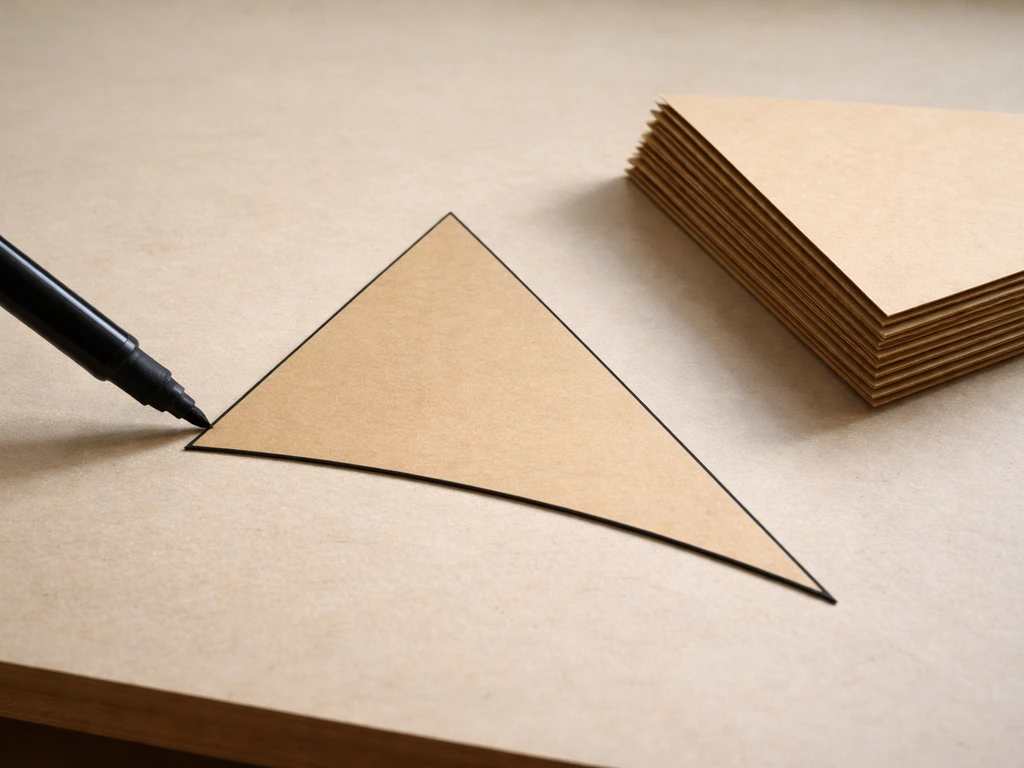
A round umbrella canopy is made of identical pie-slice panels, one per rib. For an 8-rib umbrella, you have 8 panels. Each panel is a triangle (or a very slightly curved version of one) with the narrow point at the top center and the wide curved edge at the outer rim. To get your panel dimensions right, lay out one rib flat and measure from the center hub attachment point to the tip of the rib.
For a 9-foot canopy that's typically 52 to 54 inches. That measurement is your panel's slant height. The base width of each panel at the outer rim is calculated from the total canopy circumference divided by 8.
For a 9-foot (108-inch) diameter canopy: circumference is roughly 339 inches, divided by 8 gives about 42 inches per panel base. Add 1/2 to 3/4 inch overlap seam allowance to each long edge of every panel, and add about 1 inch to the base edge for the hem or rib pocket.
Cutting the panels
Cut a paper or cardboard template first. It saves fabric and catches geometry errors before you commit to expensive acrylic cloth. Trace and cut all 8 panels from the template, keeping the fabric grain consistent across panels so they all drape the same way. Stack them and compare edges before you sew anything.
Sewing the panels together
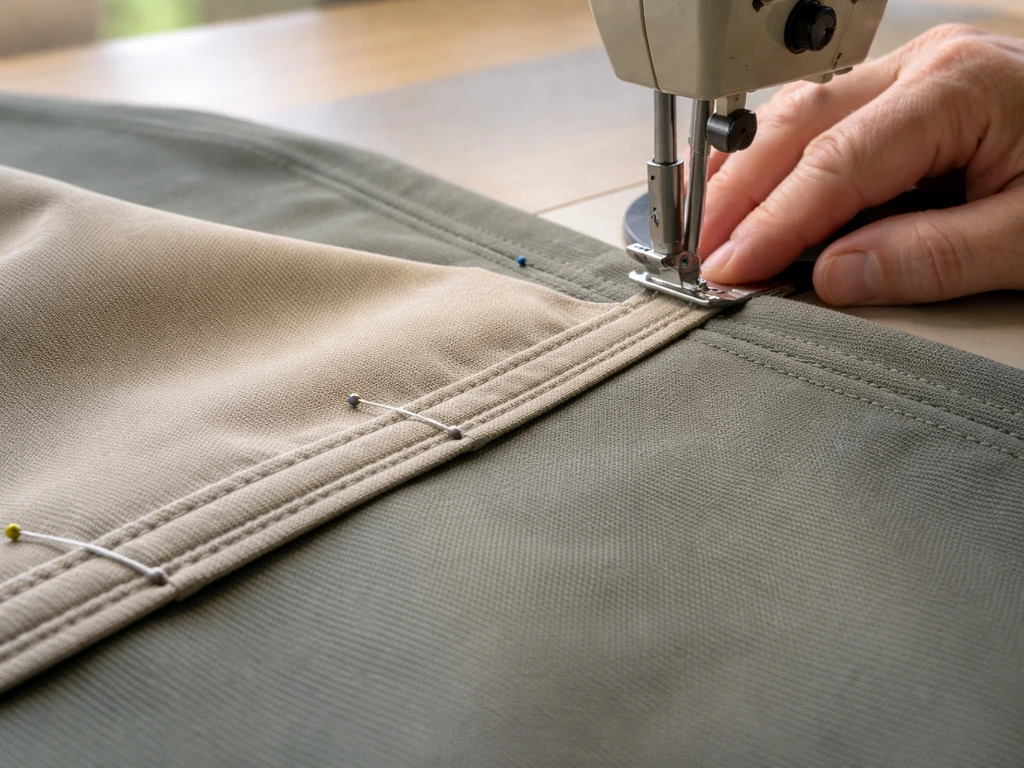
Use overlap seams, not folded French seams, for outdoor canopy work. Overlap one panel edge over the adjacent panel by 1/2 to 3/4 inch and sew two parallel lines of stitching: one near each edge of the overlap. Set your machine to 4.5 to 5 stitches per inch. The most important sewing tip here: keep gentle tension on the fabric both in front of and behind the needle as it feeds through. If you let either end go slack, the seam puckers, and puckered seams collect water and stress the stitching over time. Work through all 8 panels sequentially, assembling the canopy like an octagonal cone.
Finishing the edges
At the outer rim (the base of each panel), fold the edge under about 1 inch and sew a hem, or fold and sew a rib pocket (a tube just wide enough for the rib tip to slide into). Rib pockets give a cleaner fit and prevent the canopy from sliding off the ribs.
At the top center of the assembled canopy, cut a clean center hole roughly 1 inch in diameter to slide over the pole, then reinforce it with a grommet. For maximum grommet holding power, make sure that spot has at least 4 layers of fabric, so build up a reinforcing patch of folded fabric before setting the grommet. Set grommets at each rib pocket opening as well if your hub design uses tie-cord attachment instead of pockets.
Assembling the Frame and Mechanisms
Choosing an opening system
You have three realistic options for a DIY build: push-up with a locking pin, pulley/cord, or crank with a worm gear. A push-up design is the simplest to build from scratch. A crank system is more comfortable to use but requires sourcing a worm gear crank assembly as a pre-built unit (you can adapt these from umbrella repair parts suppliers). A pulley/cord system sits in between. For a first build, I recommend push-up or a sourced crank assembly. Avoid trying to fabricate a worm gear yourself.
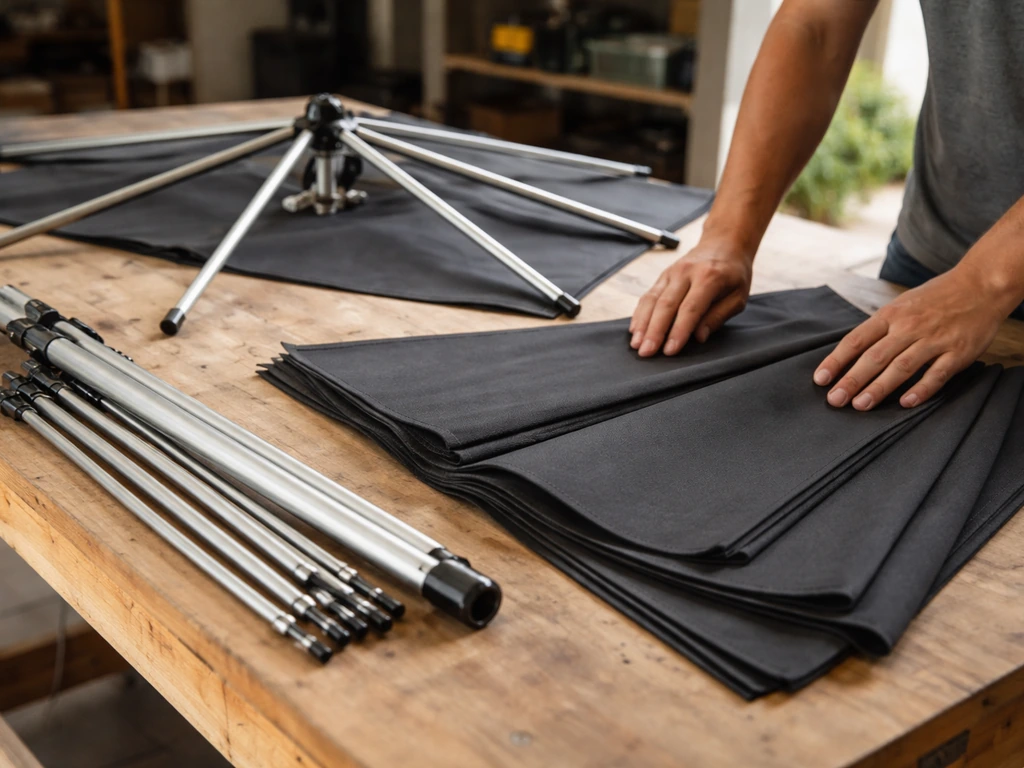
Assembling the hub and ribs
The upper (spider) hub attaches to the top of the pole via a bolt, set screw, or rivet, depending on the hub hardware you sourced. Each of the 8 ribs pins into a socket on the spider hub using a small rivet or screw. The runner hub slides freely up and down the pole below the spider hub. Each stretcher arm connects the runner hub to the underside of a rib at roughly the midpoint of the rib's length. When you push the runner hub upward, the stretcher arms push the ribs outward and upward, opening the canopy. Make sure all rib/stretcher pivot pins move freely before mounting the canopy fabric.
Installing a crank mechanism
If you're using a salvaged or purchased crank assembly, the cord from the crank winds around a spool inside the mechanism and routes up through the hollow pole to the runner hub. Thread the cord up through the pole before mounting the hub assembly at the top. Tie the cord to the runner hub using a double overhand knot or figure-eight knot so it cannot slip through.
Secure the crank housing to the pole using the same method the original hardware used (screws, rivets, or a retaining pin). Mixing fastener types here causes the housing to shift under load and jams the gear. Use a set screw through the pole wall at the crank mount point if you're building from scratch.
Adding a tilt mechanism
A tilt collar fits onto the pole just below the upper hub. The collar has a locking button or collar-tighten knob that holds the upper section of the pole (and the entire canopy) at a fixed angle. On a button-tilt design, you crank the umbrella fully open first, then press the button to release the upper pole section and push it to your desired angle. The collar then locks it there. If you're sourcing tilt hardware separately, match the collar's inner diameter to your pole's outer diameter exactly. A loose fit will let the upper pole wobble and wear out the tilt locking mechanism quickly.
Step-by-Step: Making a Complete Patio Umbrella from Scratch
- Cut and label your 8 canopy panels from your template, with seam allowances on the long edges and a hem/pocket allowance on the outer rim.
- Sew the panels together using overlap seams (1/2 to 3/4 inch overlap, two stitch lines per seam), maintaining even feed tension throughout.
- Hem or sew rib pockets along the outer rim of each panel.
- Build up a reinforcement patch at the center top of the assembled canopy and cut the center hole (about 1 inch diameter). Set a spur grommet through all layers at this point.
- Set grommets or finalize tie points at any rib-attachment locations if your design uses cord ties rather than pockets.
- Thread the opening cord through the hollow pole (if using crank or pulley design) before assembling the frame.
- Attach the crank housing or push-up collar to the lower pole section using screws or rivets. Confirm it does not rotate or slide under hand pressure.
- Mount the runner hub onto the pole above the crank/collar. Tie or crimp the cord to the runner hub.
- Mount the upper spider hub at the top of the pole using its set screw or bolt.
- Pin all 8 ribs into the spider hub sockets. Pivot pins should move freely.
- Connect all 8 stretcher arms between the runner hub and rib midpoints using the pivot hardware supplied with the hub.
- Slide the assembled canopy's center grommet over the finial and down the pole until it seats at the spider hub.
- Work around the canopy, pushing each rib tip into its fabric pocket (rib pockets face downward for correct drape). Ensure the fabric sits on the upper side of the ribs, not below them.
- Partially open the umbrella and check that all panels tension evenly before making any final attachments.
- Screw or press-fit the finial cap onto the top of the pole to lock the canopy center in place.
- Open the umbrella fully and inspect drape, tension, and seam alignment before moving to testing.
Attaching the Canopy, Hardware, and Finial Correctly
The order of attachment matters more than most DIY guides admit. The canopy center grommet goes over the top of the pole first, before the finial is attached. Trying to thread a finished canopy over a capped pole is a frustrating mistake. Once the grommet is seated at the spider hub, work around the canopy in a star pattern (opposing ribs, not sequential ones) when pushing ribs into their pockets. This keeps even tension as you go and prevents one side from pulling tight while the other side bunches. If your design uses cord ties at the rib tips instead of pockets, tie each one snugly but not so tight that it prevents the rib from sitting flat.
The finial is the last thing that goes on. It threads, screws, or press-fits onto the tip of the pole above the canopy center grommet, sandwiching the fabric in place. Make sure the finial is fully seated and tight. A loose finial lets the canopy center shift every time the umbrella opens or closes, which eventually tears the center grommet hole larger. If your finial uses a threaded post, add a small amount of thread-locking compound to keep it from vibrating loose over the season.
For the hub attachment at the top of the pole, confirm the spider hub's set screw is fully tightened after the canopy is installed. The canopy's weight and fabric tension can shift the hub slightly during installation, and a loose hub will cause uneven rib deployment on every open cycle.
Testing Operation, Tilt, and Fixing Common Build Issues
First open cycle
Open the umbrella slowly for the first time. If you built a crank model, turn the crank steadily and watch all 8 panels as they deploy. They should rise and tension evenly. Stop if you feel unexpected resistance. On a push-up model, push the runner hub smoothly upward and listen for the locking pin to click into place through the pole hole. If it doesn't click, the hole in the pole and the pin in the collar may be misaligned. Rotate the collar slightly until they line up.
Common problems and fixes
| Problem | Likely Cause | Fix |
|---|---|---|
| Canopy opens unevenly / one side sags | Uneven panel cutting or one rib pocket too loose | Re-check panel dimensions; re-sew the loose pocket tighter or add a tie at the rib tip |
| Canopy bunches at center | Center grommet hole too large or finial not fully seated | Add a reinforcing grommet patch; re-seat and tighten finial |
| Crank turns but canopy doesn't rise | Cord not tied to runner hub, or cord slipped off pulley | Re-route cord through pole, re-tie with figure-eight knot at runner hub |
| Tilt mechanism won't hold angle | Collar inner diameter too loose for pole, or collar lock not engaged | Replace collar with correct diameter; confirm lock button/knob is fully engaged after tilting |
| Ribs don't deploy fully / stay partially closed | Stretcher arm pivot pins stiff or misaligned | Remove stretcher, clean pivot point, apply dry lubricant, re-attach |
| Seams puckering after sewing | Uneven thread tension during sewing | Re-sew affected seams with even feed tension; apply seam sealer over existing seams as a stop-gap |
If the tilt mechanism feels stiff or grinds when you engage it, don't force it. Apply a penetrating lubricant to the collar joint and work it gently before trying again. Forcing a seized tilt collar can crack the collar or bend the upper pole section, which is a much harder repair than a little corrosion.
Checking drape and tension
Once fully open, walk around the umbrella and look at each panel from the side. They should curve gently downward from the hub to the rib tips in a consistent arc. If one or two panels sag more than others, the rib pocket for that panel is probably loose or the panel was cut slightly long. You can take in a sagging pocket by sewing an additional seam line closer to the rib tip end of the pocket tube. If the whole canopy sags uniformly, the ribs are likely too short for the panel geometry. This is why confirming your rib length matches your panel slant height before cutting is so important.
Weatherproofing, Storage, and Keeping It Secure in Wind
Weatherproofing your DIY canopy
Even quality solution-dyed acrylic is water-repellent rather than fully waterproof at the seams, because the needle holes in stitched seams are a path for water. After you finish sewing, apply a seam sealer along every seam line on the underside of the canopy. Let it cure for 24 hours before the first use. Then apply a fabric guard spray (such as 303 Fabric Guard or equivalent) to the entire canopy surface. This step restores and enhances the water-repellent finish that the manufacturing and sewing process can partially compromise. Reapply fabric guard once a season or any time water stops beading and starts soaking into the fabric instead of rolling off.
Wind safety: the most important habit you'll build
A patio umbrella, even a well-built one, is not designed to withstand wind gusts. This is especially true for cantilever (offset) designs, but it applies to center-pole umbrellas too. Close and tie off your umbrella whenever you leave the patio, overnight, and any time wind picks up. When closed, use the built-in fabric ties or add Velcro wrap straps to reduce the wind profile of the folded canopy. An open umbrella in a 30 mph gust acts like a sail and will either topple the stand or snap a rib at the hub connection point.
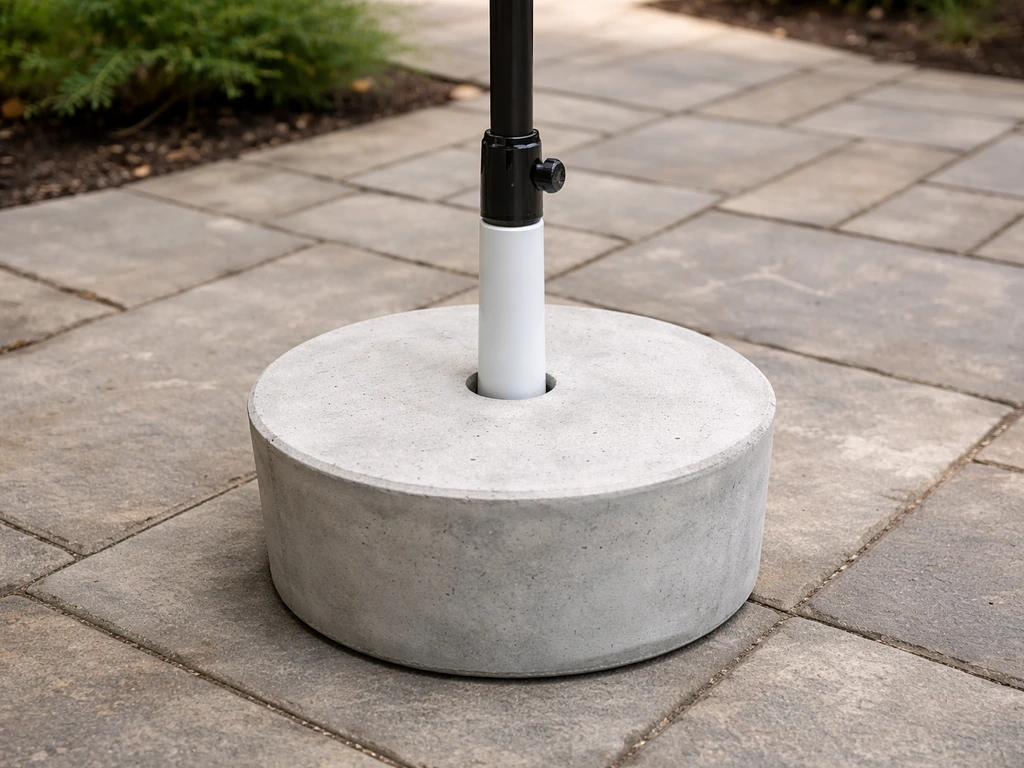
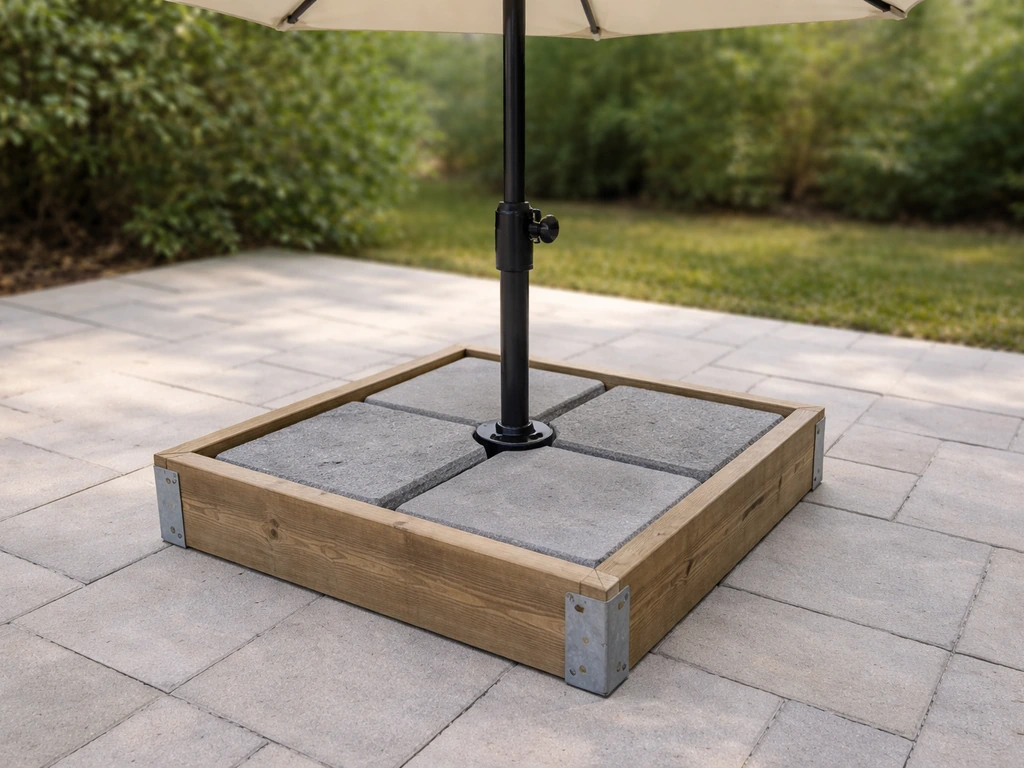
For the base, match the stand weight to your canopy size and local wind conditions. A quick next step is to pick the right stand base weight and learn how to make a patio umbrella stand that won’t tip in wind. Choose a DIY patio umbrella stand base weight that matches your canopy size and local wind so the umbrella stays stable.
A 9-foot canopy generally needs a base of at least 50 pounds, with heavier bases (75 pounds or more) recommended for windier climates. An in-ground sleeve anchor is more secure than any freestanding base. If your umbrella pole uses a locking pin or set screw where it inserts into the base, make sure it is fully engaged every time you set up. Make sure the pole-to-base [locking pin or set screw](https://www.
sxgaobu. com/news/how-do-i-keep-my-patio-umbrella-from-blowing-over-8-proven-methods-that-actually-work. html) is set to match your umbrella’s design, since the correct locking geometry is part of effective DIY wind securing. A pole that can lift out of its base in a gust becomes a projectile.
End-of-season storage and winterizing
Before storing for winter, clean the canopy with mild soap and water, rinse thoroughly, and let it dry completely before folding. Storing a damp canopy even briefly leads to mildew that is very hard to remove from acrylic fabric. Disassemble the umbrella if possible (most two-piece poles separate at the sleeve joint) and store the pole horizontally to prevent warping. Store the canopy loosely rolled or folded in a breathable canvas storage bag, not a sealed plastic bag.
If you want to leave the frame outdoors, at minimum remove the canopy and store it inside. A protective cover (a related project covered in guides about how to make a patio umbrella cover) adds another layer of protection if full disassembly isn't practical. If you want extra protection from sun, rain, and debris, follow a guide on how to make a patio umbrella cover protective cover.
Lubricate the crank gears, tilt collar, and all pivot points with a dry silicone lubricant before storing and again at the start of each season. This one habit prevents most of the seized-mechanism problems that make umbrellas feel broken when you take them out of storage each spring. Moving parts that are dry and corroded over winter are the number one cause of cranks that strip and tilt collars that crack when you first try to use them.
Ongoing maintenance to extend your umbrella's life
- Inspect all rib-to-hub pivot pins at the start of each season and replace any that show corrosion or cracking
- Check the opening cord or pulley system for fraying at stress points (especially where the cord exits the pole or wraps around a pulley); replace the cord at the first sign of fraying, not after it snaps
- Re-apply fabric guard spray every season to maintain water repellency
- Tighten the finial and spider hub set screws mid-season, as vibration from wind and daily use loosens them over time
- Close and tie off the umbrella during any wind event and whenever the patio is unoccupied
- Never force a stiff crank or tilt mechanism; lubricate first, then try again
FAQ
Can I make a patio umbrella without a sewing machine?
You can, but it limits durability. For outdoor canopy seams and hems, hand-stitching usually cannot match the stitch density needed to resist pucker, so water can wick into the needle holes. If you must go manual, use thick outdoor thread and a tight stitch spacing, then seam-seal on the underside and apply fabric guard, but expect shorter life than with a heavy-duty machine.
Do the panel dimensions change if I want a different umbrella diameter than 9 feet?
Yes. You need to recalculate both slant height (hub to rib tip) and the panel base width. Use the canopy circumference divided by the number of panels to get the base width, then add your seam overlap and the rim hem or rib pocket allowance. Keep the same geometry across all panels, otherwise ribs will open unevenly and cause one side to sag.
What’s the difference between overlap seams and French seams for outdoor umbrellas?
Overlap seams place one panel edge over the adjacent edge and stitch with two parallel lines, which better tolerates bias movement and water paths outdoors. Folded French seams can be bulkier and can trap moisture if the outer layer is compromised. For a canopy you plan to use in real weather, overlap seams are the safer default, especially after you seam-seal the underside.
Should I cut panels on a straight grain or at an angle (bias)?
For consistent drape, keep the fabric grain orientation the same across all panels. Bias cuts can look smooth initially, but they stretch differently and make some panels pull tighter when the umbrella opens. Before cutting all 8 panels, compare a few off-cuts side by side when laid on a flat surface to confirm matching curvature.
How do I choose seam sealer if my fabric is acrylic or marine polyester?
Pick a seam sealer intended for outdoor fabric and compatible with synthetic fibers. The key detail is that sealer should be applied to the underside along every seam line after sewing, then fully cured before exposure. If you use a sealer that stays tacky or cracks, it can undermine water beading and increase dirt retention on the canopy.
How can I prevent puckering if my fabric feeds unevenly?
Use gentle, consistent tension on both sides of the needle as the fabric advances, and avoid letting the fabric ends go slack. Also consider a short test seam on scrap with the same thread and needle, then check the back for loops or tight pulling. If the test puckers, adjust foot pressure and stitch length before sewing the full canopy.
What if my push-up locking pin does not engage when the umbrella is fully raised?
First, confirm the runner hub is aligned with the collar and pole hole when fully open. A common cause is misalignment from installation, so rotate the tilt collar slightly until the pin lines up, then test again slowly. If it still does not click, check that all stretcher pivot points move freely and that the rib pockets are not pulling the canopy out of shape.
How do I stop the canopy from sliding off the ribs over time?
Rib pockets help because they guide and restrain the rib tips. If you see any drift, inspect pocket tube width and make sure the rib tips slide in smoothly but do not rattle. Another practical fix is to reinforce pocket openings at stress points so the pockets do not stretch, which can loosen the fit after repeated open-close cycles.
Can I use a crank mechanism instead of push-up, and what’s the biggest failure risk?
You can use a pre-built crank assembly, and the biggest failure risk is mismatch or movement at the crank housing mount. Keep the housing secured using the same fastener style the assembly was designed for, and avoid mixing fastener types. After mounting, verify the spool and cord wind path are centered and the cord stays taut as the runner hub travels.
How much cord length slack should I allow in a pulley or crank system?
Aim for minimal slack, enough to avoid binding when the umbrella opens and closes. If the cord is too long, it can wrap unevenly on the spool and delay tension at the runner hub, leading to uneven rib deployment. If too short, it can pull the runner hub hard at full travel and increase wear on the cord and spool.
What should I lubricate on the umbrella, and how often?
Lubricate the crank gears, tilt collar joint, and every pivot point that moves when opening and closing. Use a dry silicone lubricant, apply it before the first season use and again before storing, then wipe away excess so it does not attract grit. Avoid heavy oils that can gum up outdoors.
Why do my ribs sag even when the pockets look tight?
If only one or two panels sag, the pocket for those panels is likely loose, or the panel was cut slightly long or short. If the entire canopy sags uniformly, the rib length likely does not match the panel slant geometry you calculated. A quick check is to measure hub-to-rib tip slant height against your rib length before final assembly next time.
What’s the safest way to test the umbrella after assembly?
Open it slowly at first, watching all panels rise together, and stop if you feel resistance or notice uneven tension. Do a second test with the umbrella at an angled tilt, then check that the tilt lock holds without grinding noises. This staged testing helps you catch pin misalignment or restricted pivot movement before you stress the seams and center grommet.
Is it okay to store the umbrella folded with the canopy attached?
It’s better to keep the canopy clean and fully dry, then store it loosely or rolled in a breathable bag. Damp storage even briefly can cause mildew, which is difficult to remove from acrylic fabric. If possible, disassemble the pole and store it horizontally to reduce warping, then remove the canopy for winter storage in climates with cold wet conditions.
How do I anchor or secure the umbrella to reduce wind risk?
Even a well-built umbrella is vulnerable in gusts, so close and tie it off whenever you leave or when wind picks up. For stability, ensure the pole is fully engaged in its base locking pin or set screw, and consider an in-ground sleeve anchor for added security. If you see wobble at setup, fix the fit before using it in any windy conditions.
Step-by-step DIY and concrete patio umbrella stand with pole fitting, stable alignment, weatherproof finishing, and wobb
Step-by-step DIY patio umbrella stand guide with weight, anchoring, tools, and safe setup for stability in wind.

Step-by-step fixes for patio umbrellas that won’t open or close, with checks for jams, cords, latches, and lubricating t