
You can make most patio umbrellas taller by using one of three approaches: extend a telescoping pole to its next locked position, add a commercial pole extender or sleeve adapter between the pole sections, or raise the entire setup by lifting the base onto a platform or into a taller stand. Which method works depends on what type of pole mechanism you have, how much height you actually need, and whether your base can handle the extra leverage. I'll walk you through all of them, from a two-minute fix to a full DIY extension build.
How to Make a Patio Umbrella Taller: Extensions, Fixes

Luca Morrison
20 Jul 2026
What this guide covers (and a quick decision checklist)
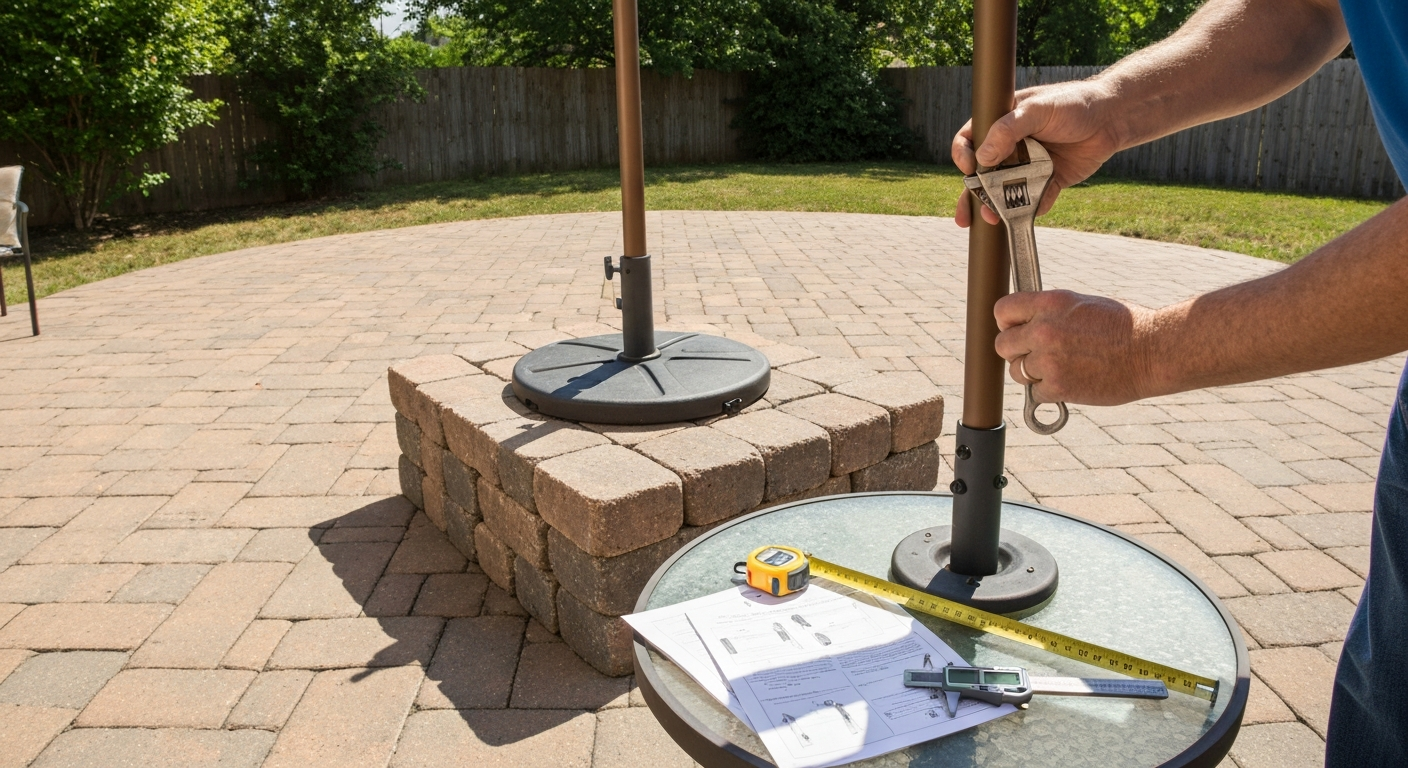
This guide is for anyone who needs more shade coverage, more headroom under the canopy, or wants to position their umbrella over a taller table. Before you start taking anything apart, run through this quick checklist to figure out your fastest path forward.
- Does your pole telescope? If yes, skip ahead to the built-in adjustments section first — you may already have the height you need locked inside the pole.
- Do you need 6 inches or less of extra height? A simple platform under the base or a sleeve riser is probably your fastest fix.
- Do you need more than 12 inches of extra height? You are likely looking at a new pole section, a replacement base with a taller mast, or a different stand entirely.
- Is your current base heavy enough? Any height increase shifts the canopy's wind leverage upward. Make sure your base meets or exceeds the manufacturer's minimum weight before adding height.
- Is the pole cracked, bent, or corroded at a joint? Stop here — extending a compromised pole is a safety issue. See the safety section below.
- Are you renting or in a temporary setup? A platform riser or adjustable sleeve adapter is easier to remove than a permanent extension.
Safety warnings, know when to stop
Adding height to an umbrella is mechanical work with real consequences if something fails. A patio umbrella canopy can act like a sail in wind. At 30 mph, a 7.5-foot diameter canopy needs roughly 75 pounds of anchoring resistance to stay put, according to ASTM beach umbrella safety testing. Raise the canopy higher and that wind leverage increases. Before doing anything else, check these points.
- Inspect the entire pole for cracks, dents, pitting from corrosion, or bent sections. Do not extend a damaged pole under any circumstances.
- Check every joint, collar, and splice for slop or wobble. A loose fit that feels minor at ground level becomes a serious failure point when the canopy is higher and catching more wind.
- Confirm your base weight is adequate. Most market umbrellas 7.5 to 9 feet in diameter require a base of at least 50 pounds, and larger rectangular models can require 100 pounds or more. Treasure Garden, for example, explicitly lists minimum base weights in their model documentation. If your base is underweight at the current height, it is definitely underweight after an extension.
- Never use wood splices, duct tape, or hose clamps as a permanent structural fix. These are field patches at best.
- If the umbrella is in a concrete-cast in-deck sleeve and you are increasing pole length, confirm the new pole's overlap inside the sleeve is at least 12 inches to maintain proper bite.
- Call a professional or contact the manufacturer if you have a commercial cantilever umbrella, an offset umbrella with a side mast, or any umbrella mounted to a structure like a pergola or fence post. The engineering tolerances on those systems are much tighter.
When replacement is the smarter call: if the pole is aluminum and has gone chalky white with pitting corrosion at the base section, or if a fiberglass pole has delaminated or cracked ribs, the cost of a proper replacement pole is almost always less than the cost of an ER visit. A new pole section for a standard 1.5-inch OD umbrella typically runs $30 to $80 from the manufacturer. That is the honest answer.
Quick fixes you can do right now
If you need more height today with minimal tools, these are your fastest options. Neither requires disassembling the umbrella.
Raise the base with a platform or deck riser
Set the entire base on a stable platform, a weather-resistant hardwood block, a set of deck tiles, or a concrete paver stack works fine. Every inch of platform height translates directly to one inch of additional canopy height. For a 6-inch gain, two 3-inch composite deck blocks stacked under the base feet do the job cleanly. The critical requirement: the platform must be wide enough to fully support the base footprint so it cannot tip, and it must sit on a flat surface. Do not stack a heavy umbrella base on a single center block, it will rock.
Use a taller table
If your umbrella goes through a table's center hole, switching to a taller table immediately raises the canopy without touching the pole or base at all. Bar-height tables (typically 40 to 42 inches tall) run 6 to 8 inches taller than standard dining tables (28 to 30 inches). Confirm the table hole diameter matches your pole, most center-hole tables take a 1.5-inch to 2-inch OD pole and come with a rubber grommet that can be swapped for a different size.
Reposition the pole up in the base socket
Some freestanding base systems have a bolt-clamp or set-screw at the top of the base tube that locks the pole at a specific depth. If your pole drops 4 to 6 inches below the rim of the base tube, loosen the clamp, pull the pole up until just 3 to 4 inches are seated inside the tube, and re-tighten. You will gain a few inches instantly. This only works if the overlap remaining is enough to keep the pole stable, I would not go below 4 inches of pole seated inside the base, and heavier bases with a tight-fitting bore give you more security at shallow depths.
Measure first, compatibility is everything
Before you buy any adapter, extender, or replacement section, you need three measurements. Getting these wrong means ordering parts twice and wasting a week.
How to take the measurements
- Pole outer diameter (OD): Use digital calipers or a close-fitting wrench for a reference. Wrap a strip of paper tightly around the pole, mark where it overlaps, measure the strip flat, and divide by pi (3.14) — that gives you OD. Most consumer umbrella poles are 1.5 inches (38 mm) OD. Larger commercial-grade poles run 1.9 to 2.0 inches (48 to 51 mm) OD.
- Base hole inner diameter (ID): Measure the inside diameter of the base socket opening with calipers or a step gauge. A snug but not forced fit is what you want for any adapter. If your pole OD is 1.5 inches and the base ID is 2.0 inches, you need a sleeve reducer that bridges that gap.
- Available pole length and overlap needed: Measure the total exposed pole length from base rim to where the ribs start. Then measure how much pole you need inside the base for stability (minimum 4 inches for most bases, 12 inches for in-deck sleeves). Subtract the overlap from the exposed length to find your usable extension zone.
- Height needed: Measure from the ground to the bottom of the canopy in its current position. Measure your target height. The difference is the extension length you need — add a couple of inches as buffer to account for overlap in any splice joint.
| Measurement | What to measure | Common values | Why it matters |
|---|---|---|---|
| Pole OD | Outside diameter of center pole | 1.5 in (38 mm), 1.9–2.0 in (48–51 mm) | Sets adapter bore size and extender fit |
| Base hole ID | Inside diameter of base socket | 1.5 in, 2.0 in, 2.375 in | Must match pole OD or adapter OD |
| Overlap depth | How deep pole sits inside base | 4–6 in consumer, 12 in in-deck sleeve | Determines stability and safe pull-up range |
| Extension needed | Gap between current and target height | 6 in to 24 in typical | Determines extender or platform height |
| Wall thickness | Thickness of pole wall | ~0.080 in (2.0 mm) common on 1.5 in OD aluminum | Affects internal sleeve fit and splice strength |
Tools and materials checklist
Whether you are using a commercial adapter or building a DIY riser, you will need most of these. I have split them into what you definitely need and what is situation-specific.
Always needed
- Digital calipers or tape measure and paper strip (for measuring pole OD and base ID)
- Permanent marker (for marking overlap and cut lines)
- Silicone spray or PTFE dry-film lubricant (for freeing stuck collars or telescoping sections — choose one labeled safe for plastics and aluminum, and test on a small area first; avoid formulas that warn against polycarbonate if your collar is clear plastic)
- Adjustable wrench or pliers with jaw pads (for tightening clamp collars without scratching the pole)
- A helper or a way to support the canopy while you work on the pole
For commercial adapter or extender installations
- Commercial pole extender or sleeve adapter sized to your pole OD and base ID (more on types below)
- Stainless steel hose clamps or set-screw collar if the extender does not include its own locking hardware
- Anti-seize compound: use copper or aluminum-based anti-seize for aluminum-to-aluminum threaded splices; nickel or ceramic for mixed metals in coastal/high-humidity environments (match the chemistry to the metals to avoid galvanic corrosion)
- Hand drill with step drill bit (for adding a cross-pin hole if your extender needs a locking pin)
For DIY riser builds
- Schedule 40 aluminum pipe or heavy-wall PVC pipe in the correct OD to slip over or inside your pole (PVC is fine for indoor/covered patios; aluminum is better for full outdoor exposure)
- Hacksaw or pipe cutter (for cutting riser to length)
- Sandpaper or deburring tool (to clean cut edges)
- Through-bolt hardware: 1/4-inch stainless carriage bolt, nut, and fender washers for pinning the splice
- Marine-grade waterproof adhesive or epoxy (optional secondary bond on internal sleeves)
- Level (for confirming the pole sits plumb after installation)
Know your pole type before you start
Patio umbrella poles come in several configurations, and the right method for adding height depends entirely on which one you have. Here is a plain-language breakdown of the common types.
| Pole type | How to identify it | Built-in height range | Best extension method |
|---|---|---|---|
| Telescoping two-piece | Upper section slides inside lower section; has a push-button, collar, or clamp at the joint | Usually 6–12 in of adjustment | Use built-in range first; add extender at splice if more needed |
| Push-button collar | Spring-loaded button pops through holes in the inner pole; click to adjust | Fixed increments, typically 3–4 height stops | Limited to existing holes; drilling new holes is possible but weakens pole |
| Threaded section splice | Two pole sections screw together; visible threading at joint | None — fixed length once assembled | Threaded extender coupler between sections; anti-seize on threads |
| Single fixed pole | One solid piece, no visible joint | None | Platform riser or base swap; pole replacement is most stable long-term option |
| Crank-lift | Handle on side of pole housing that turns to raise/lower canopy via internal cord and pulley | Canopy height only, not pole height | Pole extender adds height; do not confuse canopy position with pole length |
| Tilt mechanism | Collar or button near top of pole that lets canopy angle forward or back | Angle adjustment only, not height | Combine with extender for both height and angle control |
Getting the most out of built-in adjustments
A surprising number of people never fully extend their telescoping poles. If your umbrella has a two-piece telescoping pole, this is always step one, it costs nothing and takes about 90 seconds.
Telescoping poles
- Fully close the canopy so it is not catching wind while you adjust.
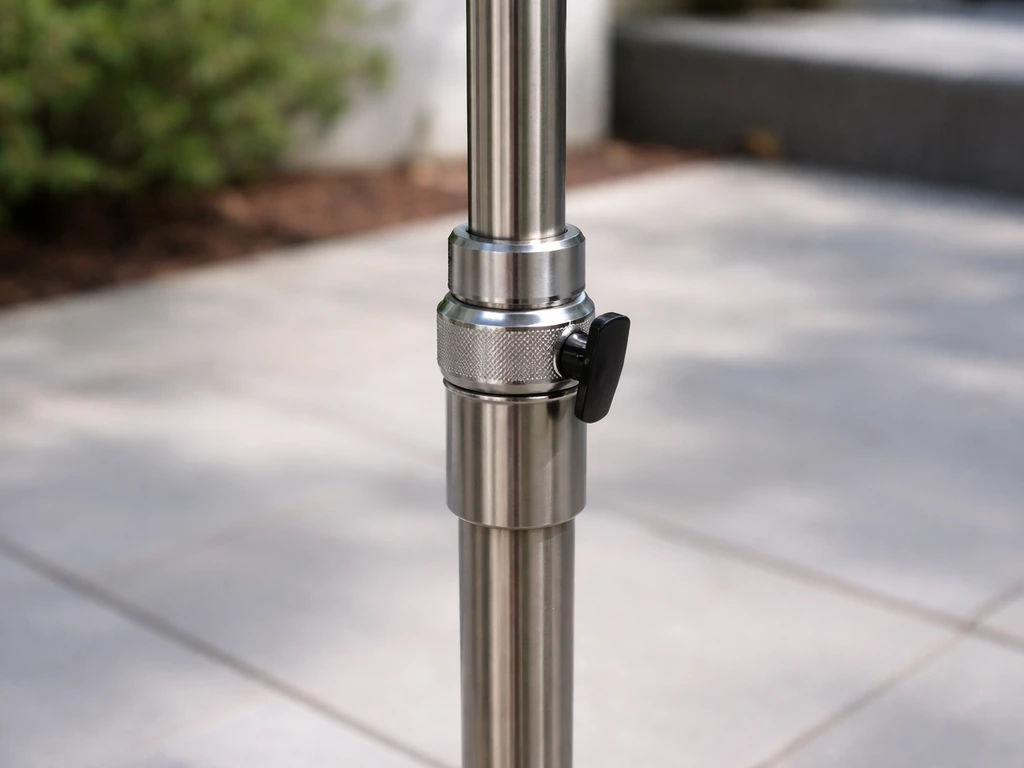
- Locate the adjustment collar or clamp near the mid-point of the pole where the two sections meet.
- If it is a twist-collar: twist counterclockwise (usually) to loosen, slide the upper section up to the next position or fully extended, then twist clockwise firmly to lock.
- If it is a clamp-lever collar: flip the lever open, slide up, flip the lever closed.
- If it is a push-button: depress the button, slide up until the button pops through the next higher hole, confirm the button is fully seated.
- Give the upper section a firm push-down test before opening the canopy. It should not slip. If it slips under light downward pressure, the collar is worn and needs to be tightened or replaced before you use the umbrella.
Crank-lift umbrellas
The crank handle raises and lowers the canopy along the pole via an internal cord and pulley, it does not change the pole's physical height. If your crank canopy is already at the top of its travel range and you need more height, you need to address pole length, not the crank. That said, if your crank is not lifting the canopy fully because of a worn cord or slipping pulley, fixing that mechanism can restore a few inches of lost canopy height. Keep the crank clean and lubricated with a dry PTFE spray, oil-based lubricants attract grit and accelerate wear on the internal cord.
Tilt mechanisms
A collar-tilt or push-button tilt near the top of the pole lets you angle the canopy toward the sun. Tilting forward does drop the leading edge of the canopy a few inches lower, which can feel like less height on that side. If your canopy seems too low only on one edge, check that the tilt mechanism is fully returned to the upright position. A stuck tilt collar is a common culprit: spray silicone lubricant into the collar gap, let it penetrate for a few minutes, then work the tilt back and forth. Do not force it with a pipe wrench, you can crack the housing.
Commercial adapters and extenders: what to buy and how to choose
The aftermarket for patio umbrella adapters is bigger than most people expect. There are three main product categories, and knowing which one fits your situation will save you from buying the wrong thing.
Sleeve reducers and base adapters
These drop into an oversized base socket to reduce the hole ID so a smaller pole fits snugly. Products like BajaMate pool and patio adapters and FurniHQ HDPE adjustable inserts are examples. They do not add height, but they do let you put a standard 1.5-inch OD pole into a 2-inch or 2.375-inch base socket without wobble. This matters for height work because a wobbly base connection amplifies instability at the top of any extended pole. If your base hole is larger than your pole, start with a proper sleeve reducer before adding length above.
Pole extenders and splice couplers
These are the products that actually add height. They come as either an external sleeve (a short tube that slips over both pole ends and is locked with set screws) or an internal coupler (a rod or tube that inserts into the hollow core of each pole end). For a 1.5-inch OD aluminum pole with roughly 2. For reference, a 7.5' commercial market umbrella product specification lists a 1.5" outer diameter and approximately 0.080" (≈2.0 mm) wall thickness for its two‑piece aluminum pole 7.5' Commercial Market Umbrella — product specification (pole diameter & wall thickness). 0 mm wall thickness, an internal coupler needs to be sized to the pole's inner diameter, roughly 1.34 to 1.36 inches for that wall thickness. External sleeves need to clear the OD, typically 1.6 to 1.65 inches ID for a 1.5-inch OD pole. Check the product specs carefully: the difference between a 1.5-inch bore and a 1.5-inch fit is often the confusion that causes returns. Marketplace sources including Etsy also offer 3D-printed reducer sleeves and small-batch custom adapters for unusual pole sizes, these work fine as sleeve fillers but should not be used as primary structural load-bearing couplers on their own.
In-deck and in-ground sleeves
If your umbrella sits in a cast-in concrete or deck sleeve (common around pools and on tiled patios), the sleeve itself is fixed. You cannot raise the sleeve, but you can use a shorter seating depth with a set-screw collar to gain a few inches of height as described earlier. For a more significant height increase with an in-deck sleeve, the right approach is a longer replacement pole, not an adapter piled on top of an adapter. Pool and patio sleeves are typically sized for 1.5-inch to 2.0-inch OD poles, and the sleeve depth is usually 12 to 18 inches, meaning a replacement pole must be long enough to sit 12 inches into the sleeve and still clear your target height above the deck.
| Adapter type | Best for | Adds height? | Typical material | Approximate cost |
|---|---|---|---|---|
| Sleeve reducer / base insert | Oversized base hole, wobble prevention | No | HDPE, rubber, nylon | $10–$30 |
| External splice sleeve | Joining two same-OD pole sections end-to-end | Yes, by added section length | Aluminum, steel | $20–$60 |
| Internal coupler rod | Joining hollow pole sections from inside | Yes, by added section length | Aluminum, fiberglass | $15–$50 |
| Threaded coupler | Threaded-end pole sections | Yes, by added section length | Stainless steel, aluminum | $25–$70 |
| 3D-printed / custom sleeve | Non-standard OD or unusual base hole | No (filler only) | PLA, ABS (indoor use) | $5–$25 |
| Platform riser | Raising entire base assembly | Yes, by platform height | Wood, composite, concrete pavers | $0–$40 DIY |
DIY pole extension: step-by-step
If you cannot find a commercial extender that matches your pole, or if you want to save money, you can build a reliable splice using aluminum pipe from a hardware store. This works well for single-piece fixed poles and for adding length above a telescoping pole's upper section. See the guide on how to extend patio umbrella for full details on sizing replacement sections and step‑by‑step splice examples.
- Measure the ID of your umbrella pole's upper end with calipers. You need a coupler pipe that slides snugly into this bore — typically 1.34 to 1.40 inches OD for a standard 1.5-inch consumer pole.
- Cut a length of Schedule 40 aluminum pipe (or heavy-wall aluminum electrical conduit, which is widely available and cheap) to serve as your internal coupler. It should extend at least 4 inches into each pole section — so a 4-inch extension into the lower section and 4 inches into the upper section means a minimum 8-inch coupler, plus the gap length you want to add. For a 6-inch height gain, cut a coupler that is 14 inches total (4 + 6 + 4).
- Deburr the cut ends of the coupler with sandpaper or a deburring tool so there are no sharp edges.
- Insert one end of the coupler 4 inches into the lower pole section. Mark the coupler at the top of the lower pole end with a marker.
- Drill a 1/4-inch cross-pin hole through both the lower pole wall and the coupler at the center of the overlap zone. Insert a 1/4-inch stainless steel carriage bolt, add a fender washer and nyloc nut on the other side, and tighten finger-tight plus a quarter turn. Do not over-torque aluminum — snug is enough.
- Slide the upper pole section onto the top of the coupler until it seats 4 inches deep. Mark, drill, and pin this joint the same way.
- Check the assembly with a level. The pole should be plumb. If it leans, the coupler is not centered — recheck the bore fit and tighten the pins evenly.
- Apply a thin bead of marine-grade sealant around each joint seam to keep water out of the hollow bore. Water trapped inside aluminum poles accelerates corrosion from the inside out — this is a common failure point I have seen on umbrellas that looked fine from the outside.
Stabilizing a taller umbrella, base weight, anchors, and wind
This step gets skipped far too often. Every inch of additional pole height increases the wind moment arm, the mechanical leverage wind has on the base. A canopy that was borderline stable at the original height can become genuinely dangerous after an extension.
Base weight
Check your umbrella's documentation for the minimum base weight. If you cannot find it, use 50 pounds as a floor for any umbrella up to 9 feet in diameter, and 100 pounds for larger market or rectangular umbrellas. Treasure Garden and other major manufacturers publish model-specific base weight requirements, and some offer bolt-on supplemental weight rings designed to stack onto existing bases. See the Treasure Garden, product page (example base-weight requirement listed in model notes) for an explicit example of a model-specific minimum base weight requirement Treasure Garden — product page (example base-weight requirement listed in model notes). After raising your umbrella's height, add weight if you are anywhere near the minimum. Sandbag-style anchor weights that sit on the base feet work in a pinch.
Ground anchors for soft surfaces
On grass or soft soil, a screw-in spiral ground anchor (sometimes called a helix anchor) can add meaningful hold. Products like the Orange Screw consumer ground anchor drive into soil by twisting and resist pull-out forces surprisingly well for their size. Thread the pole through the anchor's loop or use a clamp to connect the base to the anchor point. These are especially useful for temporary setups on a lawn where you cannot use a heavy base.
Wind habits that protect the umbrella
- Close the canopy whenever you are not actively using the umbrella, especially overnight or if wind picks up. Even a moderate gust can tip a setup that felt perfectly stable in still air.
- The ASTM F3512 standard for market umbrella wind safety provides manufacturers with a testing framework, but it does not mean every umbrella on the market has been tested to it. When in doubt, assume your umbrella is not rated for sustained winds above 20 to 25 mph with the canopy open.
- Tilt the canopy slightly (if you have a tilt mechanism) to deflect wind rather than catch it flat — this meaningfully reduces the load on the base during a gust.
- If you live in a consistently windy area, consider a weighted in-ground sleeve installation rather than a portable base. The concrete surrounding a cast sleeve can provide far more hold than even a 150-pound portable base.
Troubleshooting stuck or seized mechanisms
The most common reason people think they need to modify their umbrella is actually a stuck mechanism that has never been fully extended. Before buying a single part, try these fixes.
Stuck telescoping collar or push-button
- Spray silicone or PTFE dry lubricant into the joint gap and the button recess. Wait 3 to 5 minutes.
- Work the section up and down with moderate force while the lubricant penetrates. Do not torque or twist — straight up and down only.
- If it still will not move, the pole may have corroded at the joint. Try a second application and a longer soak (20 to 30 minutes). On aluminum poles, a mild aluminum-safe penetrating oil can help, but wipe it off thoroughly afterward and follow up with dry PTFE spray — oil residue attracts grit and will seize the joint again faster.
- If the button is depressed but the section still will not slide, the pole wall may have dented slightly at that joint from a past impact. Check by looking down the bore with a flashlight. A dented bore requires pole section replacement.
Stuck crank or jammed pulley
A crank that turns but does not raise the canopy almost always means a frayed or slipped internal cord, or a worn crank gear. A crank that will not turn at all is usually a jammed cord wrapped around the pulley axle inside the housing. To access it, locate the crank housing cover (usually two to four Phillips screws on the housing body), remove it, and look for cord wrapped around the pulley axle or a frayed cord end that has slipped off the spool. Re-seating the cord and replacing frayed sections with 3mm to 4mm braid is a straightforward fix that restores full canopy travel, and with it, any height the canopy had lost by sagging.
Seized tilt collar
Tilt collars are usually plastic over a metal pin. Silicone spray and patient back-and-forth movement fixes most of them. If the plastic housing is cracked or the pin is visibly bent, replace the collar assembly, forcing it will snap the housing and leave you with a pole that tilts permanently, which is both annoying and potentially unsafe in wind.
Preventive maintenance to keep height adjustments working
Most umbrella mechanisms fail because they sit outdoors all season with no attention. Fifteen minutes of maintenance at the start and end of each season will prevent almost every stuck collar, seized joint, and corroded splice I have ever seen.
- At season start: extend all telescoping sections, wipe down the pole with a damp cloth, apply dry PTFE spray to every sliding joint and collar, and test all buttons and cranks through their full range.
- Mid-season: if you get a lot of rain or live near the coast, a quick wipe and re-spray of the joints every 6 to 8 weeks keeps salt and mineral deposits from binding them.
- At season end: fully retract telescoping sections, apply a light coat of silicone spray to all joints before storing, and never store the umbrella with water trapped inside a hollow pole — tip it upside down briefly to drain before covering or storing.
- Apply anti-seize to any threaded splice sections every two to three seasons. For aluminum-to-aluminum threads, aluminum-based anti-seize works well. For stainless hardware in aluminum, use a nickel or ceramic formulation to avoid galvanic issues in damp conditions.
- Inspect the base socket for corrosion, cracking, or deformation once a season. A degraded base socket is the single most common reason an umbrella becomes unstable at height.
When you need a taller stand instead
Sometimes the umbrella itself is fine but the base or stand is the limiting factor. If you have a standard pole but a short or low-profile base that buries the pole too deep, swapping to a taller stand raises the effective canopy height without touching the pole at all. If you are considering building or choosing a new stand specifically to gain height, the related guides on making a patio umbrella stand and DIY patio umbrella stand builds cover exactly that process, including height, weight, and hole sizing considerations. For step-by-step building plans, sizing guidance, and weight considerations, see the guide on how to make a patio umbrella stand. For tips on protecting your umbrella when not in use, see a short guide on how to put cover on patio umbrella. For step-by-step instructions on building a patio umbrella itself, see how to make a patio umbrella. If you're also protecting your umbrella fabric, see a step-by-step guide on how to make a patio umbrella cover. For step-by-step plans and materials lists, see our do it yourself patio umbrella stand guide. Likewise, if your pole has simply reached its structural limit and you need a longer replacement section, the guide on how to extend a patio umbrella covers pole replacement and sourcing replacement sections.
FAQ
What primary standards and safety guidance should be researched for a brand‑agnostic article on making a patio umbrella taller?
Search ASTM standards and related summaries (e.g., ASTM F3512 and F3681) and CPSC safety alerts referencing those standards. Include wind‑safety test methods, recommended ballast/retention values from those tests, and any CPSC consumer guidance. These are authoritative sources for wind loads, anchoring, and safety warnings.
Which engineering references are necessary for estimating wind forces and base weight needs?
Include structural load references that explain velocity‑pressure formulae (ASCE/IBC qz ≈ 0.00256×V²) to estimate canopy wind load, plus practical conversion examples to lb/ft². Use these to translate wind speeds into approximate uplift/ overturning forces and to justify base weight and anchoring recommendations.
What product‑level data is needed about pole dimensions and materials?
Collect manufacturer spec sheets and retailer listings that give center‑pole outer diameter (OD), wall thickness, and material (aluminum, steel, fiberglass). Document common ODs (≈1.5" and 1.9–2.0") and two‑piece/telescoping geometries so readers can match adapters/risers to their model.
Which commercial components and aftermarket sources should be surveyed?
Survey off‑the‑shelf adapters, reducer sleeves, pool/deck sleeve systems, add‑on ballast products, universal bases, and marketplace custom adapters (e.g., 3D‑printed sleeves). Use supplier/product pages to list available adapter types, sizing ranges, and installation notes.
What repair and troubleshooting sources are required for stuck or damaged mechanisms?
Include manufacturer FAQs/service pages and independent umbrella repair guides covering stuck runners, seized tilt collars, jammed cranks, pulley/cord issues and safe diagnosis steps (support canopy, secure base). Also collect recommended fixes (lubricants, cord replacement, crank access) and safety cautions against forcing mechanisms.
Which maintenance materials and lubricant specifications should be referenced?
Reference product datasheets and supplier guidance for plastic‑safe silicone sprays, PTFE/dry‑film lubricants, and anti‑seize compounds. Note warnings about specific plastics (test first) and guidance on choosing anti‑seize chemistry to avoid galvanic corrosion for threaded splices and accessory weights.
Next Articles
How to Extend a Patio Umbrella Pole Step by Step
Step-by-step how to extend a patio umbrella pole, identify the right mechanism, troubleshoot jams, lubricate, and lock i
How to Make a Patio Umbrella Cover Step by Step
Step-by-step sewing guide to make a custom, weatherproof patio umbrella cover with sizing, pattern, closures, and secure
How to Make a Patio Umbrella: Canopy to Frame Guide
Step-by-step DIY guide to make a patio umbrella, from UV canopy cutting to frame tilting, testing, and weatherproofing.