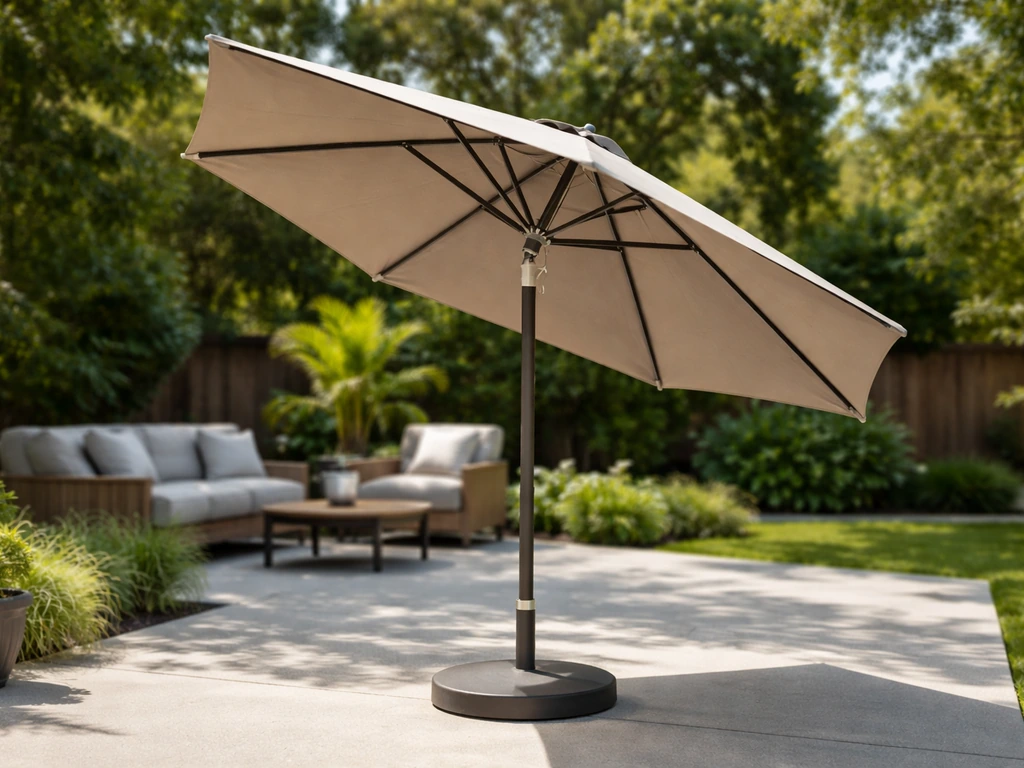
If your patio umbrella lost its base, has a wobbly stand that won't hold, or you just need a stable setup without spending $80–$150 on a new commercial base, you can build one yourself in an afternoon. If you also need help choosing materials and assembling the stand, follow this guide on how to make patio umbrella bases step by step. If you want the full walkthrough, follow the step-by-step sections below to choose the right stand type and build it to match your umbrella how to make a patio umbrella stand. The right DIY stand depends on two things: what kind of umbrella you have (center-pole or offset/cantilever, crank or tilt) and what surface you're mounting to (concrete, pavers, or a wood deck). Get those two factors right, and you can build something that's actually more stable than a lot of store-bought options.
Do It Yourself Patio Umbrella Stand: DIY Guide

When a DIY stand actually makes sense

Not every situation calls for a DIY solution, so let's be honest about when it does and when it doesn't. Building your own stand makes a lot of sense when your original base cracked, went missing, or was just undersized to begin with. It also makes sense when you've got a heavier or larger umbrella that commercial bases don't support well, or when you're setting up on an irregular surface where a bolt-down approach would be far more secure than a freestanding weight.
- Your original base broke, cracked, or was lost and a replacement isn't available or costs as much as the umbrella itself
- The existing base tips over in moderate wind because it's too light for your canopy size
- You're installing on a wood deck, concrete slab, or pavers and want a permanent or semi-permanent mount
- You have an offset (cantilever) umbrella and need a weighted base plate system the manufacturer no longer sells
- You want to save money: a DIY concrete-filled base costs $15–$30 in materials versus $80–$150 for a commercial equivalent
Where DIY doesn't make as much sense: if your umbrella's crank mechanism, tilt collar, or pole itself is damaged, fixing the stand won't help. In that case, the mechanical repair comes first. Also, if you're renting and can't drill into your surface, you're limited to freestanding weighted options, which require significantly more weight than most people expect.
Match your stand to your umbrella type
Before you build anything, figure out exactly what kind of umbrella you're dealing with. The stand design that works great for a center-pole umbrella with a crank lift can completely interfere with an offset umbrella's operation. Here's how to think through it.
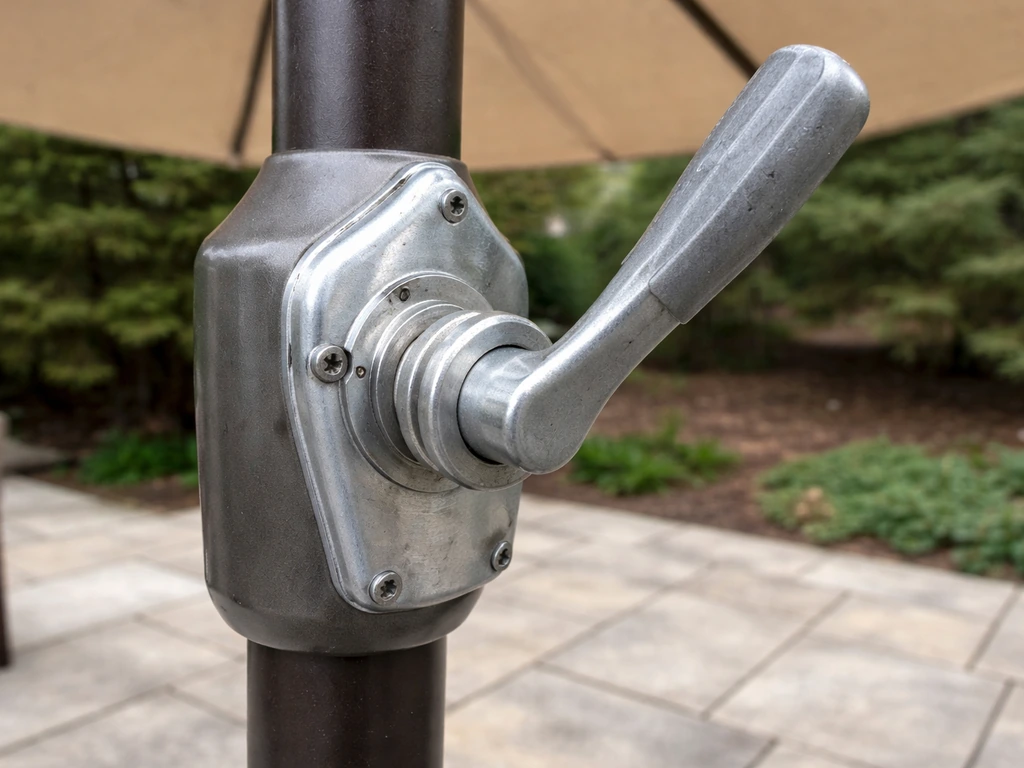
Center-pole umbrellas (crank or tilt)
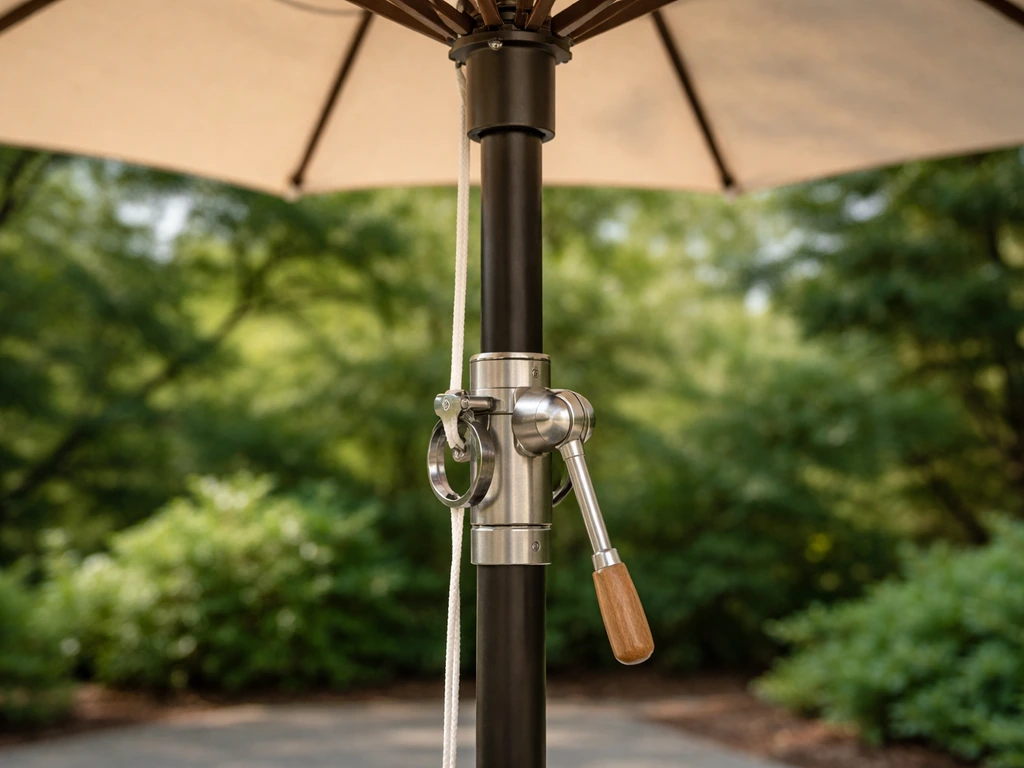
These are the most common type: the pole runs straight up through the center of the canopy. Most use either a hand-crank lift or a pulley/push-button tilt system. For these, your DIY stand just needs a snug sleeve hole for the pole diameter (usually 1.5 inches or 1.875 inches) and enough weight underneath to resist tipping. The crank or tilt mechanism sits above the stand, so interference is rarely an issue as long as the sleeve isn't too tall and doesn't restrict the pole's range of motion. If your umbrella goes through a table hole, note that the table itself adds stability and you may need less base weight.
Offset (cantilever) umbrellas
Offset umbrellas have a side post that swings the canopy out over your seating area. These put enormous lateral force on the base because the canopy's weight and wind load are never directly over the stand. DIY bases for cantilever umbrellas need to be either very heavy plate-weight systems or bolted down to a solid surface. A lightweight freestanding bucket of concrete will not cut it here. If you're working with a cantilever umbrella, your realistic DIY options are either a weighted base plate assembly (stacked concrete or steel plates over a ground-level frame) or a direct bolt-down to a concrete slab.
| Umbrella Type | Best DIY Stand Style | Minimum Weight (freestanding) | Bolt-down Option? |
|---|---|---|---|
| Center-pole, 6–7 ft canopy | Concrete-filled bucket or planter | 20–30 lbs | Yes, deck or concrete |
| Center-pole, 7.5–10 ft canopy | Concrete-filled container or ground insert | 40–50 lbs | Yes, strongly recommended |
| Offset/cantilever | Weighted base plate frame or bolt-down plate | 50–80+ lbs | Yes, highly recommended |
| Center-pole through table | Table sleeve anchor + supplemental base weight | 15–20 lbs additional | If table is anchored |
Materials and tools you'll need
The exact list depends on which build you're doing, but here's what covers all the common DIY stand approaches. Buy what applies to your method and skip the rest.
For a weighted freestanding stand (concrete-filled container)
- A heavy-duty plastic planter, bucket, or purpose-built umbrella base shell (at least 18 inches diameter for a 9–10 ft umbrella)
- 1–3 bags of ready-mix concrete (80 lb bags; one bag yields roughly 0.6 cubic feet)
- A steel or PVC sleeve pipe cut to match your umbrella pole diameter (1.5 in or 1.875 in inner diameter), at least 12 inches long
- A bolt, washer, and nut to secure the pole through the sleeve (5/16 in or 3/8 in diameter stainless steel is ideal)
- Mixing bucket or wheelbarrow and a mixing paddle or old trowel
- Level
- Duct tape or a rubber stopper to temporarily plug the bottom of the sleeve during pour
- Zip ties or bailing wire to center the sleeve in the container while concrete sets
For a bolt-down base plate (deck or concrete)
- Steel or aluminum base plate, at least 3/8 in thick and 12x12 inches minimum (larger for big umbrellas)
- A welded or bolted pole sleeve centered on the plate, sized to your umbrella pole
- For concrete: 3/8 in or 1/2 in wedge anchor bolts (Dyna-Bolts or similar expansion anchors), minimum 4 per plate
- For wood deck: 3/8 in lag screws, at least 3 inches long, with washers, driven into deck joists where possible
- Hammer drill with masonry bit (for concrete)
- Standard drill and bits (for wood deck)
- Wrench or socket set
- Level
- Marker and tape measure
For a ground-insert stand (in-ground concrete pour)
- A metal ground-insert sleeve (available at umbrella suppliers or fabricate from heavy steel pipe)
- 1–2 bags of ready-mix concrete
- A 2x6 scrap board with a hole drilled to hold the sleeve perfectly vertical during the pour
- Post-hole digger or rented auger
- Level
- Stainless steel through-bolt and knob to lock pole into sleeve once installed
Step-by-step builds for each stand type
Option 1: Concrete-filled weighted container (most popular DIY)
This is the go-to for most homeowners because it's cheap, portable (add wheels under the container), and works for any surface. It's essentially replicating what commercial fillable umbrella bases do, except you control the size and weight.
- Pick your container: a 5-gallon bucket works for small umbrellas (6–7 ft), but a 10–15 gallon heavy-duty planter is better for 9–10 ft canopies. Make sure it has drainage holes you can plug, or drill a centered hole in the bottom for the sleeve pipe to pass through.
- Cut your sleeve pipe to about 14–16 inches and center it vertically inside the container. Use zip ties or bailing wire attached to the container rim to hold it perfectly upright. Check it with a level.
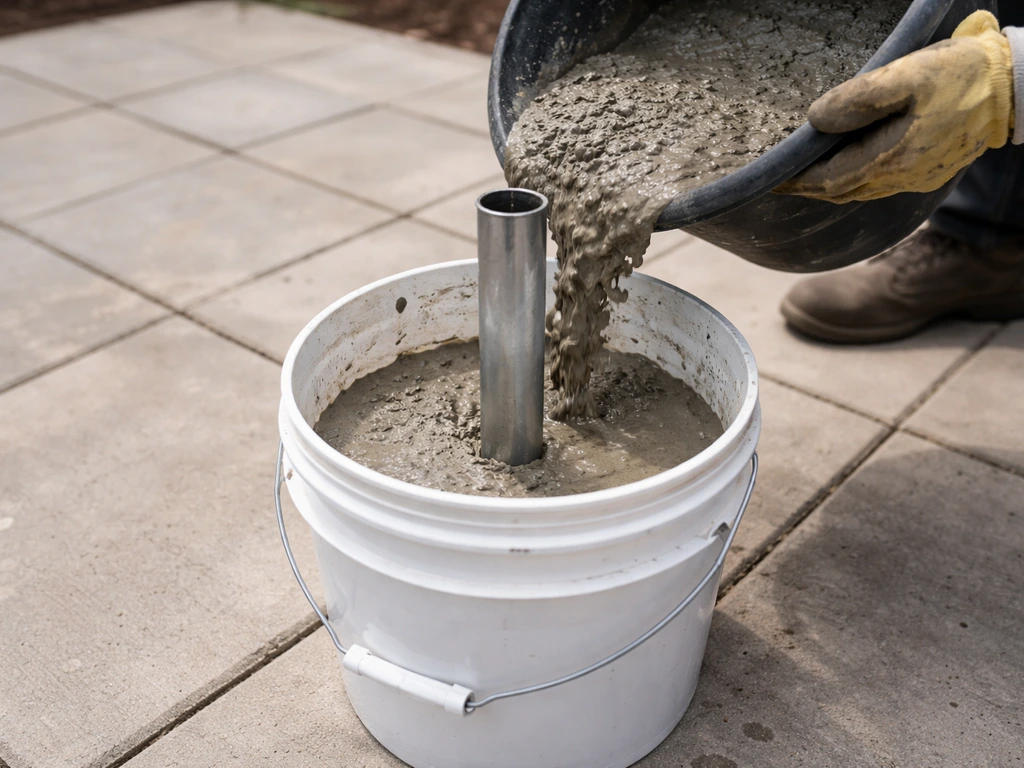
- Plug the bottom of the sleeve with duct tape or a rubber cap so concrete doesn't fill it during the pour.
- Mix your concrete to a thick, oatmeal-like consistency. Pour it slowly around the sleeve, tapping the container sides to remove air bubbles. Fill to about 2 inches below the container rim.
- Double-check the sleeve is still centered and plumb. Adjust before the concrete starts to set (you have about 15–20 minutes with fast-setting mix).
- Let it cure fully: at least 24 hours before light use, 48–72 hours before full load. Do not rush this.
- Once cured, remove the tape from the sleeve bottom. Insert your umbrella pole, then drive a stainless steel bolt through the pre-drilled hole in the sleeve and pole to lock it in place and prevent rotation. Tighten the nut snugly but don't overtorque on aluminum poles.
Option 2: Bolt-down base plate on concrete or pavers
This is the most stable option for a permanent or semi-permanent setup on a concrete patio or solid paver base. Bolt-down base plates are designed specifically to anchor into concrete and resist the lateral and rotational forces that tip freestanding stands. If you're building your own plate, have a metal shop weld a sleeve to a steel plate, or buy a commercial plate and skip the fabrication.
- Position the plate where you want the umbrella. Mark the four bolt hole positions with a marker. Move the plate aside.
- Drill into the concrete with a hammer drill and the correct-diameter masonry bit for your anchor bolts (the anchor bolt packaging specifies the drill bit size, typically 3/8 in or 1/2 in).
- Blow dust out of the holes with compressed air or a bulb blower. This matters for expansion anchor grip.
- Insert wedge anchor bolts into the holes and tap them flush with a hammer.
- Set the plate over the bolts, add washers and nuts, and tighten with a wrench. The plate should sit flat and not rock.
- Insert the umbrella pole into the sleeve, check it for plumb, and tighten the locking knob or through-bolt.
- For pavers: if the pavers are on a solid concrete sub-base, you can drill through the pavers and into the concrete beneath. If they're on compacted gravel, this option isn't suitable and a heavy weighted container is better.
Option 3: Lag-screw mount on a wood deck
- Locate your deck joists (use a stud finder or probe with a thin nail). Position your base plate so at least two, ideally all four, lag screws will hit solid joist wood, not just decking.
- Pre-drill pilot holes slightly smaller than your lag screw diameter to prevent splitting.
- Drive 3/8 in lag screws through the plate's mounting holes and into the joists. Use a washer under each lag head. They should be snug and fully seated, not stripped.
- Insert the umbrella pole into the sleeve. Tighten the locking mechanism. Check for wobble at the base: if the plate flexes, add a second plate layer or use longer lag screws into deeper joist wood.
- Important: if your deck has composite decking over older joists, check joist condition before relying on this for a large umbrella. Rotted or undersized joists won't hold the lateral load.
Option 4: In-ground concrete pour (ground insert)
This is the most permanent option and the most stable of all. It's ideal if you have a consistent spot in a lawn or unpaved area where the umbrella lives every season. It's not reversible without digging, so think it through first.
- Dig a hole at least 12 inches deep and 10 inches in diameter at your chosen location.
- Take a scrap 2x6 board and drill a hole in the center sized to snugly hold your sleeve pipe. This jig will hold the sleeve perfectly vertical while the concrete sets.
- Lower the sleeve into the hole and lay the 2x6 across the hole so the sleeve hangs centered and plumb. Check with a level from two directions.
- Mix 1–2 bags of ready-mix concrete and pour it around the sleeve, filling to 1–2 inches below grade. Tap the surrounding soil to release air pockets.
- Recheck level and plumb while the concrete is still workable. Adjust the 2x6 jig as needed.
- Allow at least 48 hours to cure before installing the umbrella. 72 hours is better.
- Install the umbrella pole into the sleeve and secure with the through-bolt and locking knob. The sleeve should stick up just enough above grade to accept the pole without the base plate of the umbrella dragging on the ground.
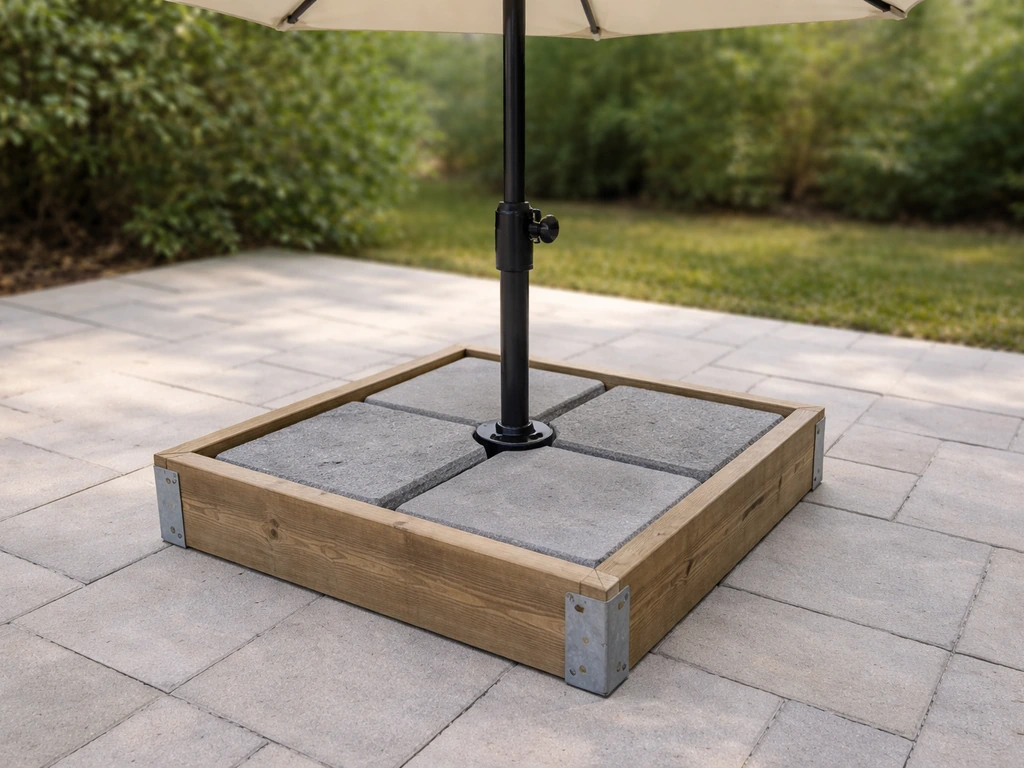
Option 5: Frame-style weighted base for offset umbrellas
For cantilever umbrellas, the base frame needs to extend in multiple directions to counteract the canopy's offset weight. The simplest DIY version uses a steel or heavy lumber cross-frame with concrete blocks or weight plates stacked on top.
- Build or buy a cross-shaped base frame from 2x6 or 4x4 lumber (or welded steel angle iron) that extends at least 24–30 inches in each direction from the center sleeve.
- Mount the umbrella post sleeve at the center of the cross. The sleeve must be firmly bolted or lag-screwed to the frame, not just resting on it.
- Stack concrete paving blocks or bagged sand on the frame arms. You need a minimum of 50 lbs for smaller cantilever umbrellas; 80 lbs or more is safer for 10–13 ft canopies. Use all available weight and don't skip plates.
- Secure the stacked weights so they can't shift (use ratchet straps across the frame if needed).
- Insert the cantilever post into the sleeve and tighten all locking mechanisms. Confirm the umbrella can swing and rotate freely without the frame arm hitting the canopy mechanism.
Stability and wind resistance: the numbers that matter
The single biggest mistake people make with DIY umbrella stands is underestimating how much weight is actually needed. A patio umbrella canopy acts like a sail in the wind, and the leverage on the base is significant. There are two rules of thumb worth keeping in mind.
For freestanding center-pole umbrellas: use roughly 10 pounds of base weight per foot of canopy diameter as a working minimum. So a 9-foot umbrella needs at least 90 pounds of base. That sounds like a lot because it is. Most commercial bases sold for 9-foot umbrellas are chronically undersized at 40–50 lbs, which is why they tip. If you're in a consistently windy area, add 20–30 percent to that number. For cantilever umbrellas, the leverage arm means you need even more, and bolting down is almost always the right call.
For reference, retailer guidance suggests roughly 20–30 lbs as the minimum for 6–7 ft umbrellas and 40–50 lbs for 7.5–10 ft umbrellas as the floor, not the target. Those weights work in calm conditions; add more if your yard is exposed or elevated.
Preventing tipping and rotation
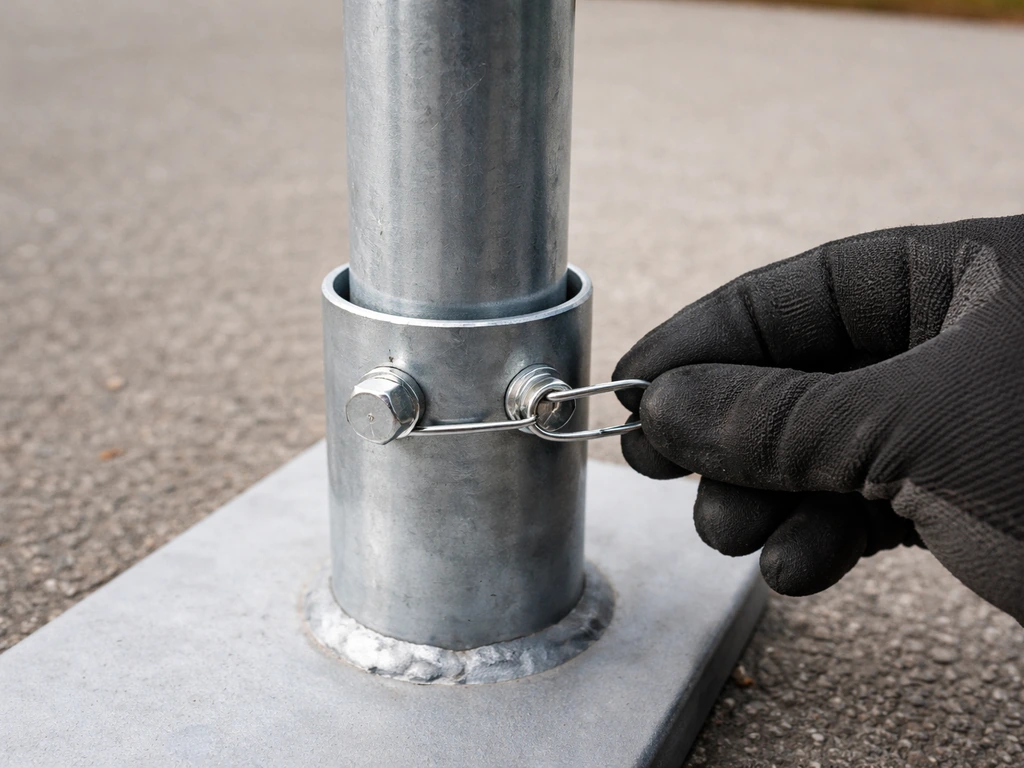
- Always use a through-bolt or locking pin to secure the pole to the sleeve. Gravity alone lets the pole spin and walk out in wind.
- For freestanding stands, lower the center of gravity by keeping the weight as low in the container as possible rather than piling it on top.
- On concrete, use expansion anchor bolts rated for the expected load, not standard masonry screws, which can pull out under lateral stress.
- On wood decks, hit joists with every fastener. Screws through decking alone will not hold a large umbrella in wind.
- Close the umbrella during high-wind conditions. No stand, DIY or commercial, is designed to hold a fully open umbrella in strong sustained wind. This is not optional advice.
Surface-by-surface anchoring summary
| Surface | Best Anchoring Method | Key Hardware | Notes |
|---|---|---|---|
| Concrete slab | Bolt-down base plate | Wedge/expansion anchor bolts (3/8 in or 1/2 in) | Drill depth per anchor spec; blow dust before inserting |
| Pavers over concrete | Drill through paver into concrete base | Same as concrete | Only works if pavers are on solid concrete, not gravel |
| Wood deck | Lag screws into joists | 3/8 in lag screws, 3 in minimum length | Hit joists, not just decking; check joist condition first |
| Lawn or soil | In-ground concrete pour | Ground-insert sleeve, 1–2 bags ready-mix concrete | Permanent; allow 48–72 hr cure before use |
| Any surface (no drilling) | Heavy freestanding weighted container | Concrete fill, pole through-bolt | Use significantly more weight than seems necessary |
Setting up the umbrella with your new stand
Once your stand is built and cured or mounted, the setup process matters almost as much as the build itself. Wikipedia notes that ready-mix concrete hydration starts when water is added, which is why timing matters for strength gain and the curing process blank" rel="noopener noreferrer">cured. A poorly seated pole or a misaligned tilt mechanism will cause problems with the crank or tilt operation, and it's easy to avoid. When you add a DIY cover, make sure it snaps or ties securely, stays loose enough to prevent pooling water, and does not rub against the pole or crank mechanism.
- Lower the canopy completely before inserting the pole into the sleeve. Never try to install an open or partially open umbrella.
- Insert the pole fully into the sleeve until it seats at the bottom. If there's a stop pin or snap button on the pole, make sure it clears the sleeve top so it can engage.
- Align the canopy so it opens in the direction you want. With center-pole umbrellas, the crank handle should face a convenient side. With tilting mechanisms, the tilt direction should face away from your seating to provide shade correctly.
- Insert and tighten the through-bolt or locking knob. Firm is enough; don't overtorque on aluminum poles, which can crush or crack.
- Open the umbrella partially using the crank and check that the mechanism moves freely without hitting the sleeve top or any part of your stand frame. If it binds, the sleeve is too tall and needs to be trimmed or shimmed down.
- Open fully and check the canopy for level. If the pole leans, adjust the sleeve angle before the concrete is fully cured (for fresh pours) or shim the base plate (for bolt-downs).
Seasonal storage and maintenance for your DIY stand
A DIY stand can easily last 10 or more years if you maintain it properly between seasons. The materials that fail fastest are untreated wood frames (rot), bare steel plates (rust), and plastic containers left outside through freeze-thaw cycles (cracking). Here's how to extend the life of each component. If you want to extend the life and performance of your umbrella setup, focus on maintenance habits like checking the pole sleeve and keeping the base securely seated after storms extend patio umbrella.
End-of-season takedown
- Close the umbrella canopy completely and remove it from the stand before first frost if possible. Store the canopy and pole indoors or under a weatherproof cover.
- For concrete-filled container stands: if the container is plastic and will stay outside through winter, wrap it with an old moving blanket or burlap to insulate it. Freeze-thaw cycles crack plastic containers faster than anything else.
- For bolt-down base plates: remove the pole and install a rubber cap or plug over the sleeve opening to keep debris and water out. Inspect the anchor bolts for any rust or loosening and tighten if needed.
- For wooden frame stands: apply an exterior wood sealant or paint annually. If any part of the frame feels soft or spongy, replace that section before the next season, not after.
- Remove and store any weight plates from frame-style cantilever bases if they're not weather-rated. Concrete paving blocks are generally fine outside; steel plates should be brought indoors or stored under a tarp.
Spring setup checklist
- Inspect the sleeve for any cracking, corrosion, or debris. Clean it out with a rag before reinserting the pole.
- Check all anchor bolts and lag screws for looseness. Concrete expands and contracts through winter and fasteners can back out slightly. Retighten to spec.
- Check the concrete fill in your container for any cracking. Small cracks are cosmetic; large cracks that shift the sleeve's alignment need to be repaired with hydraulic cement or the stand rebuilt.
- Inspect and lightly oil any steel or iron components (bolt threads, locking knobs) before reassembly to prevent seizing.
- Reinstall the umbrella pole, tighten the through-bolt, and test the crank and tilt mechanism through its full range before you actually need it. Catching a problem in April is much less frustrating than discovering it mid-summer.
If you're also looking at ways to adjust your umbrella's height above the stand or want to extend the pole reach for better shade coverage, those are related adjustments worth exploring alongside your new base setup. After your stand is dialed in, you can also learn how to make a patio umbrella cover that protects the canopy from sun, rain, and wind between seasons. Similarly, if you went the route of making a complete custom umbrella assembly rather than just the stand, the canopy and pole dimensions need to be matched to whatever sleeve size you built into your base.
FAQ
Can I use a DIY do it yourself patio umbrella stand if my umbrella base threads are damaged or missing hardware?
It depends on whether the pole needs the stand for structural support or only for alignment. If the pole threads or the pole itself are damaged, the stand cannot fix the root mechanical problem. For missing hardware, you may be able to build a sleeve-based stand that captures the pole and keeps it vertical, but confirm the umbrella model uses a slip fit versus a threaded connection before drilling or welding anything.
What should I do if my umbrella pole sleeve fits too loosely or too tightly in the stand?
Aim for a snug fit that allows smooth vertical movement without wobble. If it is too loose, add a durable bushing or wrap the sleeve with a thin, weather-resistant shim so the pole does not rock. If it is too tight, do not force it, ream or adjust the sleeve size, and check for misalignment so the crank or tilt parts do not bind during operation.
How do I decide between a freestanding weight stand and a bolt-down base for a do it yourself patio umbrella stand?
Use bolt-down when wind is a factor, when you have an offset or cantilever umbrella, or when you are on a surface that can move (pavers that shift, loosely laid stone, or soft deck boards). Choose freestanding only when you can reach the required weight reliably and your umbrella is center-pole with a straightforward vertical load path.
Will a concrete bucket of fill work for a cantilever umbrella stand?
Usually no. Cantilever umbrellas generate strong lateral forces that a lightweight bucket cannot resist, even if it looks heavy. If you want a DIY cantilever setup, plan for either a heavy cross-frame with substantial stacked weight or a true bolt-down approach to concrete.
How much base weight is enough if my patio umbrella size is between standard categories?
Use the working minimum as a floor, then scale by your canopy diameter rather than the retailer category. If you are between sizes, calculate 10 pounds per foot of diameter for center-pole as a baseline, then add extra for windy or exposed areas. Also account for any uplift effect if the canopy is kept at an angle during windy conditions.
Is it safe to drill into my patio pavers for a bolt-down do it yourself patio umbrella stand?
Only if the pavers are installed over a stable base and you can anchor into concrete beneath, or you have a method that properly transfers load without cracking the paver. In many cases, drilling into pavers only will loosen over time. For uncertain installs, choose a mount method designed for your exact surface thickness and base layer, or opt for a freestanding system.
How can I prevent rust or freeze-thaw damage on a steel or plastic do it yourself patio umbrella stand?
For steel, avoid leaving bare steel exposed, use a primer and a rust-resistant coating, and keep water from pooling where it meets the sleeve. For plastic containers, freeze-thaw is a common failure mode, fill and seal thoughtfully, and store or drain if your climate freezes hard. If you use untreated wood for any frame part, treat it for outdoor exposure and keep the underside off standing water.
What setup checks should I do after installing a DIY umbrella stand?
Before full operation, test the pole seating so the stand contact is even, then run the crank or tilt through its full range without the canopy attached if possible. Confirm the sleeve height does not restrict travel and that the stand does not shift when you push lightly at the pole near the base.
Do I need a DIY cover even if my umbrella stand is solid and stable?
Yes, especially for protecting the sleeve area and preventing corrosion. A cover should fit so it does not rub the pole or crank mechanism, and it should stay loose enough to reduce water pooling. Tie or snap it securely so wind does not turn it into a sail that increases strain on the stand.
How do I choose the correct stand height for best clearance and tilt operation?
Match the stand sleeve height to the umbrella’s required pole travel, not just the canopy height you want. If the sleeve is too tall, the tilt collar or crank components may interfere. If you want more clearance above seating, adjust height after the mechanism clears fully, and re-check weight and stability once the umbrella is moved higher.
How often should I re-check or adjust my do it yourself patio umbrella stand after storms?
After significant wind or heavy rain, inspect that the pole is still seated correctly, check for any loosened fittings if bolted, and confirm the base has not shifted. Also look for changes in sleeve fit, especially if you used shims, since swelling or movement can develop after wet-to-dry cycles.

Step-by-step fixes for patio umbrellas that won’t open or close, with checks for jams, cords, latches, and lubricating t
Learn how patio umbrellas work: components, open close tilt, stability, and step by step troubleshooting common mechanic
Fix a patio umbrella crank that won’t work with safe step-by-step jam, gear, and base troubleshooting and repair tips.