You can build a solid DIY patio umbrella stand in an afternoon using a weighted bucket or wood frame, or cast a concrete stand that will hold up for years. The key to getting it right is matching the stand's sleeve to your specific pole diameter (most residential poles are 1.5 or 2 inches) and making sure the finished base is heavy enough to resist tipping. Get those two things right, and you'll have a stand that works as well as anything you'd buy at a store.
How to Make a Patio Umbrella Stand DIY and Concrete

Luca Morrison
23 May 2026
DIY bucket or frame vs. concrete: which one should you build?
Before you grab any tools, it helps to know which build style makes sense for your situation. There are really two paths: a quick DIY stand using a weighted bucket or a wood-and-hardware frame, or a cast concrete stand that's heavier, more permanent, and much harder to tip. Neither is universally better. It depends on how often you move the umbrella, whether you're in a windy spot, and how much time you want to put in.
| Feature | DIY Bucket/Frame Stand | Cast Concrete Stand |
|---|---|---|
| Build time | 1–2 hours | 1–2 hours plus 7+ days curing |
| Portability | Easy to move | Very heavy, essentially fixed |
| Weight achievable | 30–50 lb with fill | 50–100+ lb depending on mold size |
| Cost | Under $30 most cases | $20–$50 depending on mold/hardware |
| Best for | Standard patios, occasional moves | Windy areas, permanent setup |
| Skill level | Beginner | Beginner to intermediate |
If you're just trying to keep a 7-foot umbrella stable on a calm to moderately breezy patio, the bucket or frame build is fast, cheap, and totally adequate. If you're dealing with real wind exposure, a large canopy (9 feet or bigger), or a cantilever umbrella, lean toward the concrete build. You'll thank yourself later when the first big gust rolls through.
Measure your pole first, then gather your materials
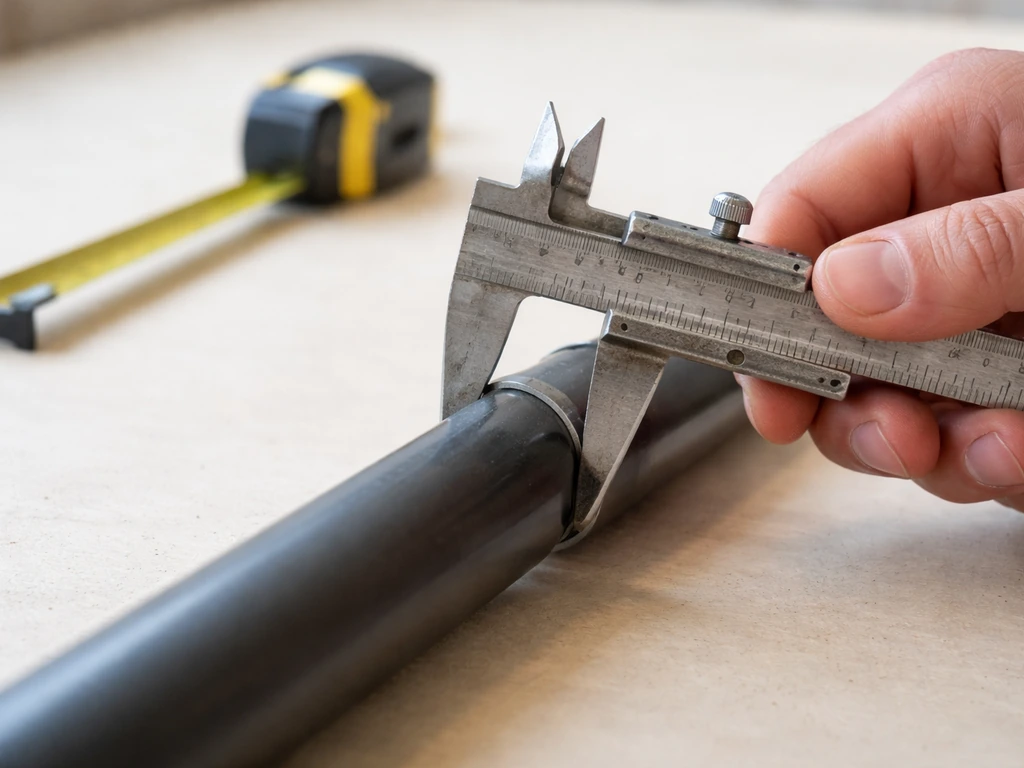
The single biggest mistake people make building a DIY stand is not measuring the pole before buying or cutting anything. Umbrella poles range from 1-1/8 inches all the way up to 3 inches in diameter depending on the size and brand. The two most common residential sizes are 1.5 inches and 2 inches. A sleeve sized for a 1.5-inch pole will let a 2-inch pole wobble; a 1.5-inch pole dropped into a 2-inch sleeve will rattle around and tilt. Either mismatch causes instability, which is exactly what you're trying to avoid.
Grab a tape measure or a set of calipers and measure the outside diameter of your umbrella pole at the base. Write it down. That number drives every sizing decision in the build: the PVC pipe or metal sleeve you'll use as the pole receiver, any reducer rings or adapters you need, and how tight the final fit will be. If you're between sizes, always size the sleeve to your actual pole measurement and plan to use reducer rings to fill any gap. A snug fit with a reducer beats a sloppy fit every time.
Materials and tools for a DIY bucket or frame stand
- One 5-gallon plastic bucket with a lid (or a square planter box for a cleaner look)
- One section of PVC or ABS pipe: inside diameter matching your pole (common sizes: 1.5-inch ID for a 1.5-inch pole, 2-inch ID for a 2-inch pole), cut to 10–12 inches long
- Quikrete or similar fast-setting concrete mix: one 50-lb bag is usually enough for a 5-gallon bucket
- PVC reducer rings or rubber grommets if your pole is smaller than your pipe ID
- Waterproof construction adhesive or PVC cement
- A level
- A drill with a 1/4-inch bit
- A saw (hacksaw or PVC cutter for the pipe)
- A mixing bucket or tub if not using the base bucket itself
- Exterior spray paint or sealant for the finished stand (optional but recommended)
Materials and tools for a cast concrete stand
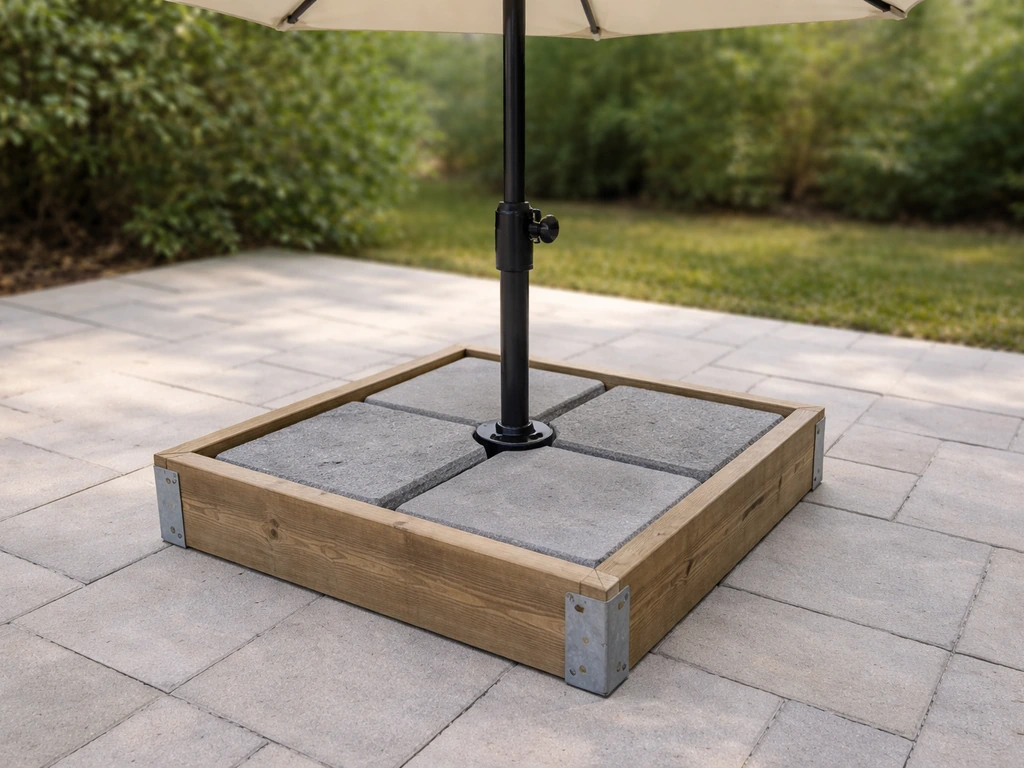
- A mold: a round plastic planter (12–16 inches diameter), a square plastic storage tub, or a custom-built wooden form
- Quikrete Concrete Mix 80-lb bag (targets roughly 3000–4000 psi depending on mix ratio)
- One section of steel pipe or heavy-wall PVC: ID matched to your pole, 12–14 inches long to give good depth in the concrete
- Threaded steel rod (3/8-inch or 1/2-inch) and nuts/washers if you want anchor points inside the concrete for extra holding strength
- Rebar or wire mesh cut to fit inside the mold for reinforcement (optional but recommended for larger molds)
- Mold release spray or petroleum jelly to coat the mold interior
- A level
- Mixing tub and a margin trowel or mixing paddle on a drill
- Rubber gloves, safety glasses
- Plastic sheeting or a damp burlap sack for curing
How to build a DIY bucket or frame stand
- Cut your PVC or ABS pipe to 10–12 inches. Clean the cut edges so they're smooth and won't damage your pole.
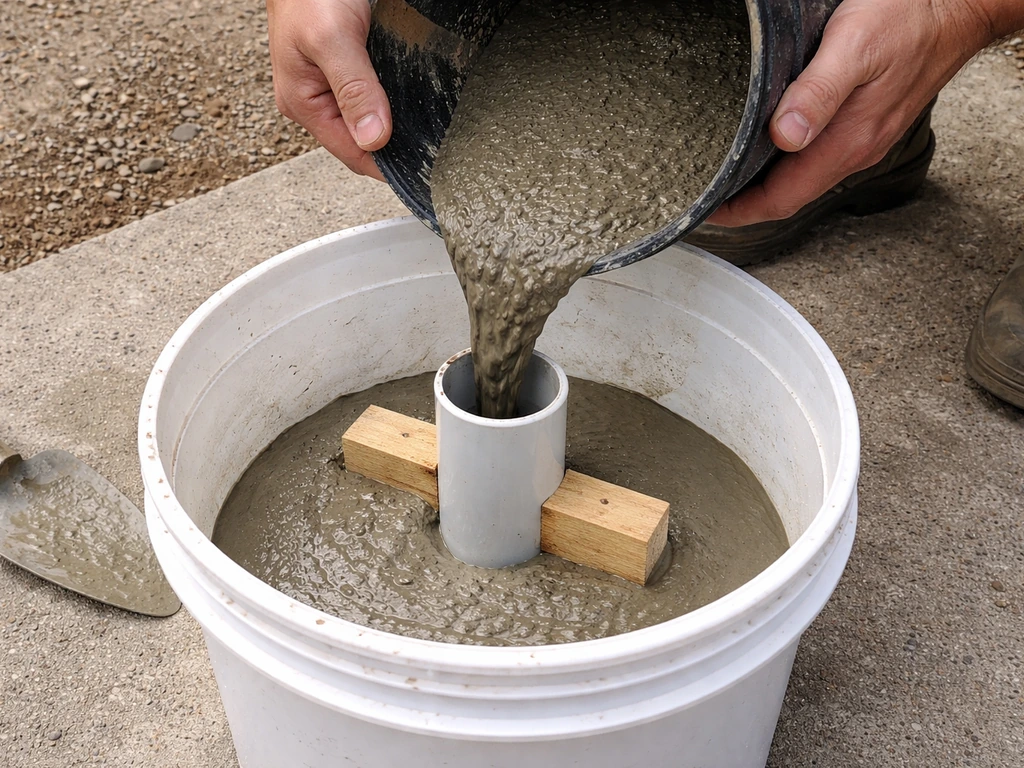
- Center the pipe vertically in the empty bucket. Use a scrap of wood or masking tape across the top of the bucket to hold the pipe perfectly centered and plumb while the concrete sets. Check with a level.
- Mix your concrete according to the bag directions. For an 80-lb bag of Quikrete, you'll add roughly 3 quarts of water (start with less and add gradually until you reach a thick oatmeal consistency). Over-watering weakens the finished stand.
- Pour the concrete slowly around the pipe, tapping the bucket sides to settle air bubbles. Fill to about 3 inches from the top of the bucket so you have room to put the lid on later.
- Check the pipe is still plumb with your level. Adjust before the concrete stiffens (you have about 10–15 minutes with fast-setting mix).
- Let the concrete firm up for at least 24 hours before moving the stand. Do not insert or load your umbrella pole during this period. At 24 hours, concrete is only about 15–20% of its final strength.
- After 24 hours, you can carefully move the stand but wait a full 7 days before using it regularly in wind. By day 7, the concrete will be around 65–75% of its design strength, which is safe for normal use.
- If using a PVC sleeve, test-fit your pole. If there's any wobble, add reducer rings or wrap the pole base with a few layers of electrical tape to tighten the fit.
How to build a cast concrete stand (the stronger option)
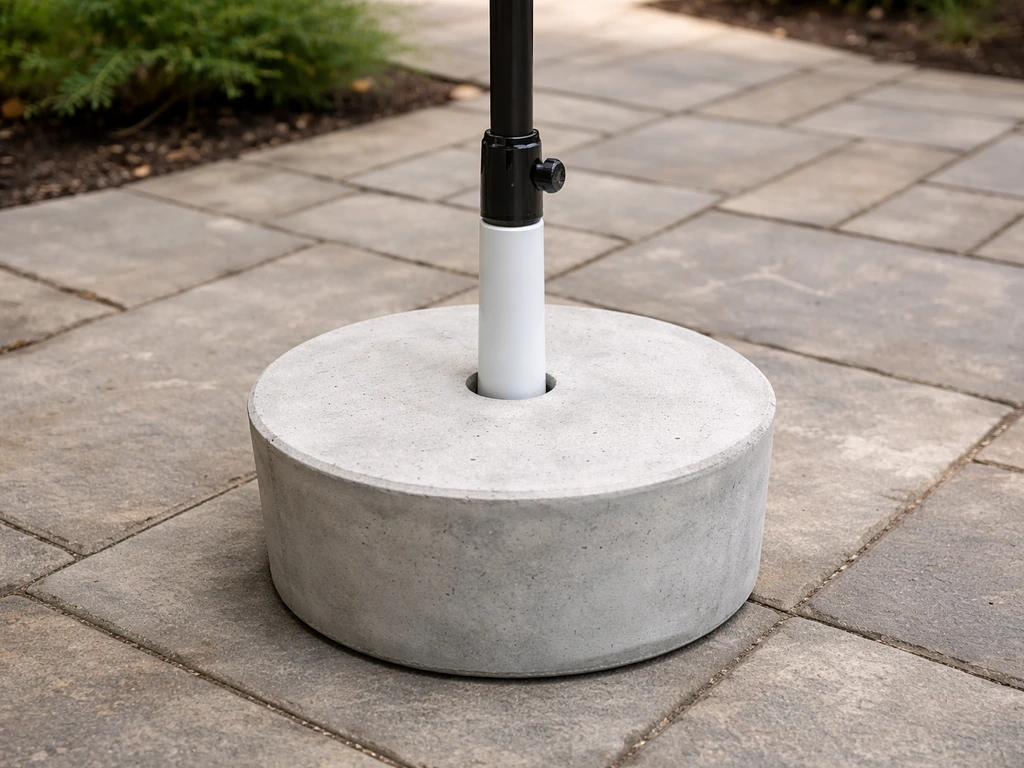
A cast concrete stand in a proper mold gives you more weight and a cleaner look than the bucket method. The build process is similar but gives you more control over the final shape and finished weight. A 12-inch round form filled with concrete will come out around 50–70 lb depending on depth, which is plenty for most setups. For a 7-foot umbrella in a breezy spot, aim for at least 30 lb total; larger canopies need more.
- Coat the inside of your mold with mold release spray or a thin layer of petroleum jelly. This step makes demolding possible without cracking the concrete or destroying a mold you want to reuse.
- Cut your steel pipe or heavy-wall PVC to 12–14 inches. This length ensures enough concrete surrounds the sleeve for a solid hold. Center and suspend it vertically in the mold using a piece of scrap wood laid across the top, with the pipe taped or tied to it.
- Optional but worth doing: thread a 12-inch section of 3/8-inch threaded rod horizontally through the pipe sleeve near the bottom, securing it with nuts on both sides. This rod acts as an anti-rotation anchor embedded in the concrete.
- Add rebar pieces or wire mesh cut to fit inside the mold around the sleeve. This reinforcement dramatically reduces cracking over time, especially in freeze-thaw climates.
- Mix your concrete. A standard 1: 2:3 ratio (1 part cement, 2 parts sand, 3 parts gravel) gives you around 3000–4000 psi, which is more than enough for a stand. An 80-lb bag of Quikrete pre-blended mix (just add water) is the easiest approach. Add water gradually: the Quikrete guidance suggests 6–9 pints per 80-lb bag. Aim for the lower end of that range for a stronger result.
- Pour concrete into the mold in layers, tamping each layer down with a rod or the handle of a trowel to remove air pockets. Work slowly around the sleeve pipe to avoid displacing it.
- Check the sleeve pipe with a level after each pour layer and correct before moving on.
- Smooth the top surface with a trowel. Let the stand sit undisturbed for 24 hours, then cover it with plastic sheeting or a damp burlap sack to slow moisture loss during curing. Proper curing dramatically improves final strength.
- Wait 7 days before using the stand for regular umbrella duty. If you're in a colder climate (below 50°F), curing takes longer, so give it an extra few days.
- After 7 days, remove the mold if you used a reusable form. Sand any rough edges with coarse sandpaper. The stand is ready to use.
Weatherproofing your stand so it doesn't fall apart in a season
A concrete stand left bare will absorb water, which leads to freeze-thaw cracking in cold climates. A wood frame or bucket stand left unfinished will rot or degrade in UV. Either way, a little weatherproofing upfront saves a lot of frustration. Here's what actually works outdoors.
For concrete stands
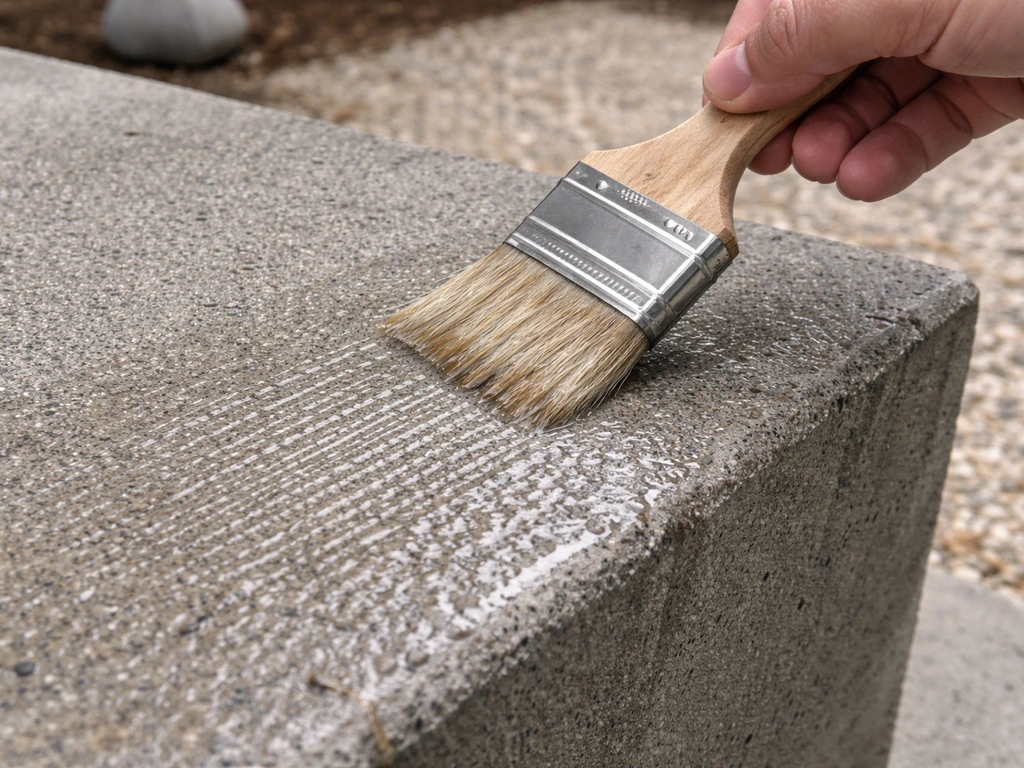
Once the concrete is fully cured (28 days for maximum strength, 7 days for practical use), apply a penetrating concrete sealer to the exterior surfaces. A brush-on masonry sealer available at any hardware store works well. It soaks into the concrete rather than sitting on top, so it won't peel. Reapply every 2–3 years. If your sleeve pipe is steel and sticks above the concrete, coat exposed metal with a rust-inhibiting primer followed by outdoor metal paint. Where the steel pipe meets the concrete, watch for water pooling, which accelerates corrosion at that joint.
For bucket or wood frame stands
Plastic buckets are inherently water-resistant, but UV degrades them over time. A coat of exterior paint rated for plastic adds UV protection and makes the stand look intentional rather than improvised. If you built a wood frame stand, seal or paint all wood surfaces with an exterior-rated product before the first use. For hardwoods like teak, a penetrating outdoor sealer (not a thick film finish) is the right call: it protects against moisture and UV without creating a surface that peels. Reapply annually for wood surfaces.
Watch out for galvanic corrosion at metal contact points
If your umbrella pole is aluminum and your sleeve pipe is steel (or vice versa), you have dissimilar metals in direct contact in a wet outdoor environment. That's a recipe for galvanic corrosion, where one of the metals degrades faster than it should. The fix is simple: wrap the contact surface with electrical tape, use a rubber grommet between the two metals, or coat the sleeve interior with a waterproof sealant before inserting the pole. It's a small step that extends the life of both the stand and your pole.
Using your stand safely and keeping it stable in wind
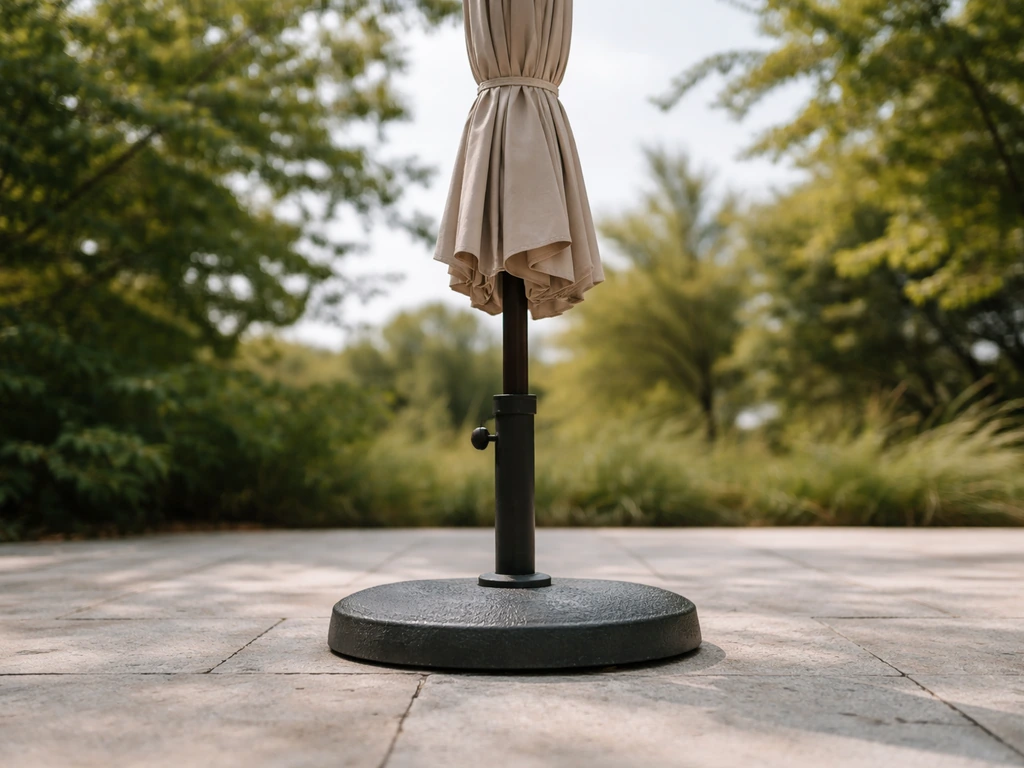
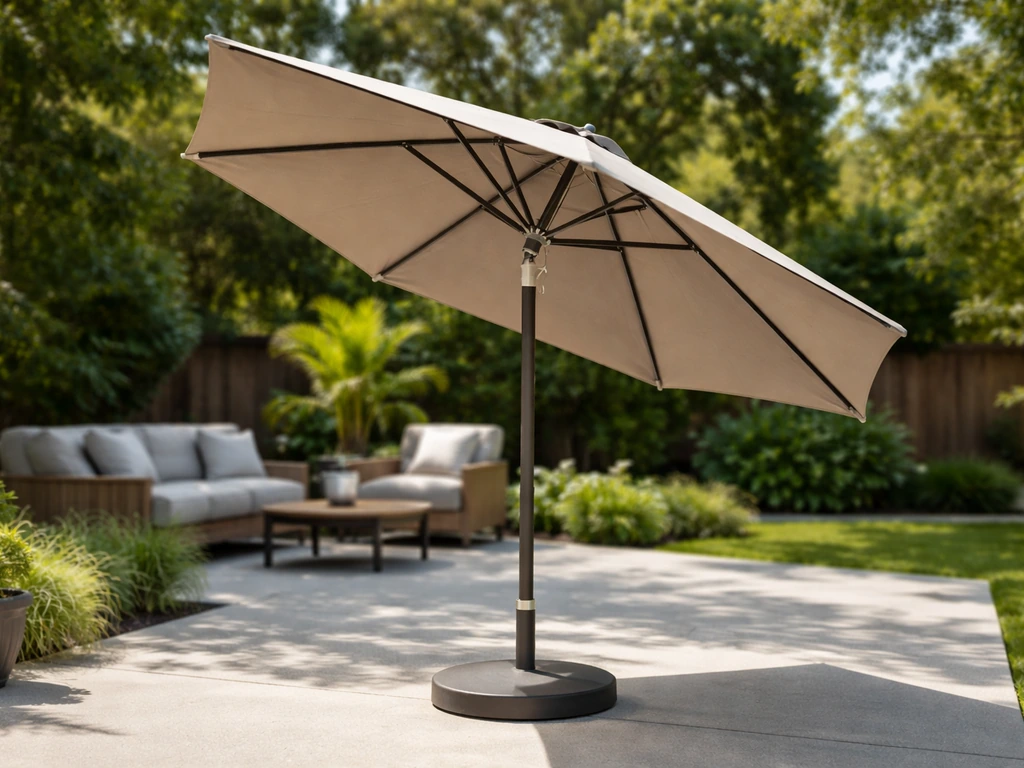
Weight and fit are the two things that determine whether your stand stays upright when the wind picks up. A 30-lb base is a reasonable starting point for a 7-foot umbrella in calm to light-wind conditions, but if you're in a genuinely windy spot or running a 9-foot or larger canopy, heavier is always better. A concrete stand in the 60–80 lb range combined with a snug pole fit handles most residential conditions well.
- Always close or tilt your umbrella when wind picks up significantly. No stand, DIY or commercial, is designed to hold a fully open umbrella in strong gusts.
- Place the stand on a flat, level surface. Uneven ground creates a tilt that compounds with wind load and can cause tipping.
- Make sure the pole fits snugly in the sleeve with no lateral play. A pole that rocks even slightly in the sleeve multiplies wind torque and destabilizes the whole setup.
- For extra security outdoors, you can run a short bungee cord or strap from the stand to a heavy piece of patio furniture as a secondary restraint in storm-prone areas.
- If your umbrella has a tilt mechanism, keep it in the upright position when wind is present. A tilted canopy catches significantly more wind load.
Common mistakes and how to fix them
Most problems with DIY umbrella stands come down to a handful of recurring errors. Here's what goes wrong and what to do about it.
| Problem | What caused it | Quick fix |
|---|---|---|
| Pole wobbles in the sleeve | Sleeve ID is larger than pole OD | Add reducer rings, rubber grommets, or wrap pole base with electrical tape until fit is snug |
| Stand tips in mild wind | Base is too light for canopy size | Add weight to the base (water, sand, or gravel inside the bucket) or rebuild with more concrete |
| Concrete cracked after first winter | Concrete wasn't sealed or absorbed water that froze | Chip out loose sections, apply hydraulic cement patch, then seal the whole stand with masonry sealer |
| Sleeve pipe tilts in the concrete | Pipe wasn't held plumb while concrete cured | If the tilt is minor, use reducer rings to compensate; if severe, you'll need to recast |
| Pole rusting at the sleeve junction | Dissimilar metals in wet contact (galvanic corrosion) | Remove pole, clean rust, coat sleeve interior with rubber-based sealant, reinsert with a rubber grommet |
| Stand slides on smooth patio surface | No friction on the base | Attach non-slip rubber feet or a rubber mat to the bottom of the stand |
| Concrete sleeve crumbling at the top rim | Too much water in the mix or concrete wasn't cured properly | Chip out the damaged area, apply a vinyl concrete patcher, and cure it correctly this time |
One mistake worth calling out specifically: using the stand too early after casting. Concrete at 24 hours looks and feels solid, but it's only at about 15–20% of its design strength. Loading it with an umbrella and wind pressure at that stage can cause settlement or cracking that weakens the sleeve anchor permanently. The 7-day wait is the minimum before regular use, and the full 28-day cure is when the concrete hits its rated strength. Quikrete also notes that mix consistency depends on using the correct water amount per 80-lb mix to help control performance blank" rel="noopener noreferrer">the full 28-day cure is when the concrete hits its rated strength. Plan your build timeline accordingly so you're not tempted to rush it.
If you find yourself wanting to go further after finishing the stand, there are related projects worth exploring: adjusting your umbrella height to match your new stand setup, adding a custom cover to protect the umbrella when it's not in use, or building out other DIY patio components to complement the stand.
After your stand is secure, you can add a cover that fits your umbrella so it stays protected when it's not in use custom cover to protect the umbrella when it's not in use. If you also want a little more clearance, you can adjust your patio umbrella height by using the right extender or sleeve setup adjusting your umbrella height.
After you have the right pole fit and stand weight, you can focus on how to extend patio umbrella height or reach with the correct adapters and replacement parts. You can also learn how to make a patio umbrella cover so the umbrella stays protected between uses. Getting the stand right is the foundation everything else builds on, and with the right pole fit and enough weight, yours will hold up season after season.
FAQ
Can I use a DIY umbrella stand on a tile or smooth concrete patio without it sliding?
Yes, as long as the sleeve is sized to your pole and you keep the base heavy enough to prevent rocking. For a bucket stand, place a non-slip mat or rubber pad between the bucket and patio surface so the stand cannot slide when the umbrella pole flexes. For concrete, consider adding an anti-slip patch under the base if the patio is smooth tile or stone.
What should I do if my umbrella pole still wobbles in the stand?
If you see wobble after assembly, do not just tighten hardware or assume the stand will “settle.” Re-check your pole outside diameter measurement at the exact contact area (some poles taper slightly), then confirm the sleeve inner diameter plus any reducer rings creates a snug fit without forcing the pole. A snug fit with a reducer is better than a loose fit even if the umbrella initially looks stable.
How can I fix a concrete stand if the sleeve fit is too loose?
If your concrete sleeve anchors are too loose, you can lose grip at the joint and increase cracking risk over time. Use a sleeve and pole receiver sized for a snug fit, and keep exposed steel parts painted or sealed so moisture does not work into the interface. If you already cast and the fit is wrong, replacing the receiver insert or recasting the stand is usually safer than trying to “build up” the sleeve after the fact.
Do I need to increase the stand weight if people often move the umbrella around?
Plan for the umbrella being closed and sometimes handled by one person. Add enough base weight to resist not only wind, but also accidental bumps. A practical approach is to target the higher end of the recommended weight range if the umbrella is frequently opened and closed in gusty conditions, or if children or guests may grab the canopy edge.
Does a cantilever umbrella require a different stand approach than a standard patio umbrella?
Yes, especially for cantilever umbrellas or setups that place more leverage on the pole receiver. Cantilever models often experience higher side loads than center-pole umbrellas, so defaulting to a heavier concrete base and a tighter sleeve fit reduces wobble and long-term stress at the receiver.
What’s the best way to prevent corrosion if my pole and sleeve are made of different metals?
If the pole receiver is steel and you have dissimilar metals, avoid direct contact in wet conditions. A simple decision aid is to ensure one continuous barrier where metals touch, such as a rubber grommet or waterproof sealant on the sleeve interior, so water cannot bridge between the two metals.
How long should I wait before using the concrete umbrella stand after casting?
For concrete, wait at least 7 days before regular use, and do not run the umbrella during the first week even if it “feels hard.” Concrete at 24 hours may look stable, but loading it early can create settlement or micro-cracking that later worsens around the sleeve anchor.
Should I size the sleeve based on the umbrella label size or the actual pole diameter?
Match the sleeve to the pole at the base where it actually inserts. Measure the outside diameter, not the label size, because brands vary and some poles are slightly tapered. If you are between diameters, choose the sleeve based on your measured pole size and use reducer rings to remove play.
How should I weatherproof a bucket or wood frame stand for rainy climates?
Most bucket and wood frame solutions assume dry weather exposure, so for wet climates treat the stand like outdoor furniture. Paint bucket exteriors for UV protection, and for wood use an exterior-rated penetrating sealer on all faces and edges, not just the top, because end grain soaks moisture fastest.
If I adjust umbrella height or add a cover, do I need to re-check the stand setup?
When upgrading a cover or raising the umbrella, keep clearances in mind so the canopy does not rub the sleeve or receiver during opening and closing. After any height or adapter change, re-check stability by pushing the canopy gently side-to-side, if you notice movement, adjust the receiver fit or base weight before leaving it unattended.
Next Articles
Do It Yourself Patio Umbrella Stand: DIY Guide
Step-by-step DIY patio umbrella stand guide with weight, anchoring, tools, and safe setup for stability in wind.

How to Fix a Patio Umbrella That Won't Open or Close
Step-by-step fixes for patio umbrellas that won’t open or close, with checks for jams, cords, latches, and lubricating t
How Does a Patio Umbrella Work? Components, Use, and Fixes
Learn how patio umbrellas work: components, open close tilt, stability, and step by step troubleshooting common mechanic