To extend a patio umbrella pole, locate your extension mechanism (either a push-button lock, twist collar, or hand crank), support the canopy with one hand, release the lock, slide or crank the pole to the desired height, then re-engage the lock until it clicks or seats firmly. If the pole is stuck, don't force it. Clean the joint, spray silicone lubricant into the channel, wait a minute, then try again. The steps below walk through both manual telescoping and crank/tilt systems so you can match the exact procedure to your umbrella. If you need the full process for setting up a patio umbrella from scratch, see our guide on how to make patio umbrella.
How to Extend a Patio Umbrella Pole Step by Step

Luca Morrison
4 Jul 2026
Understand how your patio umbrella pole extends
Before you touch anything, spend 30 seconds figuring out which type of extension system you have. Getting this wrong is the number one reason people strip a lock collar or jam a crank. There are two main categories.
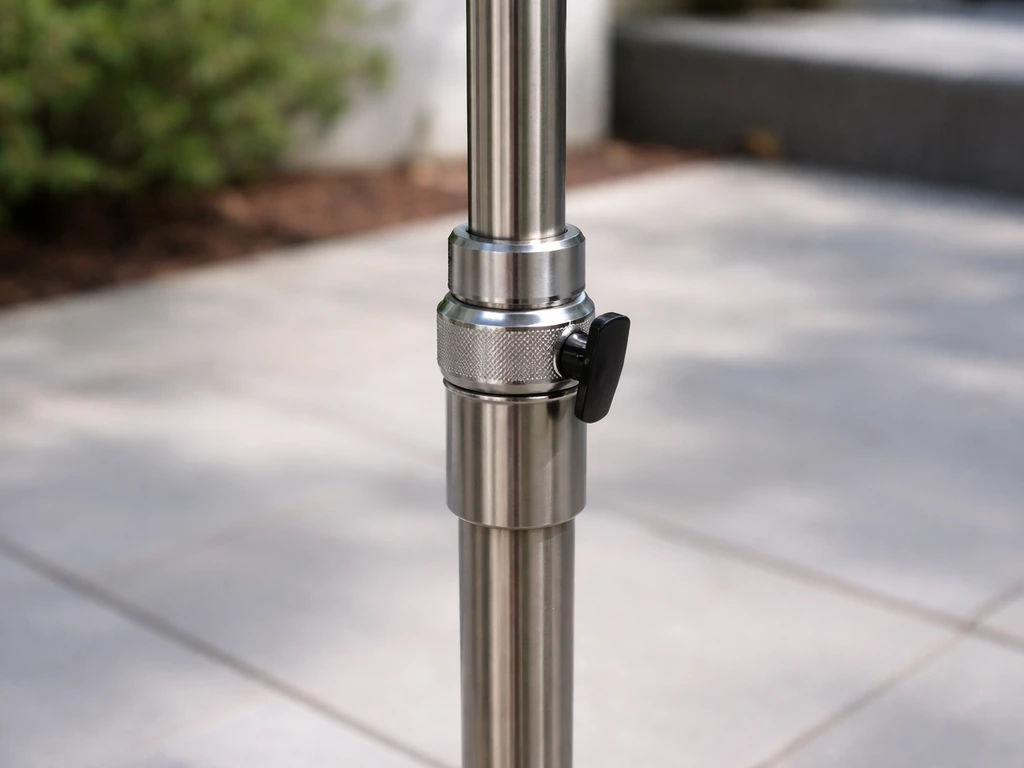
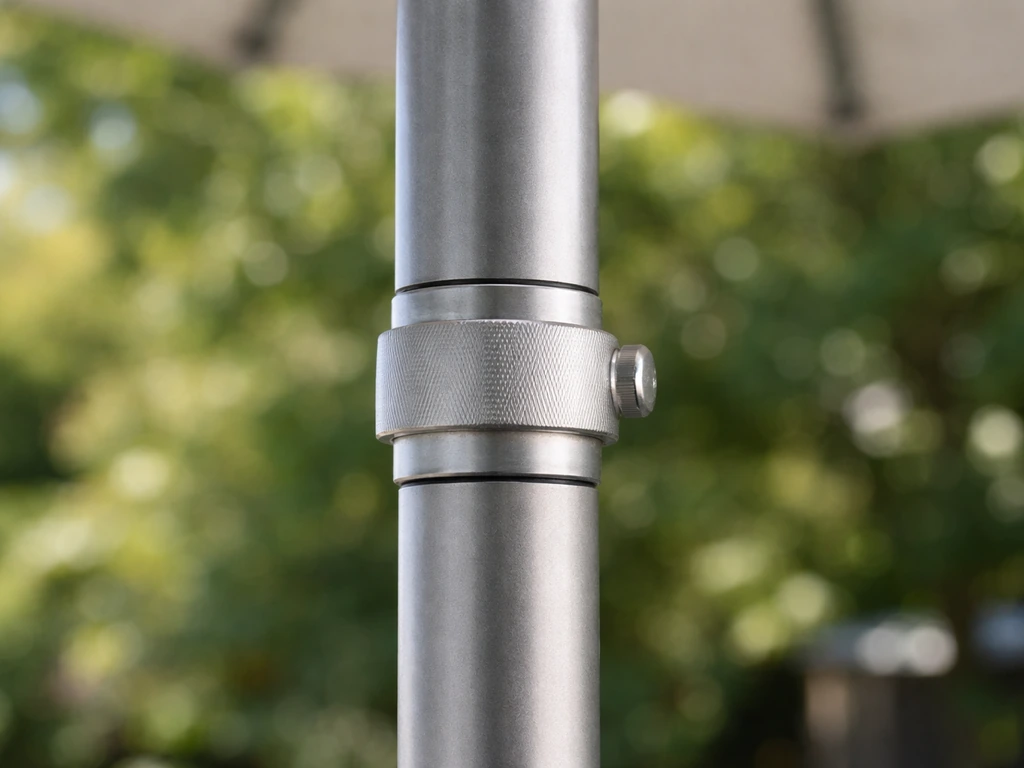
Manual telescoping poles have two or more pole sections that slide into each other. The lock is usually one of three things: a spring-loaded push button that pops through a hole in the outer tube, a twist collar you tighten by hand, or a set-screw/clamp you tighten with a screwdriver or hex key. You can spot these by looking at the pole joint where the upper and lower sections meet. Run your hand along it and you'll feel either a button, a ribbed collar, or a small screw head.
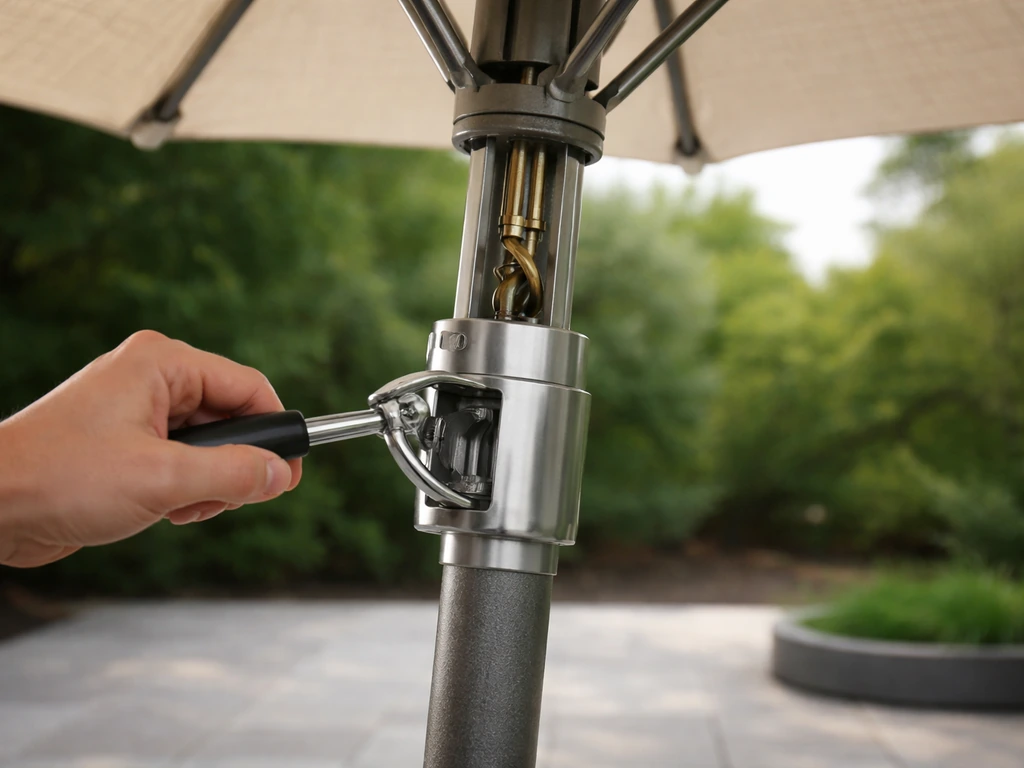
Crank and tilt systems don't raise the pole itself. Instead, a hand crank at the base of the pole winds an internal cord or cable that pulls the canopy ribs open. Some models (like the Treasure Garden Glide Tilt) let you keep cranking past the fully-open position to engage a tilt. Others use a separate push-button or collar-cam to tilt after you've cranked fully open. The key identifier is a crank handle sticking out of the lower pole section. If you also see a push button or a ribbed collar near the top hub, you have a push-to-tilt model. If there's only a crank, it's likely a crank-through-tilt.
| Mechanism Type | How to Identify It | How Extension Works | Lock Type |
|---|---|---|---|
| Push-button telescoping | Button on outer pole shaft, pops out when aligned | Slide sections apart; button snaps into hole at desired height | Spring-loaded pin through hole |
| Twist/collar telescoping | Ribbed or smooth collar at pole joint | Loosen collar, slide to height, retighten collar | Friction clamp |
| Set-screw telescoping | Small screw or bolt at pole joint | Loosen screw, slide, retighten screw | Mechanical fastener |
| Crank open (no tilt) | Crank handle at base only | Crank clockwise to raise canopy; stop at firm resistance | Internal stop ring |
| Crank open + push tilt | Crank handle plus push button near hub | Crank fully open, then push button to tilt | Hub button/cam lock |
| Crank-through tilt | Crank handle only (Treasure Garden Glide Tilt style) | Crank to open, continue cranking to tilt | Internal cam at stop |
Tools and safety before you start
You don't need many tools for this, but having them on hand before you start saves a lot of frustration mid-process.
- Silicone-based spray lubricant (not WD-40, not general oil-based spray)
- A clean rag or paper towels
- Phillips and flathead screwdrivers (for set-screw or access panel removal)
- Hex/Allen key set (common for set-screw telescoping collars)
- A soft brush or old toothbrush for cleaning joint debris
- Mild dish soap and water in a spray bottle for cleaning before lubing
On the safety side: always check the wind before you start. Close and put away the umbrella any time wind exceeds about 15 to 20 mph, and never try to open or extend it in gusty conditions. For cover changes, keep the umbrella safely closed and follow the manufacturer’s instructions so you can secure the fabric without stressing the ribs or pole Close and put away the umbrella any time wind exceeds about 15 to 20 mph.
A partially extended umbrella in a sudden gust can catch air like a sail, yanking it out of your hands or tipping the stand. Also keep an eye on your fingers around the pole joints and hub area during extension. These are pinch points, especially on crank systems where the ribs snap open under spring tension. Keep kids back from the umbrella while you're working on it.
Step-by-step: extend the pole (manual and crank/tilt setups)
Manual telescoping pole (push-button, twist collar, or set-screw)
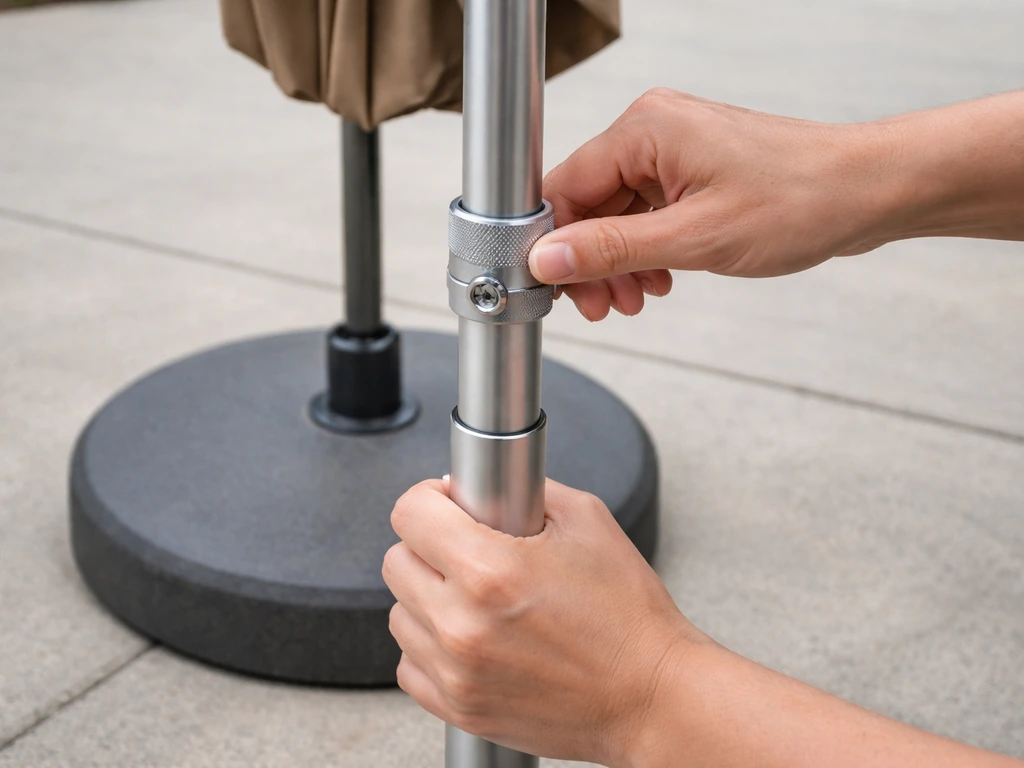
- Set the umbrella in a stable base or have a second person hold the lower pole section. You don't want it tipping while you're adjusting height.
- Make sure the canopy is closed before extending. Trying to extend with the ribs open puts stress on the internal connections.
- Find the lock at the pole joint. For a push-button: press and hold the button in. For a twist collar: rotate counter-clockwise to loosen. For a set-screw: use your hex key or screwdriver to back the screw out two or three turns (you don't need to remove it fully).
- While holding the lock open (or with the collar loose), slide the upper pole section upward to your desired height. On a Sun Garden-style parasol, push the sliding pole up until it hits the hard stop inside the tube, which tells you you're at the designed maximum extension point.
- Release the button (it should pop into the alignment hole with a click) or re-tighten the collar or screw firmly. Give the pole a light tug downward to confirm it's locked. It should not slide.
- If your model has a hub hook (like some Home Depot models), grasp the hub and push up until the hook clicks into the hanging buckle on the upper hub. This is a secondary safety lock and it matters. Don't skip it.
- Once locked, open the canopy using the tilt knob, cord, or crank, depending on your model.
Crank/tilt umbrella (extending the canopy via the crank mechanism)
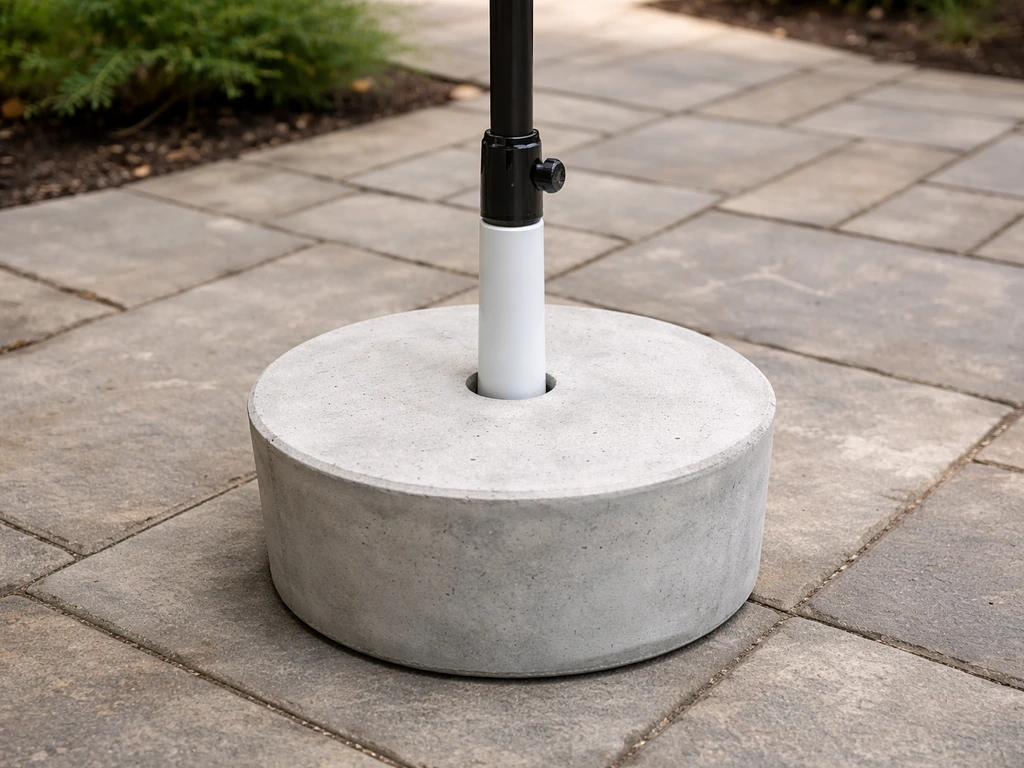
- Make sure the umbrella pole is seated in the base and the base is stable on level ground.
- Check that the tilt lock (if your model has a separate push-button or collar tilt) is fully disengaged before you start cranking. Trying to crank with a tilt lock engaged can bind the cord and damage the internal gears.
- Turn the crank handle clockwise. The canopy ribs will begin to rise. Keep cranking at a steady pace.
- Stop cranking the moment you feel firm resistance and the canopy is fully open and flat. Many manuals, including those from Treasure Garden, explicitly warn against continuing to crank once the canopy is completely open. Over-cranking drives the internal shaft or gear beyond its designed travel and can strip the cord or gear teeth.
- If you have a push-tilt model: with the canopy now fully open, press the tilt button (usually on the hub just under the canopy) and lean the pole to your desired angle. Release and confirm it locks.
- If you have a crank-through-tilt model (like Treasure Garden Glide Tilt): after the canopy is fully open, continue cranking slowly in the same direction to move through the tilt range. Stop at your desired tilt angle.
- Use two hands to finalize the angle if needed, and give the hub area a visual check to confirm all hooks and buckles are seated before stepping away.
Troubleshooting a stuck or jammed extension
If the pole sections won't slide, the button won't depress, or the crank turns but the canopy doesn't rise, work through the following checks from simplest to most involved. Don't force anything. Forcing a stuck mechanism is almost always what turns a fixable problem into a broken one.
Stuck push-button or lock pin
A button that won't depress is almost always dirt or moisture inside the button housing. Push it rapidly a few times to feel for any movement. Then spray silicone lubricant directly around the button base and work it in and out a dozen times. If it still won't move, you may need to remove the single screw that holds the push-button assembly housing to access and clean the mechanism directly. One Reddit user fixed a pole stuck between open and closed positions exactly this way: one screw, a quick clean and reset of the spring, and it worked perfectly again. No forcing required.
Telescoping pole sections won't slide
This is usually corrosion or debris at the joint. First confirm the lock is actually released (collar loose, screw backed out, button depressed). Then try working the sections back and forth in small increments, maybe half an inch each way, while applying silicone spray to the joint. If the pole is aluminum on aluminum, a thin film of dried mineral deposits or oxidation may have fused the surfaces lightly. Patient back-and-forth movement combined with lubricant almost always breaks this loose. If the pole has visibly bent at the joint, stop. A bent section won't slide without causing more damage, and that's a replacement situation.
Crank turns but canopy doesn't rise
This points to the internal cord, cable, or gear teeth. The crank is still turning something, but the connection between the crank and the canopy-raising mechanism has broken down. Before disassembling, check if your umbrella has a small access panel on the lower pole section near the crank housing. If it does, open it and look for a snapped cord, a cord that has jumped off a pulley, or visibly stripped gear teeth.
A cord off its pulley can often be reseated. A snapped cord or stripped gear means you need a replacement part. Do not keep cranking to try to force the canopy up. Some manuals explicitly warn against continuing to crank after the umbrella is completely open, such as “[do not continue to crank once … canopy is completely open](https://manualzz.
com/doc/22466481/treasure-garden-akz13-umbrella-user-manual). ”. That will destroy whatever is left of the gear or cord.
Umbrella stuck mid-way between open and closed
This is a known failure pattern on push-button telescoping models. The button has likely shifted in its housing so it's partially engaged against the pole wall instead of seated in the lock hole. Try pressing the button fully in while simultaneously pushing the upper pole section slightly upward (taking tension off the button). That relieves the side-load on the pin and lets it retract cleanly. If that doesn't work, the access-screw approach described above is your next step.
Lubrication, cleaning, and preventing future sticking
The single best thing you can do to keep your umbrella extending smoothly is clean and lubricate it at the start and end of every season. This takes about 10 minutes and prevents the stuck-pole problems that cause most of the headaches described in the troubleshooting section above.
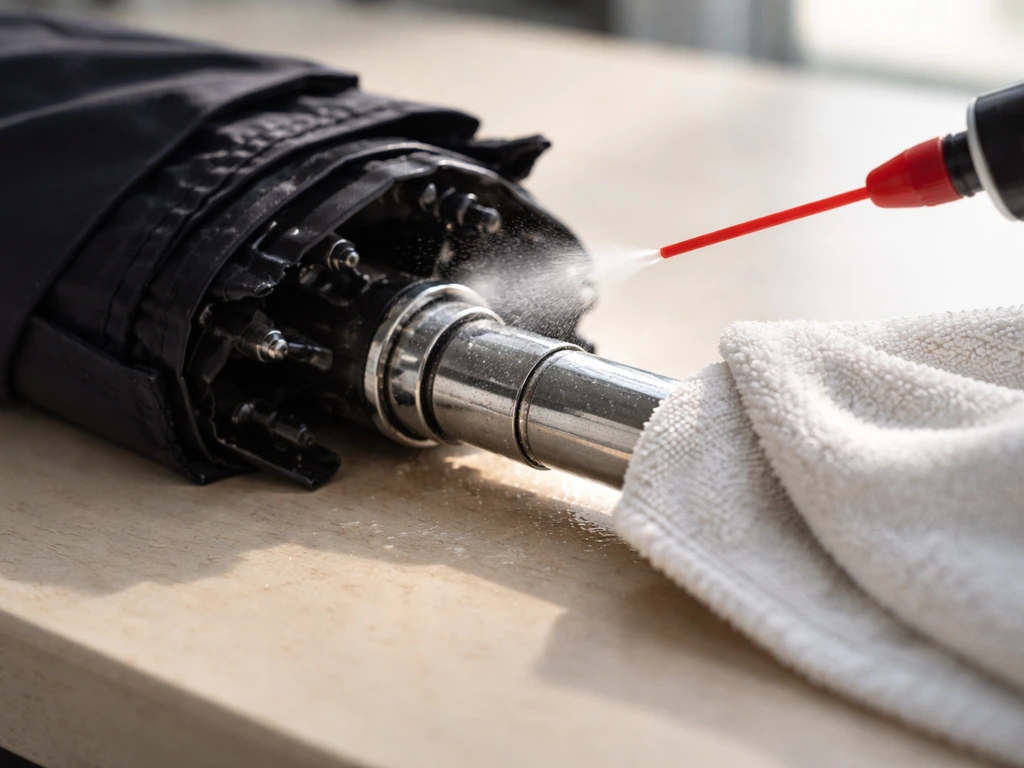
Use silicone-based spray lubricant, not WD-40 and not general household oil. Oil-based products attract dirt and create a grimy paste in the channels over time that makes sticking worse. Silicone stays clean, is water-resistant, and won't degrade rubber or plastic components.
For telescoping pole joints: wipe the joint area down with a damp cloth first, scrubbing out any visible grit with a soft brush. Let it dry for a couple of minutes, then spray silicone into the channel gap at the joint. Work the sections back and forth a few times to distribute it, then wipe off any excess that drips onto the pole surface. You don't want lubricant migrating onto the canopy fabric.
For crank and tilt mechanisms: locate the slider car and guide channel (the vertical slot inside the pole that the internal carriage rides in) and spray silicone directly into that channel. On auto-tilt umbrellas, silicone lubrication applied to the slider car and guide channel (the vertical slot where the carriage rides) helps address sticking without needing to fully disassemble the unit.
On auto-tilt models this is usually accessible from a small gap at the top of the lower pole section near where it meets the hub. Wipe excess with a rag. For the crank gear itself, if you can access it, wipe away any old dried lubricant and debris with a dry rag first, then apply a light coat of silicone spray or a very small amount of water-resistant lithium grease to the gear teeth and crank spindle.
For the push-button housing: a quick spray of silicone around the button base twice a year keeps the spring mechanism moving freely and prevents the dirt-caused sticking that jams the lock mid-operation.
Confirming locks, safe operation, and retraction
Once you've extended the pole and opened the canopy, take 20 seconds to verify everything is actually locked before you walk away. Once the pole extension is working, you can focus on making a patio umbrella cover to protect the canopy when it is stored how to make a patio umbrella cover. A canopy that looks open but isn't fully locked can collapse unexpectedly, and that's both a safety issue and a fast way to break the ribs.
- On telescoping poles: apply a firm downward tug to the upper section. It should not move at all. If it slides even slightly, the lock isn't fully engaged.
- On push-button models: visually confirm the button is popped out fully on both sides of the hole (most buttons go through the pole and are visible on each side).
- On crank models: after cranking to full open, the mechanism should feel firmly stopped, not springy or loose. If it feels like there's still slack in the crank, you may not be fully open.
- On hub-hook models: physically look at the hub and confirm the hook from the lower hub is seated in the upper hub buckle. It should be visibly engaged, not floating near it.
- Tilt locks: if your umbrella has a tilt function, confirm the tilt lock is engaged in your chosen angle before letting go. Give the pole a gentle push to one side. It should resist.
- Close and retract in wind: always close the canopy before retracting the pole. Trying to collapse a telescoping pole with an open canopy puts enormous lateral stress on the joint and can bend the inner shaft.
For retraction on a crank model, crank counter-clockwise. On a push-to-tilt model, release the tilt lock before you start cranking down. On a telescoping model, depress or loosen the lock, lower the upper section, and re-engage the lock at the storage position. Once the pole is locked into its storage position, you can also set up a patio umbrella stand so the umbrella stays secure and stable outdoors make a patio umbrella stand. Never leave a telescoping umbrella with the pole partially extended and unlocked overnight. Even mild overnight wind can stress the joint in an unlocked position.
When to replace parts or get help
Most extension problems are fixable at home with cleaning and lubrication. But some failure modes are genuine parts replacements, and it's worth being honest about that rather than spending an afternoon fighting a broken component.
Replace the push-button/spring-lock if the spring no longer holds tension and the button won't pop back out after pressing. On telescoping flagpoles and umbrella poles alike, the spring button is a serviceable component. To replace it, you typically hold the button in while pulling the two pole sections apart, then swap in the new spring-button assembly. Most umbrella manufacturers (including Treasure Garden and SunSetter-style brands) sell these by series. You'll need your model number, which is usually on a sticker at the base of the lower pole section or on the original manual.
Replace the collar or tilt mechanism if the push-button tilt no longer locks the canopy at angle and the collar itself feels cracked or has visible play. Treasure Garden, for example, sells collar replacement kits specific to their UM80, UM81, and UM92 series, and the rib replacement instructions walk you through the collar removal process without full disassembly. Matching the right kit to the right series matters here. A wrong-series collar won't seat correctly.
Replace the internal cord or cable on crank models if you've confirmed via the access panel that it's snapped or jumped its pulley and can't be reseated. Internal cords are usually brand and model specific. If you can't find a replacement cord, some umbrella repair shops can restring a crank mechanism for less than the cost of a new umbrella.
If the pole itself is visibly bent or cracked at a joint, that section needs to go. A bent pole will never extend or retract smoothly, and continuing to use it risks a full canopy collapse. At that point, compare the cost of a replacement pole section against a new umbrella. If your goal is to make a patio umbrella taller, first verify whether the extension sections and locks are functioning properly before swapping parts or upgrading the pole section. For mid-range and premium umbrellas, a replacement pole section is usually available and worth ordering. For budget models under about $80, a new umbrella often makes more sense financially.
If you're working through all of this and starting to think about building or customizing your setup rather than just repairing it, the same principles apply to DIY stand builds and pole modifications. Getting the pole height right is also closely related to making a patio umbrella taller overall, which involves a slightly different approach if you're working with the base rather than the pole joint itself.
FAQ
How can I tell whether my umbrella uses a telescoping extension versus a crank/tilt extension?
Look for a crank handle sticking out of the lower pole section. If you see only pole sections that slide into each other, it is telescoping. If the crank handle is present and the canopy ribs open with the crank, it is a crank or crank-through-tilt system, meaning extending is about operating the internal cord, not lifting the pole by hand.
What’s the correct way to extend if my umbrella has multiple lock points, not just one?
Extend slowly and stop at each intended height. Engage each lock fully before going higher. If your model has more than one hole or locking position along the pole, treating it like a single lock can leave the upper section partially seated and increase the chance of slipping under wind.
Can I use WD-40 or regular oil to make the extension smoother?
Avoid WD-40 and household oils. They tend to attract dust and form a sticky residue that makes the joint seize again. Use silicone-based spray lubricant instead, and apply only to the metal channels and mechanisms, then wipe off any excess so it does not migrate onto the fabric.
My button releases but the pole will not extend, what should I check first?
Confirm the lock is actually released, then try small back-and-forth movement of the upper section while applying silicone at the joint. If the surfaces look like they may have fused (for example, oxidation or dried mineral deposits), patience with incremental movement usually works better than adding force.
What should I do if the pole extends but doesn’t feel fully locked?
After reaching the desired height, re-seat the lock until it visibly clicks or feels firmly seated, then do a gentle test by lightly pulling up on the canopy end without fully lifting the umbrella. If there is any wobble or it slips, close it and re-engage, because a canopy that looks open but is not locked can collapse or stress the ribs.
Why does my crank turn but the canopy doesn’t open or raise?
That usually indicates a failure between the crank and the canopy-raising mechanism, such as a snapped internal cord, a cord that jumped off a pulley, or stripped gear teeth. Use the access panel (if present) to look for visible damage, and do not keep cranking because it can strip the remaining gear or worsen a cord break.
If the crank works but the umbrella won’t tilt to angle, what’s wrong?
On push-to-tilt or auto-tilt designs, the tilt often requires the separate tilt lock (or a specific engagement point after fully opening). Make sure the tilt lock is released before cranking down, and for extending upward confirm the canopy has reached full-open before attempting tilt engagement.
How do I extend an umbrella safely if wind is picking up?
Keep the umbrella closed and do not extend in gusty conditions. If winds exceed roughly 15 to 20 mph, stop and stow it. A partially extended umbrella can catch air like a sail, pulling the pole or stand and increasing the risk of injury at pinch points.
What’s the best way to lubricate my umbrella without getting lubricant on the canopy fabric?
Wipe the joint area clean first, let it dry, then spray into the channel or guide slot. Work the mechanism a few times to distribute, then wipe off excess. Keep rags handy so any drips landing on fabric are removed immediately.
How often should I clean and lubricate if I use my patio umbrella frequently?
Do a quick clean and silicone lubrication at the start and end of every season as a baseline. If you live in a high-moisture area or use it in coastal air, consider a short mid-season check for grit around the button base and pole joints to prevent early sticking.
Should I leave a telescoping umbrella partially extended overnight?
No. Never leave it partially extended and unlocked. Even mild overnight wind can stress the joint and pin area, increasing the chance of bending at the joint or damaging the locking mechanism.
When is a stuck umbrella problem likely a parts replacement instead of just lubrication?
If the spring button will not hold tension or the button will not pop back out after pressing, that points to a spring-lock replacement. If the crank internal cord is snapped or cannot be reseated via an access panel, the cord or gear set likely needs replacement rather than more lubrication. Visible bending or cracking at a pole joint also usually requires replacing that pole section.
Next Articles

How to Make a Patio Umbrella Cover Step by Step
Step-by-step sewing guide to make a custom, weatherproof patio umbrella cover with sizing, pattern, closures, and secure
How to Make a Patio Umbrella: Canopy to Frame Guide
Step-by-step DIY guide to make a patio umbrella, from UV canopy cutting to frame tilting, testing, and weatherproofing.
How to Make a Patio Umbrella Stand DIY and Concrete
Step-by-step DIY and concrete patio umbrella stand with pole fitting, stable alignment, weatherproof finishing, and wobb