Most patio umbrella rib problems fall into one of three categories: a bent rib that won't let the canopy open fully, a cracked or snapped rib that makes one section of the canopy sag, or a rib that's popped loose from the hub or connector and just needs to be re-seated. The good news is that all three are fixable at home with basic tools, and a full rib replacement usually takes under an hour once you have the right part in hand. Here's how to figure out exactly what's wrong and what to do about it.
Fix Patio Umbrella Rib: Diagnose and Repair Step by Step

Luca Morrison
23 May 2026
Quick diagnosis: figure out what's actually broken
Before you grab any tools, take two minutes to look closely at the rib and identify the failure point. The fix you need depends almost entirely on where and how the damage happened, so a quick visual check saves you a lot of backtracking.
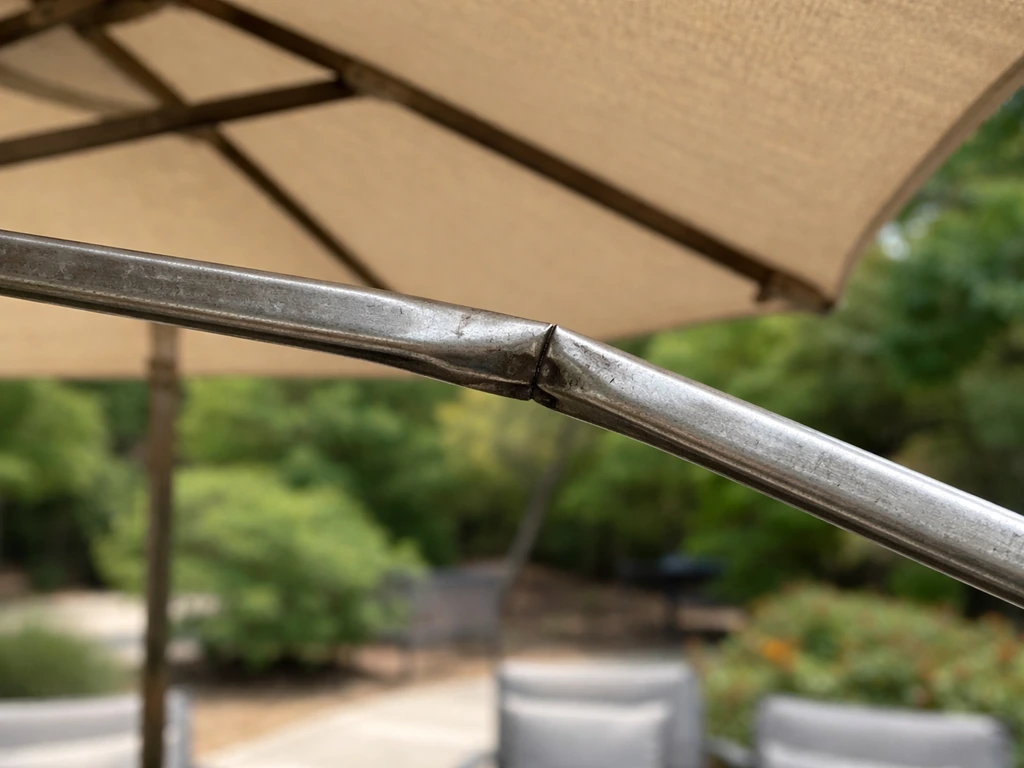
Bent rib (mid-rib deformation)
This is the most common wind damage result. The rib itself, the metal or fiberglass spoke that radiates out from the center hub, has a visible kink or curve somewhere along its length. The canopy may look lumpy, angled wrong, or refuse to open all the way because the bent section is hitting something or losing its structural line. If the bent rib has any crack or is more than gently deformed, treat it like a broken rib and follow the replacement rib steps bent section. Check by looking down each rib from the hub outward. A healthy rib should be straight or follow a very gentle, consistent arc depending on the umbrella's design.
Cracked or snapped rib
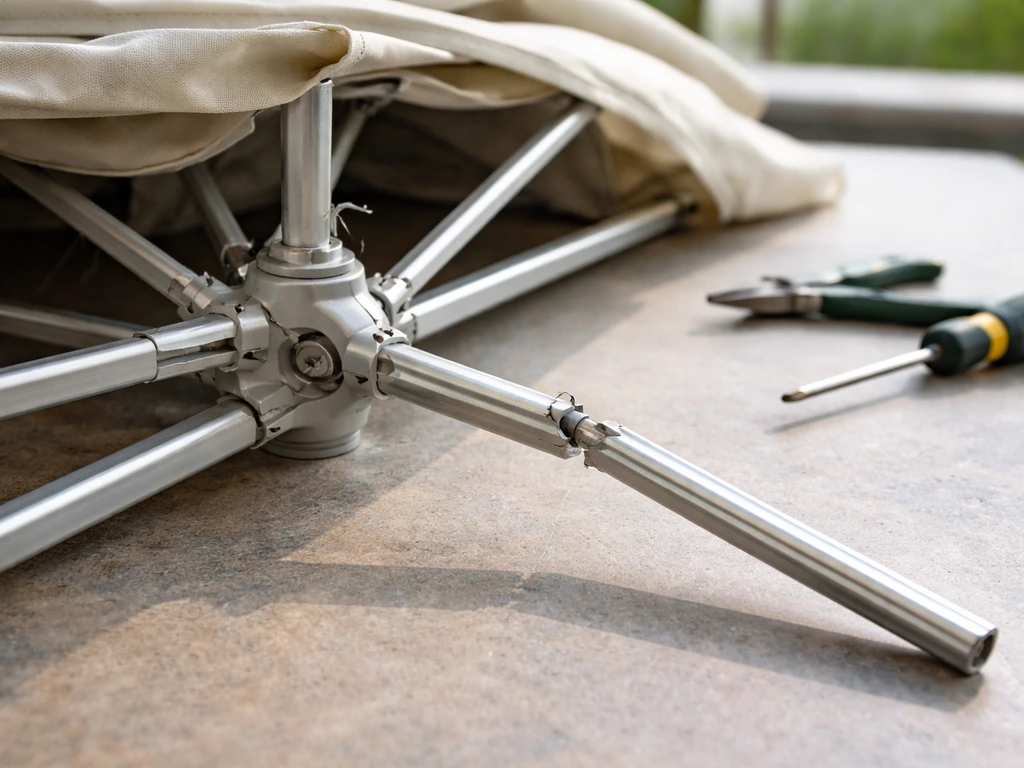
Run your hand along the rib (carefully, especially with fiberglass, which can splinter). A crack usually shows as a white stress fracture on fiberglass or a visible split on aluminum. A fully snapped rib will have obvious play when you flex it, and the canopy panel attached to that rib will sag badly. This one needs a replacement segment, not a re-bend.
Loose or disconnected hub or connector
Sometimes the rib itself is fine, but it's popped out of the hub (the central ring that the ribs attach to) or the elbow connector mid-way along the arm has come apart. The rib will feel floppy at one end, or you'll see a gap where it should connect. This is actually the easiest fix: it's usually just a matter of re-seating the rib and securing the hub ring.
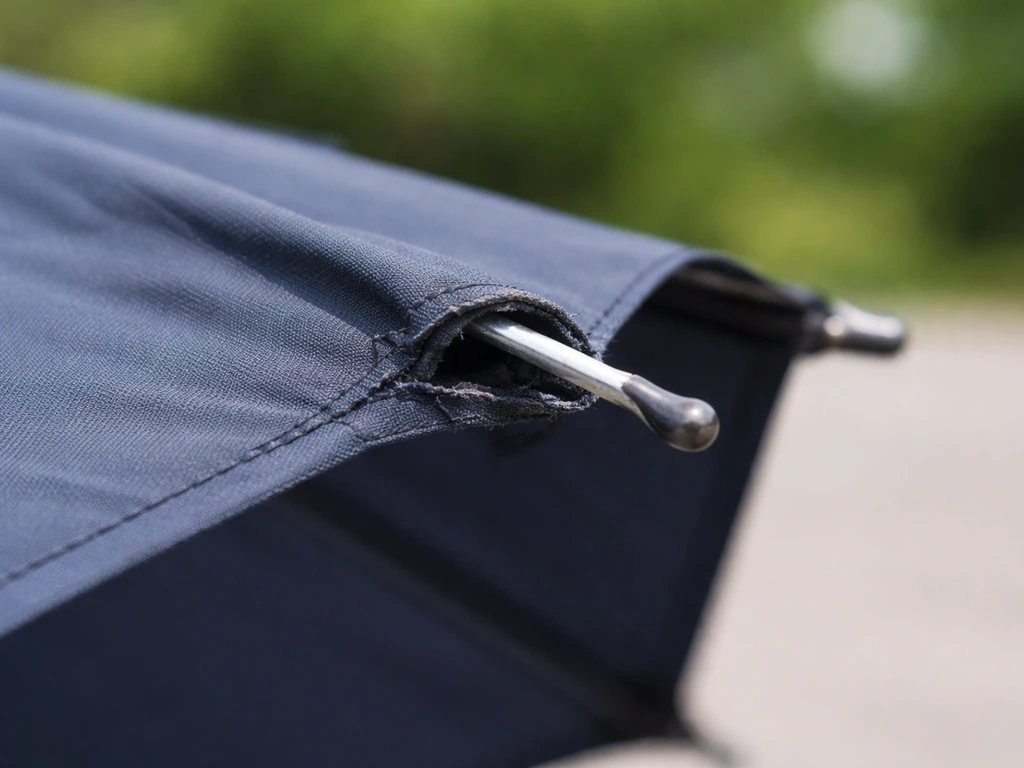
Rib torn through the canopy fabric
If the rib tip has punched through the canopy hem or the fabric sleeve at the end has torn loose, the structural rib may be fine, but the attachment point needs repair. You'll often see this happen after a gust catches the canopy at a bad angle. This is worth noting separately from a broken rib because the fix is mostly fabric work, not metalwork.
| Symptom | Likely Cause | Repair Path |
|---|---|---|
| Canopy won't open fully / one section droops | Bent rib mid-span | Re-bend (fiberglass) or replace (aluminum) |
| One canopy panel completely sagging | Cracked or snapped rib | Replace the rib segment |
| Rib flops loose, hub feels wobbly | Rib disconnected from hub or connector | Re-seat rib, tighten hub ring |
| Grinding or jumping when opening/closing | Rib not seated on hub slider properly | Disassemble, re-seat, lubricate slider |
| Canopy torn at rib tip or fabric sleeve loose | Rib tip damage or tie worn through | Repair fabric attachment, check rib tip |
Safety first, and the tools you'll need
A few quick safety notes before you start: If the umbrella is currently open and the canopy is under any tension, close it before doing anything else. Never work on an open umbrella in wind, even light wind. If you have a fiberglass rib that's cracked or splintered, wear gloves and safety glasses because fiberglass splinters are nasty. If the umbrella has LED lighting wired through the ribs (some higher-end models do), unplug it from any power source completely before disassembly.
Here's what you'll likely need, depending on the repair:
- Work gloves and safety glasses (especially for fiberglass ribs)
- Phillips and flathead screwdrivers
- Pliers (needle-nose are useful for small connectors and ties)
- A soft mallet or rubber hammer (for re-seating ribs without damaging them)
- Measuring tape (to measure rib diameter and length for ordering replacements)
- Replacement rib segment matched to your umbrella's hub type, rib diameter, and material
- Replacement hub ring or connector if the hub is cracked
- Zip ties or replacement fabric ties (for canopy attachment points)
- Dry PTFE spray or silicone spray lubricant (not WD-40, which attracts dirt)
- A camera or phone to photograph the assembly before you start taking things apart
The single most important thing before ordering any part: measure your rib diameter in millimeters, measure the overall rib length, note whether your ribs are aluminum or fiberglass, and take a photo of the hub connection style. Replacement ribs need to match on all of these points, not just the length. Bringing that information (or your umbrella's brand and model number) to the parts supplier saves you a return trip.
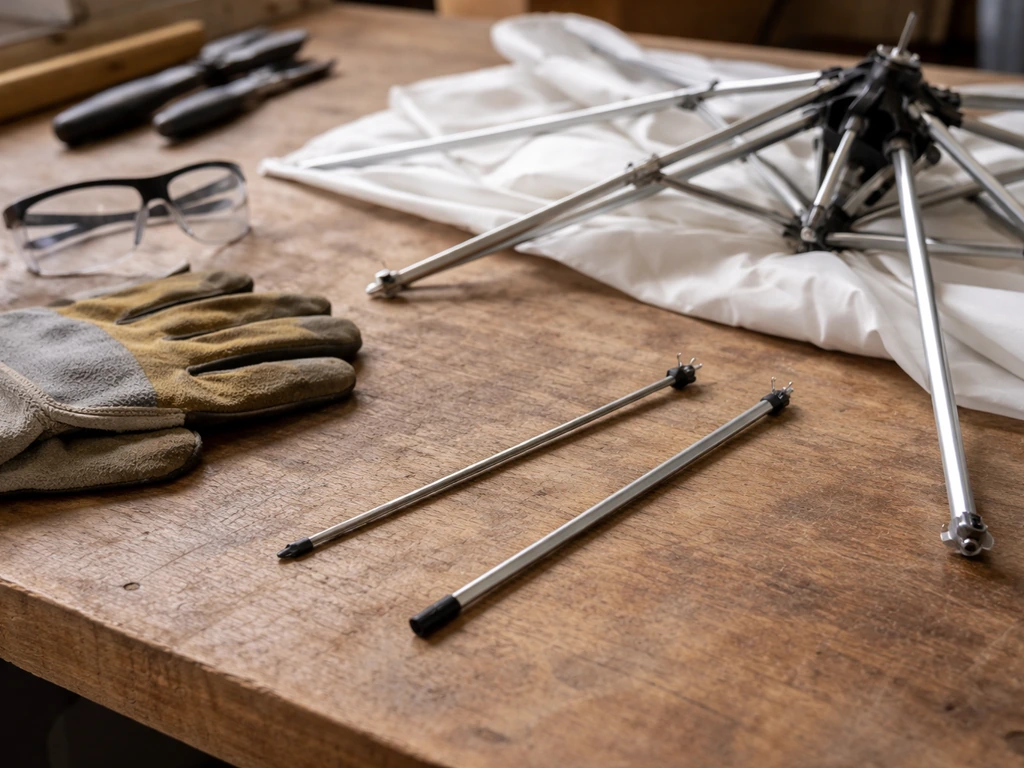
How to disassemble and access the rib
The disassembly order matters. Work in the wrong sequence and you'll put unnecessary stress on parts that aren't broken yet. Here's the general order that works for most standard hub-and-pole patio umbrellas:
- Close the umbrella fully and make sure it's latched or secured so the canopy stays collapsed.
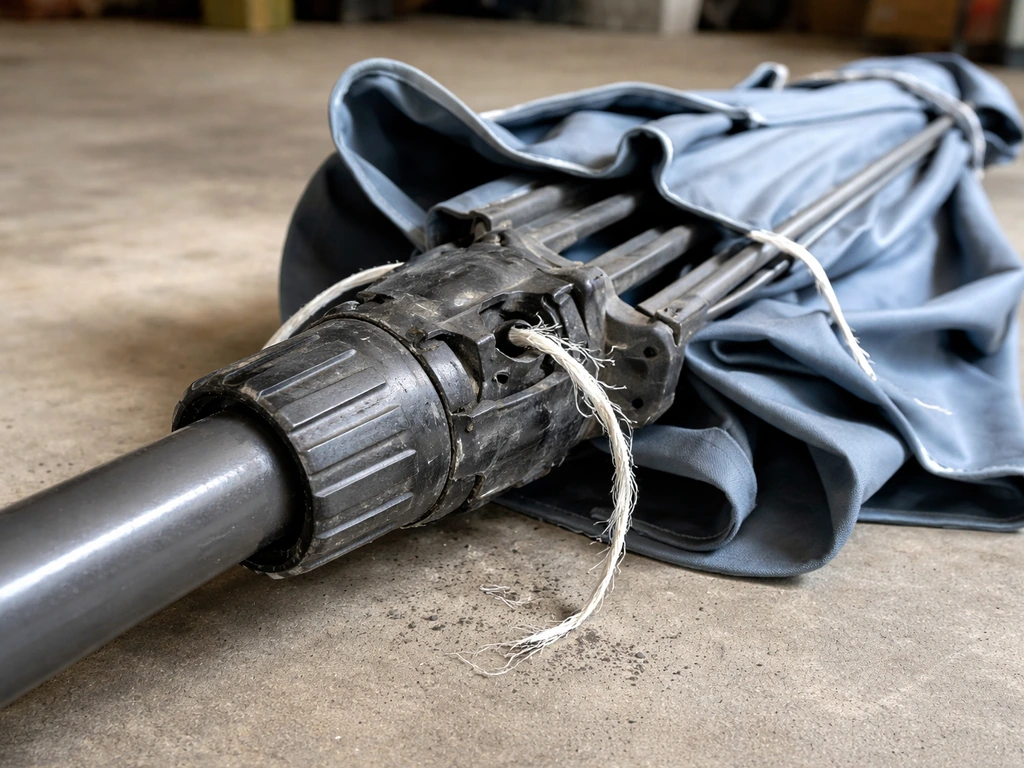
- Remove the finial: that's the decorative cap at the very top of the pole. It usually unscrews counterclockwise. Set it aside.
- Pull the canopy hem or tie loops off the rib end tips one by one. Work around the canopy removing each attachment point. On most umbrellas these are simple loops of fabric or cord that slip over a small nub at the rib tip.
- Slide the canopy fabric up and off the frame. You don't always need to remove it completely, but getting it off the ribs gives you clear access to work.
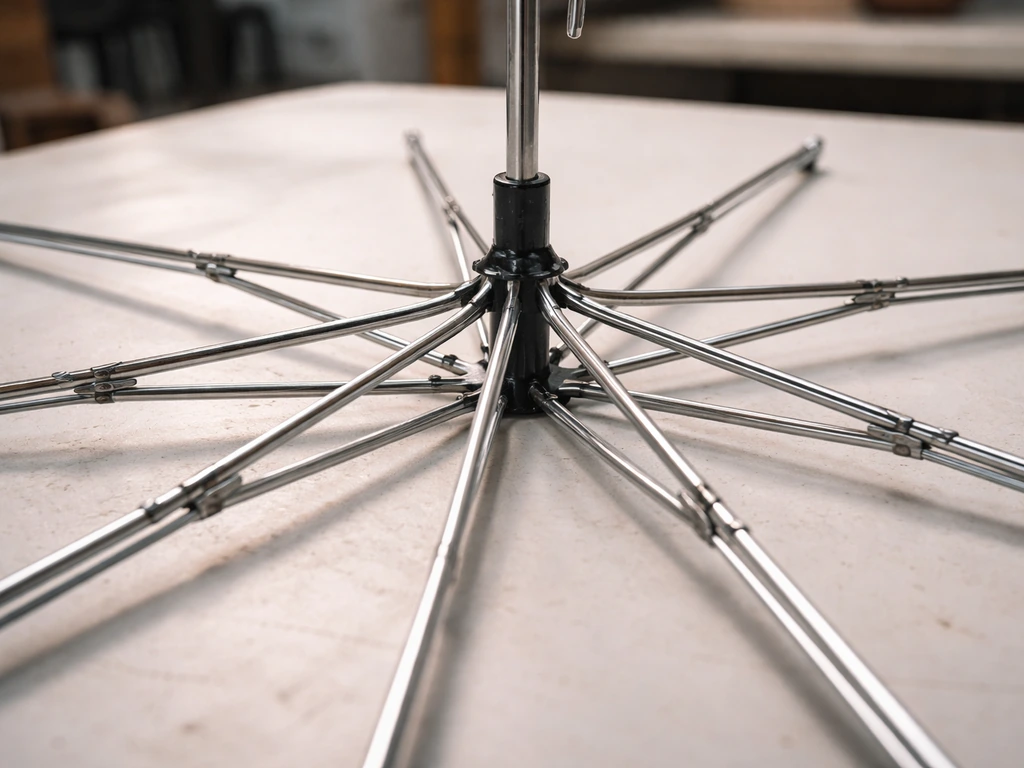
- Locate the upper hub ring (the collar that holds the ribs in place at the top hub). This usually has a set screw or friction fit. Loosen it before trying to remove any individual rib.
- If your umbrella has a slider hub (the moving ring that travels up and down the pole when you open and close), check whether the damaged rib connects to that slider as well. Many umbrellas have both an upper fixed hub and a lower sliding hub connected by struts. Note how the rib connects to both before removing anything.
- On models with a slider knob or car (common on auto-tilt designs), loosen that knob before attempting to move the slider hub.
- Remove only the damaged rib. Keep all other rib connections intact. Prying out multiple ribs at once just creates new alignment problems.
Take a photo before you remove the damaged rib, specifically of how it sits in the hub socket. That photo is your reassembly reference. Rib channels in hubs are directional, and getting the angle wrong means the canopy won't sit level.
Fix option A: re-seating or carefully re-bending a damaged rib
This option works when the rib is structurally sound but bent out of alignment, or when it's simply popped loose from the hub. Whether you can actually re-bend a rib safely depends almost entirely on what it's made of.
Fiberglass ribs: re-bending is often viable
Fiberglass is designed to flex, which is exactly why it's popular on wind-rated umbrellas. If the rib has a gentle bend and no visible crack or white stress fractures, you can often work it back toward straight by hand with slow, even pressure. Apply the pressure gradually over the full bent section rather than forcing it at one point. If the fiberglass is intact and springs back to near-straight, that rib still has structural integrity and you're good to reinstall it.
If re-bending opens up a crack or the rib snaps, switch to Fix Option B. Don't try to tape or splint a cracked fiberglass rib and reinstall it: the repair won't hold under any real load.
Aluminum ribs: re-bending is almost never a good idea
This is the most important gotcha in this whole repair. When you bend aluminum, the metal work-hardens at the bend point. Bending it back creates a new stress concentration in the same spot, and that's where it will snap, often suddenly, under the next load. If your aluminum rib has a noticeable kink or deformation, treat it as a broken rib and replace it. Re-bending it back into shape is a temporary fix at best and a safety hazard at worst, especially on a larger umbrella where a snapping rib can damage the canopy or hit someone nearby.
Re-seating a rib that's popped loose from the hub
If the rib is just disconnected, re-seating is straightforward. Slide or push the rib end back into its hub socket, making sure it's fully seated and not just partway in. On hub designs with an axle pin at the rib end, verify that pin is centered inside the pivot hole in the end-cap, not sitting off to one side, before you tighten anything. Use a soft mallet to tap the connection home if it's stiff, not a metal hammer which can deform the hub. Tighten the hub ring collar, re-check that the rib pivots smoothly, and move on.
Fix option B: replacing a broken rib segment
This is the right move for any cracked, snapped, or significantly bent aluminum rib. It sounds intimidating but is actually a pretty clean job once you have the correct replacement rib in hand. If the rib is cracked, snapped, or bent out of alignment, you’ll typically need to replace a broken patio umbrella rib rather than trying to re-bend it.
Getting the right replacement rib
Measure the damaged rib before you order anything: total length in inches or centimeters, outer diameter in millimeters, and note the connection style at the hub end (pin, screw, clip, or socket). Also note whether there's a secondary rib or strut that connects from the mid-point of this rib down to the lower slider hub. Some umbrellas call these stretchers or struts, and they're a separate part. Take photos of both connection points. If your umbrella is a named brand (like Treasure Garden, Frankford, California Umbrella, or Shadowspec), look up the model number on the underside of the hub or pole and contact the manufacturer or their parts supplier directly. Getting the exact-match part matters more here than price shopping.
Installing the replacement rib
- With the umbrella closed and the canopy removed or pulled clear, remove the damaged rib from the hub socket. Keep all other ribs in place.
- If there's a lower strut connecting this rib to the slider hub, disconnect it from the strut pivot first, then remove the rib from the upper hub.
- Slide the new rib into the upper hub socket. Match the orientation to your reference photo. The rib should slide in with light resistance, not force.
- If the design uses an axle pin at the hub connection, verify it's centered in the pivot hole before proceeding.
- Reconnect any lower strut to its pivot point on the new rib. The strut pin should click or seat flush with no wiggle.
- Tighten the upper hub ring collar back to snug. Don't overtighten on plastic hubs; you only need enough to prevent the rib from backing out.
- Manually pivot the new rib through its full range of motion (from closed/flat to fully open/extended) while watching the hub connection. It should move smoothly without binding.
- Before reattaching the canopy, test the full open/close cycle of the umbrella frame to confirm all ribs move in sync.
Replacing a hub connector or elbow piece
On some umbrella designs, the rib is actually two segments joined by a mid-rib elbow connector. If that connector is cracked or the pivot pin has sheared, you replace just the connector rather than the whole rib. The process is similar: remove the two rib segments from the broken connector, fit them into the new connector, secure any pins or screws, and verify the joint articulates smoothly through its full range.
A note on LED-lighted umbrella ribs
If your umbrella has LED lighting wired through the ribs, there will be small wires routed through holes in the rib. Before pulling a damaged rib out, carefully feed those wires back through the rib and note where they plug into the top hub housing. After the new rib is in place, re-thread the wire through the rib channel and plug it back into the socket inside the hub before closing the hub housing. Don't force the hub cap back on if the wire is kinked or pinched.
Reassembly and testing: don't skip this part
Reassembly is the reverse of disassembly, but the testing steps are genuinely important, not just a formality. A rib that looks correctly installed can still be slightly misaligned in a way that binds the mechanism or puts uneven stress on the canopy.
- Before reattaching the canopy: open the umbrella frame fully (without fabric) and watch all ribs from below. They should fan out evenly and all reach the same radial position. If one rib is sitting higher or lower than the others at full extension, go back and check its hub connection.
- Close the frame and reopen it two or three times. The action should feel smooth and consistent. Any grinding, skipping, or sudden dropping means a rib isn't seated or a strut pivot is binding.
- If you lubricated the slider channel, wipe off any excess spray now and slide the mechanism back and forth to distribute what remains evenly.
- Reattach the canopy: start by slipping the center hub cover back on, then work around the rib tips, attaching each fabric loop or tie. Keep the tension even as you go.
- Screw the finial back on.
- Open the umbrella fully with the canopy attached. Look at each panel: they should all be under similar tension. A panel that's sagging or pulling means the rib tip attachment point on that section isn't secure.
- If your umbrella has a tilt mechanism, test it. Tilt should feel smooth and hold position without slipping.
- Finally, partially close the umbrella and release it. A healthy mechanism will stay at whatever position you leave it. If it collapses under its own weight, there's a hub locking or slider issue that's separate from the rib repair, but worth addressing before you put the umbrella back into regular use.
How to prevent rib failures going forward
The repairs above fix today's problem. These habits prevent the next one.
Close it before the wind picks up
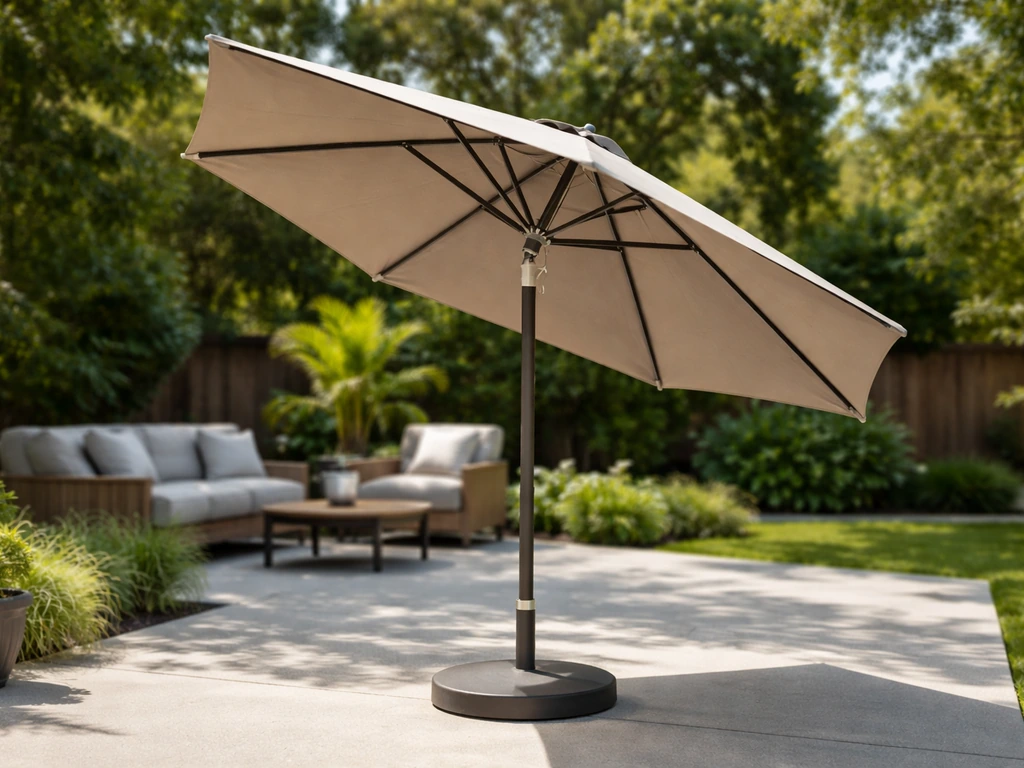
The vast majority of rib damage comes from wind. A patio umbrella is not designed to function as a wind sail, and the ribs carry enormous leverage loads when the canopy catches a gust. Close and secure your umbrella anytime sustained winds exceed 25 mph, and definitely before any storm. Frankford recommends closing and securing umbrellas when sustained winds exceed 25 mph, and notes that leaving umbrellas open or unattended in harsh conditions can void the warranty Close and secure your umbrella anytime sustained winds exceed 25 mph. Don't leave it open and unattended when you go inside, even briefly: wind can go from calm to damaging in seconds.
Inspect the ribs and hub connections at the start of each season
Spend five minutes at the beginning of patio season running your hand along each rib and looking at each hub connection point. Catch a small crack or a loose hub ring early and it's a 10-minute fix. Miss it until the rib snaps mid-summer and you're doing a full replacement. Also check the fabric tie loops at the rib tips: frayed or worn ties eventually let the canopy pull away from the rib, which puts the rib into an unbalanced load situation.
Lubricate the slider and hub mechanism annually
The slider hub that travels up and down the pole when you open and close the umbrella has a guide channel that benefits from lubrication. Use a dry PTFE spray or silicone spray, not WD-40 or grease, which attract dirt and create a gummy buildup over time. Spray lightly into the channel, wipe off the excess, then open and close the umbrella several times to work the lubricant in. This keeps the ribs from being forced into awkward angles when the slider sticks mid-travel.
Store it properly in the off-season
Leaving an umbrella open or partially open through winter is a reliable way to arrive at rib problems in spring. Moisture gets under the canopy, sits against metal rib connections, and causes rust that freezes moving parts. Store the umbrella closed, in a cover or indoors if possible. If it has to stay outside, make sure it's fully closed and secured so it can't partially open in winter wind.
Don't force a stuck mechanism
If the umbrella won't open or close smoothly, stop and find out why before applying more force. Forcing it is almost always how a fixable sticky slider becomes a snapped rib. Check the hub, the slider channel, and each rib connection point before putting any serious pressure on the crank or push mechanism.
When to replace instead of repair
Most single-rib failures are worth repairing, especially on a quality umbrella. But here are the situations where replacement makes more sense than repair:
- Three or more ribs are damaged at the same time, which usually means the hub itself took the load and may be cracked or deformed internally
- The hub ring or central hub casting is cracked, since this is the structural anchor for all ribs and a cracked hub can't be safely repaired in most cases
- Replacement ribs for your specific model are no longer available and cross-compatible parts don't fit correctly
- The pole is bent, not just the ribs, since a bent pole means the whole frame geometry is off
- The umbrella is more than 8 to 10 years old and has had multiple rib failures, which usually indicates the frame has fatigued broadly rather than failing at one point
If you're on the fence, compare the cost of the replacement rib (typically $15 to $50 for most standard sizes) against the cost of a comparable new umbrella. On a mid-range or premium umbrella, repair almost always wins. On a budget umbrella where the replacement rib costs nearly as much as a new one, it's worth at least pricing out a replacement before committing to parts.
If the damage is more complex than a rib swap, like a bent arm assembly at the tilt joint or a problem with the crank mechanism, those are separate issues worth looking into on their own. If you’re dealing with a bent arm assembly at the tilt joint, see how to fix patio umbrella arm as the adjacent guide to troubleshoot the arm mechanism and related hardware. If you suspect a broken patio umbrella arm rather than just a damaged rib, treat the tilt joint or crank mechanism as a separate issue and diagnose it before ordering parts. If the problem is specifically a patio umbrella arm, you’ll need to identify the arm or tilt joint damage and replace any broken arm components as needed bent arm assembly. Similarly, if the whole frame is twisted rather than just one rib bent, that points to a different root cause worth diagnosing before putting money into parts.
FAQ
How can I tell if the issue is truly a rib problem and not the crank, slider hub, or tilt joint?
If the umbrella binds, check whether the ribs move freely when you manually open and close the canopy slightly (with the umbrella closed at rest and no tension). If ribs feel stiff at the same spot every time, or the slider hub sticks mid-travel, the root cause may be the slider channel or linkage rather than a bent or snapped rib.
Can I fix a bent aluminum rib with heat or stronger re-bending?
Generally no. Aluminum work-hardens at the kink, so reheating or repeatedly re-bending usually makes the failure worse at the bend point. A visibly kinked aluminum rib is best treated as a replacement, not an adjustment.
What should I do if my fiberglass rib is hairline cracked but still flexible?
Do not reinstall if the crack or white stress fracture is visible. Even if the rib flexes, the fracture reduces load capacity and can open further under canopy tension. Replace the rib segment instead of relying on tape, glue, or splints.
My rib will seat into the hub, but the canopy still sits crooked. What’s most likely wrong?
Most often the rib is installed at the wrong angle in the directional hub channel. Use the pre-disassembly photo reference, confirm the rib is fully seated, and re-check that the hub cap and collar are tightened without shifting the rib’s orientation.
When re-seating a rib, how do I know it’s fully seated and not partially engaged?
Look for a consistent gap-free fit at the rib-to-hub interface and verify any pivot pin is centered in the end-cap pivot hole (not off to one side). If you can move the rib with noticeable looseness or feel play at the hub, it is likely not fully seated.
Can I just replace the fabric sleeve or hem attachment if the rib punctured the canopy end?
Yes, but only if the rib itself is structurally intact. Inspect the rib tip for bending, cracks, or splintering. If the rib is damaged, repairing the fabric alone will not stop the rib from re-puncturing under load.
What if my umbrella has LED wiring through the ribs, and the wire got kinked when I removed the rib?
Do not force reassembly with a pinched wire. Reroute the cable through the rib channel exactly as before, confirm it is not trapped between parts, and ensure the connector plugs in smoothly inside the hub before closing the hub housing.
How do I measure the correct rib size for ordering without guessing?
Measure rib outer diameter in millimeters and total rib length, then identify connection type at the hub end (pin, screw, clip, or socket). Also note any secondary strut or stretcher connection and take photos of both hub and mid-rib connector styles, since length alone is not enough.
My umbrella uses two rib segments with a mid-rib elbow connector. When should I replace the connector instead of the whole rib?
Replace the connector if the joint articulation point is what’s cracked or loose, while both rib segments themselves remain straight and intact. If either segment is visibly bent, cracked, or has a snapping failure, replace the affected segment or the rib assembly rather than only swapping the connector.
What lubricant should I use for the slider channel, and what should I avoid?
Use a dry PTFE spray or silicone spray applied lightly to the slider guide channel, then wipe excess and cycle the umbrella a few times. Avoid WD-40 and heavy grease, since they attract dirt and can create a gummy buildup that forces ribs into awkward angles.
How soon should I stop and get replacement parts if something feels wrong during repair?
Stop if the rib won’t pivot freely after installation, if the hub cap feels like it is catching on a misaligned channel, or if you see the canopy bind when opening. These symptoms suggest misalignment, incomplete seating, or incorrect part matching, and forcing the mechanism can worsen the failure.
What’s the safest way to test the repair before using the umbrella outdoors again?
After reassembly, open and close the umbrella slowly a few times with no wind and observe the canopy shape and rib movement. Confirm smooth pivoting at the hub and look for any new sagging in the repaired section before relying on it under actual outdoor conditions.
Next Articles
Broken Patio Umbrella Repair Guide: Diagnose and Fix Fast
Diagnose and repair a broken patio umbrella fast with step by step checks, fixes for common parts, and maintenance tips.

How to Fix a Patio Umbrella That Won't Open or Close
Step-by-step fixes for patio umbrellas that won’t open or close, with checks for jams, cords, latches, and lubricating t
How Does a Patio Umbrella Work? Components, Use, and Fixes
Learn how patio umbrellas work: components, open close tilt, stability, and step by step troubleshooting common mechanic