You can repair a broken patio umbrella rib in most cases without buying a new umbrella. Depending on where the rib snapped, you have three realistic options: splint the break with a copper sleeve and bolts, reattach a rib that popped loose at the hub or connector, or slide in a full replacement rib section. The right fix depends on what kind of break you have and what material the rib is made of. This guide walks you through diagnosing the problem, gathering what you need, doing the actual repair, and making sure the umbrella opens correctly when you're done.
Repair Broken Patio Umbrella Rib: Step-by-Step Fix Guide

Luca Morrison
8 Jun 2026
Quick diagnosis: figure out which rib broke and how
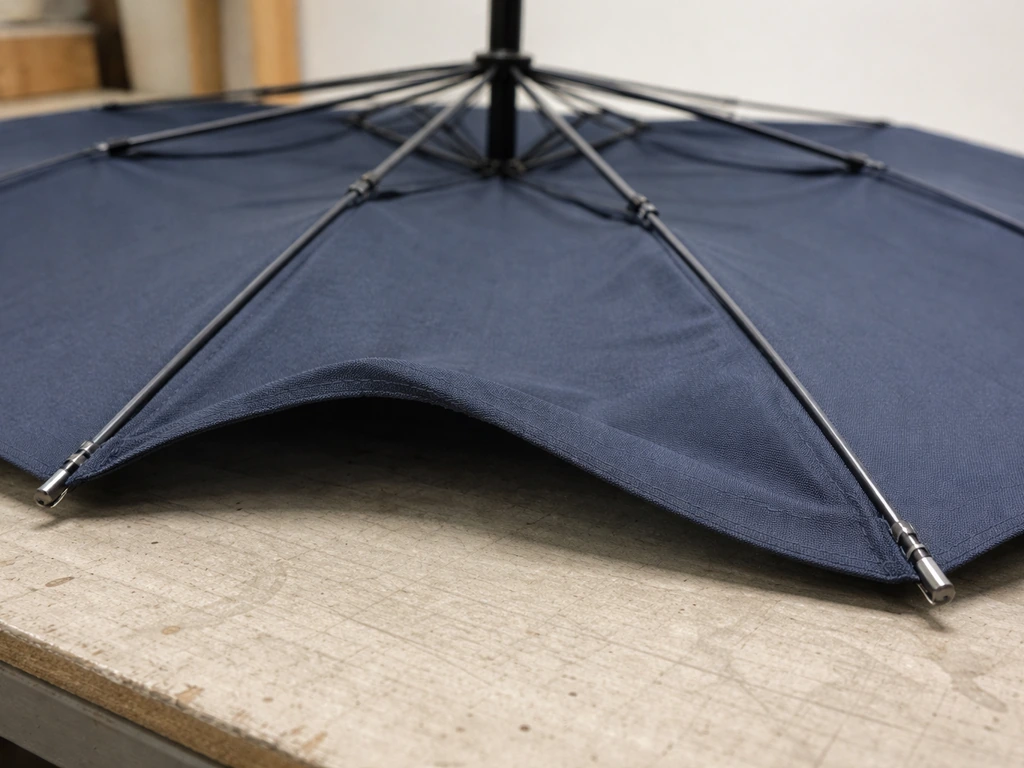
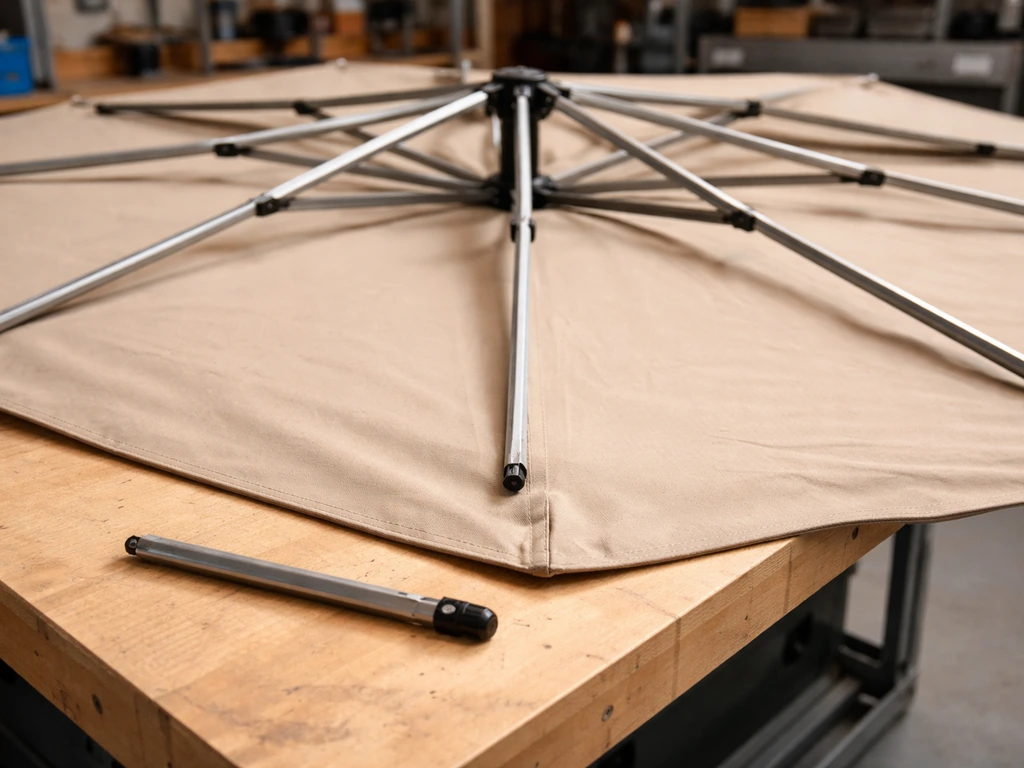
The most obvious sign of a broken rib is a canopy section that droops while the rest of the umbrella looks normal. One spoke sags because the rib underneath it can no longer hold tension. Start by opening the umbrella fully (or as fully as it will go) and walking around it. Look straight up along each rib from tip to hub. You're checking for three things: a clean snap somewhere along the rib's length, a crack or splinter in a fiberglass rib, or a rib that has pulled loose from its connection at the hub or runner ring.
Once the canopy is loose or removed, compare each rib's arc and alignment. A healthy rib holds a smooth, consistent curve. A broken one will either hang limp, kink at the break point, or sit at a noticeably different angle than the others. Note where the break is: at the hub connection, somewhere in the middle third of the rib, or near the tip. That location determines your repair approach.
Metal vs. fiberglass: what the failure looks like
Aluminum ribs usually bend before they snap. If yours is bent rather than broken clean through, that's a separate problem closer to a bent-frame repair. A clean snap on an aluminum rib leaves two relatively smooth ends. Fiberglass ribs fail differently: they crack, splinter, or shatter, and you'll often see white stress fractures radiating from the break point. Fiberglass splinters can be sharp, so handle a broken fiberglass rib carefully and consider wearing gloves during inspection.
Hub break vs. mid-rib break
A rib that came loose from the hub or runner (the sliding ring on the pole that pushes the ribs open) is often not broken at all. The connector pin, rivet, or tab that holds the rib in the hub slot may have sheared off or popped out. If the rib itself is intact but just flapping free, reattaching at the hub is a much simpler fix than splinting a snapped rib. If the break is mid-rib, you're looking at either a sleeve splice repair or a full rib replacement.
What to gather before you touch anything
Getting your tools and parts together first saves a lot of frustration. There's nothing worse than having the umbrella half-disassembled and realizing you're missing a bolt.
- Work gloves (especially if dealing with fiberglass splinters)
- Safety glasses
- Needle-nose pliers and regular pliers
- Phillips and flathead screwdrivers
- A drill with 1/8-inch bit (for the sleeve splice method)
- Measuring tape
- A 6-inch section of 5/8-inch copper tubing (for the sleeve splice method on metal ribs)
- Small bolts and nuts or self-tapping screws sized to match the drill bit
- Epoxy rated for metal or fiberglass (depending on rib material)
- Replacement rib section if you're doing a full swap (measure hub-to-tip length before ordering)
- A permanent marker to label parts and orientation before disassembly
- A small container or zip-lock bag for screws and small parts
For a full rib replacement, you need to match the replacement to your umbrella. Measure the rib from the hub connection point to the tip. Also note whether the rib attaches at a top hub, a lower runner, or both, and whether the tip has a plastic cap or a specific fitting. Many umbrella brands sell replacement rib kits directly, and generic replacement ribs are available in common lengths (usually 24 to 30 inches for residential umbrellas). If you have a branded umbrella from Treasure Garden, Tropitone, or similar, search for your model number plus 'rib replacement kit' for the best match.
Disassembly: open the umbrella just enough to get to the rib
You don't always need to strip the umbrella completely down. How much you disassemble depends on where the break is and which repair method you're using.
- Move the umbrella to a flat, stable work surface. A picnic table or outdoor workbench works well. Lay it on its side if needed.
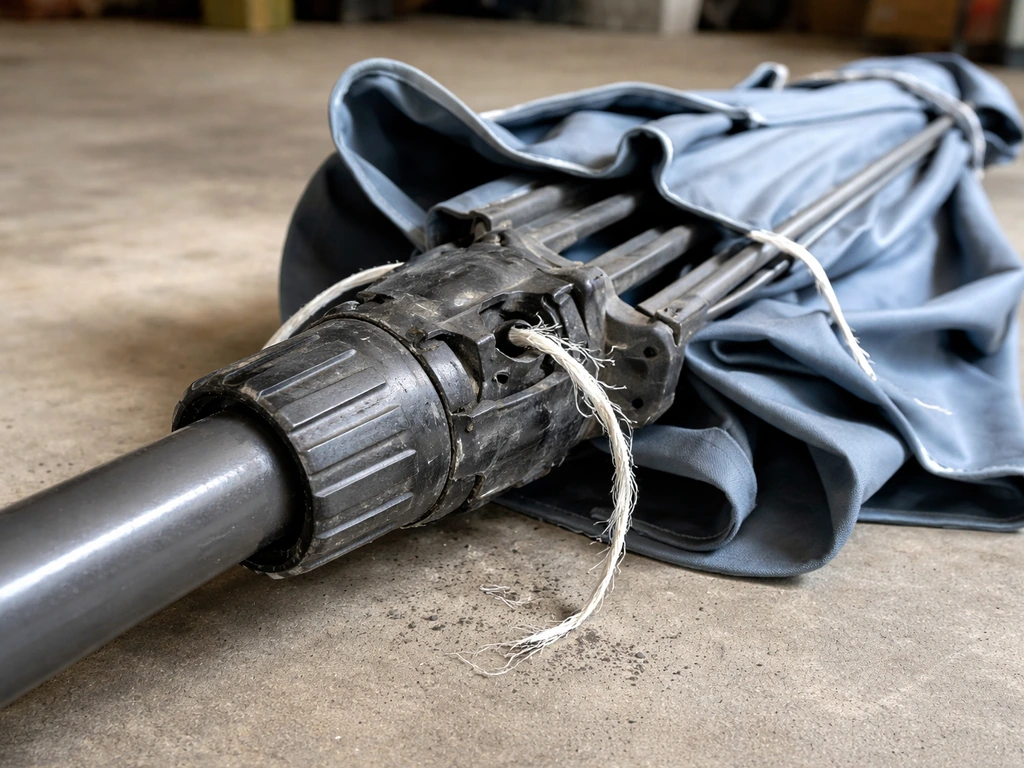
- Remove the canopy fabric first if you're doing a full rib replacement. Most canopies are held in place by fabric sleeves that the ribs slide through, plus a center cap at the top. Unthread the ribs from the fabric sleeves carefully and set the canopy aside.
- For a sleeve splice repair on a mid-rib break, you may be able to leave the canopy partially on. Just loosen the sleeve pocket around the damaged rib so you have clear access to the break.
- Crank or push the umbrella to its open position to identify exactly which rib is damaged and where the connectors are. Treasure Garden's official rib replacement instructions specifically tell you to crank the umbrella open first as the starting step.
- Once you've identified the rib, close the umbrella back down. This releases tension so you can work safely.
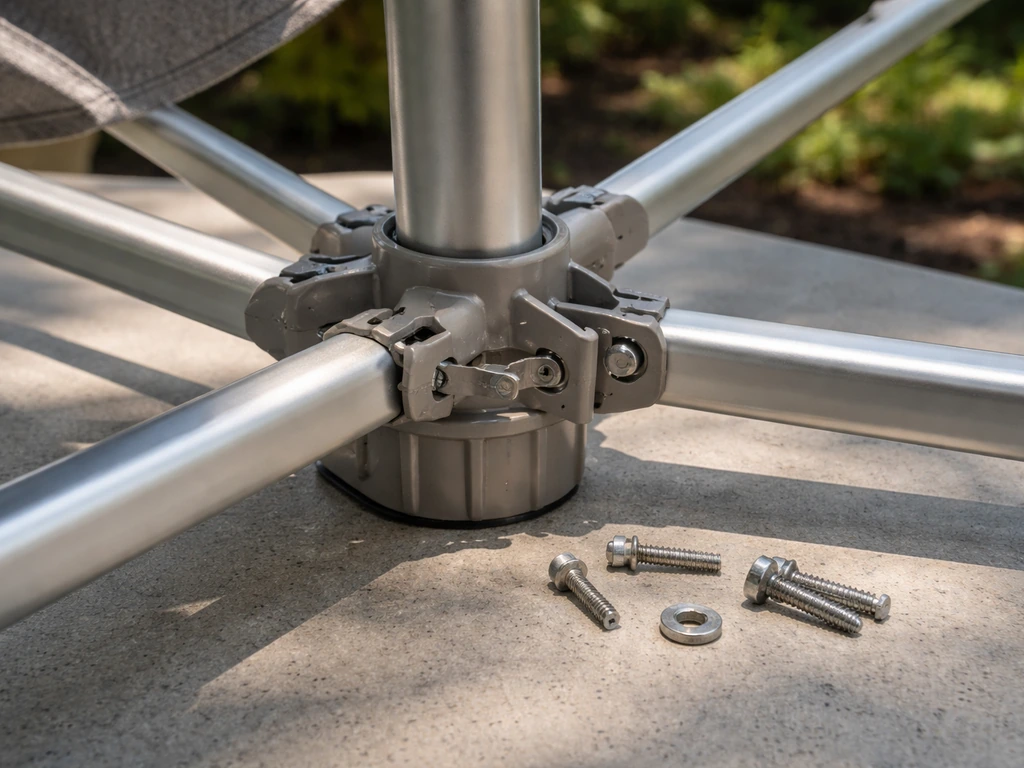
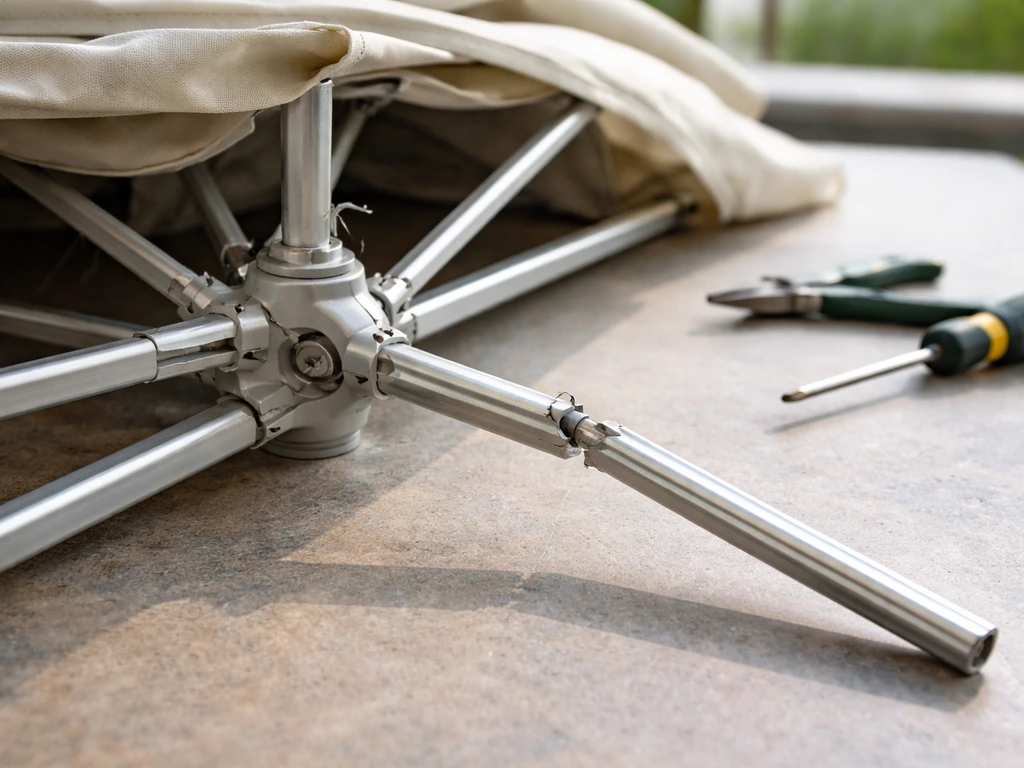
- Locate the rib's connection at the hub (the top fitting where ribs meet the pole) and at the runner ring (the lower sliding ring). Each rib typically pins or clips into a slot at each connection point.
- Use needle-nose pliers to remove the retaining pin, rivet, or clip that holds the broken rib in its hub slot. Mark the slot position with your permanent marker before removing anything. Keep all hardware in your zip-lock bag.
- Gently separate the rib from the hub, working slowly. Keystone Ridge's installation guidelines specifically caution about separating each rib only about 6 inches from the center pole during handling to avoid stressing the other ribs.
- Once free at both ends, slide or lift the damaged rib out completely.
One thing to watch here: don't force anything. If a connector pin won't budge, apply a small amount of penetrating oil (like WD-40) and wait five minutes before trying again. Forcing a stuck pivot pin can damage the hub itself, which is a much harder fix.
Three ways to fix the rib: reattach, splice, or replace
Here's where the repair splits into different paths. Use the table below to pick the right approach for your situation, then follow the detailed steps for that method.
| Failure type | Best repair method | Difficulty | Cost |
|---|---|---|---|
| Rib popped out of hub connector (rib itself intact) | Reattach at hub | Easy | Low (hardware only) |
| Clean snap in the middle of a metal rib | Copper sleeve splice | Moderate | Low ($5–$15 in materials) |
| Cracked or splintered fiberglass rib | Epoxy + sleeve splice or full replacement | Moderate | Low to moderate |
| Shattered rib, multiple breaks, or break very close to hub | Full rib replacement | Moderate | Moderate ($10–$40 per rib) |
| Hub tab or runner connector broken (rib intact) | Replace connector hardware | Easy to moderate | Low |
Option 1: Reattaching a rib that popped loose
If the rib is intact but just disconnected at the hub or runner, this is the simplest fix. This exact process is also commonly used when you need to fix patio umbrella rib connections that popped loose near the hub or runner reattached at the hub or runner. Check whether the connecting pin or rivet sheared. If it's missing, match the diameter at a hardware store (usually 1/8 to 3/16 inch).
Slide the rib back into its hub slot, align the pin holes, and insert a new bolt or cotter pin. If the patio umbrella arm is still misaligned after reattaching the rib, adjust the rotation and connection points before testing the opening and closing fix patio umbrella arm. If the hub slot itself cracked, you may need to reinforce it with a small metal bracket and epoxy before reinserting the rib.
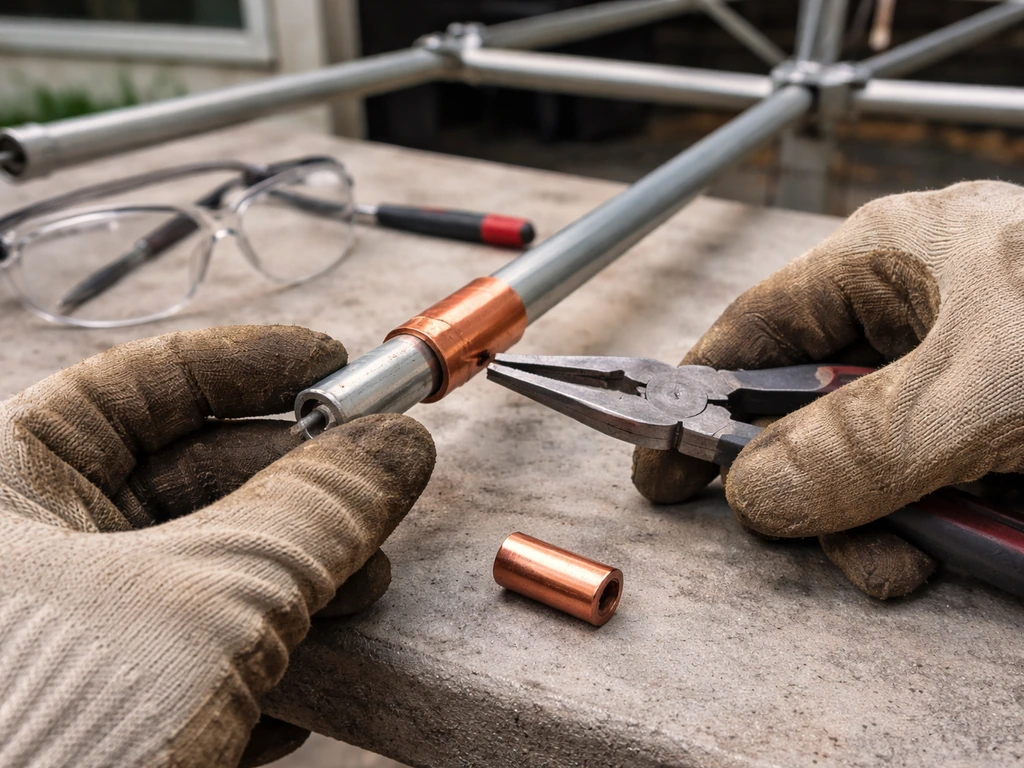
Option 2: Copper sleeve splice for a snapped metal rib
This is the most practical repair for a clean mid-rib snap on an aluminum rib. It's surprisingly sturdy when done right.
- Cut a 6-inch section of 5/8-inch copper tubing (available at any hardware store in the plumbing aisle).
- Use pliers to flatten the tubing into a channel shape that fits snugly over the rib. You want it to cup the rib rather than just sit on top.
- Align the two broken rib ends so they overlap slightly inside the copper sleeve. Center the sleeve so it extends about 3 inches past each side of the break.
- Drill 1/8-inch holes through the copper sleeve and the rib on each side of the break. Two holes per side (four total) gives the most secure hold.
- Insert small bolts or self-tapping screws through each hole and tighten. Snug is enough here. Overtightening can crush the rib and actually weaken the repair.
- If you want additional reinforcement, apply a bead of metal epoxy around the sleeve edges before tightening the bolts, then let it cure before reassembling.
Option 3: Repairing a cracked fiberglass rib
A cracked but not fully separated fiberglass rib can sometimes be saved with epoxy alone if the crack is minor. Clean the crack with isopropyl alcohol, apply fiberglass-rated epoxy into the crack, press the surfaces firmly together for about 60 seconds, and let it cure fully per the product instructions before putting any load on the rib. For a complete break, use the same copper sleeve splice method as above, but also pack epoxy inside the sleeve before bolting.
The epoxy fills the gaps that the brittle fiberglass leaves behind. Be honest with yourself here: if the rib shattered into more than two pieces or splintered badly, a full replacement is the smarter call. A patched fiberglass rib in bad shape will fail again quickly.
Option 4: Full rib replacement
When the rib is too far gone to repair reliably, swap it out entirely. You've already removed it during disassembly. Now slide the new rib through the canopy sleeve pocket if the canopy is still attached, or lay the canopy out and thread the rib through its pocket from hub end to tip. Then follow these steps:
- Open the umbrella frame just enough to hook the new rib's hub end into the upper hub slot. Don't force it fully open yet.
- Align the rib's hub connector with the slot you marked earlier and insert the retaining pin.
- Connect the lower end of the rib to the runner ring in the same way.
- Replace any hub cover, foam ring, or guide tube that you removed during disassembly. Park N Pool's Eclipse/Aurora rib replacement instructions specifically call out reattaching the guide tube at this stage, so check your model's documentation if it applies.
- Gently open and close the umbrella a few times by hand (without the crank) to confirm the new rib moves freely through its full range of motion before you apply full opening tension.
Reassembly and alignment: the part most people rush
This step matters more than most people think. A rib that's reinstalled at the wrong rotational position will cause the canopy to sit crooked, put uneven stress on the other ribs, and make the umbrella hard to open or close cleanly.
- Before you reattach the canopy, open the frame and visually check that the repaired or new rib follows the same arc as the ribs on either side of it. It should curve at roughly the same angle and reach the same height when the umbrella is fully open.
- Reattach the canopy fabric, threading each rib back through its sleeve pocket. Start at the hub end and work toward the tip on each rib.
- Replace the center cap or top finial if you removed it.
- Stand back and look at the umbrella from about 10 feet away with it fully open. The canopy should form a smooth, even dome. If one section sits higher or lower than the others, the rib is not seated correctly at the hub or runner connection. Go back and check that the pin is fully seated in the correct slot.
A common mistake here is reinstalling the rib one slot off from where it should be. Most hubs have evenly spaced slots, so the rib will seem to fit even in the wrong position. That's why the marker note during disassembly matters. If you didn't mark it, count the slots and match the spacing of the adjacent ribs.
Test, adjust, and confirm the repair held
Don't skip this step. A repair that looks good closed can still have problems when the umbrella is under full opening tension.
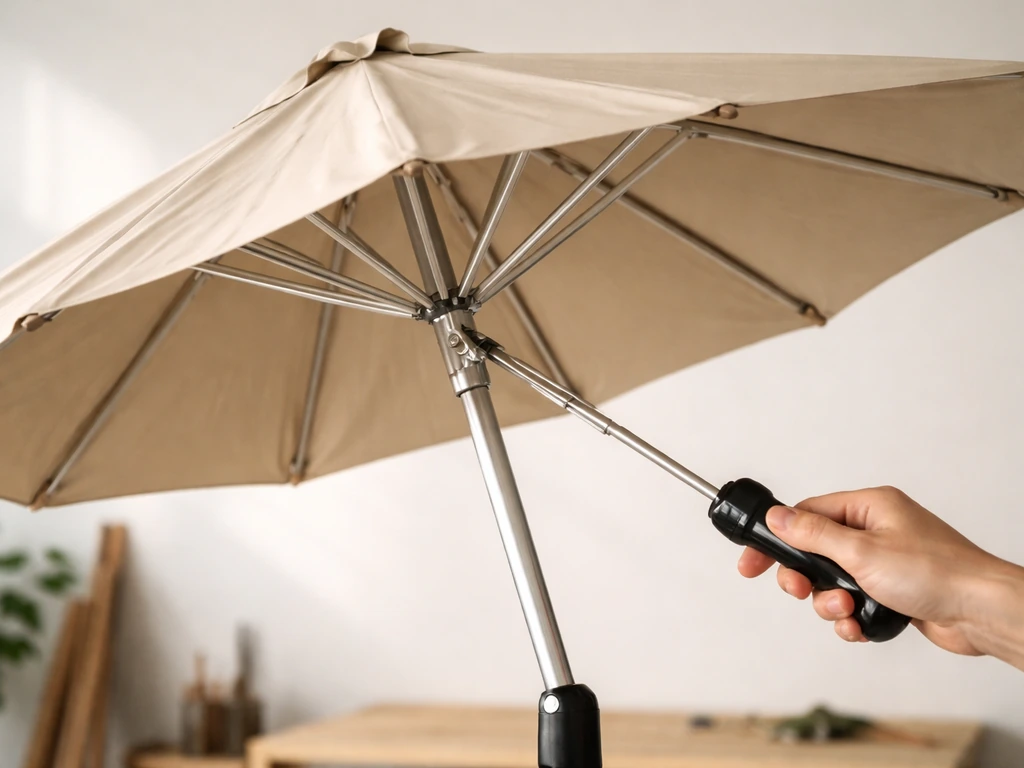
- Open the umbrella fully using the crank or push-open mechanism. Go slowly the first time.
- Watch the repaired rib specifically as it reaches full extension. It should lock open with the same tension as the others. If it droops slightly at full extension, the splice or connector isn't fully secure.
- Apply light upward pressure on the canopy section above the repaired rib with your hand. It should feel as firm and stable as the sections above the other ribs.
- Close and reopen the umbrella two or three more times. Any looseness in the repair will show up during the open-close cycle.
- If you used epoxy as part of the repair, confirm the cure time has passed before doing this test. Rushing a cure is the most common reason repairs fail on the first open.
- Check the canopy tension. After a rib repair, the canopy sometimes sits slightly loose over the repaired section. If the fabric sleeve is baggy, you may need to adjust the tip cap or any tensioning cord at the rib tip.
If the rib still droops after reassembly, go back and check the connection at both the hub and runner ring. A drooping or not-lifting rib almost always means one of those two connection points isn't fully engaged. It rarely means the splice itself failed, assuming you followed the sizing and bolt-tightening steps correctly.
How to stop this from happening again
Ribs break for a handful of predictable reasons, and most of them are preventable. Taking five minutes at the start and end of each season can easily double the life of your umbrella frame. If the issue shows up on the arm side, use the same hub and rib diagnosis steps to work out how to fix patio umbrella arm correctly.
Open and close it correctly
The single biggest cause of broken ribs is forcing the umbrella open or closed without releasing the latch or tilt mechanism first. Always make sure the tilt lock is released before cranking, and never push down hard on the canopy to force it closed. Let the mechanism do the work. Cranking too fast also puts sudden shock loads on the ribs, especially on cheap hub connectors.
Bring it in or close it when wind picks up
Wind is the number one external cause of rib damage. An open patio umbrella in a sudden gust acts like a sail, and the ribs take the full force of that load. Most residential patio umbrellas are not engineered for sustained winds above 20 to 25 mph. If you see a storm coming or the wind picks up noticeably, close the umbrella. A wind-resistant base and closure strap help but don't substitute for closing the umbrella in real wind events.
Seasonal storage done right
Leaving an umbrella out through winter or rainy seasons accelerates rib corrosion and weakens fiberglass over time. Before storage, close the umbrella fully, tie it with its closure strap, and store it horizontally or in a padded cover bag. Keystone Ridge Designs also advises closing the umbrella fully, [untying the closure cord](https://www. kaystoneridgedesigns.
com/downloads/KRDumbrellainstallationmaintenanceinstructions. pdf), and gently separating each rib about 6 inches from the center pole during maintenance so the components are handled correctly. Keystone Ridge Designs notes to keep ribs separated by about 6 inches from the center pole during handling or closure [separation distance of about 6 inches from the center pole for ribs during handling or closure](https://www. keystoneridgedesigns.
com/downloads/KRDumbrellainstallationmaintenanceinstructions. pdf). If the canopy fabric is wet, let it dry completely before covering to prevent mildew that can wick into the rib sleeve pockets and cause hidden deterioration. Check all the rib connections and pivot points for rust or corrosion at the start of each season and apply a light coat of silicone spray or dry lubricant to keep them moving freely.
If you're dealing with damage beyond a single rib, like a bent center pole, a broken crank, or multiple structural arm failures, those are separate problems that go beyond a rib splice. But for the very common case of one drooping canopy section caused by a single snapped or disconnected rib, everything you need to fix it today is covered here. If your patio umbrella has a broken arm, the rib troubleshooting and fixes above can help you get it operating safely again. Most repairs take under an hour, cost less than $20 in materials, and leave you with a fully functional umbrella rather than one headed to the landfill.
FAQ
Can I repair a broken patio umbrella rib with epoxy only?
Yes, but only if the fiberglass crack is small and the rib is still one piece. If you see a crack plus splintering, white stress fractures widening, or the rib droops at rest, replace the rib or use the sleeve splice method instead of relying on epoxy alone.
How do I know if I installed the repaired rib in the wrong position?
If the canopy does not sit evenly when the umbrella is fully opened, the most common cause is the rib installed one rotational slot off or a hub/runner connection not fully seated. Re-check the rotational position marks, then remove and reinsert the rib so it locks into both connection points.
What kind of epoxy should I use for a patio umbrella rib repair?
Do not use regular wood glue or general-purpose glue. Use fiberglass-rated epoxy when working on fiberglass ribs, and for sleeve splices, pack epoxy into the sleeve before bolting so the brittle fiberglass has support in the gap area.
What measurements matter when buying a replacement rib for a repair broken patio umbrella rib?
Measure the rib along its full span from the hub connection to the tip, then match not just length but attachment style (top hub, lower runner, or both) and the tip cap or fitting. A rib that is the right length but attaches differently can make the umbrella hard to open or close.
How tight should the bolts be for a copper sleeve rib repair?
For mid-rib snapped aluminum repairs, use a copper sleeve splice with correctly sized bolts. Over-tightening can crush thin aluminum ends and weaken the splice, while under-tightening can let it slip under opening tension.
What if the rib is bent, not broken, when I repair broken patio umbrella rib?
Yes, but it changes the fix. If the rib is bent rather than cleanly snapped, the sleeve splice can fail because there are no smooth mating ends, and the canopy tension will stay uneven. Treat bent ribs as a bent-frame issue, not a straight splice.
Should I reuse the pin or rivet if it came out during the rib repair?
Replace the bolt or cotter pin rather than reusing a deformed fastener. If a hub pin sheared, the surrounding slot can be stressed, so clean the hole, confirm it aligns, and reinforce cracked hub slots with a small metal bracket and epoxy before reinstalling.
Why does my repaired rib still droop even after it looks connected?
A rib that droops after reassembly usually points to an unengaged hub slot, a runner ring not locking fully, or the rib not seated to its stop. Splice failure is less likely if sizing and bolt steps were correct, so verify engagement at both connection points first.
Is it safe to inspect a broken fiberglass patio umbrella rib up close?
Use gloves and eye protection for fiberglass inspection, especially if you see splintered ends or radiating fractures. Fiberglass splinters can be sharp, and small fragments can drop into the hub area when you handle the broken rib.
What should I do if the hub connector pin feels stuck during the repair?
Penetrating oil is appropriate for stuck connector pins. If parts are rusty, let the oil sit, then remove corrosion with a gentle wipe before reassembly, otherwise you can get poor seating even if the pin moves.
Should I test the umbrella after repairing one rib, and what should I look for?
Yes, and the most useful check is how the umbrella behaves under full opening tension. Open fully, then close slowly while watching for a rib that slips, a canopy that hangs crooked, or resistance that suggests a slot mismatch or a partially seated runner connection.
How long should I wait before using the umbrella after a rib repair?
Do not open or close the umbrella until any epoxy has fully cured per the product instructions. If you rush, the epoxy can creep under tension, causing the rib to separate or droop again quickly.
When should I stop repairing and replace more than just the broken patio umbrella rib?
If you see multiple ribs damaged, a broken center pole, or repeated failures after a patch, the problem may be structural or caused by repeated overloading. In those cases, replacing the affected structural components is safer than continuing to patch ribs one at a time.
What maintenance reduces the chance the repaired rib breaks again?
After repairs, season-start lubrication helps prevent repeat failures. Check all pivot points for rust or corrosion, then apply a light coat of silicone spray or dry lubricant so pins and runner connections move freely without sticking.
Next Articles
How to Fix a Patio Umbrella Arm: Repair or Replace
Step-by-step guide to fix a patio umbrella arm, pole, or spoke with diagnosis, repair, or how to replace parts.
Fix Patio Umbrella Rib: Diagnose and Repair Step by Step
Step-by-step DIY guide to fix a broken or bent patio umbrella rib, aligning parts and restoring smooth opening
Broken Patio Umbrella Repair Guide: Diagnose and Fix Fast
Diagnose and repair a broken patio umbrella fast with step by step checks, fixes for common parts, and maintenance tips.