
A broken arm on a patio umbrella is almost always fixable at home for under $50 and an hour of your time, provided you can tell an arm from a rib and know whether you're dealing with a crack, a bend, or a completely snapped joint. RoyMech, Rivet overview & typical sizes/strength notes notes that Typical pop/blind rivet and small fastener sizes used in consumer umbrella hubs fall in the 3/32" (≈0.094") to 3/16" (≈0.187") range; service practice is to drill out old rivets and replace with appropriately sized rivets or small stainless bolts, service manuals (automotive/service manuals and rivet suppliers) describe drilling out rivet heads and installing new blind rivets blank" rel="noopener noreferrer">RoyMech — Rivet overview & typical sizes/strength notes. Most of what people call a 'broken arm' turns out to be a cracked fiberglass rib, a popped rivet at the hub, or a bent aluminum strut, and each one has a straightforward repair path. This guide walks you through diagnosing the exact failure, gathering the right parts, and completing a safe, lasting repair step by step. For quick troubleshooting and emergency fixes, see the related guide on broken patio umbrella.
Patio Umbrella Broken Arm Repair: Diagnose, Fix, Prevent

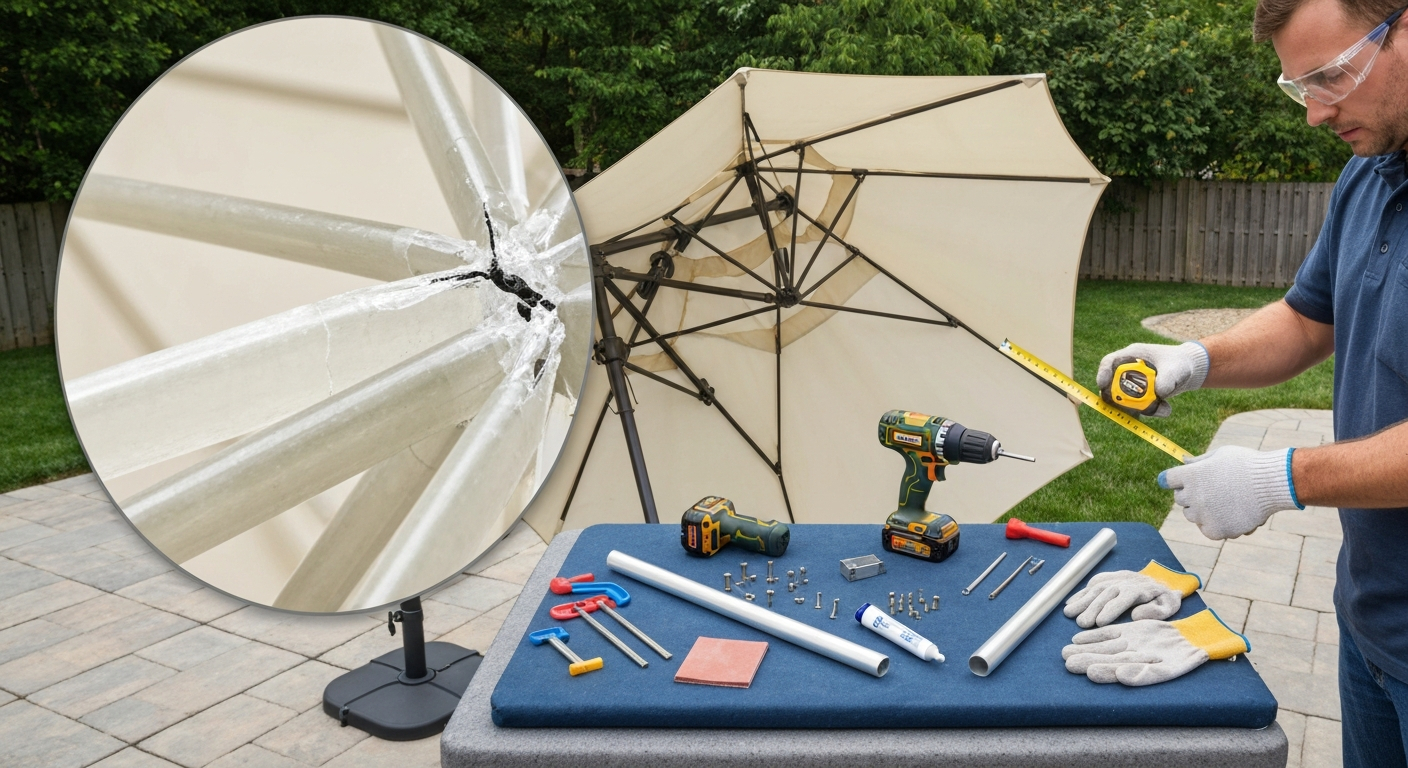
Quick diagnosis: tell arm vs rib vs hub vs joint damage in 2 minutes
Before you order a single part, spend two minutes working through this checklist. The fix you need depends almost entirely on which piece actually failed. Close the canopy, flip or tilt the umbrella so you can see the frame clearly, and run through the following.
- Open the canopy slowly and watch which panel sags or collapses — that panel points you to the failed rib or arm supporting it.
- Feel each rib (the long spokes that run from the hub out to the canopy hem) for cracks, kinks, or soft spots. Fiberglass ribs crack with a visible white fracture line; wooden ribs split along the grain; aluminum ribs crease or dent.
- Check the main arm (the thicker, longer piece that angles out from the center pole to support the rib cluster on offset/cantilever models) for a visible bend, crease, or full break.
- Wiggle each rib at the hub (the central fitting where all ribs meet). If a rib flops but looks intact, the rivet or pin connecting it to the hub has failed, not the rib itself.
- Look at the runner hub (the sliding ring that travels up and down the pole) — cracked plastic, a stuck runner, or a missing strut pin means hub or joint damage.
- Try the crank or pulley: if the umbrella won't open but the frame looks fine, the cord, pulley, or crank gear is the culprit, not the arm or rib.
- If you see a sharp 90-degree bend or complete separation on the central support arm of a cantilever model, that is a true broken arm requiring sleeve repair or full-arm replacement.
If your checklist points to a bent arm rather than a clean break, or to multiple cracked ribs at once, jump ahead to the DIY vs replacement decision section before you commit to parts. A single broken rib is almost always worth fixing; four broken ribs on a ten-year-old frame usually isn't.
Patio umbrella anatomy: the parts that break
Understanding the vocabulary saves you from ordering the wrong part. Here is a plain-language rundown of every component that commonly fails, organized from the canopy edge inward toward the pole.
- Ribs: The long, slender spokes that radiate from the hub and support the canopy fabric. Most 9–10 ft consumer umbrellas have 8 ribs. Ribs are made from fiberglass, aluminum, or wood and are the most commonly broken component.
- Struts (also called support arms or spreaders): Shorter diagonal braces that run from the runner hub (lower) up to the mid-point of each rib, giving the canopy its domed shape. A broken strut lets a canopy panel droop even when the rib itself is fine.
- Main arm: On offset and cantilever models, this is the large-diameter structural tube that angles out from the vertical pole to hold the canopy away from the base. This is what most people mean by 'broken arm' in the truest sense.
- Upper hub: The fixed fitting at the top of the pole where all ribs are pinned. Hub cracking or pin-hole ovalization means ribs wobble or fall loose.
- Runner hub (slider): The ring that slides up the pole as the umbrella opens, pushing the struts outward. Cracked runner plastic or a stuck runner is a common failure on older umbrellas.
- Hub pins and rivets: Small metal fasteners that hold ribs and struts to the hub. When a rivet shears, the rib appears to 'fall off' even though both the rib and hub are undamaged.
- Tilt mechanism: A ratchet wheel, collar, or push-button tilter near the top of the pole. Damage here affects tilt angle but not the structural integrity of the arm or rib.
- Crank and lift cord: The handle/gearbox (crank) or rope-and-pulley (cord-lift) system that opens and closes the canopy. A jammed crank can cause someone to force the frame and snap a rib, but the crank itself is a separate repair.
Common failure types and what they look like
Each failure type has a specific visual signature, and once you know what you're looking at, diagnosis takes about 30 seconds per component.
| Failure type | Visual symptoms | Common cause |
|---|---|---|
| Cracked fiberglass rib | White or chalky fracture line across the rib, panel sags at that spoke, rib may still be held by canopy hem | Wind load, UV embrittlement over several seasons, forced closure |
| Bent aluminum arm/rib | Visible kink or bow, rib no longer sits straight when closed, canopy puckers on one side | Single high-wind event, leaning heavy objects against open umbrella |
| Snapped wooden rib | Clean split along grain or full break, splinter visible at fracture | Rot weakening the wood, impact, or forcing the canopy open when wet/swollen |
| Detached rivet or pin | Rib flops freely at the hub, small metal stub or hole visible at hub attachment point | Fatigue from repeated open/close cycles, corrosion of aluminum rivet |
| Cracked hub (plastic) | Rib cluster feels loose or wobbles, visible crack radiating from pin hole in hub body | UV degradation of plastic over 5–8 years, overtightening, freeze-thaw |
| Torn or detached joint (rib-to-strut) | Strut hangs loose, panel droops mid-span rather than at the tip | Rivet shear at the rib mid-point bracket, canopy overfilled with water weight |
| Broken cantilever main arm | Sharp bend or complete separation of the large support arm, canopy tilts dramatically to one side | Severe wind, base not anchored, improper storage with canopy open |
Safety first: gear, workspace setup, and weather rules
Umbrella repair sounds low-stakes, but you're working with metal edges, rivets that can pop at speed, epoxy fumes, and in some cases a structure that can suddenly spring open. Do not skip this section.
Personal protective equipment
- Safety glasses: mandatory when drilling out rivets. A blind rivet mandrel can eject at eye level.
- Work gloves: cut-resistant gloves when handling broken fiberglass (splinters are fine and nearly invisible) or sharp aluminum edges.
- Dust/particulate mask (N95 or better): required when sanding fiberglass. Fiberglass dust is a respiratory irritant.
- Nitrile gloves: when mixing and applying two-part epoxy. Skin sensitization from uncured epoxy resin is a real and cumulative risk.
Workspace and weather precautions
- Work with the umbrella fully closed and the base secured, or lay the pole horizontally on a padded workbench. Never work on an open, vertical umbrella in anything above a calm breeze.
- Do not attempt repairs in winds above 10 mph (16 km/h). An open frame can catch a gust and become a projectile.
- Epoxy and most solvent-based adhesives require ambient temperatures above 50°F (10°C) to cure properly. Cold slows or prevents hardening.
- Keep a fire extinguisher nearby if you are using a heat gun to soften adhesive or straighten a thermoplastic component.
- If the umbrella has a heavy cantilever arm, have a second person support it while you work. A falling arm can cause serious injury.
Tools and parts checklist
Gather everything before you start. Mid-repair parts runs are frustrating and let epoxy cure in the wrong position. Here is what you need for the full range of repairs covered in this guide.
Hand tools
- Cordless drill with a 3/32" and 3/16" bit set (for drilling out old rivets)
- Pop rivet gun (hand-squeeze or ratchet style)
- Needle-nose pliers and flathead screwdriver (for removing rivet mandrel stubs and old pin clips)
- Tape measure and marker (for measuring rib length and sleeve position)
- Hacksaw or pipe cutter (for trimming replacement sleeves or ribs to length)
- Sandpaper: 80-grit and 120-grit (for surface prep before epoxy bonding)
- C-clamps or hose clamps, 2–4 pieces (for clamping sleeves during epoxy cure)
- Heat gun (optional, for softening stubborn adhesive or gently warming thermoplastic hubs)
- Bench vise (optional but very helpful for holding ribs steady while you work)
Replacement parts and consumables
- Model-matched replacement rib: measure total rib length and end-bracket style before ordering. Ribs are NOT universal — a Treasure Garden rib will not fit a Galtech hub. Plan on $50–$150 per rib from specialty retailers like PatioUmbrellaStore.
- Aluminum sleeve/splint tube: a short section of aluminum tube with an ID that fits snugly over (or inside) the broken rib. Hardware stores sell aluminum tube stock in standard sizes; buy a piece 8–12 inches long.
- Pop rivets: stainless-steel blind rivets in 3/32" and 3/16" diameter. Stainless gives roughly 2–3× the shear strength of aluminum rivets of the same size. Buy a mixed pack.
- Small stainless bolts, nuts, and washers (M4 or M5 / #8-32 or #10-24) as alternatives to rivets where you want the ability to disassemble.
- Two-part structural epoxy: a slow-cure (30–60 minute) variety gives you working time to position a sleeve correctly. 5-minute epoxy is too brittle for load-bearing joints.
- Fiberglass repair cloth (optional): 6 oz woven glass cloth for wrapping a fiberglass rib repair over the epoxy.
- Zip ties (heavy-duty, UV-resistant): for temporary emergency fixes only. Not a long-term structural solution.
- Hose clamps or jubilee clips: useful as a backup clamp on a splint when you run out of C-clamps.
Temporary emergency fix materials
If you need the umbrella usable while you wait for a replacement rib to arrive, you can stabilize a cracked rib with a pair of heavy-duty zip ties lashed tightly around the fracture point and a short wooden dowel or chopstick acting as a splint. This holds the panel up for light use, but close the umbrella at night and in any wind above a light breeze. Do not rely on a zip-tie fix for more than a few days.
DIY repair, replacement, or professional welding: how to decide
Not every broken arm is worth fixing, and not every fix is something you should attempt yourself. Here is an honest framework I use when I look at a damaged umbrella.
When DIY repair makes sense
- Single cracked or broken fiberglass rib on a model where a replacement rib costs $50–$80: straightforward swap, saves the umbrella.
- A popped rivet or loose hub pin: 20-minute fix with a drill and pop-rivet gun.
- A cracked wooden rib with no rot present: epoxy consolidation and sleeve splinting is effective.
- A minor bend in an aluminum strut (not a full crease or fracture): 6061-T6 aluminum can be cold-straightened carefully if the bend is gradual, but crease-bent or fractured aluminum should be replaced, not straightened.
- Detached strut-to-rib joint: drill out the old rivet and install a new stainless-steel blind rivet.
When replacement parts make more sense than repair
- Three or more ribs are broken or cracked: at this point, the frame has likely been overstressed and other ribs are compromised. A full frame replacement (available from $189–$399 from parts resellers) may cost less than multiple individual ribs.
- The hub itself is cracked or the pin holes are ovalized: the hub is the structural core, and a cracked hub will fail again under load. Replace it.
- The main cantilever arm has a full fracture: a welded repair on a large-diameter aluminum arm is possible but requires TIG welding by a skilled fabricator and likely a post-weld heat treatment to restore temper. DIY is not realistic.
- The umbrella is more than 8–10 years old with widespread UV degradation: fiberglass becomes brittle and aluminum develops fatigue cracks across the frame. Repair one thing and something else breaks next week.
When to call a professional welder or fabricator
A fractured main arm on a high-end commercial cantilever umbrella is the main scenario where professional welding pays off. A TIG weld on 6061 aluminum, followed by re-anodizing or powder coating, can restore full structural strength. Budget $75–$200 for the weld work depending on your area. This only makes economic sense if the umbrella's replacement cost is $400 or more. Note that some tilt housings on models like certain Galtech configurations are listed in their parts documentation as unserviceable, meaning the entire hub/tilt assembly must be replaced as a unit, not repaired.
Quick decision checklist
| Scenario | Recommended action | Rough cost | Time |
|---|---|---|---|
| Single cracked fiberglass rib, hub intact | DIY rib replacement | $50–$100 | 45–90 min |
| Cracked wooden rib, no rot | DIY epoxy splint | $10–$20 | 2 hrs + 24 hr cure |
| Popped rivet at hub or strut joint | DIY rivet replacement | $5–$15 | 20–30 min |
| Bent (not creased) aluminum strut | DIY cold-straighten carefully | $0 | 15 min |
| Creased or fractured aluminum strut | Replace strut or sleeve-splice | $20–$60 | 1–2 hrs |
| Cracked plastic hub | Replace hub assembly | $30–$80 | 1–2 hrs |
| Fractured cantilever main arm (high-value umbrella) | Professional TIG weld | $75–$200 | 1–3 days |
| 3+ broken ribs, old umbrella | Full frame replacement or new umbrella | $189–$399+ | 2–4 hrs assembly |
Step-by-step: replace a broken rib
This is the most common repair and also the most satisfying. A single broken rib is almost always a direct swap, and the whole job takes less than an hour once you have the right replacement rib in hand. Take photos of the old rib before you remove it, including how the canopy hem attaches and how the strut bracket is oriented. For step-by-step parts sourcing and a parts list, see the guide to repair broken patio umbrella rib. You will thank yourself later.
Before you order your replacement rib
Ribs are model-specific. Measure the old rib from the center of the hub-end pin hole to the tip, note the material (fiberglass or aluminum), and photograph the hub-end bracket and tip fitting. Galtech uses manufacturer part codes in the format P-RIBxxxx, and their downloadable exploded parts diagrams show exactly which rib fits which model. Treasure Garden provides model-specific manuals and has a customer-support channel for part inquiries. Abba Patio posts assembly manuals on manuals.plus with exploded diagrams that include part references. Tropitone explicitly states that replacement parts are available for many current and discontinued lines. For any brand, contact the manufacturer's support channel with your model number rather than guessing from a generic listing.
Removal
- Close the umbrella completely and lay it flat on a padded surface or across two sawhorses. Put on safety glasses and gloves.
- Locate the rivet or pin at the hub where the broken rib attaches. Most consumer umbrellas use a blind rivet (a smooth-headed fastener with no thread visible). Some higher-end models use a clevis pin with a cotter clip.
- For a rivet: use a 3/32" drill bit and drill straight through the center of the rivet head at low speed until the head pops free. Do not drill deeper than the head thickness or you will enlarge the hub hole. Remove the mandrel stub with needle-nose pliers.
- For a clevis pin: remove the cotter clip with pliers, slide out the pin, and set it aside if it is undamaged.
- Slide the rib out of the hub socket. If the tip of the rib passes through a canopy hem pocket, slide the rib out from the hub end.
- Note where the strut attaches mid-rib: if your strut has a separate bracket riveted to the rib, record the distance from the hub pin hole to the strut bracket center. This measurement is needed when fitting the new rib.
Measuring and fitting the replacement
- Lay the old rib next to the new one and confirm they match in total length, cross-section shape, and end-fitting style. Even a 1/4-inch length difference will cause the canopy to pucker or pull.
- If the strut bracket is a separate piece, transfer it to the new rib at the measured distance from the hub end. Drill the appropriate rivet hole and install a new stainless-steel rivet.
- Slide the new rib into the hub socket, aligning the pin hole in the rib with the pin hole in the hub.
- Thread the canopy hem pocket over the rib tip if applicable.
Securing the fasteners
- Insert a new 3/16" stainless-steel blind rivet through the aligned hub and rib holes.
- Pull the rivet gun trigger firmly and steadily until the mandrel snaps — you will hear a clear click. The rivet head should sit flush against the hub surface.
- Test by pulling the rib sideways: it should have no lateral play but should pivot smoothly in the plane of opening.
- If using a clevis pin, insert the pin, and install a new stainless cotter clip or e-clip (do not reuse the old one if it is bent).
- Slowly open the umbrella and check that the repaired rib rises evenly with the others. If it lags, check that the strut is seated at its lower hub attachment.
Step-by-step: splinting or sleeving a cracked wooden or fiberglass arm
A sleeve splice is the right move when a rib or arm has a localized crack but both halves are otherwise straight and sound. It works best on fiberglass and wood, and on aluminum when the tube wall is not creased. If the aluminum is kinked or folded, replace the section rather than splinting it. The finished repair recovers a useful portion of the original strength if you do the surface prep and epoxy application correctly.
Materials for a sleeve splice
- Aluminum sleeve tube: select a tube whose inner diameter is a snug slip-fit over the rib outer diameter. For a typical 10 mm fiberglass rib, a 12 mm OD x 10 mm ID aluminum tube works well. Cut the sleeve to 8–10 inches (200–250 mm) so it extends at least 4 inches on each side of the crack.
- Two-part slow-cure structural epoxy (30-minute or 60-minute pot life): products like Loctite Epoxy Heavy Duty or 3M DP420 work well. Avoid 5-minute epoxy for structural joints.
- 6 oz fiberglass woven cloth (optional but recommended for fiberglass rib repairs): wrapping two layers over the sleeved joint adds significant bending stiffness.
- 80-grit sandpaper for surface prep.
- Hose clamps or C-clamps (2–4 pieces).
- Masking tape to protect adjacent surfaces from epoxy drips.
The splice procedure
- Close and lay flat the umbrella. Put on nitrile gloves, safety glasses, and your N95 dust mask before sanding.
- Sand the outer surface of the rib for 4 inches on each side of the crack with 80-grit paper. Sand until the surface looks uniformly scuffed with no gloss remaining — epoxy bonds to the surface, not to the finish. Wipe clean with isopropyl alcohol and let dry.
- Sand the inner bore of the aluminum sleeve lightly with a rolled-up strip of 80-grit paper. Wipe clean.
- If the crack has allowed the rib to slightly separate, squeeze the two halves together and wrap a single layer of masking tape around the crack point to hold alignment while you work.
- Mix your two-part epoxy thoroughly per the instructions — typically a 1: 1 ratio by volume. Mix for a full 60 seconds, scraping the sides of the mixing cup.
- Apply a thin, even coat of epoxy to the sanded outer surface of the rib over the full 8–10 inch working length. Also apply a thin coat to the inside bore of the sleeve.
- Slide the sleeve over the rib, centering it over the crack. Rotate the sleeve slightly as you push it on to spread the epoxy evenly.
- Clamp the sleeve firmly with hose clamps or C-clamps. You want even pressure around the circumference, not a pinched clamp. Wipe away any squeeze-out immediately with a paper towel dampened with isopropyl alcohol.
- Optional fiberglass wrap (for fiberglass ribs): saturate strips of 6 oz glass cloth in your epoxy mixture and wrap two layers tightly over the sleeve, extending 1 inch beyond each sleeve end. Smooth with a gloved finger to remove air bubbles.
- Let the assembly cure undisturbed for the full manufacturer-specified cure time. For most slow-cure epoxies this is a minimum of 24 hours at room temperature. Do not try to rush it with heat unless the product specifically allows it.
- After cure, remove the clamps and inspect the joint. It should feel solid with no movement at the crack. Lightly sand any rough epoxy blobs with 120-grit paper.
- Reinstall the rib in the hub (if it was removed) using a new stainless rivet, or simply open the umbrella slowly and verify the repaired rib tracks evenly with its neighbors.
A note on fiberglass vs wood vs aluminum splints
Fiberglass ribs fail in brittle fracture with no significant yielding beforehand, which is why the break looks clean and sharp. A properly applied epoxy sleeve with fiberglass overwrap can recover a meaningful percentage of original bending strength. Wood ribs that split along the grain without rot can be similarly repaired, but if you see any soft, discolored, or crumbling wood at the fracture, that is rot and the timber needs replacing, not splinting. Aluminum sleeves work on both wood and fiberglass substrates as an outer reinforcing tube. On aluminum-over-aluminum joints, use an epoxy that is rated for metal bonding, and add a stainless rivet through the sleeve and rib at each end of the splice for mechanical backup.
Straightening or replacing a bent aluminum arm
If the main structural arm on a cantilever umbrella has a gradual curve from a single wind event, and the aluminum has not kinked, you can sometimes cold-straighten it. For step-by-step instructions on repairing or replacing umbrella arms, see the guide on how to fix patio umbrella arm. For step-by-step instructions, see the guide on how to fix bent patio umbrella arms. Clamp the arm in a padded vise close to the bend, apply steady manual pressure in the opposing direction, and work slowly. Stop and check alignment every few degrees. The typical alloys used in patio umbrella frames are 6061 or 6063 variants. 6061-T6 has a yield strength around 275 MPa and can be carefully cold-worked over a gradual bend radius, but it will crack if you try to work a sharp kink. The softer 6063 bends more forgivingly. If you see any surface cracking during straightening, stop and replace the arm. A cracked aluminum arm is not a structural member you want supporting a canopy over people.
For a complete fracture or a deeply kinked arm, replacement is the right call. Contact your umbrella's manufacturer with the model number. Galtech, Treasure Garden, and Tropitone all publish parts diagrams and offer support channels for replacement component inquiries. For cantilever frames with welded main arms, a TIG weld by a qualified fabricator who works with aluminum is a viable path if the umbrella is high-value and the arm geometry is accessible. Do not attempt this repair with a MIG welder and ER4043 wire unless you have genuine TIG experience with thin-wall aluminum tube.
Fixing detached joints and sheared rivets
A detached rivet is one of the fastest and most satisfying repairs you can do. Consumer umbrella hubs typically use blind rivets in the 3/32" to 3/16" diameter range. When an aluminum rivet shears through fatigue or corrosion, the rib it held simply flops loose. The repair procedure is: drill out the remains of the old rivet with a bit matching the rivet body diameter (not the head), clear any debris from the hole, align the rib back in the hub socket, and install a new 3/16" stainless-steel blind rivet. Stainless rivets provide roughly 2–3 times the shear strength of aluminum rivets of the same diameter, so upgrading to stainless on the replacement is a straightforward structural improvement. If the hub pin hole has become ovalized from the rivet working back and forth, and the hole is now visibly egg-shaped, the hub needs replacement, not just a new rivet.
When the tilt or crank is making the problem worse
A jammed crank or a frayed lift cord causes people to force the frame during opening, and that force often snaps a rib right at the hub. If you have a broken rib and a sticky crank, fix both or you will be back here next season. A stiff crank usually needs lubrication: spray a silicone-based lubricant (not WD-40, which attracts dirt) into the crank housing and work the handle back and forth. A stripped crank gear needs a replacement crank assembly, and most brands sell these as a unit. A frayed lift cord should be replaced before it snaps mid-open; replacement cord sets are available for most market-umbrella styles and the restringing process is covered in detail in a related guide on this site. For step-by-step instructions on repairing detached arms and ribs, see our guide on how to fix patio umbrella arm. See our guide on fixing patio umbrella ribs for detailed, step-by-step instructions and parts recommendations. Some Galtech tilt housings are listed in their parts documentation as unserviceable as individual components, meaning if the tilt mechanism is broken, the full hub-and-tilt assembly must be replaced as a unit.
Brand-specific guidance: where to find parts
The three most important things to have before contacting any manufacturer or parts retailer are: your umbrella's model number (usually on a label near the base collar or on the crank housing), a photo of the broken part, and the total rib or arm length in inches. With those three things, any reputable parts supplier can match a replacement.
| Brand | Parts resource | Tip |
|---|---|---|
| Treasure Garden | Model-specific manuals, exploded hub/tilt/adapter diagrams, customer support channel | Use the support channel with your model number for warranty inquiries on recently purchased umbrellas |
| Galtech | Downloadable exploded parts diagrams, parts list with codes (P-RIBxxxx, P-HUBxxxx, P-PINxxxx) | Note: some tilt housings are listed as unserviceable — confirm before ordering individual parts |
| Tropitone | Care, maintenance and replacement parts documentation; parts available for current and discontinued lines | Explicitly covers aluminum frame replacement parts — call with model and part description |
| Abba Patio | User/assembly manuals on manuals.plus (e.g., 10ft Vienna offset umbrella); exploded diagrams with part references | Download the PDF for your model and use the part reference numbers when ordering |
| Generic/unknown brand | Specialty retailers like PatioUmbrellaStore sell compatible ribs for many frames | Measure carefully — ribs are not universal. Bring the old rib to a local shop if possible |
Realistic costs and time estimates
Repair costs vary widely depending on whether you need a single rivet or an entire replacement frame. Here is an honest summary of what you should expect to spend, based on current part pricing from specialty retailers.
- Pop rivets and pins: $5–$15 for a full assortment box, enough for many repairs.
- Structural epoxy and sandpaper: $10–$20 for enough to do several sleeve splices.
- Aluminum sleeve tube stock (hardware store): $5–$12 for a 12-inch section.
- Single replacement fiberglass or aluminum rib (OEM or compatible): $50–$150 depending on brand and model.
- Full replacement frame: $189–$399 from parts resellers, sometimes more for commercial or designer brands.
- Replacement canopy (if the frame is sound but fabric is worn): around $92 for a standard 9 ft 8-rib canopy at major home-improvement retailers, which is often cheaper than a new umbrella.
- Professional TIG weld repair (fractured cantilever arm): $75–$200 depending on your area.
When to retire the umbrella and how to dispose of it
Some umbrellas are not worth repairing. If you have an umbrella that is more than 8–10 years old with widespread UV-whitened fiberglass, cracked plastic hubs across multiple points, and a frame that creaks and flexes noticeably when open, it has given you its service life. Ongoing repairs will cost more than a comparable new umbrella, and a structurally compromised canopy is a safety hazard in any wind.
Before discarding, strip the canopy fabric and check whether it is polyester or solution-dyed acrylic. Polyester fabric can go in curbside recycling in some municipalities if washed and dried. Aluminum components (frame tubes, hub bodies) are scrap metal and can be taken to a metal recycler. Fiberglass ribs are not recyclable through standard channels in most areas and will go to landfill, but keeping them out of the waste stream by repairing rather than replacing is exactly the point of the repair-first approach. If the base is cast iron or concrete, check whether a neighbor or community garden can use it.
Prevention and maintenance: keep the frame from breaking again
Most broken ribs and bent arms are preventable. The two biggest causes are leaving the umbrella open in wind and skipping the annual inspection. Here is a maintenance routine that adds years to a frame.
Wind and weather habits
- Close the umbrella any time wind picks up above 15–20 mph (24–32 km/h). A standard residential patio umbrella is not designed to function as a wind-resistant shade sail.
- Never leave the umbrella open overnight. Temperatures drop, wind increases, and you are not there to close it when a storm rolls in.
- Always anchor the base properly. A base weight appropriate for your umbrella diameter (typically 50 lbs minimum for a 9 ft umbrella, more for offset models) prevents the whole unit from tipping, which is the main cause of main-arm fracture on cantilever designs.
- Remove any pooled water from the canopy before closing. A gallon of water weighs about 8 lbs. That weight on a closing canopy torques the ribs asymmetrically and fatigues the hub pins.
Annual inspection checklist
- At the start of the season, open the umbrella fully and look at every rib from tip to hub for hairline cracks, white stress marks, or unusual bends.
- Wiggle each rib side-to-side at the hub to check for loose rivets or ovalized pin holes.
- Inspect the lift cord or crank mechanism. Frayed cord should be replaced before it snaps mid-operation.
- Check all visible rivets and fasteners for corrosion. Replace any that show white powdery oxidation (aluminum) or red rust (steel).
- Lubricate the crank gear, tilt mechanism, and any pivot points with a silicone spray.
- Check the hub plastic (upper hub and runner) for UV cracking. A hub that is starting to crack will fail completely within a season or two under load.
- At the end of the season, close the umbrella, remove the canopy if possible, and store the frame in a dry place or in a fitted cover. Moisture trapped under a closed canopy through winter accelerates both wood rot and aluminum corrosion.
Repair and maintenance work on the frame fits naturally alongside fixing other umbrella issues you may encounter, from bent components and broken ribs to deeper structural problems with the hub assembly. Addressing one problem while the umbrella is already apart is always more efficient than making separate trips back to it, so use any repair session as an opportunity to run through the full inspection checklist above.
FAQ
How do I quickly diagnose whether the problem is a broken arm, a broken rib, or hub/joint damage?
Inspect visually with the umbrella closed and open: 1) Broken rib: visible crack or missing section along the thin member that supports the canopy (often near outer end or midspan); canopy will sag locally. 2) Broken arm/strut (main structural member): thicker tubing between hub and pole—look for fracture, split, or separation at welded/bolted joints; failure here often makes the umbrella lopsided or unable to hold shape. 3) Hub/joint damage: cracked plastic/metal hub, ovalized pin holes, missing rivets/pins, or pulley/tilt housing damage—look at the runner, tilt mechanism, and where ribs connect to hub. 4) Quick checks: try gently opening/closing by hand (support canopy) and look for play/wobble at pins or audible crunching; run your fingers along ribs to find cracks or softness (rotted wood). Photograph damage and compare to your model’s exploded diagram (manufacturer manual) to map part numbers.
What criteria should I use to decide DIY repair vs replacing the umbrella or hiring a pro (welding/metalwork)?
Use these rules of thumb: - DIY repair likely: single rib fracture, small split in wooden rib, minor fiberglass crack, loose/missing rivet, slightly bent aluminum arm that can be straightened, or detached joint where replacement rivet/bolt works. - Consider pro/replacement when: main mast/primary load-bearing arm is fractured (especially multiple cracks), large hub/tilt housing is cracked/stripped, aluminium tubing has multiple deep cracks, alloy unknown and welding required, or safety-critical welds are needed (mainspar with high load). - Cost/time test: if replacement parts cost ≥50–70% of a new umbrella or the repair requires specialist welding, replacement often makes sense. - Safety: if the umbrella bears large loads (commercial, heavily cantilevered/large offset models) or the repaired member would be in tension/shear with uncertain strength, prefer professional repair or replacement.
What basic tools and parts should I have on hand before attempting repairs?
Tools: drill with metal/wood bits, rivet gun (blind/pop rivet), hammer, punch/drift, adjustable wrench set, socket set, needle files, hacksaw or tube cutter, clamp(s), C‑clamp or pipe vice, sandpaper, heat gun, respirator/gloves/eye protection. Parts & consumables: replacement ribs/arms (model‑specific), stainless pop rivets (3/32"–3/16" common), small stainless bolts/nuts/washers, metal or composite sleeves (aluminum tubing sleeves), two‑part epoxy or marine epoxy, fiberglass cloth & resin (for fiberglass ribs), wood glue/epoxy for timber ribs, hose clamps, zip ties, temporary hose/duct tape, stainless steel wire, anti‑seize/lubricant. Keep the umbrella manual or exploded diagram and part numbers (manufacturers: Treasure Garden, Galtech, Tropitone, Abba Patio links help find parts).
Step‑by‑step: how do I replace a snapped rib (aluminum, fiberglass or wood)?
1) Close umbrella and secure (pole in base, canopy down). 2) Remove canopy fabric or slide canopy back to expose rib ends if needed. 3) Identify how the rib attaches to the hub and tip (rivet, bolt, bracket). Photograph and note fasteners. 4) Drill out rivets or remove bolts holding the broken rib to the hub and tip bracket. Support hub to prevent further damage. 5) Remove broken rib. Measure length and note end‑bracket style; source a model‑specific replacement rib. 6) Install replacement: align end bracket at tip and hub, secure with new rivet or stainless bolt/nylock nut sized to match hole (replace with same or next larger rivet and ream hole carefully if needed). Use stainless hardware where possible. 7) Open and test operation slowly. Retension canopy if needed. 8) Dispose of broken rib per local recycling rules; keep old part for reference.
Step‑by‑step: how do I splint or sleeve a cracked wooden or fiberglass arm/rib?
1) Safety: wear gloves and eye protection. Close and secure the umbrella. 2) Clean area—remove loose fibers/wood, sand to good surface, and dry. 3) For wood: inject wood epoxy or two‑part epoxy into splits; clamp and insert a hardwood spline or glued dowel if split; wrap with fiberglass cloth and epoxy for reinforcement if needed. 4) For fiberglass: sand around break to feather edges; wrap with fiberglass cloth and epoxy laminating resin, using 2–4 plies to restore section; allow full cure. Alternatively, sleeve with an internal metal or composite tube slightly undersized so it can be epoxied inside the damaged tube—cut sleeve to span at least 2–3 times the tube diameter on each side of break. 5) Clamp and cure fully per epoxy instructions (often 24–48 hours). 6) Reinstall and test cautiously; avoid high loads until proven. Splint repairs are best for small breaks or where replacement parts are expensive—retire part if load-bearing failure reappears.
How do I straighten or replace a bent aluminum arm safely?
answer":"1) Assess severity: small bend can be cold‑straightened; creased or cracked tube requires replacement. 2) Remove the arm from the hub or pole to avoid stressing joints. 3) Support tube in a padded vise or between pipe clamps on a sturdy surface; use soft jaws to avoid marring. 4) Heat selectively with a heat gun (not an open flame) if cold‑straightening is needed—6061/6063 alloys have temper limits; avoid overheating (keep below ~250–300°C; if unsure, avoid heat and accept replacement). 5) Use a hardwood dowel inside tube or an adjustable spanner and slow bending back into shape; measure alignment against straight reference. 6) Check for cracks after straightening (run hand along seam, look for hairline fractures). If cracks appear or alloy has work‑hardened, replace the arm. 7) If welding is considered, consult a TIG welder experienced with 6061 aluminum; welded repairs on 6061 reduce strength unless heat‑treated afterward—prefer replacement for critical members. 8) Reassemble and test.
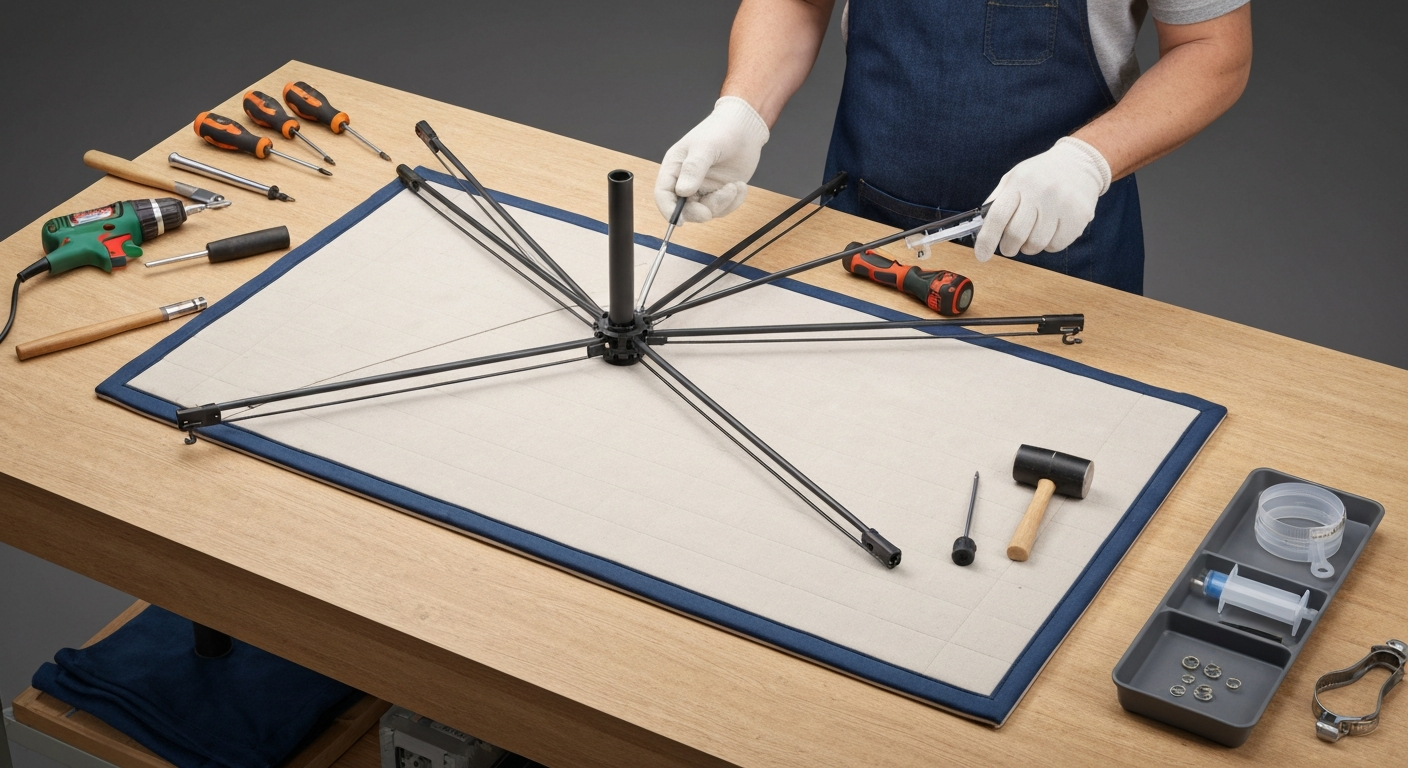
Fix patio umbrella arm: step-by-step DIY repairs, tools, costs, safety tips, temporary fixes and when to replace.
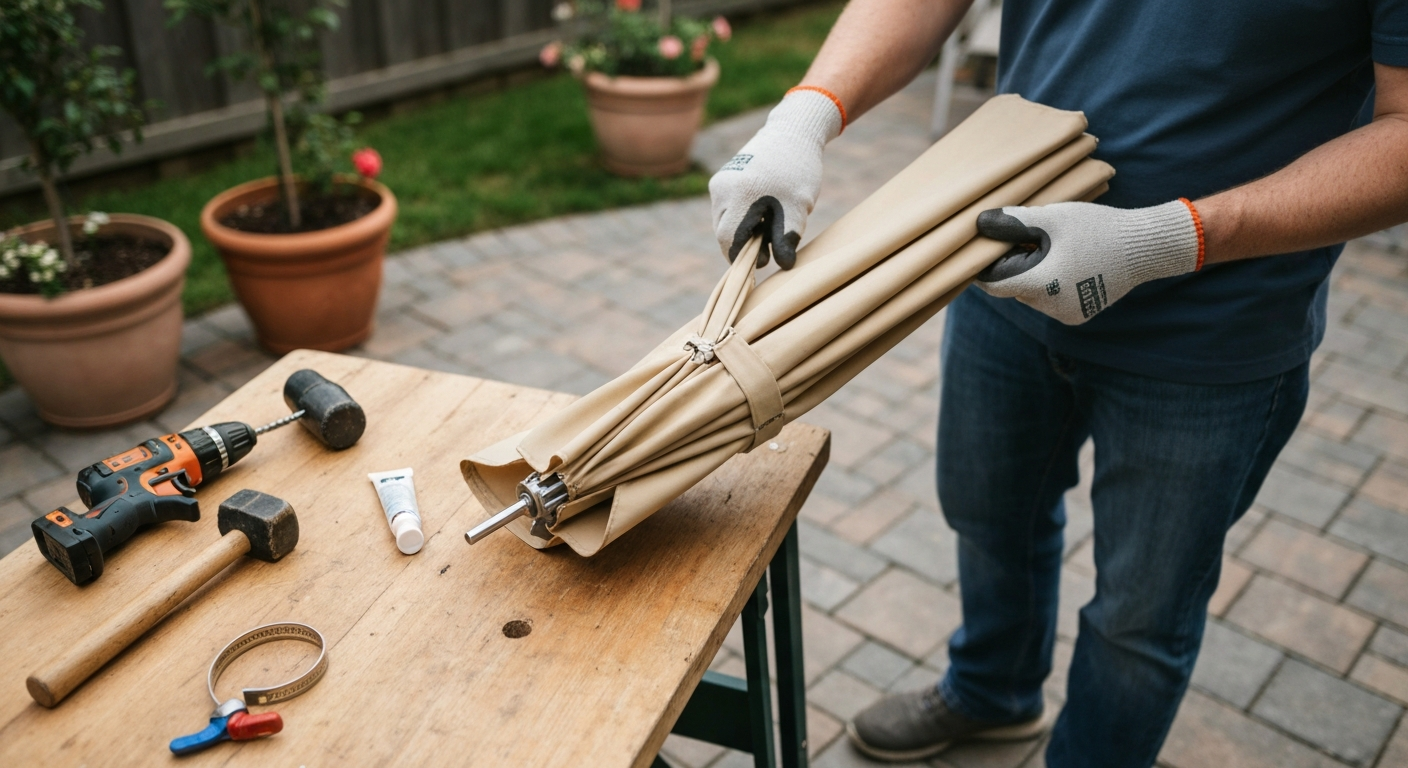
Fix bent patio umbrella: step-by-step repairs for ribs, arms, and pole with tools, costs, and safety tips.
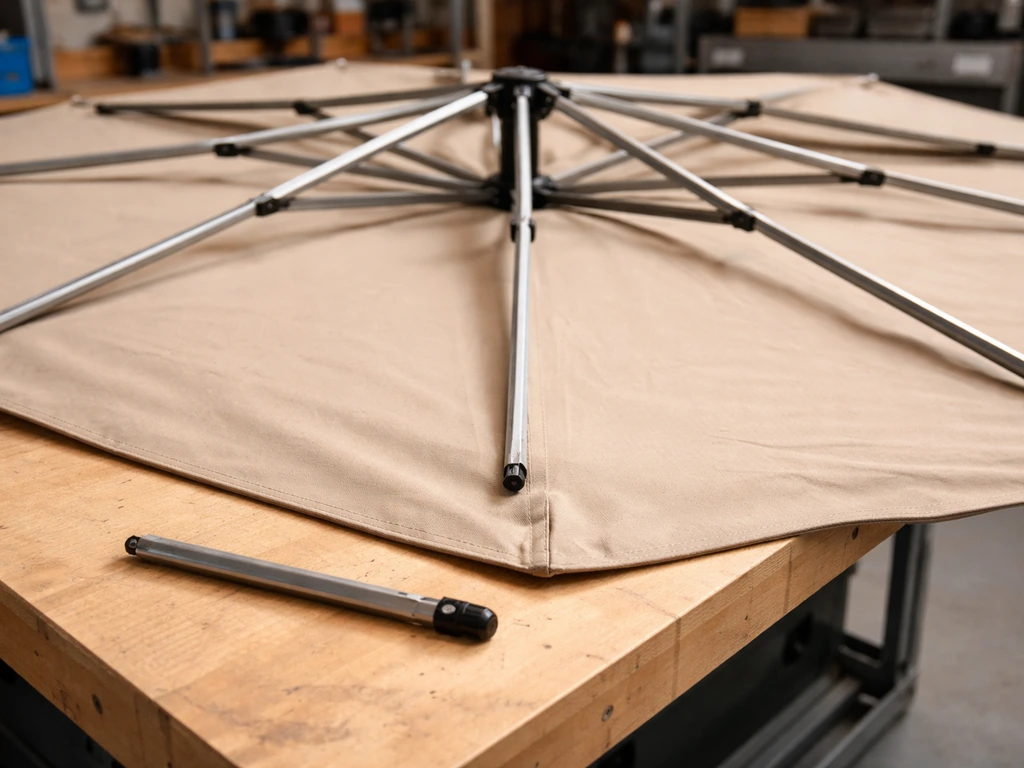
Step-by-step guide to repair a broken patio umbrella rib, inspect damage, replace parts, reassemble, test alignment, pre