
A manual lift patio umbrella is any umbrella whose canopy goes up and down through human-powered effort, whether that means sliding a collar up the pole by hand, pulling a rope through a pulley system, or turning a hand crank that drives a worm gear. Manual-retraction patio awnings work on the same principle: a hand crank or pull cord rolls the fabric in and out along spring-loaded lateral arms, with no motor involved. Neither system is more complicated than it sounds, but getting the assembly right, operating them safely, and knowing how to diagnose problems before they become expensive will save you from replacing equipment that just needs a little attention.
Manual Lift Patio Umbrella Guide: Setup, Repair & Care

Luca Morrison
4 Aug 2026
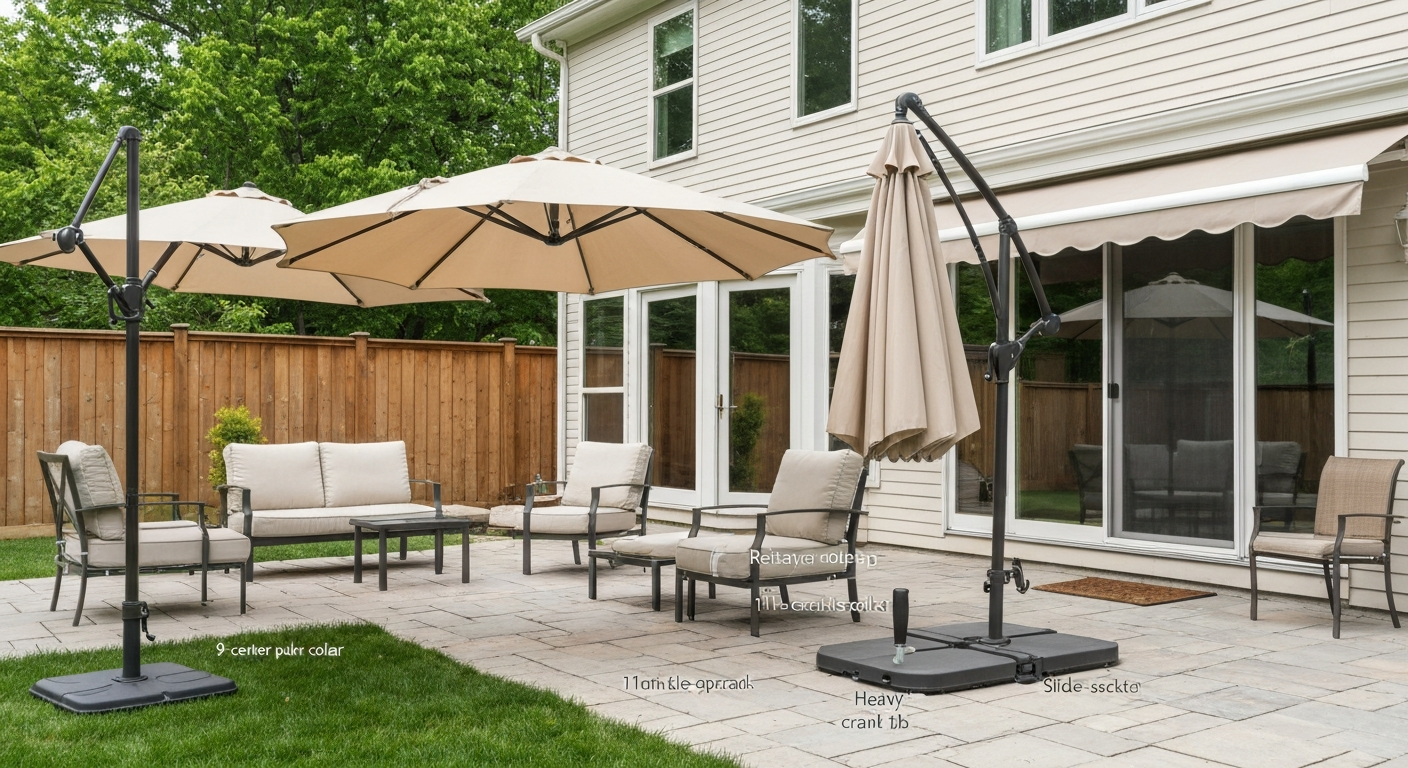
What Exactly Are These Things?
The term 'manual lift' covers a wide range of patio shade hardware, but the common thread is always the same: a person provides the energy to extend or retract the shade. On umbrellas, that usually means a push-up collar, a rope-and-pulley loop, or a crank socket built into the pole. On awnings, it typically means a hand crank connected to a spool that rolls the fabric over a tube, assisted by spring tension built into the arm cassettes. Treasure Garden's assembly documentation, for example, labels these control points explicitly: the 'Open/Close socket' for the crank and the 'slider car' for cord-based systems. Once you understand which type of mechanism your shade uses, every repair and maintenance task becomes much more logical.
Manual patio shades and retractable awnings occupy a broad category that includes everything from a simple 7-foot push-up market umbrella to a 28-foot wide lateral-arm awning mounted to a house wall. The mechanical complexity scales accordingly, but the core principle stays the same. If you are also working with or considering a retractable awning alongside your umbrella, the setup and maintenance differences are worth understanding before you buy or repair.
Push-Up vs Crank: Which Design Is Right for You?
This is the most common question I hear, and the honest answer is that neither design is universally better. They solve the same problem in different ways, and your best choice depends on umbrella size, how often you open and close it, and whether easy DIY repair matters to you.
How Push-Up Mechanisms Work
A push-up (also called slider or collar) umbrella has a fabric sleeve or plastic runner that travels up and down the center pole. You either slide it up by hand or pull a looped rope that runs through pulleys at the hub and finials. A locking collar or push-button pin holds the runner at the open position. These mechanisms have very few moving parts, which makes them cheap, light, and extremely easy to repair. The downside is physical effort: on a large canopy, pushing a heavy umbrella open by hand gets old quickly, and the rope-pulley variants can develop cord fraying or pulley seizure over time. Push-up models are ideal for umbrellas up to about 9 feet where the canopy weight is manageable.
How Crank and Manual Retraction Mechanisms Work
A crank umbrella uses a socket on the pole (usually near the bottom or mid-pole) where a removable handle slots in. Turning the handle clockwise winds a cord onto an internal spool or drives a worm gear that lifts the runner. This mechanical advantage makes opening a large or heavy canopy much easier and gives you more precise control. The tradeoff is a slightly more complex gearbox that can strip or jam if you over-crank, and replacement parts are a bit harder to source. Crank-style systems are preferred for umbrellas over 9 feet or any cantilever model. Manual-retraction awnings follow the same logic: a wall-mounted or side-mounted hand crank rolls the fabric out along tension-loaded lateral arms.
| Feature | Push-Up / Slider | Crank / Manual Retraction |
|---|---|---|
| Typical canopy size | Up to 9 ft | 9 ft and larger; all cantilevers |
| Physical effort required | High on large canopies | Low; mechanical advantage |
| Number of moving parts | Few (collar, pulleys, cord) | More (gearbox, spool, cord) |
| DIY repair difficulty | Easy | Moderate |
| Replacement parts availability | Widely available | OEM-specific; model number matters |
| Risk of over-travel damage | Low | Moderate if over-cranked |
| Best for | Small/medium umbrellas, budget builds | Large umbrellas, awnings, cantilevers |
My recommendation: if you have a straightforward center-pole umbrella under 9 feet, a push-up or rope-pulley model is more than adequate and will be cheaper to maintain. For anything larger, a cantilever, or a wall-mounted awning, the effort savings and control of a crank system justify the added complexity. Manual push-up umbrellas are a whole separate conversation worth exploring if that's your setup.
Size Guidance and Notes for Large Shades
Umbrella and awning size affects almost every decision you make: base weight, bracket count, installation height, tool selection, and whether you need a second person for assembly. Get this wrong and you end up with an unstable structure that's a wind hazard.
Umbrella Sizing
For center-pole umbrellas, the general rule is that the canopy diameter should overhang your table or seating area by about 2 feet on each side. A 48-inch round table needs roughly a 9-foot umbrella. Cantilever models like the Treasure Garden AG25T series require a minimum free-standing base weight of 200 lbs for the model, and the manufacturer explicitly requires two-person assembly. Do not skip that second set of hands. Large cantilevers and side-pole umbrellas shift their center of gravity far off the pole, creating significant tipping moments that a light base simply cannot handle.
12-Foot Manual Retractable Awnings
A 12-foot manual retractable awning sits in a size range that requires at least 3 wall brackets, secured with 3/8-inch lag bolts at least 4 inches long, penetrating a minimum of 2.5 to 3 inches into solid structural wood (per Sunair installation guidelines). The brackets must land on studs or properly backed solid framing, not just drywall or sheathing. At this size, wind loading on the brackets is the dominant structural concern, not the weight of the fabric. Sunair's guidelines are explicit: wind is the largest load these brackets will ever see. For projection beyond 10 feet, mounting height should be at least 9 feet 6 inches at the top of the brackets to maintain useful headroom underneath at the recommended 3/12 pitch. The absolute minimum installation height is 8 feet, and Sunair advises against exceeding 10 feet of projection if you can only achieve 8-foot mounting height. 12-foot manual retractable awnings are a popular size, and the setup details matter considerably for safe installation.
Awning Width and Bracket Count Reference
| Awning Width | Minimum Brackets Required |
|---|---|
| 8–14 ft | 3 brackets |
| 15–17 ft | 4 brackets |
| 18–20 ft | 5 brackets |
| 21–28 ft | 6 brackets |
| 29–40 ft | 8 brackets |
Parts and Tools: Know What You're Working With
Before you can fix or maintain anything, you need to be able to name the parts. I've seen plenty of people struggle to describe what's broken because they don't know what the component is called. Here's a complete labeled reference for both umbrellas and manual awnings.
Manual Lift Umbrella Parts
| Part Name | What It Does | Where to Find It |
|---|---|---|
| Pole / Mast | Structural center column; canopy travels along it | Center of the umbrella |
| Hub / Crown | Junction point where ribs attach at the top | Top of the pole, inside canopy |
| Finial | Decorative cap at the very top of the pole | Tip of the pole above the hub |
| Ribs | Radial arms that hold canopy fabric open | Radiating from the hub |
| Stretchers | Secondary arms linking ribs to the runner/slider | Between ribs and runner |
| Runner / Slider car | Moving collar that travels the pole to open/close canopy | Mid-pole; slides up and down |
| Locking collar / push button | Locks the runner in the open position | On the runner or pole |
| Cord / Rope | Transmits force from crank or pull handle to runner | Runs through pulleys inside pole |
| Pulleys | Redirect cord path through the pole or hub | Inside hub and base of pole |
| Crank handle | Removable handle that fits the crank socket | Stored separately; inserts into socket |
| Crank socket / Open-close socket | Receives the crank handle; drives the internal spool | Mid or lower pole |
| Tilt knob / Tilt mechanism | Allows canopy angle to be adjusted | Below the hub on the pole |
| Pole base / Base sleeve | Receives the pole; mounts to table or freestanding base | Bottom of the pole assembly |
| Canopy / Fabric | The shade fabric itself | Attached to ribs and hub |
Manual Retractable Awning Parts
| Part Name | What It Does |
|---|---|
| Cassette / Hood | Housing that covers the rolled fabric when retracted |
| Fabric tube / Roller tube | Tube onto which the fabric winds when retracted |
| Lateral arms | Folding spring-loaded arms that extend when awning opens |
| Front bar / Valance bar | Leading edge of the fabric; pulls the canopy out |
| Wall brackets (AU10 or equivalent) | Mount the cassette to the wall; primary load-bearing points |
| Pitch / Slope unit | Adjustable joint that sets the arm projection angle |
| Hand crank and rod | User-operated tool that drives the roller tube |
| Spring tension assembly | Built into the arms; assists extension and controls retraction |
| Lag bolts (3/8" x 4–7") | Fasten wall brackets to structural framing |
Tools You'll Need
For umbrella assembly and repair, you'll typically need: a flathead and Phillips screwdriver, needle-nose pliers, a lighter or heat gun for heat-shrink cord terminations, scissors, and a mallet for stubborn pole joints. For awning installation and adjustment, Sunair's guidelines call out specific socket sizes that you should have ready: a 1/2-inch socket and ratchet for wall bracket bolts, a 17 mm socket for the slope/pitch adjustment unit, a 13 mm deep socket for front arm attachment, and a 10 mm socket for gear adjustment. Add a stud finder, a level, a drill with 3/8-inch masonry or wood bits, and a tape measure to that list for any wall-mounted installation.
- Flathead and Phillips screwdrivers
- Needle-nose pliers
- Mallet or rubber hammer
- Scissors and utility knife
- 1/2" socket and ratchet (awning bracket bolts)
- 17 mm socket (awning pitch/slope unit)
- 13 mm deep socket (awning front arm attachment)
- 10 mm socket (awning gear adjustment)
- Stud finder and level (wall-mounted awnings)
- Drill with 3/8" bit
- 3/8" lag bolts, 4–7" length (awning installation)
- UV-resistant polyester (Dacron) braided cord, 3–4 mm diameter (cord replacement)
- Silicone-based lubricant spray
Quick Setup: Unboxing, Bases, and First Assembly
Whether you're setting up a new umbrella or reassembling one after winter storage, the sequence matters. Rushing through setup is how you end up with stripped crank sockets and misrouted cords.
Setting Up a Manual Lift Umbrella
- Unbox all parts and lay them out on a clean surface. Identify the pole sections, hub assembly, ribs, canopy, runner, and any hardware bags.
- If the pole comes in sections, connect them now. Most poles use a slip-fit or twist-lock joint. Align any cord-routing holes before locking sections together.
- Thread the lift cord (if present) through the pole sections and pulleys before fully seating the joints. You cannot easily re-thread a cord after the pole is assembled.
- Attach the hub to the top of the pole, ensuring the rib sockets are oriented outward. Some hubs twist-lock; others are pinned.
- Attach ribs to the hub sockets. Snap stretcher arms between the ribs and the runner/slider car.
- Slide the runner onto the pole from the top before attaching the lower pole section or base, then connect the cord to the runner if your model uses a cord-pull system.
- Spread the canopy over the ribs and attach any Velcro straps, tie-downs, or rib pockets.
- Insert the pole into its base or table hole. For freestanding bases, fill with sand or water per manufacturer weight requirements (cantilever models: minimum 200 lbs).
- Test the lift mechanism slowly before fully opening. Confirm the runner travels freely and the locking collar engages cleanly.
- For cantilever models, get a second person for this process. Do not attempt to stand and tilt a large cantilever pole alone.
Mounting a Manual Retractable Awning
- Use a stud finder to locate wall studs. Mark stud centers clearly. All brackets must land on solid framing.
- Determine bracket count based on your awning width (see the sizing table above) and space them evenly across the studs.
- Hold the first bracket at the mounting height (minimum 8 ft, ideally 9 ft 6 in for a 10-ft projection), mark bolt holes, and pre-drill with a 3/8-inch bit.
- Fasten each bracket with 3/8-inch lag bolts at least 4 inches long, penetrating 2.5 to 3 inches into solid wood. Do not over-torque; check that the bracket sits flush.
- With a helper, lift the cassette onto the brackets. Most cassettes hook or drop into bracket receivers and are then pinned or bolted.
- Adjust the pitch/slope unit on each arm to your desired angle using the 17 mm socket. A slight downward pitch (3/12 is a common starting point) aids water runoff.
- Extend the awning fully using the hand crank and inspect that fabric extends evenly and arms travel symmetrically.
- Check the front bar for level. If one side leads the other, adjust arm tension or crank engagement per your manufacturer's manual.
- Retract fully, then extend once more to confirm smooth operation before calling the installation complete.
Safe Daily Operation: Raising, Lowering, and Adjusting
This is the part that most people skip reading because it seems obvious, and it's also where most mechanical damage happens. Over-cranking is one of the most common ways to strip an internal spool or break a cord. Follow the manufacturer's sequence every time.
Opening a Crank Umbrella
- Confirm the umbrella is seated securely in its base and the base is stable. Do not open in wind.
- Insert the crank handle into the Open/Close socket on the pole. It should seat fully without forcing.
- Turn the handle clockwise. The runner will travel upward and the canopy will begin to open.
- Continue turning until the runner reaches maximum height and the canopy is fully spread. You will feel a slight change in resistance.
- Stop immediately when the canopy is fully open. Do not continue cranking past this point. Over-cranking can strip the spool or snap the internal cord.
- Remove the crank handle and store it in its holder or a nearby bag. Leaving it in the socket during use is a snag hazard.
- If your model has a tilt mechanism, adjust tilt only after the canopy is fully open (see tilt section below).
Closing a Crank Umbrella
- Return the tilt to the neutral (vertical) position before closing. Attempting to close a tilted canopy stresses the ribs and cord.
- Insert the crank handle into the socket.
- Turn counterclockwise slowly and evenly. Keep light downward pressure on the canopy fabric with your free hand to guide the ribs inward smoothly.
- Continue until the runner is fully lowered and the canopy is collapsed around the pole.
- Secure the canopy with the wrap strap or tie cord. Never leave the canopy loosely closed in outdoor conditions.
Opening and Closing a Push-Up / Rope-Pull Umbrella
- Grasp the runner collar or the pull cord loop, depending on your model.
- Push the runner upward firmly or pull the cord downward in steady, even pulls.
- When the runner reaches the open position, engage the locking collar by twisting it to the locked position, or press the push-button pin into its hole.
- To close, disengage the lock, then lower the runner slowly. Do not drop it; a free-falling runner can damage the stretchers.
- Guide the canopy closed by hand as the runner descends.
Operating a Manual Retractable Awning
- Insert the crank rod into the crank socket on the cassette or side bracket.
- Turn in the direction marked 'Open' or 'Extend' (usually counterclockwise when facing the crank, but check your model).
- Extend to the desired projection. You do not need to go fully out every time.
- To retract, turn in the opposite direction. The spring-loaded arms will assist but the crank still does most of the work.
- Retract fully and confirm the front bar seats against the cassette housing before leaving the awning unattended in any wind.
Wind and Operational Safety
Close and stow your umbrella or retract your awning at the first sign of sustained wind. A practical rule is to retract when wind reaches Beaufort Scale Force 4 (sustained winds around 13–18 mph, enough to move small branches). The CPSC has documented umbrella injuries resulting from wind events, and a significant share involve umbrellas that were left open in gusty conditions. See the U.S. Consumer Product Safety Commission, safety resources (umbrella safety alerts and data) for documented umbrella injury reports and official safety alerts U.S. Consumer Product Safety Commission — safety resources (umbrella safety alerts and data). ASTM standards F3512 and F3681 set anchoring and labeling requirements for market and beach umbrellas used in commercial or public settings, and those standards exist because wind is genuinely dangerous. Do not wait for a gust to make the decision for you. If a forecast calls for high winds overnight, close and secure before you go to bed.
Tilting and Slope Adjustment
Tilt mechanisms let you angle the canopy to block low sun without repositioning the whole umbrella. There are a few common types: a push-button collar tilt just below the hub, a crank-engaged tilt on some premium models, and a rotation collar that allows 360-degree repositioning on cantilevers. They all move the canopy angle, but they work differently and each has its own failure modes.
Push-Button and Collar Tilt
- Fully open the canopy before attempting any tilt adjustment.
- Locate the tilt knob or push-button collar just below the hub.
- Disengage the tilt lock by pressing the button or loosening the collar knob.
- With one hand supporting the canopy, gently push the hub section in the desired direction until you reach the angle you want.
- Re-engage the lock by releasing the button or tightening the collar. Give the canopy a light push to confirm it's locked before letting go.
- Keep hands clear of moving rib and stretcher joints during adjustment.
Cantilever Rotation and Tilt
Cantilever umbrellas typically offer both lateral tilt and full 360-degree rotation at the horizontal arm. Treasure Garden's documentation is explicit on this: disengage the tilt/adjust knob before moving the slider car, never apply tilt adjustments in windy conditions, and keep the umbrella secured to its base at all times. The weight and offset of a cantilever canopy means an unsecured pole during tilt adjustment can tip the whole unit. Two-person adjustment is strongly advised for any cantilever over 11 feet.
Awning Pitch Adjustment
On a manual retractable awning, pitch (the downward angle of the arms) is set at the slope unit on each arm, adjusted with a 17 mm socket. Sunair's pitch chart uses a 3/12 pitch as a standard reference point: for a 10-foot projection, mount at 9 feet 6 inches and the arms will slope at roughly 3 inches per foot of projection. This angle is important for both water runoff and aesthetics. Adjusting pitch unevenly between the two arms will cause the front bar to hang crooked, which stresses the fabric and creates tracking problems over time. Always adjust both arms by the same amount and re-extend the awning fully to verify level after any pitch change.
Common Failure Points and How to Diagnose Them
Most manual umbrella and awning problems trace back to a small number of root causes. Before you order parts or start disassembling anything, work through this diagnostic sequence. It takes about 10 minutes and will tell you exactly what you actually need to fix.
Quick Troubleshooting Checklist
| Symptom | Most Likely Cause | First Check |
|---|---|---|
| Canopy won't open or is hard to raise | Seized pulley, frayed cord, debris in pole track | Inspect pulleys and cord; try spinning pulleys by hand |
| Crank turns but canopy doesn't move | Stripped spool, broken internal cord, disengaged gearbox | Open pole access panel or base; inspect cord and spool |
| Canopy won't stay open / drops | Worn locking collar, broken push-button pin, frayed cord | Test locking collar; inspect pin and cord tension |
| Tilt won't hold position | Worn tilt knob, stripped collar threads, bent tilt joint | Check knob engagement; inspect tilt collar for cracks |
| Rib won't stay open / flops down | Broken or bent rib, cracked stretcher, missing connector pin | Visually inspect all ribs and stretcher-to-runner connections |
| Awning tracks unevenly (one side leads) | Unequal arm pitch, fabric misaligned on roller tube | Check pitch units on both arms; inspect fabric leading edge |
| Awning won't retract fully | Over-extended cord, arm spring fatigue, fabric caught on housing | Check for fabric snags; test arm spring resistance |
| Cord is frayed or snapped | UV degradation, chafe on pulley edge, age | Replace cord with 3–4 mm UV-resistant polyester braid |
| Pole wobbles in base | Loose base fitting, underfilled ballast, stripped base sleeve | Check base weight; tighten base hardware; inspect sleeve |
Inspecting the Mast, Slider, and Pulleys
Start by releasing all tension from the system. Either fully open or fully close the canopy to take the load off the cord and pulleys. Then photograph the cord routing before touching anything. This sounds overly cautious, but I have seen plenty of people pull a cord out of a pulley and spend an hour trying to figure out where it went. With the cord slack, reach into or access the hub area and try to spin each pulley by hand. A healthy pulley spins freely with almost no resistance. A seized pulley feels rough or won't spin at all. If a pulley won't spin, it's either corroded or has a worn bearing, and it needs to be replaced, not just lubricated. While you're up there, look at the slider car for any cracking, deformation, or corrosion buildup in the track channel. Light surface corrosion can be cleaned; deep pitting or a cracked slider means replacement.
Inspecting Cords and Ropes
Run the full length of the cord through your fingers while looking for flattened sections, visible fibers separating, hard stiff spots from UV degradation, or shiny chafe marks from pulley contact. Any of those signs means the cord is close to failure and should be replaced before it snaps under load. The replacement material to use is 3 to 4 mm (approximately 1/8 to 5/32 inch) UV-resistant polyester or Dacron braided line. This is the same cord marine hardware suppliers sell for small-diameter running rigging. It resists UV, abrasion, and stretch far better than nylon and is widely available at hardware and outdoor retailers. When you thread the new cord, follow the exact routing path you photographed earlier and secure the end with a stopper knot or the original sewn termination method.
Inspecting Ribs and Stretchers
With the canopy fully open, look at each rib from the hub outward. You're looking for any visible bend, kink, or crack, especially near the hub socket and at the mid-rib connector. A rib that has a sharp bend (not a gentle curve, but an actual kink) is structurally compromised. Do not operate the umbrella with a broken or badly bent rib. The force of opening and closing can propagate the damage and tear the canopy fabric. For replacement ribs, contact the OEM parts department with your model number. Treasure Garden, SunSetter, and other major brands maintain parts and customer support pages where you can order OEM replacement ribs. A steel or aluminum sleeve over a mildly bent rib can work as a temporary fix, but OEM replacement is the right long-term answer. Welding aluminum umbrella ribs is not recommended as it can compromise the surrounding material and voids any warranty.
Inspecting Tilt Mechanisms and Collars
Tilt failures are almost always either a worn knob that no longer develops enough friction to hold position, or a cracked plastic collar that has lost its clamping ability. To test the knob, open the umbrella, set a moderate tilt, and try to push the canopy back to vertical with moderate hand pressure. If it moves easily, the knob is worn. Inspect the collar visually for hairline cracks, especially on the underside where stress concentrates. Replacement tilt collars and knobs are model-specific parts. This is where having your model number and the manufacturer's parts page bookmarked saves you significant time.
A Note on Retractable Awning Arm Assemblies
Lateral arm assemblies on retractable awnings are spring-loaded under very significant tension. Sunair's installation guidelines are clear: do not remove arm assemblies or attempt to disassemble arm cassettes without following specific manufacturer instructions. The spring tension stored in those arms is enough to cause serious injury if released suddenly and unexpectedly. If your awning arms need internal service beyond what the OEM manual explicitly covers as a user procedure, this is a job for a professional awning technician. That's not a hedge: it's a genuine safety boundary based on how these systems are built. For Monmouth manual retraction awning owners specifically, consult the Monmouth installation manual for arm service procedures before attempting anything beyond pitch adjustment and fabric inspection. See the Monmouth manual retraction patio awning installation manual for detailed arm service and safety procedures. Consult the patio awning manual for Monmouth manual retraction awning owners before attempting anything beyond pitch adjustment and fabric inspection.
Maintenance, Wind-Securing, and Seasonal Storage
Most of the repairs I've described in this article are preventable with basic seasonal maintenance. The steps take less than an hour and will extend the life of your umbrella or awning by years.
Routine Maintenance Steps
- At the start of each season, wipe down all metal pole sections with a damp cloth, then dry thoroughly. Apply a thin coat of silicone-based spray lubricant to the pole where the runner travels and to all pulley axles.
- Inspect the cord along its full length. Replace at the first sign of fraying, UV hardening, or chafe marks.
- Check all rib connector pins and hub socket pins. Tap any loose pins back into place and apply a drop of thread-locking fluid if they won't stay.
- Test the locking collar or push-button by opening the umbrella and applying light downward pressure. It should hold without slipping.
- For awnings, check all lag bolts for any sign of loosening. Snug any that have worked loose. Inspect bracket flanges for cracks.
- Clean canopy fabric with mild soap and water. Do not use bleach on most synthetic fabrics; check your specific canopy material requirements.
- At the end of the season, lubricate all pivot points and pulley axles once more before storage.
Winterizing and Seasonal Storage
For umbrellas, fully close and dry the canopy before storage. If the fabric retains moisture going into a storage bag or cover, you will find mold in the spring. Remove the pole from its base, clean and dry the base sleeve, and store the pole horizontally or in a padded vertical rack to prevent warping. For awnings, retract fully and confirm the fabric is dry. If your awning has a vented cassette housing, inspect the vents for debris and spider webs before the next season. In climates with hard freezing, it is worth checking whether the manufacturer recommends any additional winterizing steps for the arm tension springs, as metal fatigue from freeze-thaw cycling can reduce spring life over time.
When to Repair vs When to Replace (or Call a Pro)
I always recommend starting with repair, but there are honest limits. Here's how I think about it:
- Replace a cord, pulley, collar, or tilt knob: almost always worth it. These are inexpensive parts and straightforward DIY jobs.
- Replace a rib or stretcher with an OEM part: worth it if the rest of the frame is in good shape. Not worth it if multiple ribs are damaged or the hub is cracked.
- Crank gearbox failure on a mid-range umbrella: compare the OEM part cost to the umbrella replacement cost. If the gearbox costs more than half the umbrella's current value, lean toward replacement.
- Retractable awning arm internal spring service: call a professional unless the OEM manual provides explicit user instructions. The injury risk from improperly released arm tension is real.
- Structural damage to the pole, main hub, or awning cassette frame: replacement is usually the right call. These are not serviceable in the field.
- Any umbrella or awning that has been struck hard by wind and shows bent or deformed main structural members: retire it. A wind-damaged frame may look mostly fine but have hidden stress fractures that will fail suddenly.
For replacement parts, always start with the OEM. Treasure Garden, SunSetter, and Sunair all maintain customer support and parts pages. See Treasure Garden, Customer Support and Manuals page (parts and support) for OEM manuals, part names, and dealer/parts contacts when ordering replacement parts blank" rel="noopener noreferrer">Treasure Garden — Customer Support and Manuals page (parts and support). Search by your model number, not just the part description, because part dimensions vary between models even within the same product line. Third-party parts are acceptable for generic hardware like cords, bolts, and pulleys, but for structural parts like ribs, hubs, and arm assemblies, OEM is worth the premium.
FAQ
What core definitions and device types should the how‑to article define upfront?
Define 'manual lift' as any patio umbrella or awning whose canopy movement is human‑powered (push‑up/slider, cord‑and‑pulley, or hand‑crank) rather than motorized. Explain common product classes: center‑pole market/tilt umbrellas (push‑up slider or pulley), offset/cantilever umbrellas (crank or pulley), and lateral‑arm retractable awnings (manual crank or pull‑bar). Note control points readers will see in manuals: open/close (crank socket or slider/collar), tilt/rotation knob, pulley/carriage, and gearbox/spool.
What specific technical comparisons between push‑up (slider/collar) and crank (gearbox) designs are required?
List mechanical differences and operation limits: Push‑up/slider uses a runner/collar that slides on the mast, sometimes with a locking button or rope/pulley — simple, lower cost, but limited canopy size and less mechanical advantage. Crank uses a gearbox (worm gear or spool) to translate handle rotation into canopy travel — higher mechanical advantage for larger diameters and cantilevers, allows smoother controlled movement and often integrates a dedicated open/close socket and separate tilt control. Include failure modes: sliders seize (corrosion/debris), cords fray; gearboxes suffer stripped gears or broken crank handles. Provide guidance on expected size ranges where each design is typical (push‑up common ≤9–10 ft; crank common ≥9–12 ft and widespread for 12 ft and larger and cantilevers).
What size‑specific guidance must be included, especially for 12 ft systems and 12 ft manual retractable awnings?
Give actionable rules: For market umbrellas: 6–9 ft = small (single person operation), 9–11 ft = medium (two‑person preferred for heavy frames), 12 ft+ = large (use crank or pulley cantilever; two people recommended). For lateral‑arm awnings: note bracket counts and mounting heights per width (reference Sunair: 8–14 ft = 3 brackets, 15–17 ft = 4, 18–20 ft = 5, etc.) and the typical minimum mounting height (never below 8 ft). For a 12 ft manual retractable awning, emphasize at least 3 wall brackets, appropriate lag anchors (3/8" lag bolts 4–7" long with 2½–3" embedment in solid wood or structural anchors for masonry), and obey pitch/clearance guidance (typical projection/pitch charts; maintain recommended top‑of‑bracket height and slope).
What exact parts, fasteners and tools lists should I include for homeowners doing assembly, operation and repairs?
Provide two lists: (A) Common parts to name and photograph: canopy, ribs, hub/runner (slider), mast/pole, crank gearbox and handle, open/close socket, tilt knob/hinge, pulley(s), cord/rope, collars, collars/locking pins, base plate and weighted base or anchor kit, rib connectors, end caps, replacement ribs, replacement pulleys, replacement cord (see sizing). (B) Tools: adjustable wrench, 1/2" and 3/8" sockets and ratchet, 17 mm socket (manufacturer examples), 13 mm deep socket, 10 mm socket, Phillips and flat screwdrivers, hex/Allen keys (common sizes 4/5/6 mm), needle‑nose pliers, snap ring pliers, rubber mallet, wire cutters, small awl/pick, torque wrench (if mounting bolts have torque spec), lubricant (dry Teflon or silicone spray), penetrating oil (for corrosion), marine‑grade braided polyester cord (3–4 mm ≈ 1/8"–5/32"), replacement rivets/bolts per OEM part numbers. Call out socket sizes used in professional guides (½", 17 mm, 13 mm, 10 mm) and common lag sizes (3/8" lag bolts 4–7" long). Include images or labeled diagrams of each part and fastener type.
What step‑by‑step sequences should be provided for safe setup, opening, closing and adjusting pitch/tilt?
Give concise numbered sequences: A. Setup/assembly (two‑person for large units): 1) Read OEM manual and verify model number and parts. 2) Place base/mount and secure to substrate per OEM torque/anchor specs; use minimum base weight recommended (example: cantilevers often require ≥200 lb). 3) Install pole/mast, insert rib assembly and secure pins/bolts, attach canopy. B. Opening (crank models): 1) Insert crank into 'Open/Close' socket. 2) Turn clockwise slowly until runner reaches stop; stop immediately at full open. 3) Engage tilt/rotation only per manual and not in wind. C. Opening (push‑up/slider): 1) Unlock any collar or push‑button. 2) Raise runner evenly until it locks; engage lock. 3) If pulley/cord system, check line routing and free slack. D. Lowering: 1) Remove any tilt, secure hand positions away from ribs. 2) Reverse crank slowly or depress sliding collar and lower gently, controlling descent. 3) Fully close and secure canopy with strap. E. Adjusting pitch/slope: 1) Put umbrella in nominal position (per manual). 2) Loosen tilt knob or slide tilt collar; adjust to desired angle; re‑tighten per torque guidance; keep hands clear. Always state two‑person assistance for large diameters, avoid using tilt in windy conditions, and use only OEM‑approved motions.
What detailed troubleshooting and DIY repair procedures must be included for common failure points?
Provide diagnostic sequence and repair steps for common issues: 1) Stuck mast/slider: Verify no line under tension; photograph routing; inspect inside pole for debris/corrosion; remove runner if possible, clean track, apply penetrating oil then wipe and light dry lubricant (Teflon); inspect pulleys/bearings and replace seized pulley. 2) Broken/frayed cords: Fully relieve tension (open or close as OEM instructs), photograph pulley path, unthread old cord, measure and install polyester braided replacement (3–4 mm), secure termination with stopper knot or sewn eye, test under light load. 3) Bent ribs: Do not operate if severely bent; remove canopy, source OEM replacement rib if available; temporary reinforcement via aluminum/steel sleeve is a stopgap only. 4) Broken collars/tilt mechanisms: Inspect fasteners and replace small parts (pins, set screws, or OEM collar assemblies); do not modify load‑bearing components—order OEM parts. 5) Pulley/gears: Inspect for seized bearings and worn teeth; replace pulleys or gearbox if worn; document gear damage with photos for warranty/parts ordering. For each repair list: safety steps, required parts and part numbers (if available), approximate difficulty level, and estimated time.
Next Articles
Monmouth Manual Retract Patio Awning Troubleshooting and Repair
Step-by-step Monmouth manual retraction patio awning fixes for jammed, uneven, or incomplete retraction, plus maintenanc
Manual Push Up Patio Umbrella Repair Guide and Fixes
Step-by-step manual push up patio umbrella repair to fix stuck pole, misalignment, jams, hardware, and safe operation
12 ft Manual Patio Retractable Awning Troubleshooting Guide
Fix a 12 ft manual patio retractable awning with crank, fabric roll, and tension troubleshooting plus maintenance and re