
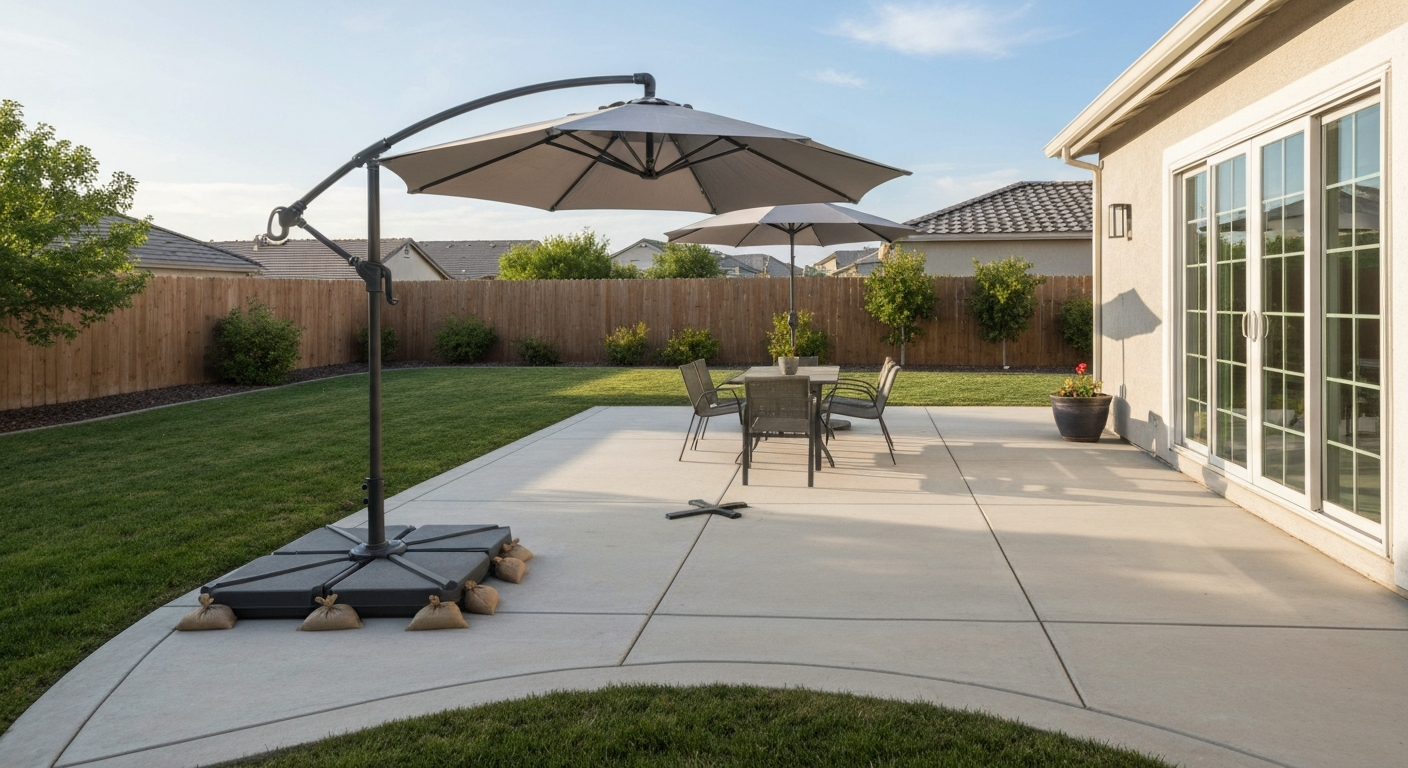
To secure an offset (cantilever) patio umbrella, you need to match your anchoring method to your surface and umbrella size. On a portable patio, fill a weighted cross base with sand or stack concrete pavers until you hit at least 150–200 lb of ballast for a 10–11 ft canopy. On concrete, bolt a surface plate to the slab using M10 or 3/8-in concrete anchors into a minimum 2.5-in embedment. On a wood deck, lag-bolt a base plate into structural joists, not just decking boards. In soil, set an in-ground sleeve in a concrete footing at least 70 cm deep and 40 cm wide. Every method also requires a simple rule: close the umbrella when sustained winds exceed 20–25 mph.
How to Secure Offset Patio Umbrella: Anchoring & Ballast

Luca Morrison
22 Jul 2026
What this guide covers and who it's for
This guide is written for homeowners who already own a cantilever umbrella and need to anchor it properly, retrofit a weak setup that wobbles or tips, or repair hardware that has failed. I've worked through all of these situations on my own patio and on setups I've helped neighbors fix. Whether your base keeps sliding on pavers, your umbrella leans after a storm, or you're starting a fresh install on a concrete slab or deck, you'll find a method here that fits your surface and your budget.
A safety note before anything else: a cantilever umbrella extends its canopy several feet from the pole, so the leverage forces on the base are much higher than with a center-pole umbrella. Even modest wind speeds create real overturning forces. This is not a setup-and-forget piece of outdoor furniture. Every step in this guide is designed to keep you, your family, and your property safe.
Assess your umbrella and site before you start
Taking 20 minutes to measure and observe your specific setup before buying anything will save you money and a return trip to the hardware store. Here's what to check.
Measure your umbrella
- Canopy diameter: measure tip to tip across the widest span. Most residential offset umbrellas are 9–13 ft. Larger canopies catch more wind and need proportionally more ballast.
- Pole diameter and sleeve size: measure the outer diameter of the pole at the base. Common sizes are 1.5 in, 2 in, and 63 mm (2.5 in). Your base or ground sleeve must match this exactly.
- Arm offset distance: measure from the pole centerline to the canopy center. A wider offset means higher torque on the base.
- Canopy projected area (for wind math): multiply diameter by diameter and multiply by 0.785 to get approximate canopy area in square feet. A 10-ft umbrella has roughly 78.5 sq ft of projected area.
Assess your surface
- Concrete slab: note thickness (typically 3.5–4 in for residential pads) and condition (cracked concrete may not hold expansion anchors reliably).
- Wood deck: locate joist direction and spacing. You need to bolt into joists, not just decking boards.
- Pavers or stone tile: identify whether pavers sit on sand or a concrete base, since this affects whether bolting is an option.
- Soil or lawn: check soil type. Sandy or soft soil requires a wider, deeper footing than clay.
- Portable surfaces (artificial turf, composite tile): plan on a weighted portable base only — no permanent fastening is possible.
Wind exposure checklist
- Is your patio on an elevated deck, rooftop, or hillside? Wind speeds are higher at elevation and with less surrounding shelter.
- Are there buildings, fences, or trees within 15 ft that break the prevailing wind?
- What is the typical summer gust speed in your area? Check local NOAA data or a home weather station.
- Has the umbrella ever tipped, leaned, or moved in past storms? If yes, your current method is undersized.
- Is the umbrella on the windward or leeward side of your house?
A quick wind-load reality check: using the simplified ASCE formula, wind pressure at 30 mph is roughly 0.00256 × 30² = 2.3 psf. At 50 mph it's about 6.4 psf. Apply that pressure to a 10-ft canopy (78.5 sq ft) with a conservative drag coefficient of 1.28 for a flat canopy, and horizontal force at 30 mph is about 230 lb. At 50 mph it's over 640 lb. Your anchoring system has to resist that force, including the overturning moment created by the offset arm. This is why lightweight bases fail.
How to choose the right anchoring method
Work through these questions in order to land on the best method for your situation.
- What surface are you working on? Concrete and decks allow bolting. Soil allows in-ground sleeves. Portable surfaces are limited to ballasted bases.
- Do you need to move the umbrella? If portability matters, stick with a weighted portable base. If it's a permanent install, bolting or an in-ground sleeve is far more secure.
- What is your wind exposure? Low-exposure residential patios can use a well-ballasted portable base. Elevated decks, rooftops, or open backyards in gusty regions require bolted or in-ground anchoring.
- What is your umbrella diameter? A 9-ft umbrella on a sheltered patio can work on a 150-lb ballasted base. A 13-ft umbrella in a windy yard needs a bolted or in-ground solution.
- What is your budget and willingness to do concrete work? Bolted or in-ground methods cost more upfront ($50–$300+ in hardware) but are vastly safer and essentially permanent.
| Method | Best Surface | Portability | Approx. Ballast/Strength | Skill Level | Cost Range |
|---|---|---|---|---|---|
| Cross/weighted portable base | Any portable surface | Yes | 150–220 lb sand fill | Beginner | $50–$150 |
| Stacked weight rings / ballast plates | Any hard or soft surface | Yes (heavy) | 100–300+ lb | Beginner | $40–$200 |
| In-ground sleeve with concrete footing | Soil / lawn | No | Permanent — very high | Intermediate | $80–$200 |
| Surface plate bolted to concrete | Concrete slab | No | Permanent — very high | Intermediate | $60–$180 |
| Lag-bolt plate to deck framing | Wood deck | No | Permanent — very high | Intermediate | $60–$150 |
| Sand/water bags over base legs | Any surface | Yes | Variable — add-on only | Beginner | $20–$60 |
| Ground anchors and straps | Soil / grass | Partial | Wind-event supplement | Beginner | $20–$80 |
Tools and materials master list
Having everything on hand before you start prevents the classic mid-project hardware-store run. Not every item applies to every method, I've flagged which methods need what below.
Common tools
- Tape measure and level (bubble or digital)
- Pencil or chalk for marking anchor locations
- Hammer drill with masonry bits (for concrete bolting) — standard drill is not sufficient
- Drill/driver with spade or auger bits (for wood deck bolting)
- Torque wrench or ratchet set (metric and SAE)
- Post-hole digger or power auger (for in-ground sleeve installs)
- Mixing tub and margin trowel (for concrete footing pours)
- Wire brush and compressed air or hand pump (for cleaning anchor holes in concrete)
- Safety glasses and work gloves
Fasteners and hardware
- Concrete wedge or sleeve anchors: M10 × 100 mm (metric) or 3/8 in × 3.5–4 in (US) are typical for surface plates
- Lag screws: 3/8 in × 3 in or 1/2 in × 3.5 in for deck framing connections
- Carriage bolts with washers and nuts (for through-bolt deck applications)
- In-ground anchor sleeve (manufacturer-matched or universal 2-in or 2.5-in)
- Ready-mix concrete or fast-set concrete (80-lb bags)
- Stainless steel or hot-dipped galvanized hardware to prevent rust
Sealants and fillers
- Exterior-grade silicone or polyurethane sealant (seal around bolt holes in decks to prevent water infiltration)
- Hydraulic cement or non-shrink grout (to stabilize a sleeve in existing concrete)
- Construction adhesive (optional: to secure base pads to prevent slippage on smooth concrete)
Safety gear
- Safety glasses (mandatory when drilling concrete or cutting metal)
- Hearing protection (hammer drilling is loud)
- Nitrile gloves when mixing concrete
- Knee pads for ground-level work
Surface-specific anchoring options at a glance
Here's a plain-English overview of all the methods you'll encounter, before we dive into step-by-step details on the two most common approaches.
- Cross/weighted base with cantilever adapter: A cross-shaped or X-shaped frame sits on the ground surface. You fill attached weight bags or fit sleeved weight plates over the arms, then seat the umbrella pole into the center sleeve. The Treasure Garden BF10, for example, accommodates four resin weight bags that each take up to 55 lb of sand (220 lb total). This is the most common portable method.
- Weight rings and stacked ballast plates: Heavy rings (cast iron, concrete, or rubber-coated) drop over the base pole or sit around the base legs. They can also be layered as square concrete pavers. Shadowspec's portable base documentation recommends two layers of 400×400×40 mm pavers per arm quadrant as a baseline, with a third layer added in windier areas.
- Sand and water bags over base legs: Soft ballast bags draped over cross-base arms add supplemental weight cheaply. They're not a primary system on their own for large umbrellas, but they're useful for adding last-minute weight before a breezy afternoon.
- In-ground sleeve with concrete footing: A steel sleeve is set in a concrete-filled hole in the soil. The umbrella pole slides into the sleeve and pins in place. Instant Shade recommends a hole at least 40 cm wide × 70 cm deep with a belled bottom. Shadowspec recommends up to 1.0 m deep × 0.5 m wide in loose soil with 0.50 m³ of concrete. This is one of the most secure permanent options.
- Concrete footing with surface anchor plate: A steel anchor plate is bolted to an existing concrete slab using expansion or wedge anchors. The umbrella base or in-ground sleeve bolts to the plate. Shadowspec uses M10 × 100 mm concrete bolts for their surface plates. The plate must be allowed to fully cure and set before loading.
- Deck or concrete direct bolting: A base plate or manufacturer-supplied mounting bracket is lag-bolted through the deck surface and into structural framing (joists or blocking), or anchor-bolted into a concrete slab. Simpson Strong-Tie and Hilti both publish allowable load tables for these anchor types. For wood decks, fastening into joists — not just decking boards — is non-negotiable.
- Ground anchors and straps: Corkscrew or stake-style ground anchors driven into soil, connected to the base legs with ratchet straps or cables. Best used as a wind-event supplement to a portable base rather than a standalone anchor. Useful for camping-style portable setups.
Method A: Cross/weighted base and cantilever base adapter
This is the method most homeowners start with and the one most often done wrong. The cross base comes with the umbrella, looks big enough, but then wobbles on the first windy afternoon because the weight bags were never filled. Here's how to do it right.
Materials
- Manufacturer cross or X-base with attached weight bags or integrated weight sleeves (match to your umbrella brand and pole diameter)
- Play sand or pea gravel (50-lb bags) — avoid dirt, which compacts and hardens into the bags
- Cantilever base adapter plate (if your umbrella requires one to offset the pole from center)
- Anti-slip rubber mat or non-skid pads (cut from rubber sheet stock) for placement under base legs
- Level (2-ft bubble level is fine)
- Funnel for filling weight bags without spilling
Step-by-step installation
- Choose and prepare the placement spot. Set the base on a flat, level surface. Use your bubble level on the base frame — if it rocks, put rubber shim pads under the low legs. A level base is essential because a tilted base puts uneven stress on the pole socket and accelerates wear.
- Attach or unfold the cross base arms. Some models have fold-out arms with a locking pin. Make sure every locking pin clicks fully into its hole. Wiggle each arm — there should be no play.
- Attach the cantilever adapter plate if your model uses one. This plate offsets the pole socket from the cross-center so the canopy clears the base assembly. Bolt it on per the manufacturer pattern and torque the bolts snugly (you're not yet torquing to final spec — do that after filling the weight bags).
- Fill the weight bags before raising the umbrella. This is the step that gets skipped most often. Treasure Garden's BF10 manual states explicitly: 'Do not open umbrella until weights are secured.' Pour sand into each bag through the fill opening using a funnel. Aim for full capacity — BF10 bags take up to 55 lb each, and all four should be filled to reach the 220-lb maximum. Seal or zip each bag closed.
- Place anti-slip pads under each base leg. On smooth concrete or pavers, the base can skid sideways under lateral wind force even with full ballast. A rubber mat cut to fit under each leg pad adds meaningful friction for free.
- Seat the umbrella pole into the base socket. Have a helper hold the umbrella while you guide the pole into the sleeve. Confirm it seats to full depth — there's usually a depth mark or a pin hole that aligns.
- Insert the retaining pin or tighten the collar clamp. This is what keeps the pole from lifting out of the socket in a gust. Never operate without this pin in place.
- Open the umbrella only partially at first. Check that the base does not rock or shift. If it moves at all, close the canopy and add more weight before proceeding.
- Final-torque the adapter plate bolts if applicable. Use your torque wrench to match the manufacturer's specified torque (check the assembly guide). Hand-tight is not sufficient outdoors.
- Mark the base position with chalk or a marking pen if it's a permanent spot. This makes it easy to check after windy days whether the base has drifted.
Tools needed
- Bubble level
- Funnel or small scoop
- Wrench or socket set (for adapter plate bolts)
- Rubber mallet (to seat locking pins)
- Chalk or marking pen
Quick tips and what to watch for
- Never use water in weight bags that are not designed for it — water can freeze in winter and crack plastic bag housings.
- Check fill levels at the start of each season. Sand compacts over winter and bags may need topping off.
- If your base has a cantilever offset arm (not a centered pole socket), confirm the adapter is rated for your umbrella's arm length. A longer arm increases torque on the base and may require a heavier base than the standard model.
- On a breezy day, watch the base from inside through a window for 10 minutes after setting up. If it rocks or creeps, it needs more weight or a different method.
- Diagram suggestion: a top-down view of the cross base with arms labeled, weight bag positions marked, and the adapter plate offset from center would help readers orient to their specific hardware.
Ballast reference by umbrella size
| Canopy Diameter | Minimum Ballast (sheltered patio) | Minimum Ballast (exposed / windy) | Notes |
|---|---|---|---|
| 9 ft | 100–130 lb | 150–175 lb | Standard cross base with 2–3 filled bags adequate for sheltered use |
| 10–11 ft | 150–175 lb | 200–220 lb | Fill all weight bags to capacity; add sand bags if base allows |
| 12–13 ft | 200–220 lb | 250+ lb or switch to permanent mount | Portable base is marginal at this size in any wind; consider bolting |
| 14 ft+ | Not recommended on portable base | Permanent mount required | Wind loads exceed safe portable ballast at this canopy size |
Method B: Weight rings, ballast plates, and stacked heavy-plate systems
Weight rings and stacked ballast plates are a practical upgrade for setups where the cross base alone isn't enough, or where the umbrella pole mounts to a separate stub without integrated weight bags. I've used this method to retrofit a neighbor's umbrella that came with an undersized decorative base, stacking pavers around the base legs turned a wobbly mess into a solid setup in under an hour.
Materials
- Cast-iron or rubber-coated weight rings (sized to fit over your base pole diameter — typically 1.5 in, 2 in, or 2.5 in bore)
- Concrete patio pavers: 400×400×40 mm (16×16×1.6 in) pavers weigh approximately 20–22 lb each, making weight calculation straightforward
- Non-slip rubber mat or grip liner (cuts to size) to place under the paver stack
- Strap ratchet or cargo strap (optional — to band stacked pavers to base legs on very windy sites)
- Level
- Work gloves (pavers have sharp edges)
Assembly and placement step-by-step
- Set the umbrella base on a clean, flat surface. Confirm it is level. Remove any debris or gravel under the base feet — even small stones cause rocking.
- If using weight rings, slide them over the base pole before seating the umbrella. Stack rings from largest bore to smallest if you're mixing sizes. Seat them flat on the base collar or base plate.
- If using concrete pavers, place a rubber mat on the ground first in each quadrant around the base legs. The mat prevents the pavers from sliding and protects the patio surface.
- Stack the first layer of pavers flat around all four base arms or in each quadrant. Shadowspec's portable-base documentation recommends starting with two layers of 400×400×40 mm pavers per quadrant. Each paver weighs roughly 20 lb, so two layers per quadrant (eight pavers per quadrant across four quadrants) adds about 640 lb total — this is a high-ballast setup for a large umbrella.
- For typical residential setups (10–11 ft umbrella, moderate wind), start with one layer of pavers per arm (four pavers, approximately 80–90 lb) and test stability. If the base moves at all under a medium push from the side, add a second layer.
- Add a third layer (or additional weight rings) for windier locations, as Shadowspec recommends. Do not stack so high that the paver column becomes unstable — a tall narrow stack can topple. Keep stack height to no more than three layers (roughly 5 in) per side.
- If the site is particularly gusty, run a ratchet strap horizontally around the stacked paver columns at all four base arms and ratchet lightly. This prevents the outer paver stacks from sliding away from the base under lateral load. Do not overtighten — you're just keeping them captured, not crushing them.
- Seat the umbrella pole and insert the retaining pin as in Method A.
- Before opening the canopy, push the top of the closed umbrella firmly in all four directions to confirm the entire base assembly (rings, pavers, and pole) stays put.
Tools needed
- Bubble level
- Work gloves
- Tape measure (to confirm paver sizing)
- Ratchet strap (optional)
- Rubber mallet (to tap weight rings fully onto pole if fit is snug)
Safe stacking guidance
- Never stack pavers higher than three layers without a restraint strap. A stack that topples can injure feet or crack the patio surface.
- Center each paver squarely over the one below it. Overhanging stacks are unstable.
- Do not use hollow concrete blocks or CMU block as substitute weight — they break under repeated load and are dangerous.
- After any wind event above 25 mph, check that paver stacks have not shifted or separated. Restack and re-level before next use.
- Weight rings that share a bore with the pole should seat below the lowest collar or clamp — they should never interfere with the crank, tilt, or rotation mechanism.
- Diagram suggestion: a side-view cross-section showing the base pole, two-layer paver stack per arm, rubber mat underneath, and an optional strap banding the stacks together would make the geometry clear.
Ballast-plate weight quick reference
| Paver Count (per arm) | Approx. Weight per Arm | Total Added Ballast (4 arms) | Use Case |
|---|---|---|---|
| 1 layer = 2 pavers | ~40–44 lb | ~160–176 lb | Sheltered patio, 9–10 ft umbrella |
| 2 layers = 4 pavers | ~80–88 lb | ~320–352 lb | Moderate wind, 10–12 ft umbrella |
| 3 layers = 6 pavers | ~120–132 lb | ~480–528 lb | Windier exposure, 12–13 ft umbrella |
Permanent methods: in-ground sleeves, surface plates, and deck bolting
If you have a 12-ft or larger umbrella, an exposed or elevated patio, or you've already had a ballasted base tip over, it's time to go permanent. These methods are genuinely more secure than any portable ballast system, and the hardware cost is often less than you'd expect.
In-ground sleeve in soil
Dig a hole at least 40 cm wide × 70 cm deep (about 16 in × 28 in). For sandy or loose soil, go wider and deeper, Shadowspec recommends up to 50 cm wide × 100 cm deep for clay, and more for sandy conditions. Bell the bottom of the hole slightly wider if you can: it creates a footing that resists pullout. Set the steel sleeve in the center of the hole, use scrap lumber as a temporary brace across the hole top to hold it plumb, and pour ready-mix or fast-set concrete around it. Check plumb before the concrete sets. Allow at least 24 hours cure (48 for fast-set in cool weather) before seating the umbrella. The sleeve should project 2–3 in above grade to keep water out.
Surface plate bolted to concrete
Position the surface plate where you want the umbrella and mark the anchor bolt locations with a pencil. Use a hammer drill with the correct masonry bit for your anchor size, for M10 × 100 mm concrete anchors (a typical size per Shadowspec's instructions), that means a 10 mm bit drilled to at least 100 mm depth. Clean the hole thoroughly with a wire brush and compressed air or a hand pump: dust left in the hole dramatically reduces anchor holding capacity, per Hilti and Simpson Strong-Tie installation guidance. Set the anchor, torque to the manufacturer's specified torque using a torque wrench, and then bolt the surface plate. For specific embedment depths, installation torque, and approved embedment/setting positions for wedge/expansion anchors, consult the Hilti HST‑series Wedge Anchor Technical Data (Hilti product guide excerpt). Seal around each bolt head with exterior silicone to prevent water intrusion. If your concrete has existing cracks, keep anchors at least 6 in from any crack.
Lag-bolting to a wood deck
This is the step where most DIYers go wrong: they bolt through the decking boards and think they're done. Decking boards are not structural. You must fasten into the joists below. When installing bolted connections to timber decks, manufacturers and Simpson Strong‑Tie guidance require fastening into structural framing (joists or blocking), not only decking boards, and show typical packer/washer/bolt arrangements; Simpson Strong‑Tie deck guidance recommends using tested fasteners/connectors and consulting their prescriptive tables or an engineer for non‑standard concentrated loads Simpson Strong‑Tie recommends fastening into structural framing (joists or blocking) with tested fasteners/connectors and consulting their prescriptive tables or an engineer for non‑standard concentrated loads.. Find the joist layout using a stud finder or by looking for nail lines in the decking. Position your base plate so at least two of its bolt holes land over joists, ideally all four. Drill pilot holes slightly smaller than your lag screw diameter (this prevents splitting) through the decking and into the joist. Drive 3/8-in × 3.5-in (or longer) lag screws with large washers. Apply a dab of exterior sealant around each lag screw where it enters the decking to keep water from wicking into the joist. Simpson Strong-Tie notes that concentrated loads from umbrella bases should fasten into framing members, not just surface boards, if your joist spacing doesn't line up with your base plate holes, add a piece of blocking between joists and bolt into that.
Retrofitting and repairing existing mounting hardware
If you've inherited an umbrella with a damaged sleeve, stripped bolt holes, or a wobbly tilt mechanism, there's usually a repair path before replacement. Here are the most common retrofit and repair scenarios.
Stripped or loose sleeve in concrete
If the in-ground or surface-mounted sleeve spins or rocks in place, the original anchoring has failed. Excavate or chip out the failed concrete around the sleeve, re-plumb it, and re-pour with fresh concrete or non-shrink grout. For a sleeve that is only slightly loose in a concrete slab hole, hydraulic cement injected around the perimeter can lock it back in place without full excavation.
Bent pole
A bent cantilever pole is a structural failure, not a cosmetic one. Do not continue using a bent pole. A bend at the base usually means the overturning moment exceeded the pole's yield strength, which also means your anchoring was undersized. The pole needs replacement (order a model-specific replacement pole from the manufacturer), and your anchoring method needs upgrading before reinstallation.
Base plate with stripped bolt holes
If the bolt holes in a cast or fabricated steel base plate have stripped threads, you have two options: tap the hole to the next size up and use a larger bolt, or drill through the plate and use a through-bolt with a washer and nut on the back. The second option is stronger and doesn't rely on the plate's thread engagement alone.
Wobbly crank or tilt mechanism at the pole
Wobble at the crank housing or tilt collar usually means a worn or cracked plastic housing, or a loose set screw. Disassemble the mechanism (most unscrew or unclip), inspect for cracks, and replace broken plastic components. Most major brands (Treasure Garden, FiberBuilt, Shadowspec) sell replacement crank assemblies. A tilt mechanism that flops freely is often just a loose locking knob or worn friction pad, replace the pad and confirm the locking knob thread is intact before spending money on a full assembly replacement.
Maintenance, inspection, and seasonal storage
A properly anchored umbrella still needs seasonal attention to stay safe and functional. Here's the maintenance schedule I use.
At the start of each season
- Check all anchor bolts for torque: retighten any that have backed off over winter (freeze-thaw cycles loosen hardware).
- Inspect the base pole socket for cracks, corrosion, or deformation.
- Check weight bag fill levels and top off compacted sand.
- Confirm all locking pins are present and straight.
- Inspect the pole for dents, bends, or corrosion at the base sleeve — the base is the highest-stress point.
- Test the crank and tilt mechanisms under no load before raising the canopy for the first time.
Monthly during the season
- Visually check that base legs are still level and paver stacks (if used) are plumb and fully stacked.
- Inspect concrete anchor bolt sealant for cracking — reseal if needed.
- Check that the canopy fabric isn't binding on the frame during rotation, which can add unexpected torque loads to the base.
- After any storm or high-wind event: check every fastener, inspect the pole at the sleeve entry point, and confirm no base movement occurred.
Seasonal storage
- Close and store the canopy before the first frost — wet canvas or polyester fabric that freezes can crack its coating.
- For portable bases, drain water bags fully and leave weight bags slightly open so residual moisture can evaporate.
- Remove the umbrella pole from in-ground or surface sleeves and store it horizontally in a garage or shed. Leaving the pole in an outdoor sleeve over winter invites moisture intrusion and accelerates corrosion at the base.
- Cover base hardware with a UV-resistant tarp or store indoors. Cast iron weight rings rust quickly when left outdoors without a cover.
- For deck or concrete bolt installs, apply a thin coat of anti-corrosion spray to exposed bolt hardware before covering.
Wind speed guidance and when to close your umbrella
No anchoring method replaces the simple act of closing the umbrella when wind picks up. Treasure Garden's BF10 manual, like virtually every cantilever umbrella manual I've read, explicitly states: close and store the umbrella in windy conditions, never leave an open umbrella unattended, and do not use the tilt function in wind. Wind damage and hurricane events are explicitly excluded from most manufacturer warranties, meaning if your umbrella blows over and bends, it's your cost to fix.
| Wind Condition | Approx. Speed | Recommended Action |
|---|---|---|
| Light breeze | Under 15 mph | Normal use, monitor |
| Moderate breeze | 15–20 mph | Reduce tilt angle, keep canopy lower |
| Fresh breeze / gusty | 20–25 mph | Close canopy, leave pole in base |
| Strong wind | 25–35 mph | Close canopy, remove pole from base if possible |
| Storm / high wind | 35+ mph | Remove and store umbrella fully indoors |
If you're at elevation (a rooftop deck or hillside patio), downgrade each threshold by 5 mph. FiberBuilt's installation documentation specifically notes that higher elevations and rooftops require upgraded base weights and through-bolt anchoring, the wind loads are simply higher up there.
Troubleshooting common failure points
Here are the issues I see most often and how to work through them from simplest to most involved.
The umbrella leans to one side
First check whether the base itself is level. A base resting on uneven pavers will always lean. Shim the low side with rubber pads. If the base is level but the pole leans, check whether the pole socket in the base is worn or cracked, this is common after several seasons. A worn socket needs to be replaced (base replacement or sleeve insert). If the pole itself is bent, see the retrofit section above.
The base creeps or slides
On smooth concrete or pavers, even a full-ballasted base can slide slightly under sustained lateral wind load. Add non-slip rubber pads under each base foot as a first step. If that's not enough, apply construction adhesive (removable type) to the pad bottoms for temporary additional grip. The long-term fix is switching to a bolted or in-ground method.
The pole rattles or spins in the sleeve
This usually means the pole is slightly smaller than the sleeve bore, or the retaining pin/collar has failed. Order a manufacturer-specific sleeve insert or collar shim. A temporary fix is wrapping the pole base with self-amalgamating tape until the diameter fills the sleeve snugly, but replace the hardware before the next season.
Weight bags split or leak
UV degradation and freeze-thaw cycles crack plastic weight bag housings over time. Empty, clean, and replace the bag housing with a manufacturer replacement. If replacement bags aren't available, double-bag the sand in heavy-duty contractor garbage bags and re-insert into the existing housing.
Anchor bolts in concrete are loose
A loose expansion anchor in concrete means the hole was too large, the anchor wasn't cleaned before installation, or the concrete has deteriorated around the hole. Remove the anchor, clean out the hole with compressed air, and fill with two-part epoxy anchor adhesive, then re-insert the bolt. Allow full cure per the epoxy manufacturer's time before reloading. If the concrete itself is crumbling, consult a structural engineer before attempting any anchor at that location.
When to call a professional
Most of what's covered in this guide is well within DIY territory. But there are a few situations where I'd recommend getting a professional involved rather than guessing your way through.
- Your patio slab is thinner than 3 inches, or has significant cracking: a structural engineer should evaluate whether it can accept the anchor loads before you drill.
- Your deck was built without a permit and you can't confirm its joist spacing or lumber grade: a contractor can inspect and confirm framing before you bolt into it.
- You're installing on a rooftop or balcony: roof membrane penetrations and balcony structural capacity require professional assessment.
- Your umbrella is 14 ft or larger: the overturning forces at this size are substantial and a professional can size a footing correctly for your specific soil conditions.
- An anchor bolt has pulled through the concrete and left a hole: this indicates concrete deterioration that needs professional evaluation, not just a bigger bolt.
A note on related anchoring topics
Securing an offset umbrella overlaps with several related challenges depending on your specific setup. If you're working on a center-pole umbrella rather than a cantilever, the anchoring principles are similar but the load geometry is different. The question of how to hold a patio umbrella in place on a surface where bolting isn't possible has its own set of solutions beyond ballast. For specific tactics on how to hold patio umbrella in place when bolting isn't an option, see the dedicated guide for practical solutions and step‑by‑step methods. If bolting isn't possible and you need temporary ballast solutions, see how to weigh down patio umbrella for practical portable-weighting options. See the detailed guide on how to anchor patio umbrella for footing sizing and soil-specific advice. And if you need to go deeper on the engineering side of soil anchoring, the topic of how to anchor a patio umbrella into different ground conditions covers footing sizing and soil types in more detail. For deck-specific installs, the topic of how to bolt down a patio umbrella walks through joist-finding and lag-bolt sizing step by step. All of these build on the same foundation: match your method to your surface, size your ballast or fasteners to your umbrella and wind zone, and close the canopy before the wind does it for you. For practical, surface-specific options and step-by-step instructions, see our guide on how to support patio umbrella. For additional methods and quick fixes, see how to stabilize a patio umbrella.
FAQ
Title and meta description for an article about securing an offset (cantilever) patio umbrella
Title: How to Secure an Offset (Cantilever) Patio Umbrella: Anchoring, Ballast, Retrofit & Safety Meta description: Practical, step‑by‑step guidance for homeowners to anchor, ballast, bolt, retrofit, inspect and maintain offset (cantilever) patio umbrellas on concrete, deck, pavers and soil — includes tool lists, weight rules of thumb tied to umbrella diameter and wind, troubleshooting, and when to call a pro.
How do I quickly assess my umbrella, site, and wind exposure before choosing an anchoring method?
Checklist: - Measure umbrella: canopy diameter (ft), pole/spigot diameter, and spigot/sleeve size. Note tilt/crank mechanisms and venting. - Identify surface: poured concrete slab, concrete pavers, timber deck (surface and framing access), soil/lawn, gravel, rooftop/portable patio. - Evaluate wind exposure: local typical gusts and maxs (use weather history), nearby barriers (walls, trees), and elevation (rooftops are higher risk). - Note use patterns: permanent vs seasonal, ability to close/store umbrella, and whether you can sink a sleeve in-ground. - Safety check: inspect current base/mount for cracks, loose bolts, or bent parts. Decision tips: choose permanent bolting or in‑ground sleeve for high wind/exposure; weighted/portable bases acceptable for low-exposure patios if properly ballasted and closed in wind.
What anchoring/ballast options work per surface (concrete, deck, pavers, soil, portable patios)?
Surface-specific options: - Poured concrete slab: surface plate bolted with expansion/epoxy anchors; or core/cast concrete footing with anchor plate or in‑ground sleeve. - Concrete pavers: set a poured concrete pad beneath pavers for a surface plate or use an oversized portable base placed on a level paver area with additional ballast. - Timber deck: bolted surface plate into structural joists/blocking (not just decking); or install an in‑deck recessed sleeve with blocking underneath and through‑bolts into framing. - Soil/gravel/lawn: in‑ground sleeve set in concrete footing, belled and sized per soil; auger / screw ground anchors with straps only for temporary, low‑wind use. - Portable patios/rooftops: heavy engineered portable base (manufacturer-specified), stacked concrete pavers, or professionally installed bolted plate to structural substrate; portable bases are less secure — prefer permanent anchoring for exposed sites. General: cross-base resin systems or weight rings work where the manufacturer’s ballast specification is met; never rely on friction alone for high wind exposures.
What are step-by-step installation checklists and tool/material lists for a concrete surface plate (bolt down) install?
Materials: - Surface plate/spigot plate sized to umbrella spigot - Mechanical wedge/expansion anchors (e.g., M10–M12) or epoxy anchors sized per plate and slab thickness - Anchor bolts, washers, locknuts - Concrete patch or epoxy (if needed) Tools: - Hammer drill with correct masonry bits - Vacuum/brush for cleaning holes - Torque wrench - Socket set, ratchet, spanner - Tape measure, level - Safety gear (glasses, gloves) Steps: 1. Verify slab thickness and rebar locations; ensure slab can take concentrated load; consult engineer if slab <4" or unknown. 2. Position surface plate and mark anchor hole centers. 3. Drill holes to manufacturer depth; clean holes thoroughly with brush and blower/vacuum. 4. If using epoxy anchors, inject epoxy per manufacturer, insert threaded rods, allow full cure. For expansion anchors, insert per installation torque guidance. 5. Torque anchors to manufacturer spec (use Hilti/Simpson tables). 6. Mount spigot to plate and check verticality with level; tighten fasteners and install umbrella only after anchor cure. 7. Inspect periodically and retorque after seasonal freeze/thaw. Safety notes: maintain required embedment, edge spacing and avoid drilling into post‑tensioned slabs without consulting a structural engineer.
What are step-by-step instructions and tools for installing an in‑ground sleeve or concrete footing for a cantilever umbrella?
Materials: - Steel sleeve/spigot (manufacturer or compatible size) - Concrete (volume depends on hole size and soil) - Gravel for base - Forming tube or sonotube (if required) - Anchor plate (optional) and grouting compound Tools: - Post hole digger or auger - Shovel, tamper - Level, plumb line - Wheelbarrow/mixer Steps: 1. Determine hole size: follow manufacturer; typical guidance: 40–70 cm diameter × 70–100+ cm deep; increase depth/diameter for sandy soils—Shadowspec gives examples up to 1.0 m deep × 0.5 m wide for clay. 2. Excavate and place 4–6" (10–15 cm) compacted gravel base. 3. Position sleeve vertically using a level and temporary bracing; if required, set anchor plate or dowels in location for spigot. 4. Pour concrete to fill around sleeve; vibrate or tamp to remove voids; plumb sleeve while concrete cures. 5. Allow concrete to cure fully (typically 48–72 hours or per mix) before installing umbrella spigot and loading. 6. Backfill around footing after cure. Notes: bell the bottom in loose soils; check local frost depth and set footing below frost line where required for permanent installs.
How should I anchor a cantilever umbrella to a timber deck?
Materials: - Structural-grade surface plate sized to spigot - Through‑bolts (stainless) long enough to pass through deck sheathing and into joists/blocking - Washers, stainless nuts, and possibly backing plate Tools: - Drill, wood bits, wrench set, torque wrench, saw (for blocking), measuring tools Steps: 1. Expose/locate structural joists; do not fasten only to deck boards. 2. Install blocking between joists under the plate location sized to distribute loads. 3. Drill holes and fasten plate with through‑bolts that bear on joists/blocking; use washers and backer plate if accessible. 4. Seal penetrations with marine sealant to prevent rot. 5. Check manufacturer load limits and consult Simpson Strong‑Tie tables for fastener selection; when in doubt, consult a structural engineer. Warning: bolting into only decking boards is inadequate and unsafe for concentrated cantilever loads.
Next Articles
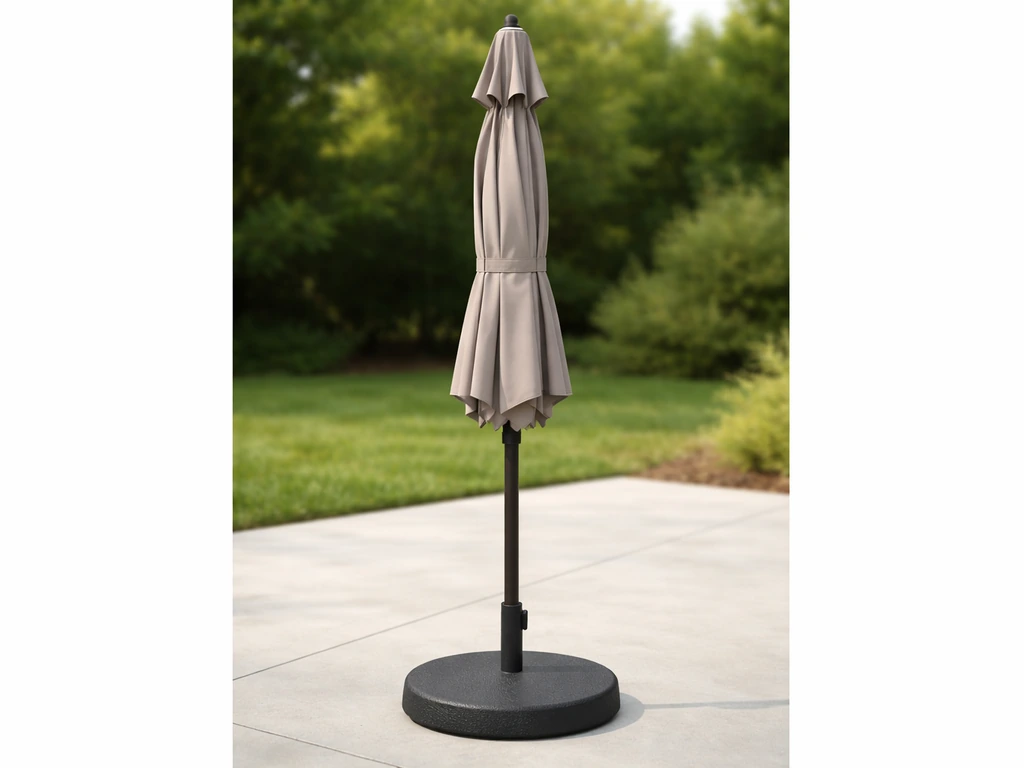
How to Support a Patio Umbrella: Fix Tipping and Wobble
Step-by-step fixes to stop patio umbrellas tipping and wobbling, from proper base setup to replacing worn tilt parts.
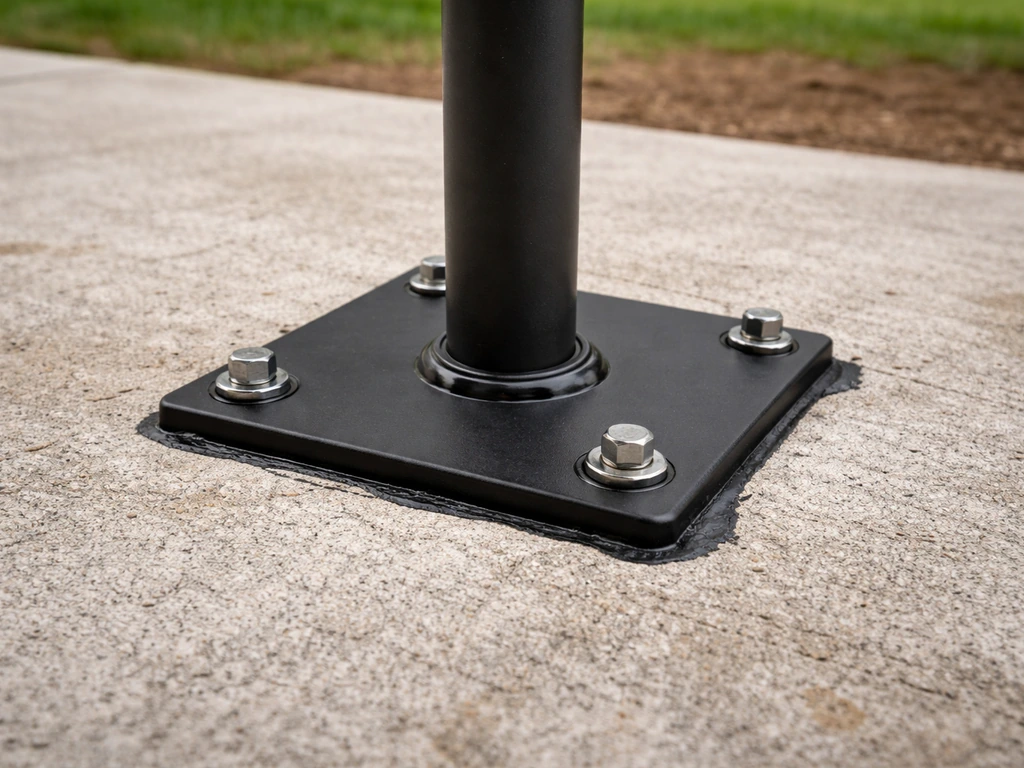
How to Bolt Down a Patio Umbrella Step by Step
Step-by-step how to bolt down a patio umbrella, choose the right anchors, drill, tighten, waterproof holes, and prevent
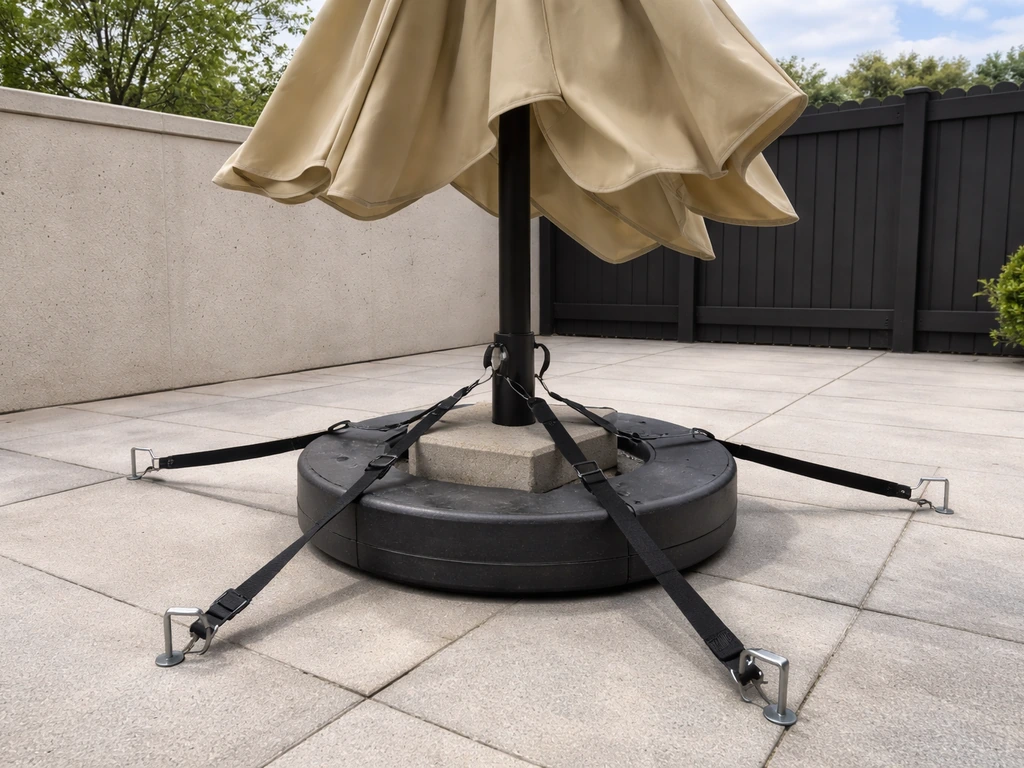
How to Hold Patio Umbrella in Place in Wind
Step-by-step methods to hold patio umbrellas in windy conditions using the right base, anchoring, and wind-stopping tact