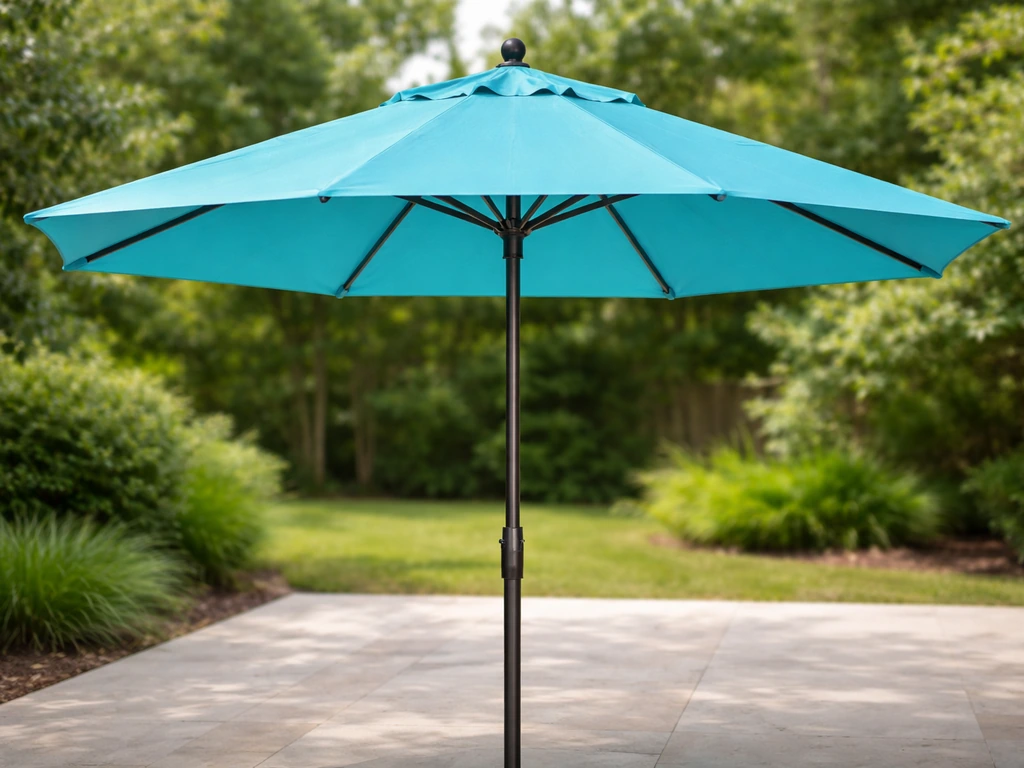
You can absolutely paint a patio umbrella and get results that last through sun, rain, and mildew, but the prep work makes or breaks the whole job. Clean the fabric or frame thoroughly, let it dry completely, sand or scuff the surface for adhesion, prime bare metal spots, then apply thin coats of the right paint for your material (acrylic fabric paint for canopies, UV-stable enamel or urethane for metal frames). Protect the crank, tilt mechanism, and any cords before you spray anything, and give the paint time to fully cure before you open and use the umbrella again. That's the whole picture, now let's walk through each step so you get a clean, even finish that actually holds up.
How to Paint a Patio Umbrella Step by Step Guide

Luca Morrison
31 May 2026
Quick Assessment: Is Your Umbrella Worth Painting?
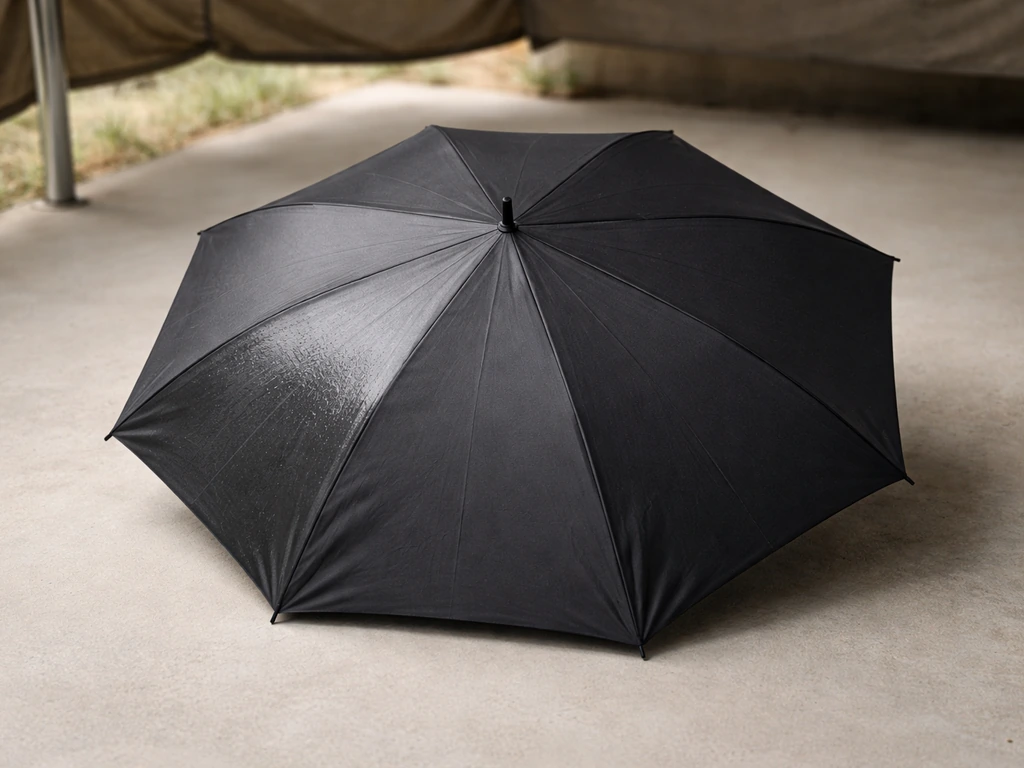
Before you buy a single can of paint, spend five minutes looking the umbrella over carefully. Painting is worth the effort when the canopy fabric is faded but structurally sound (no tears, no fraying at the seams), or when the metal frame is chalky, peeling, or showing surface rust but is not bent, cracked, or corroded all the way through. If the fabric is shredding, torn in multiple places, or the frame is deeply pitted with rust, painting is just delaying the inevitable, replacement or at least a canopy swap makes more sense.
Check the frame joints, the hub at the center, and the rib tips (those little plastic or metal caps at the end of each rib). These are the spots that rust first and weaken fastest. Give the ribs a gentle flex, if anything feels brittle or crackly, note it. Also open and close the umbrella to make sure the crank, cord, and tilt mechanism are all working before you paint. You do not want to discover a broken mechanism after you have fresh paint all over everything. If the mechanism needs repair, handle that first.
One more thing: figure out whether you are painting the fabric canopy, the metal frame, or both. The prep steps overlap, but the paint choices and techniques diverge significantly. Most people painting a faded patio umbrella are dealing with one of three situations: a sun-bleached fabric canopy, a peeling painted metal pole and frame, or both at once. Know which camp you are in before you shop for supplies.
Cleaning, Degreasing, and Getting Rid of Mildew and Chalky Finish
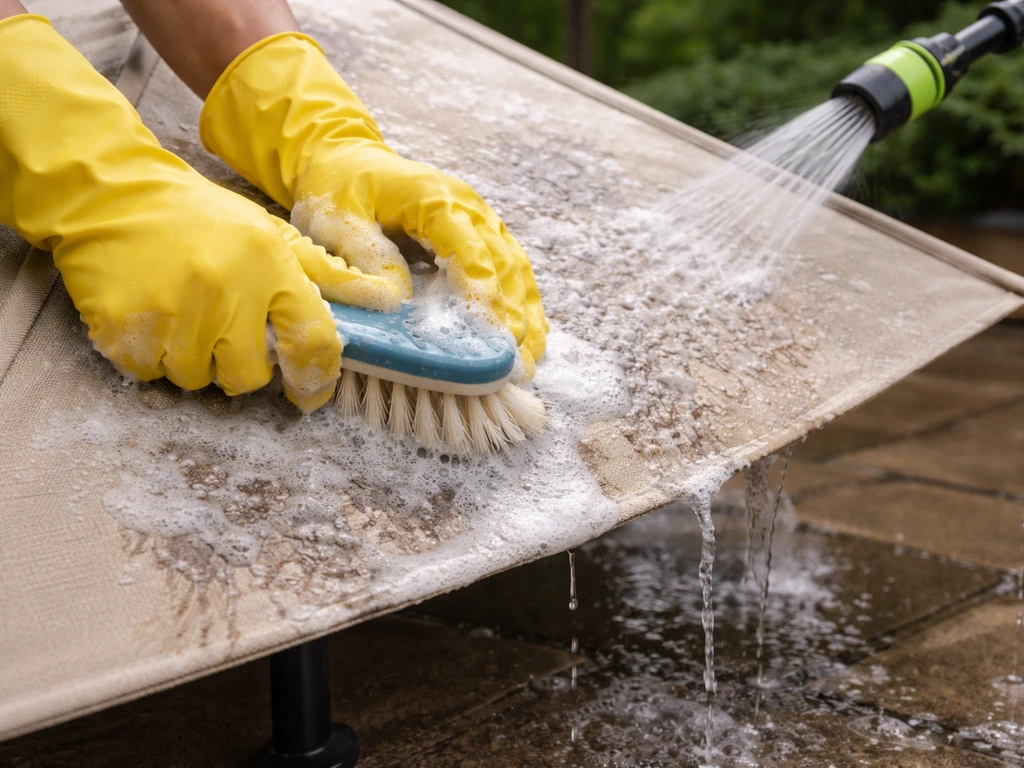
Nothing kills a paint job faster than painting over a dirty or greasy surface. Paint will not bond to mildew, sunscreen residue, bird droppings, or the chalky oxidation layer that builds up on faded fabric. This step takes longer than it sounds, but it is non-negotiable.
Cleaning Fabric Canopies
For mildew and heavy staining on outdoor fabric (including Sunbrella and similar solution-dyed acrylics), mix 1 cup of bleach and 1/4 cup of mild dish soap per gallon of clean water.
For mildew and heavy staining on outdoor fabric (including Sunbrella), mix 1 cup bleach and 1/4 cup mild dish soap per gallon of clean water, apply, let it soak up to 15 minutes, and rinse thoroughly mix 1 cup of bleach and 1/4 cup of mild dish soap per gallon of clean water.
Apply it to the open umbrella with a soft brush or sponge, let it soak in for up to 15 minutes, then rinse thoroughly until you cannot feel any soapy residue. Rinse more than you think you need to, leftover soap or bleach residue will interfere with paint adhesion. Then let the fabric air dry completely, fully open, before you do anything else. If you rush this and paint onto damp fabric, the paint will bubble and peel within weeks.
If you prefer a ready-made option, a product like Sunbrella Renew Mold and Mildew Stain Remover follows a similar process: spray it on, wait about 15 minutes, then rinse and air dry. Either approach works, the key is the thorough rinsing and the complete drying before moving forward.
Cleaning Metal Frames and Poles
For metal surfaces, start with a degreaser, a spray-on automotive degreaser or even a strong dish soap scrub works. Wipe down every surface of the pole and ribs, paying attention to any greasy buildup around the crank housing and tilt collar. Rinse clean and dry with a rag, then let it air dry for at least an hour. If there is surface rust, address it after cleaning (covered in the next section). If the existing paint is chalky and flaking, scrub off as much loose material as possible with a stiff brush before you sand.
Sanding, Small Repairs, and Priming for Real Adhesion
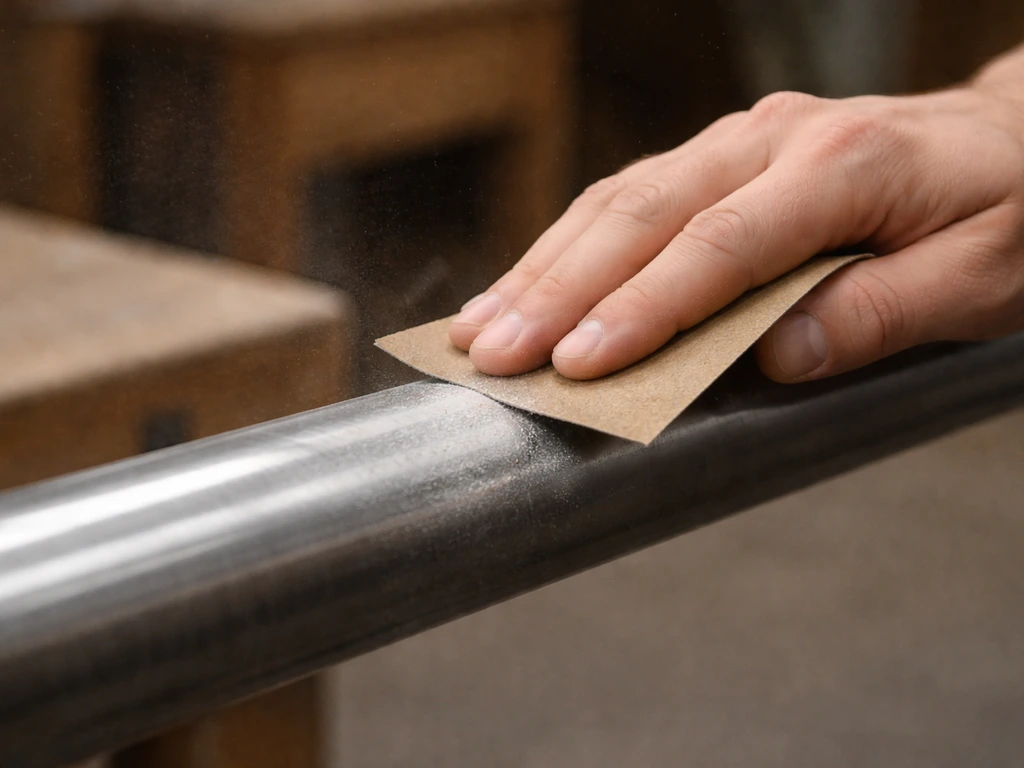
Once everything is clean and dry, you need to give the surface something for the paint to grip. On fabric, this means a light scuff with very fine sandpaper (220 grit) if the fabric is heavily glazed or slick, though most outdoor fabric does not need sanding, just thorough cleaning. On metal, sanding is mandatory.
Sanding Metal Frames
For metal poles and ribs with an existing painted finish, scuff the entire surface with 180 to 220 grit sandpaper. You are not trying to strip the old paint down to bare metal everywhere, just dull the gloss so the new paint has something to bond to. Where the old paint is already peeling or you have sanded through to bare metal, go back over those spots with 180 grit to smooth any sharp edges from the old paint lifting.
If you find rust spots on the bare metal, deal with them before priming. A rust dissolver product (like Rust-Oleum's ROC-49 or similar) applied to the rusted area, blank" rel="noopener noreferrer">left to dwell per the product's directions, then rinsed and wiped clean will neutralize the oxidation. Dry the area completely before priming. For serious rust patches, a wire brush or rust-removal drill attachment helps knock off the worst of it before the chemical treatment.
Priming Bare Metal
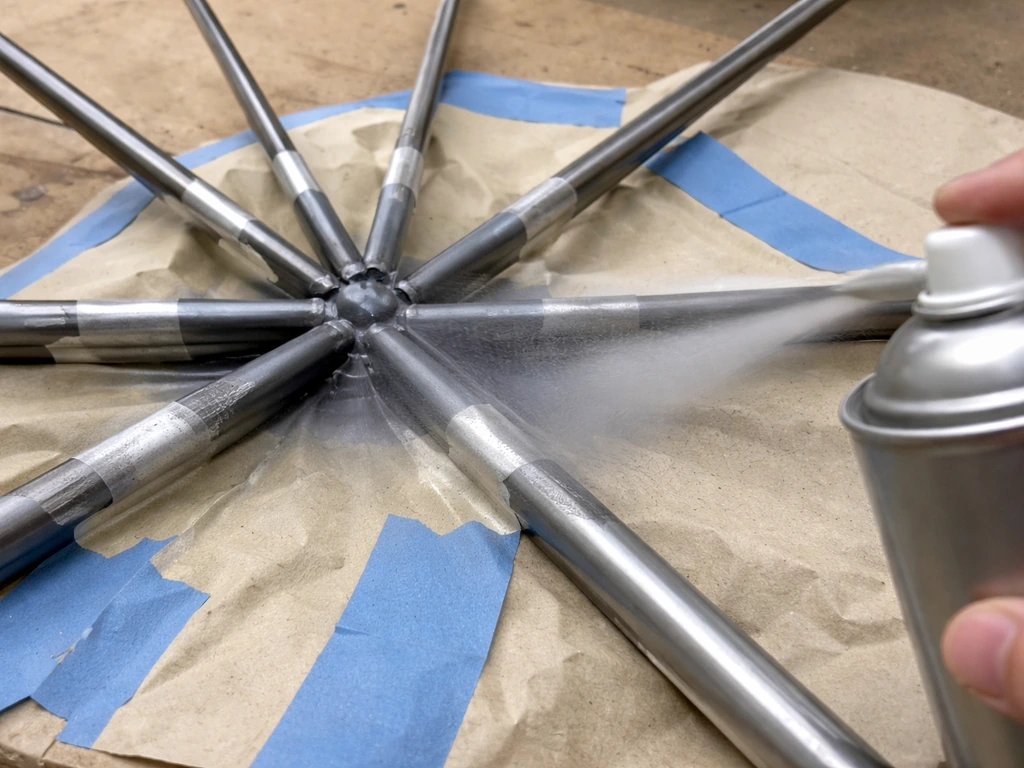
Any spot where you have sanded or scraped down to bare metal needs primer before topcoat. A self-etching primer, something like Dupli-Color's Multi-Purpose Self-Etching Primer, bonds directly to bare metal and aluminum in one step and gives the topcoat something solid to grip. Spray it on in a thin, even coat over the bare spots (or the whole frame if most of the original finish is gone), let it tack up per the can's instructions, and do not skip this step thinking the topcoat alone will hold. It will not, especially on a patio umbrella that expands and contracts with temperature every single day.
If you are dealing with heavy rust and want maximum protection, a rust-encapsulating coating like KBS RustSeal, part of a clean, degrease, and rust-blast system, goes on over the cleaned metal and locks out moisture before you apply a UV-stable topcoat. It is more involved than a rattle-can primer but makes sense for a frame that has seen significant rust damage. After RustSeal fully cures (at least 24 hours), scuff it lightly with 320 grit sandpaper before applying your color topcoat.
Protecting the Moving Parts Before You Start
This is the step most people skip and then regret. Before any sanding dust, primer, or paint gets near the umbrella, tape off or cover the crank mechanism, the tilt collar and pin, any exposed cord or pulley, and all plastic components. Use painter's tape and plastic wrap or a few sandwich bags secured with tape. Paint in the crank housing gums up the gear teeth. Paint on the tilt collar can lock the mechanism in place. Paint on the cord frays it faster and makes it sticky. A few minutes of masking now saves you from having to repair the mechanism later.
Choosing the Right Paint for Your Umbrella Material
The biggest mistake people make is grabbing a random can of spray paint and going to town. Outdoor umbrella materials each have specific needs, and the wrong paint will crack, peel, or just look terrible within a season.
| Umbrella Part | Best Paint Type | Key Properties to Look For | What to Avoid |
|---|---|---|---|
| Fabric canopy (acrylic/polyester) | Acrylic-based fabric paint or flexible outdoor fabric spray paint | Stays flexible when dry, UV-resistant, mildew-resistant | Rigid enamel, latex house paint, anything that dries hard/brittle |
| Metal pole and frame (painted steel) | UV-stable enamel spray paint or urethane topcoat | UV and salt spray resistance, bonds to primed metal, stays color-true outdoors | Interior paint, chalk paint, craft acrylics |
| Aluminum frame (unpainted) | Self-etching primer + UV-stable enamel or urethane topcoat | Etching primer for aluminum adhesion, UV-stable color coat | Paint without primer on bare aluminum (will peel) |
| Plastic components (hub, rib tips) | Flexible plastic primer + plastic-compatible spray paint | Stays flexible, UV-resistant | Standard metal paint without a plastic-bonding primer |
For fabric canopies specifically, the paint needs to stay flexible after it dries. Fabric moves, folds, and flexes every time you open and close the umbrella. A rigid paint will crack at the fold lines within weeks. Look for paints explicitly labeled for fabric or flexible surfaces, and make sure they are acrylic-based for the best UV resistance outdoors.
Results do vary depending on fabric type and how much sun exposure the umbrella gets, this is not a one-paint-fits-all situation. If your umbrella's canopy is severely faded, it is also worth considering dyeing as an alternative to painting, since dye penetrates the fibers rather than sitting on top of them.
If you want deeper, more even color, learning how to dye a patio umbrella can be a great option when the fabric is faded but still in good shape dyeing as an alternative to painting.
For metal frames, a UV-stable urethane topcoat is the gold standard for outdoor color longevity. Products like KBS BlackTop (a UV-stable urethane) are rated for 1,000 hours of salt spray resistance on their own, and even longer when applied over a rust-encapsulating primer. That kind of durability matters on an outdoor umbrella that faces sun, rain, and humidity every season.
Step-by-Step: How to Actually Paint the Umbrella
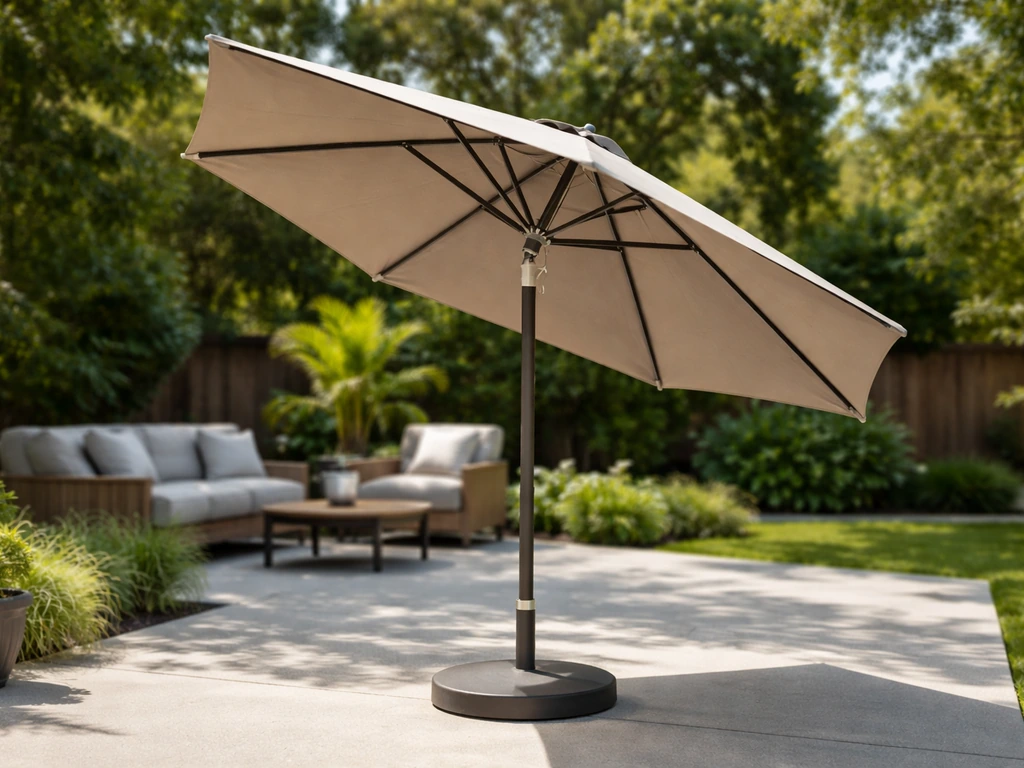
Do this on a calm day, no wind above a light breeze, temperature between 50 and 85 degrees Fahrenheit, and low humidity if possible. Overspray in wind is a real problem with umbrella canopies because of their shape. Lay down a drop cloth under the umbrella or work on grass. Open the umbrella fully and lock it in position so you have access to the whole canopy surface at once.
- Confirm the umbrella is fully clean, dry, sanded, primed (on metal), and all moving parts are masked off. Do not skip back here from a later step — everything downstream depends on this.
- Shake your spray can for a full minute (or follow the manufacturer's mixing instructions for brush-on paint). Cold paint sprays unevenly, so if the can has been sitting in a cool garage, warm it in a bucket of warm water for a few minutes first.
- Hold the spray can 10 to 12 inches from the surface. Start with the seams and edges of the fabric panels, which are thicker and absorb more paint. Work in smooth, overlapping passes — move the can before you press the nozzle and release it after each pass. Never hold the spray in one spot.
- Apply the first coat as a thin, light mist coat. You will be able to see through it — that is fine. This coat is about getting paint to stick, not about coverage. For fabric, this first coat may look patchy and uneven. Do not try to fix it by spraying heavier.
- Wait 15 to 30 minutes between coats (check your paint's label, but this range is standard for outdoor spray paints). The surface should be dry to the touch before the next coat goes on, but you do not need to wait for full cure between coats.
- Apply a second coat the same way — thin, even, moving passes. By this coat you should start seeing real coverage. Three to four thin coats typically beats two heavy ones for fabric because heavy coats stiffen the material and tend to run on the angled panels.
- For metal frames, follow the same thin-coat approach. Work in sections from the top (hub and upper ribs) downward to the pole. Watch for runs on the pole, which is a vertical surface — if you see a run forming, stop spraying and let it tack up before continuing. You can sand out small runs with 320 grit between coats once they are fully dry.
- Once you have the coverage you want, do a final inspection with the umbrella in direct light — look at an angle across the surface to catch any drips, thin spots, or uneven sheen. Add a final light pass to any thin areas.
- Remove all masking tape and plastic while the paint is still slightly tacky (not wet, not fully cured) — this helps the tape pull away cleanly without lifting paint edges.
If you are brush-painting rather than spraying (this is less common but workable for frame touch-ups), use a good quality synthetic bristle brush, work in the direction of the metal grain or panel edges, and keep the coats thin. A foam roller on the pole can speed things up and reduce brush marks.
Drying, Curing, Reassembly, and Keeping the Color Longer
Drying vs. Curing: They Are Not the Same Thing
Paint dries when the solvent evaporates (usually within an hour or two). Paint cures when the coating chemically hardens to its final durability (often 24 to 72 hours, sometimes longer for urethane topcoats). Touching the umbrella too soon, closing it before curing, or leaning anything against it before it is fully cured can ruin all your work. Leave the umbrella fully open and in a shaded, ventilated area for at least 24 hours after the final coat. Check your specific paint's curing time, some urethane topcoats need 48 to 72 hours before they can handle rain or folding stress.
Do not close and fold the canopy until the paint has fully cured. If you close it while the paint is still in the curing stage, fabric-to-fabric contact can cause the panels to stick together and peel when you open the umbrella again. This is one of the most common and frustrating gotchas with painted fabric canopies.
Reassembly Checklist
- Remove all masking tape and protective plastic from the crank, tilt mechanism, and cord.
- Test the crank — open and close the umbrella slowly the first time to check that nothing is binding. If the crank feels stiffer than normal, check for any paint overspray that snuck past the masking and wipe it away immediately with a damp cloth or appropriate solvent.
- Check the tilt mechanism. If it was working before, it should work now — if it feels stiff, a drop of silicone lubricant (not WD-40) on the collar pin is your friend.
- Inspect the rib tips and hub cap — if you painted over any plastic clips or ferrules, make sure they are not glued shut.
- Reattach any valances or decorative trim that you removed before painting.
Making the Color Last
Painted patio umbrellas need a little more care than factory-finished ones to keep the color looking fresh. To keep a painted patio umbrella looking its best, focus on gentle cleaning, proper drying, and protecting it from harsh sun and moisture painted patio umbrellas. The biggest threats are UV exposure, moisture trapped in the folded canopy, and bird droppings or tree sap sitting on the surface for days.
If you want your painted umbrella to stay bright longer, controlling UV exposure is one of the most effective ways to keep it from fading.
A few habits go a long way: close and cover the umbrella when it is not in use (a fitted umbrella cover is worth buying), rinse the canopy with clean water every few weeks to prevent dirt and organic buildup, and avoid pressure washing the painted fabric, the force will abrade the paint coating faster than anything else.
If you want to add an extra layer of protection on the fabric canopy, a UV-blocking fabric sealant or waterproofing spray (applied after the paint has fully cured) can extend the life of both the color and the canopy itself. For true weather protection, choose a waterproofing spray designed for outdoor fabric and apply it after the paint has fully cured. Reapplying a light protective topcoat once a season is much less work than a full repaint every year. Addressing fading early, before it progresses to chalking and fiber degradation, is the real key to keeping any patio umbrella looking good long-term.
One honest note on expectations: painting a patio umbrella fabric canopy is not quite the same as painting a metal surface. The color will refresh and the umbrella will look dramatically better, but paint on fabric will not last indefinitely, plan for a touch-up or full repaint every two to three seasons depending on sun exposure and how well the umbrella is stored. Painting the metal frame, when done with proper primer and a UV-stable topcoat, tends to hold up considerably longer. If you are on the fence about whether painting or another approach makes more sense for your specific situation, think about the overall condition of the canopy and whether waterproofing or protecting the existing surface might extend its life just as well.
FAQ
Can I paint my patio umbrella without deep cleaning first?
Not if you want it to last. Even if the umbrella looks clean, you need to remove sunscreen residue, mildew staining, and oxidation (the chalky layer on faded fabric). For metal, degrease first because oils around the crank and tilt collar will cause paint to fisheye or peel.
Do I need to sand the fabric canopy before painting?
Remove or cover the fabric canopy seams only if they’re already fraying. Do not aggressively sand fabric seams. If you’re painting fabric, focus on scuffing lightly only when the surface feels slick or heavily glazed, otherwise the paint may not adhere evenly at the folds.
Can I spray a waterproofing or UV sealant on top of the painted umbrella?
Yes, but only use it after the paint has fully cured. Applying sealant or waterproofing too early can trap solvents under the coating, which can lead to tackiness, uneven sheen, or premature peeling when the umbrella flexes.
What’s the best paint type for a patio umbrella canopy versus the frame?
For fabric, use paint labeled for fabric or flexible surfaces, typically acrylic-based. For metal, choose a UV-stable urethane or enamel made for exterior use. If you use the wrong type, the coating will crack at folds (fabric) or chalk and fail under sun and moisture (metal).
What should I do if the painted fabric starts bubbling or peeling soon after?
If you see bubbling, it usually means the fabric was still damp or the cleaning left residue. Let everything dry longer, then remove affected paint only in those spots by sanding lightly (fabric) or scuffing (metal), and repaint with thin coats.
How many coats should I apply when learning how to paint patio umbrella fabric or metal?
Thin coats and better control over drips. For most people, spray works best on frames and careful brush or spray works on fabric, keeping the fabric stretched and applying light layers. Thick coats cure slower and can crack when the umbrella opens and closes.
How long should I leave the patio umbrella open to cure after painting?
Wait longer than “dry to the touch” before you open, fold, or test the mechanism. Solvent evaporation can finish quickly, but curing often takes 24 to 72 hours depending on the product, especially UV-stable urethane. Keep it fully open in a ventilated, shaded spot.
What exactly should I tape off before painting the umbrella crank and tilt mechanism?
Yes, masking makes a huge difference, but cover more than just moving metal. Also protect any plastic rib tips, pulley areas, and any stitching details that you don’t want glued together by overspray or paint bridges.
Can I spot-paint a rust patch on the umbrella frame instead of repainting everything?
You can, but only for specific repairs, and be careful with paint build-up at joints. Touch-ups tend to show flashing where new paint meets old because the surface prep and coating thickness differ. If the frame is mostly peeling, spot repair often turns into a full refresh anyway.
Is it okay to use a pressure washer to clean a painted patio umbrella?
Avoid pressure washing the painted canopy. The abrasion rate is too high, it can wear through the coating on edges and at folds. Instead, use gentle rinsing with clean water, and blot or brush lightly with a soft brush if needed.
When will I know it’s time to repaint or touch up my patio umbrella?
Repaint sooner if the metal is showing rust through, if the fabric looks chalky again, or if the painted surface feels rough at fold lines. A practical rule is to touch up after one full season of heavy sun exposure, rather than waiting until you see deep peeling.
Next Articles

How to Dye a Patio Umbrella Step by Step Guide
Step-by-step how to dye and tie-dye a patio umbrella, including prep, dye choice, aftercare, and avoiding streaks.

How to Fix a Patio Umbrella That Won't Open or Close
Step-by-step fixes for patio umbrellas that won’t open or close, with checks for jams, cords, latches, and lubricating t
How Does a Patio Umbrella Work? Components, Use, and Fixes
Learn how patio umbrellas work: components, open close tilt, stability, and step by step troubleshooting common mechanic