
To open an offset (cantilever) patio umbrella, first confirm the base is weighted or anchored, then remove any tie or cover, unlock the mast clamp, and either turn the crank handle clockwise to raise the canopy, pull the hand cord on a pulley-style system, or press the quick-release button and push the hub upward depending on your mechanism. For instructions on taking the canopy down, see how to close patio umbrella. Once the canopy is fully open, engage the tilt collar or push-button to angle the shade where you need it, then lock everything in place before stepping away. The full process takes about two minutes once you know your specific mechanism, and this guide walks you through all three types, plus assembly, adjustment, troubleshooting, and storage. For step-by-step, model-specific instructions on how to open cantilever patio umbrella, see the full guide (id: 7e481a8f-cd71-4cac-93a3-ec114316f4eb). For step-by-step instructions, see our guide on how to operate patio umbrella.
How to Open Offset Patio Umbrella: Step-by-Step Guide

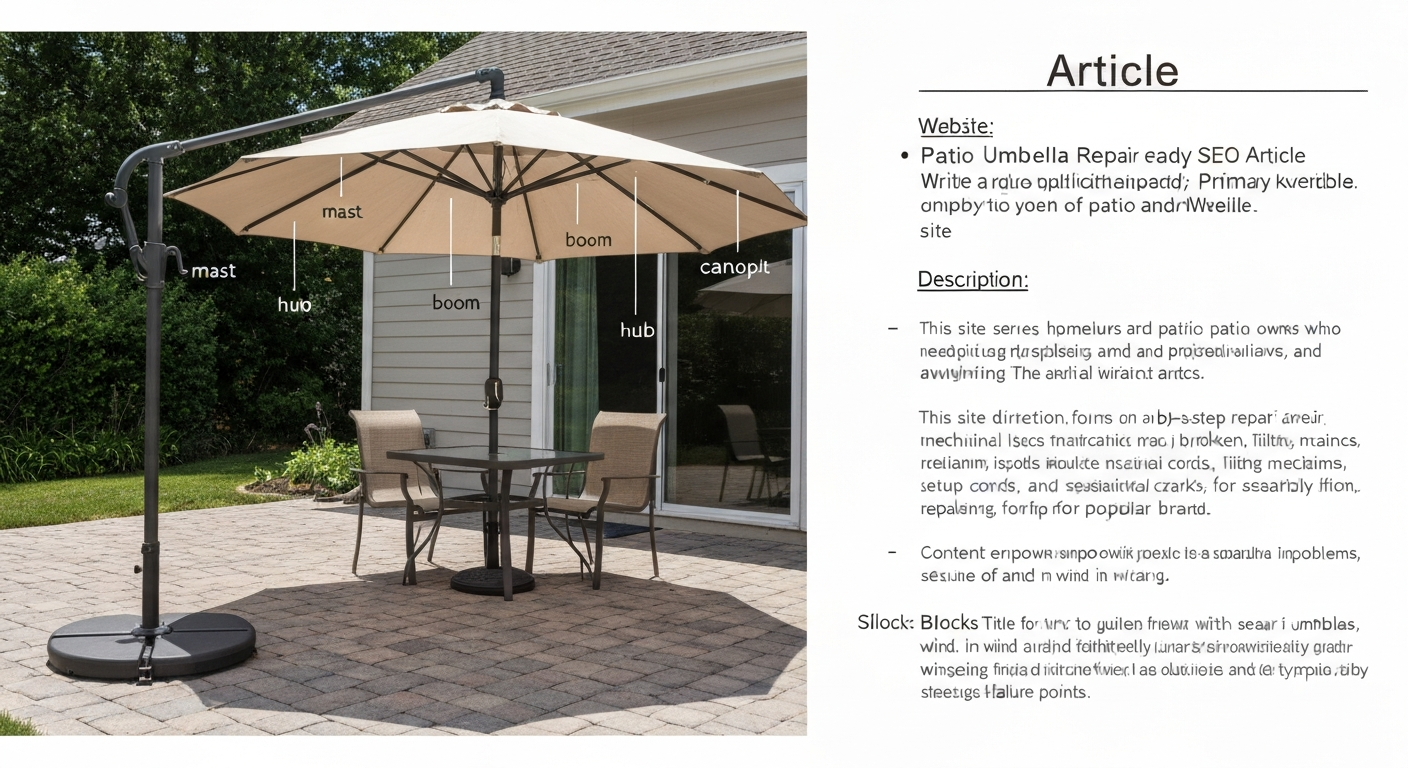
What makes an offset umbrella different from a center-pole model
A center-pole patio umbrella runs its support pole straight up through the middle of the canopy and sits in a table hole or freestanding base directly under the shade. An offset umbrella (also called a cantilever umbrella) moves that support pole to the side, letting the canopy hang out over seating without any pole in the way. The arm that extends the canopy out over the space is called the boom or main arm, and it connects to a vertical mast anchored in a heavy base or deck mount off to one side.
That side-pole design means more shade flexibility and a cleaner look, but it also means more mechanical complexity. Offset umbrellas carry real leverage forces, a 10-foot canopy arm creates significant torque on the mast and base, which is why base weight requirements are much higher than for a center-pole model. It also means the opening and tilt mechanisms are more involved, with cables, pulleys, or gas-assisted arms that are simply not present on a basic center-pole umbrella. Understanding this upfront helps you handle the mechanics correctly and spot problems before they become bigger ones.
Tools, materials, and safety checklist before you start
Before you touch the umbrella, run through this checklist. Skipping it is the single most common reason offset umbrellas tip, fail, or injure someone during setup.
- Safety glasses: flying cotter pins and snapping cables are real hazards during assembly
- Work gloves: edges on aluminum ribs and mast clamps can be sharp
- Helper: offset umbrella booms and masts are heavy and awkward — a second person prevents dropping and injury, especially on models 9 feet and larger
- Phillips-head and flat-head screwdrivers
- Needle-nose pliers (for cotter pins, cord knots, and small fasteners)
- Small socket set or adjustable wrench (for mast collar bolts and base plate fasteners)
- Silicone spray lubricant (not WD-40, which attracts dirt — use a dry silicone spray)
- Replacement cord: 3–5 mm braided polyester, available at hardware stores
- Your model's owner's manual (download from the manufacturer's website if lost — Treasure Garden, Tuuci, Sunnydaze, and most brands post PDFs publicly)
- A clear, flat workspace with no overhead obstructions during assembly
- Wind check: never open or assemble an offset umbrella in winds above 15 mph; manufacturers including Tuuci explicitly state to close all collapsible shade structures when winds exceed 25 mph
On base weight: this is not optional. Sunnydaze specifies a minimum total base weight of 120 lb (54.4 kg) for their 10-foot offset model using four cantilever base plates. A smaller 9.5-foot offset from CorLiving requires a minimum of 47 lb if you're filling the base with water, or 61 lb if using sand. Your model will have its own requirement in the manual, find it and meet it before opening the canopy. An underweighted base is the leading cause of tip-over injuries with cantilever umbrellas.
Parts inspection checklist
Run through this inspection before every season and any time the umbrella has been through a storm. Catching a frayed cable or a cracked crank housing early saves you from a mid-use failure. For model-specific part names and diagrams, pull up your owner's manual, brands like Treasure Garden (AG19, AG25 series) and Tuuci publish detailed exploded-parts diagrams that label every component by number. See the Treasure Garden AG25TSQR Cantilever Instruction Manual, Manualzz (Treasure Garden parts list & instructions) for exploded parts diagrams and labeled part callouts See the Treasure Garden AG25TSQR Cantilever Instruction Manual — Manualzz (Treasure Garden parts list & instructions) for exploded parts diagrams and labeled part callouts..
- Ribs: check each rib for bends, cracks, or broken ferrules (the small sleeves where ribs meet the hub); a bent rib will pull the canopy to one side
- Hub and hinge: the hub is the central joint from which ribs radiate; spin it by hand to check for grinding, stiffness, or play — seized hub bearings are a common failure on older cantilever models
- Crank housing: turn the crank and feel for skipping, grinding, or free-spinning with no canopy movement — these indicate stripped gear teeth or a slipped spool
- Lift cable or cord: run your hand along the full length of the cable or cord inside the pole; look and feel for fraying, kinks, or worn spots near the spool and near the hub connection
- Pulleys: on pulley-system umbrellas, check each pulley wheel for free rotation; a seized pulley will cause the cord to jump off and jam
- Tilt mechanism: engage the tilt (push-button or collar type) and verify it locks positively and releases cleanly without sticking
- Canopy fabric: look for UV-degraded areas, loose seams, torn rib pockets, or mold — a torn canopy acts as a sail in wind and increases tip risk
- Boom and mast: look along the main arm and vertical mast for dents, cracks at welds, or visible bends — pay particular attention to the junction where the boom meets the mast
- Base and fasteners: check all base plate bolts, mast collar screws, and the security stem bolt for tightness; Tuuci specifically recommends tightening the security stem bolt as a regular maintenance task
Assembling an offset umbrella frame step by step
If you are putting together a new offset umbrella or reassembling after storage, work through these steps in order. Trying to shortcut the sequence, like attaching the canopy before the boom is secured, usually means redoing it entirely. For more detailed brand-specific assembly guidance, the assembly guide for offset and cantilever frames covers this process thoroughly. For step-by-step photos and parts diagrams, see our guide on how to assemble an offset patio umbrella.
- Unpack and inventory all parts against the parts list in your manual before you start. Missing a cotter pin or collar bolt now is better than discovering it mid-assembly.
- Set up the base on a flat, stable surface and, if it's a fillable base, fill it to the required weight before attaching anything else. An empty base is useless as an anchor.
- Insert the vertical mast (the upright pole) into the base sleeve. On most models, a security stem bolt or collar fastener holds it. Tighten this with the supplied hardware — hand-tight is not enough.
- With a helper, lift and attach the boom (the horizontal or angled arm) to the mast using the hinge pin or bracket supplied. Most Treasure Garden AG-series models use a hinge pin secured with a cotter pin — push the pin through, then bend the cotter pin legs apart to lock it.
- Extend the boom arm to its working length if it is telescoping, and lock the telescoping collar or thumb screw.
- Attach the hub and rib assembly to the end of the boom. On most offset models the hub hangs from the end of the boom on a swivel hinge. Connect the steering rod (on Treasure Garden models, this is the thin rod linking the tilt sleeve to the hub) to the hub attachment point.
- Feed the lift cord or cable through the internal channel of the boom and pole if it is not pre-threaded. Route it through any pulleys and connect it to the spool on the crank housing following the diagram in your manual.
- With the canopy still closed, attach each rib to its hub socket. Most ribs push in and are secured by a small spring-lock tab — press the tab, insert the rib end, and release.
- Lay the canopy over the open rib frame, feeding each rib through its canopy pocket or sleeve. Most cantilever canopies also have a Velcro or tie attachment at the hub center.
- Do a slow, partial test open (crank or pull just enough to spread the ribs about 10 inches apart) to confirm the canopy is seated on all ribs and the cord is running smoothly before going to full open.
Opening an offset umbrella with a crank mechanism
The crank is the most common opening system on mid-range offset umbrellas. Turning the handle rotates a small gear inside a plastic or aluminum housing, which drives a larger gear or spool that winds a lift cord running up through the pole to the hub. As the cord winds up, it pulls the runner and hub upward, spreading the ribs and opening the canopy. Here is how to do it correctly: For a step-by-step walkthrough specific to opening different patio umbrella types, see how to open a patio umbrella.
- Confirm the base is fully weighted or anchored and the mast collar is tight.
- Remove any protective tie, velcro strap, or cover from the closed canopy.
- Check that no one is standing directly under or near the canopy path.
- Locate the crank handle — on most offset umbrellas it sits in a housing on the mast or on the boom near the mast junction. Fold it out from its stowed position if it folds flat.
- Turn the crank handle clockwise (the direction will be labeled or intuitive — you will feel the mechanism engage). Turn at a steady, moderate pace. Do not crank hard and fast; rapid cranking can strip gear teeth or cause the cord to jump the spool.
- As the canopy rises, watch the ribs spread evenly. If one rib is lagging or the canopy is bunching to one side, stop and manually free the stuck rib before continuing.
- Tuuci recommends separating the ribs by about 10 inches before raising the hub all the way — this helps the canopy spread cleanly and reduces stress on the hub joints.
- Continue cranking until the canopy is fully open and the ribs are taut and level. Most mechanisms have a slight resistance increase or a stop point when fully open.
- Once fully open, set your tilt angle (see the tilt section below) and lock it before stepping away.
Opening an offset umbrella with a pulley and cord mechanism
Pulley-and-cord systems use a hand cord that runs over one or more pulley wheels inside the pole and boom, giving you a mechanical advantage to raise the hub by pulling down on the free end of the cord. They are common on older offset models and some commercial-grade cantilever umbrellas. The process is a little different from cranking:
- Remove any tie or cover and confirm the base is properly weighted.
- Locate the pull cord — it typically hangs from a small cleat, hook, or cord lock near the base of the mast.
- Unhook or uncleat the cord end so it moves freely.
- Pull the hand cord downward in a steady, hand-over-hand motion. You will feel the resistance of the canopy weight through the cord — this is normal.
- Keep your feet clear of the cord as you pull. Cord tangles underfoot during pulling are a common trip hazard.
- As the hub rises and the ribs spread, continue pulling until the canopy is fully open. If the cord jams midway, stop — do not yank. Release slight tension, check the pulley wheels for a jumped cord, reseat if needed, and continue.
- Once fully open, secure the pull cord to the cleat or cord lock. On most systems you loop the cord in a figure-eight pattern around the cleat. This is the only thing holding the canopy up, so make sure it is properly cleated.
- Set and lock your tilt before stepping away.
A note on cord condition: the cord on a pulley system takes the full canopy load every time you open and close. Check it for fraying every season. A 3–5 mm braided polyester cord is the standard replacement material and costs a few dollars at a hardware store. Replacing it is straightforward and takes about 30 minutes, far better than having the cord snap while the canopy is fully extended.
Opening an offset umbrella with push-button tilt and quick-release systems
Some offset umbrellas, particularly those with auto-tilt, push-button tilt collars, or gas-spring assisted arms, open and position the canopy through a different sequence. On these models, the 'opening' action and the 'tilting' action are often combined or sequential rather than separate steps.
- Remove any tie or cover and confirm the base is fully weighted.
- Locate the push-button or quick-release collar on the boom or at the hub-to-boom junction. On Treasure Garden AG-series models, this is a spring-lock sleeve; on other brands it may be a collar with a thumb button.
- If the boom itself folds down for storage (common on many cantilever models), lift the boom to its working position first. You will hear or feel a click when the boom locks into the raised position.
- For push-button hub release: press and hold the button or squeeze the collar release, then push or pull the hub to the open position. Release the button — the spring-lock should engage positively with an audible click.
- For gas-spring assisted arms: the mechanism will resist on the way up and assist on the way down. Lift the arm to the fully extended position until the gas spring locks it. If the spring no longer holds the arm up, the gas spring has failed and needs replacement — this is not a DIY fix on most models.
- On quick-release canopy systems (where the canopy detaches from the frame for storage), clip or button the canopy to the ribs before raising the hub.
- Once the hub is locked in the open position, confirm all ribs have clicked into their open position — run your hand along each rib to feel for a rib that is still partially folded.
- Proceed to set tilt angle and lock before stepping away.
Adjusting tilt and height on an offset umbrella
Offset umbrellas offer tilt and sometimes height adjustment that center-pole models do not. Knowing how these systems work, and when to lock them down, is important both for comfort and for safety. For step-by-step instructions on how to adjust patio umbrella settings (tilt and height), see how to adjust patio umbrella.
Tilt types and how to use them
| Tilt Type | How It Works | How to Adjust | Common Issue |
|---|---|---|---|
| Push-button / collar tilt | A button or collar on the mast or boom releases a locking pin, allowing the canopy to pivot to preset angles | Press button, pivot canopy to desired angle, release button to lock at next detent position | Button sticks due to grit or corrosion — clean with silicone spray |
| Manual infinite tilt (thumbscrew) | A thumbscrew on the tilt collar clamps the canopy at any angle | Loosen thumbscrew, tilt canopy to angle, retighten firmly | Screw strips if over-tightened — replace with matching hardware |
| Auto-tilt / crank-driven tilt | Continuing to turn the crank past the fully-open position shifts the canopy angle via an internal linkage | Crank to full open, then continue cranking slowly to tilt | Linkage bends if cranked too aggressively — use light, steady pressure |
| 360° hub rotation | The canopy hub rotates around the boom tip to face any direction | Grip hub and rotate to desired direction, then engage hub lock pin if present | Hub bearing seizes — clean and lubricate bearing surface annually |
Treasure Garden AG-series cantilever umbrellas include a steering rod linked to a 360-degree rotating hub, you can swing the canopy in a full circle around the mast. To rotate, unlock the hub's spring-lock (push the spring-lock button), rotate to the desired position, and allow the spring-lock pin to re-engage. Never force rotation against an engaged lock; you will bend the steering rod.
Height adjustment on telescoping masts
Some offset umbrellas have a two-stage or telescoping mast that lets you set the overall height. To adjust: loosen the collar clamp or thumb bolt at the telescoping joint, slide the upper section to the desired height (usually there are preset notches), and retighten the collar clamp firmly. Always retighten before opening the canopy, a loose telescoping joint under a fully open canopy will slowly slip downward under the canopy's weight and leverage.
Safety stops and when to lock your settings
Lock every adjustable point, tilt collar, telescoping clamp, hub rotation lock, crank housing, before stepping away from the umbrella. An unlocked tilt collar or telescoping joint will drift in even mild wind, and in a gust the canopy can swing to an extreme angle that puts sudden force on the boom-mast junction. As a rule: if you walk away, lock it. The only exception is when you are actively adjusting it.
Troubleshooting the most common offset umbrella problems
Most offset umbrella failures fall into a handful of categories. Work through the simplest fix first before escalating, in my experience, about two-thirds of 'broken' umbrellas just need cleaning, lubrication, or a reseated cord.
| Problem | Likely Cause | DIY Fix | Difficulty / Time |
|---|---|---|---|
| Crank spins freely, canopy doesn't move | Stripped gear teeth or cord slipped off spool | Open crank housing, inspect gears for damage; reseat cord on spool and re-knot; replace crank assembly if gears are stripped | Easy–Moderate / 30–60 min |
| Canopy rises partially then stops or slips back | Frayed or knotted lift cord, spool slip | Feed cord out fully, inspect full length for frays or knots; replace 3–5 mm braided polyester cord if worn; re-knot at spool | Moderate / 45–90 min |
| Pull cord jams mid-raise | Cord has jumped off a pulley wheel | Release cord tension, access pulley (usually through an access hole in the pole), reseat cord in pulley groove; apply silicone spray to pulley axle | Easy / 15–30 min |
| One rib droops or canopy is lopsided | Bent rib, broken rib ferrule, or detached rib pocket | Straighten mild bends by hand; for cracked ribs, sleeve-splint with a matching-diameter aluminum tube and hose clamps; replace rib if metal is cracked through | Moderate / 30–60 min |
| Hub won't rotate (360° rotation locked up) | Seized hub bearing (dirt, corrosion) | Disengage hub lock, apply penetrating silicone spray to bearing, work hub back and forth until free; clean and re-lubricate annually | Easy / 15–20 min |
| Tilt button sticks or won't lock at position | Grit in button sleeve, corrosion on pin | Spray silicone lubricant into collar gap, press button repeatedly to work it free; remove collar if accessible and clean pin channel with a toothbrush | Easy / 15–30 min |
| Gas-spring arm won't hold boom up | Failed gas spring (pressure lost) | Gas spring replacement requires brand-specific parts; contact manufacturer or a specialty retailer — not a standard DIY fix on most models | Advanced / professional service recommended |
| Canopy tears at rib pocket seam | UV degradation of fabric or stress at rib end | For small tears: hand-stitch with UV-resistant polyester thread or apply Sunbrella patch tape; for large tears or multiple failures, replace canopy panel | Easy–Moderate / 30–60 min |
| Umbrella tips or wobbles when open | Underweighted base, loose mast collar bolt | Add ballast to meet minimum base weight for your model (check manual); tighten mast collar bolt and security stem bolt with a socket wrench | Easy / 10–15 min |
For problems involving bent main boom arms, cracked mast welds, or failed gas springs, get a professional assessment or contact the manufacturer's support line before continuing to use the umbrella. Tuuci, for example, directs customers to their support channel for parts and inspection on structural component failures, that guidance exists because a structural failure under a fully open 11-foot canopy is a serious safety event.
Sourcing replacement parts
Before ordering anything, get your model number from the label on the mast or from your manual. Brand-specific parts sourced from the OEM almost always fit better than generic alternatives. Here is where to look:
- Treasure Garden: contact their dealer network or download your model's parts list (AG19, AG25, and other series all have exploded-parts diagrams on their website and on Manualzz) and order through a Treasure Garden authorized dealer
- Tuuci: Tuuci's documentation directs customers to their support team for replacement parts — their OEM parts are not widely sold through general retailers
- Specialty retailers: UmbrellaSpecialist and Umbrella Bazaar carry OEM and compatible parts for many major brands
- General hardware: replacement lift cord (3–5 mm braided polyester), cotter pins, hose clamps for rib splints, and silicone spray are available at any hardware store or big-box retailer
- Amazon and eBay: useful for universal crank handles and generic cord, but verify measurements against your existing hardware before buying
- Home Depot and Lowe's: carry replacement bases, ballast weights, and some universal accessories
- CPSC recall database: before buying a used offset umbrella or replacement parts from an unknown source, check cpsc.gov for any active recalls on that model
Wind safety and anchoring your offset umbrella
Cantilever umbrellas are more vulnerable to wind than center-pole models because the side-mounted boom creates leverage that multiplies wind force at the base. A NEISS-based study covering 2010–2018 found that wind contributed to a significant fraction of patio and beach umbrella-related emergency department visits, and cantilever models with undersized bases are the highest-risk category. Take wind seriously. NOAA/National Weather Service glossary defines a 'gale' as sustained winds of 34–47 kt (39–54 mph), and NWS marine/advisory thresholds are the standard used for local wind advisories NOAA/National Weather Service glossary defines a 'gale' as sustained winds of 34–47 kt (39–54 mph), and NWS marine/advisory thresholds are the standard used for local wind advisories..
- Close the umbrella any time sustained winds reach 25 mph — Tuuci's operational guidance states this explicitly, and it applies to virtually all residential offset models
- At the NWS/NOAA Beaufort scale, a 'gale' corresponds to sustained 39–54 mph winds; well before reaching that threshold, your base requirements multiply dramatically and most residential models should be fully closed and stored
- Fill base weights to the manufacturer-specified minimum as a floor, not a target — add more weight or use a deck mount kit (Treasure Garden and others sell these separately) if your area is windy
- Use deck or surface mount kits when installing on a permanent patio. Treasure Garden's wood mount kit and surface mount options anchor the mast to the structure itself rather than relying on base weight alone
- Never leave an open offset umbrella unattended overnight or when a storm is approaching — even a brief gust well above the 25 mph threshold can tip a fully weighted base
Seasonal storage and winterizing
Getting storage right extends the life of your offset umbrella by years. UV damage, moisture in the crank housing, and freeze-thaw cycles in base weights are the primary off-season killers.
- Close the canopy fully using your crank or cord mechanism, then tie the canopy closed with the velcro straps or a soft tie — never use bungee cords, which can stress the ribs.
- If your base is a fillable weight, drain it before temperatures drop below freezing. Water expands when it freezes and will crack the base shell.
- Rinse the entire umbrella (canopy, frame, and hardware) with fresh water. Tuuci recommends weekly rinses during the season and a thorough fresh-water rinse before storage to remove salt, sunscreen, and debris that accelerate corrosion.
- Apply a dry silicone spray to the crank housing, hub bearing, pulley axles, and all collar joints before storage. This displaces moisture and prevents seizing.
- Disconnect the boom from the mast if your model allows, and store the boom and canopy assembly horizontally or in the manufacturer's storage bag. Standing a furled canopy on its tip puts stress on the hub.
- Store in a dry, covered space — a garage, shed, or basement. If outdoor storage is the only option, use a full-length, ventilated umbrella cover rated for UV and moisture.
- Before bringing the umbrella back out in spring, run through the parts inspection checklist above before opening it for the first time.
When repair is worth it, and when to replace
Most mechanical issues on an offset umbrella are worth fixing if the frame structure is sound. Replacing a cord, lubricating a hub, or patching a canopy takes 15 to 90 minutes and costs next to nothing. Replacing a stripped crank assembly runs about $20–40 for most common brands. Even a full canopy replacement on a quality frame makes more financial sense than buying a new umbrella, since replacement canopies for many Treasure Garden and similar frames are available for $60–150.
Stop and reassess if: the main boom arm is bent or has a visible crack at a weld, the mast is bent or the base socket is cracked, the gas spring has failed and the manufacturer no longer supports the model, or the frame is more than 10–12 years old and multiple components are failing at once. At that point, the cost and difficulty of sourcing multiple structural parts usually exceeds the value of the frame. For everything else, repair is almost always the smarter call.
FAQ
What are the common opening and closing mechanisms on offset (cantilever) patio umbrellas and how do they differ?
Common mechanisms: crank‑lift (gear and spool winds cable to raise/lower canopy), rope‑and‑pulley (manual rope runs through pulleys and a runner), push‑button/manual tilt (collar or pin to change angle), and gas‑spring/assisted systems (internal spring helps tilt or lift). Differences: crank uses gearing and a spool so failures are stripped gears, broken cord, or worn bearings; pulley systems fail by frayed ropes or jammed pulleys; push‑button/tilt failures are usually seized pins or worn collars; gas springs fail by loss of pressure. Each requires different inspection and repair steps.
Step‑by‑step: how do I safely open a crank‑lift offset umbrella?
1) Park umbrella closed and secure base. 2) Inspect: ribs, cords, crank housing, tilt collar, hub for damage. 3) Remove any strap/cover and free canopy fabric. 4) Turn crank slowly clockwise (per manufacturer) while watching runner move up the mast; stop if you feel hard resistance. 5) When fully open, lock any tilt/rotation brackets per model instructions (some have a locking pin or clamp). 6) Check canopy tension and that ribs are seated. If crank spins freely or slips, stop and inspect for stripped gear or broken cord.
How do I open a rope‑and‑pulley or push‑button tilt offset umbrella?
Rope‑and‑pulley: Untie any safety knot; pull the rope steadily while supporting the runner until it locks in place—secure with the built‑in cleat or knot as intended. Push‑button tilt/collar: Depress the button or loosen the tilt collar, move the hub/runner to the open position, then release the button and ensure it snaps into place. For both, open slowly and keep hands clear of ribs; if the runner doesn’t move, inspect pulleys, ropes, and the tilt pin for obstruction.
What tools and safety checklist should I follow before working on an offset umbrella?
Tools: Phillips and flat screwdrivers, small socket/ratchet set, needle‑nose pliers, adjustable wrench, hex keys, silicone spray/lubricant, replacement braided cord (3–5 mm), cotter/split pins, soft mallet, spare screws, electrical tape. Safety checklist: work on flat surface with base secured or pole removed; close and lock umbrella before heavy disassembly; wear gloves and eye protection; do not work in windy conditions; have a second person for lifting heavy parts; follow manufacturer torque specs for fasteners.
What are the assembly steps for a typical offset (cantilever) umbrella frame?
1) Unbox and lay out parts; confirm parts list per manual (mast, boom, hub, ribs, ribs collars, base plate, crank case, bolts). 2) Attach boom to mast with supplied bolts and washers; hand‑tighten initially. 3) Mount hub/runner and install ribs onto hub per instructions (some require sliding sleeves or screws). 4) Fit canopy onto ribs and secure with canopy cap or finial. 5) Install crank/handle assembly and route cable/rope through mast if required. 6) Fit umbrella stem into base or mount and secure per base type (surface mount, ballast plates, or weighted base). 7) Tighten all fasteners to spec and test open/close functions slowly. Always follow the model’s specific manual for sequence and torque.
How do I adjust tilt and rotation on an offset umbrella without damaging it?
To tilt: follow model procedure—either depress push‑button or loosen tilt collar, move canopy to desired angle and lock the pin/collar. For rotation: unlock the 360° base clamp or rotate hub per manufacturer guidance, then re‑lock. Always support the canopy while unlocking; adjust in small increments; don’t force a jammed tilt—inspect pins and sleeves if stuck. Re‑tighten locking hardware after adjustment to prevent slippage.
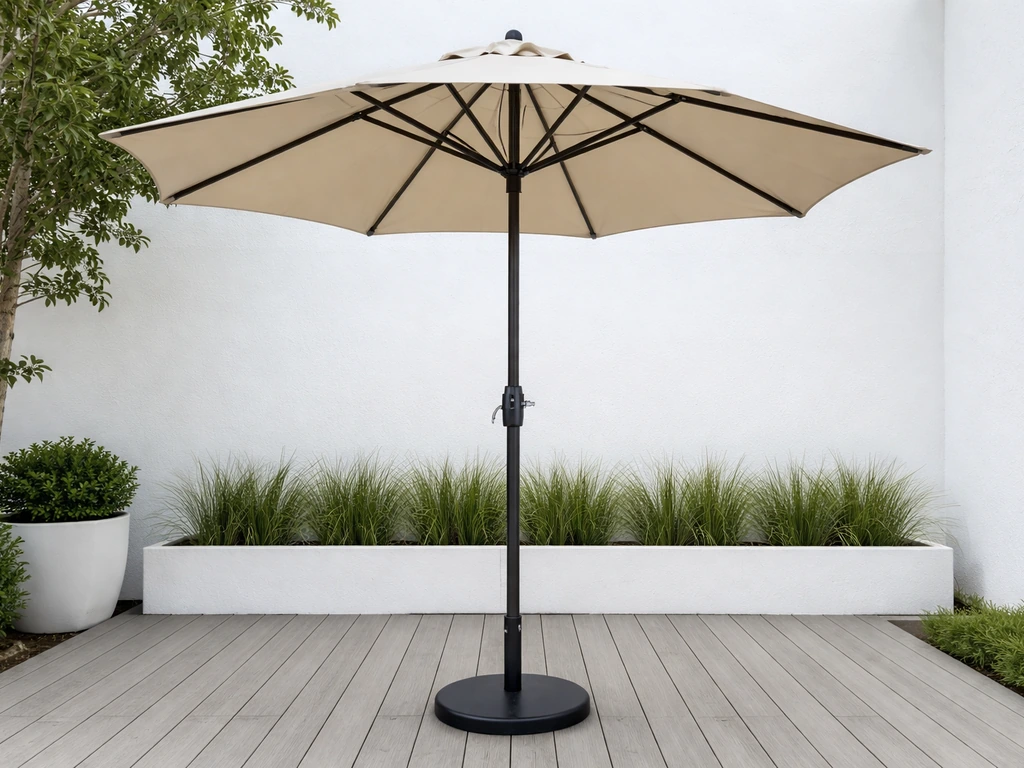
Step-by-step how to operate a patio umbrella, open close adjust tilt and troubleshoot jams, plus wind safety and mainten
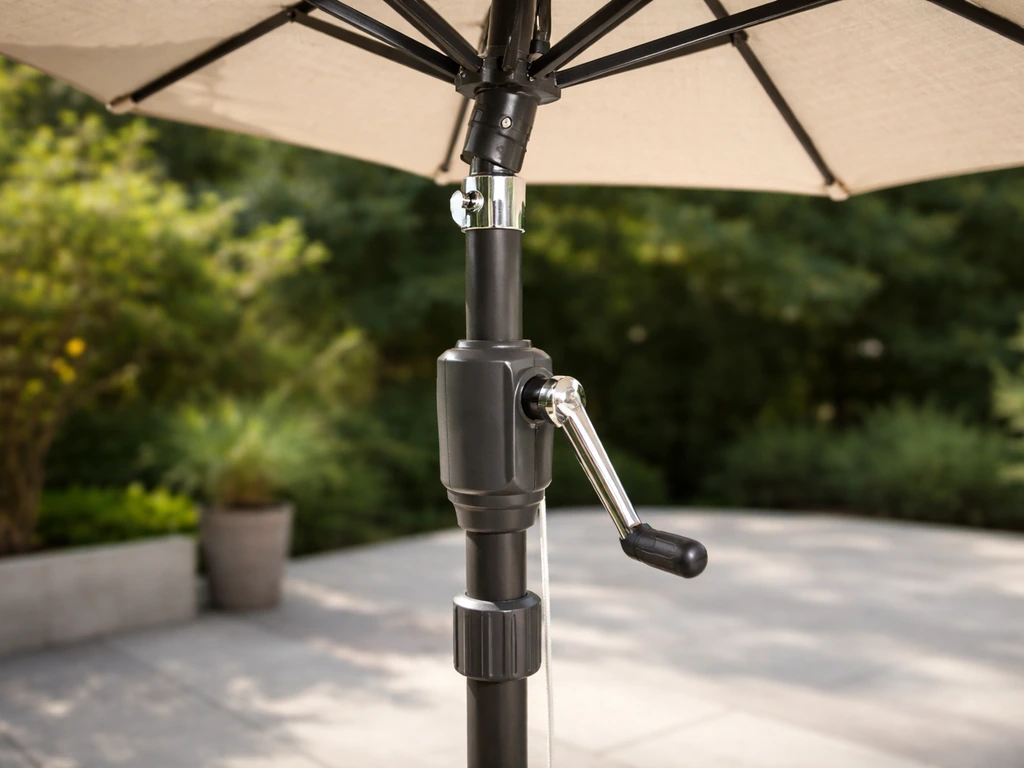
Step-by-step how to adjust patio umbrella height, tilt, rotation, crank and cord, fix locking and wobble, then maintain.
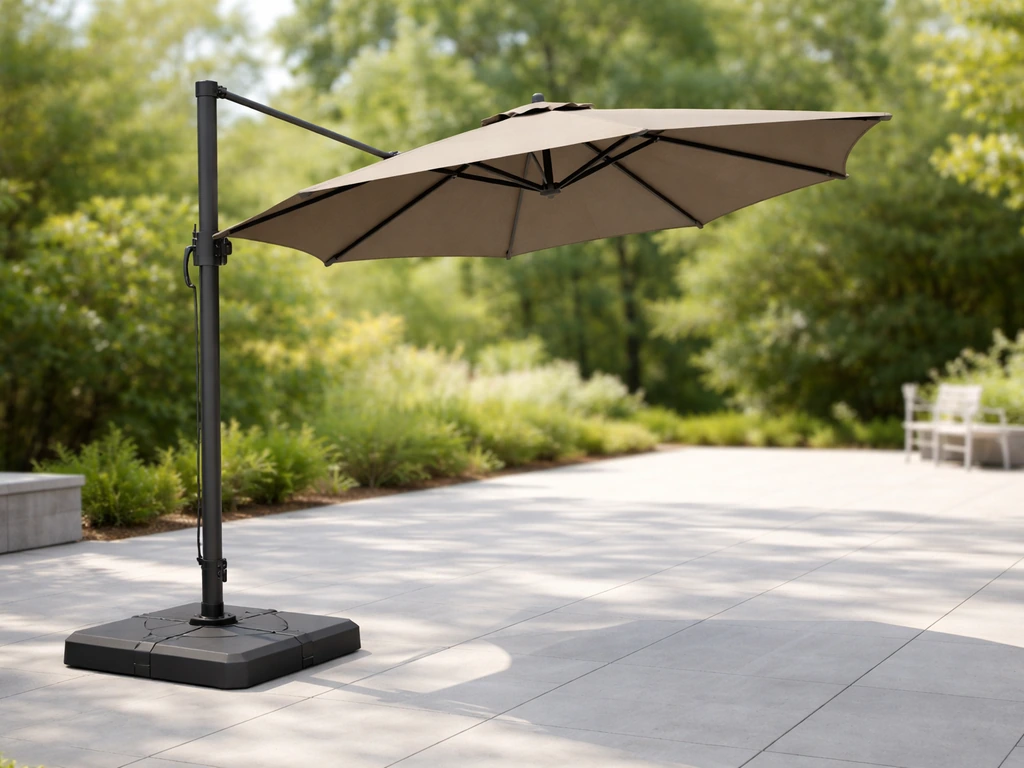
Step-by-step guide to assemble an offset patio umbrella base, mast, canopy, and crank, plus stability and quick troubles