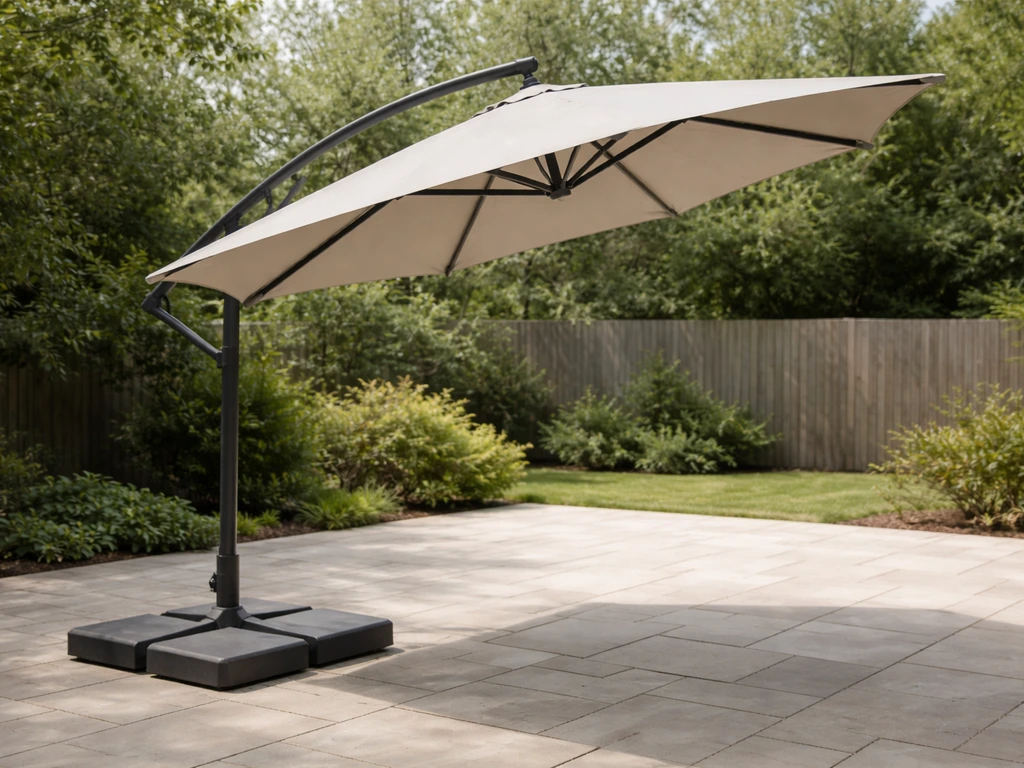
Assembling a cantilever patio umbrella takes about 30 to 60 minutes if you follow the right order: base stand first, then base weights, then the lower and upper pole sections, then the frame, and finally the canopy. Once that's done, you attach the crank handle and use it to open the canopy and dial in your tilt. The order matters more than anything else here, because these umbrellas are heavy and awkward to disassemble mid-build. Set it up where you want it to live permanently, then work through the steps below.
Cantilever Patio Umbrella Instructions: Step by Step

Luca Morrison
6 Jun 2026
What you need before you start assembly
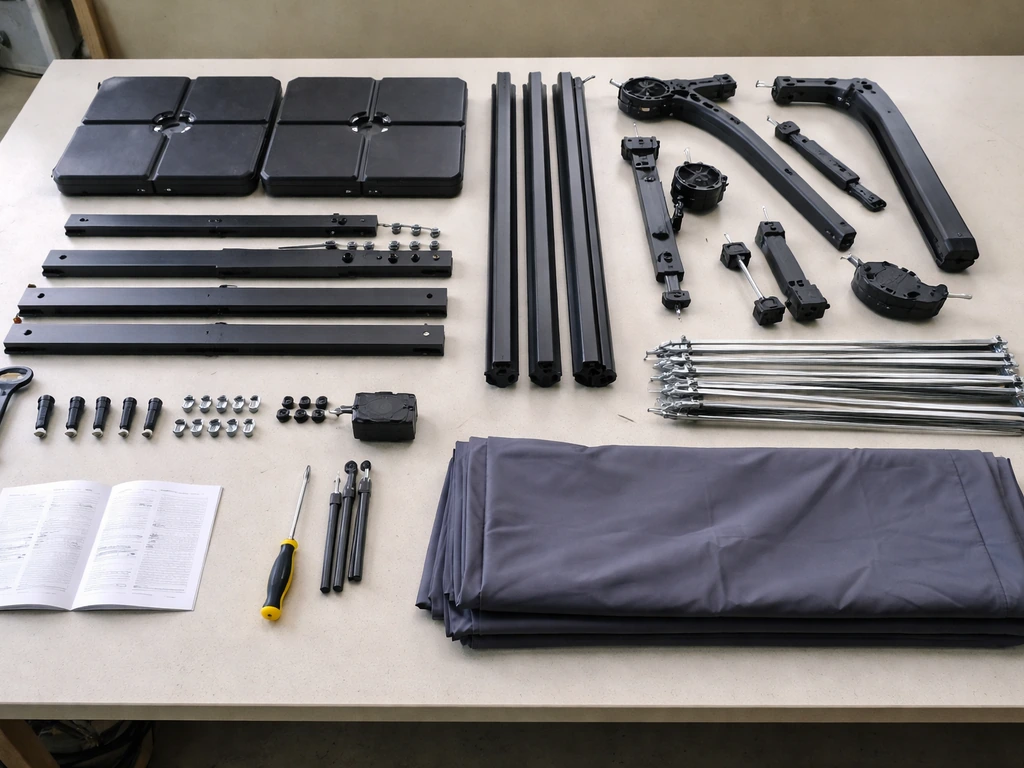
Before you open a single hardware bag, lay everything out and compare it to the parts list in your manual. This sounds tedious but it saves a real headache. Tropitone, for example, explicitly tells you to verify all hardware is present before you begin, because a missing locking knob or wrong bolt size will strand you mid-assembly with a pole leaning against your fence.
Here's what a typical cantilever umbrella kit includes, regardless of brand:
- Base stand (the cross-shaped or ring-shaped floor piece)
- Base weights (usually 4 individual blocks that slide into or onto the stand)
- Lower pole / mast section
- Upper pole or extension arm (the horizontal or angled offset section)
- Top frame assembly (the hub and ribs the canopy attaches to)
- Canopy fabric
- Crank handle and crank mechanism hardware (setscrew, lock washers, threaded stud depending on brand)
- Locking knobs or locking pins (labeled C or similar in most manuals)
- Hex head cap screws, washers, and lock washers
- A hex head wrench (usually included)
The only tools you actually need are the included hex wrench and a pair of safety glasses. That's it. Don't grab a power drill for this. Over-torquing aluminum or zinc hardware strips threads fast, and a stripped bolt on a base weight seat is not a fun fix.
One more thing before you start: pick your final location now. Tropitone's manual is blunt about this and they're right. With four base weights at a combined 429 lb, you are not moving this thing after it's built. Pick your spot, check that the patio surface is level, and start assembly right there.
Step-by-step cantilever umbrella assembly
Step 1: Set up the base stand and add the weights
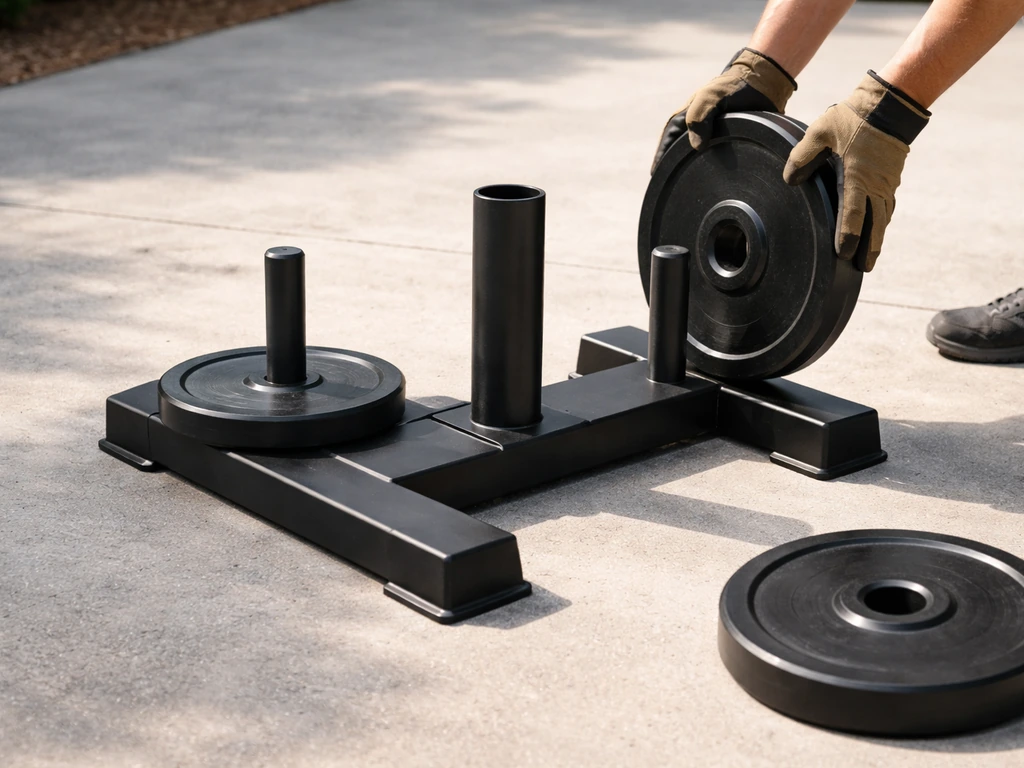
Place the base stand flat on the ground at your chosen location. Most stands have a center sleeve where the main pole will eventually slide in. Before you do any of that, load the base weights. They typically have built-in handles and drop into slots in the base stand. Load all four now. This is your stability foundation, and skipping this step or doing it later means you're wrestling a tipping structure. A 429 lb base isn't optional on a cantilever, it's what keeps the whole offset design from going over in a gust.
Step 2: Insert and secure the lower pole
Slide the lower (main) pole into the center sleeve of the base stand. Most poles have a pre-drilled hole that aligns with a hole in the sleeve. When they line up, insert the locking knob or bolt and tighten it with the hex wrench. Don't crank it down as hard as you can, just snug and firm. You should feel it seat. If the pole wobbles at all after tightening, check that the knob is threaded fully and that no debris is in the sleeve.
Step 3: Attach the upper pole or extension arm
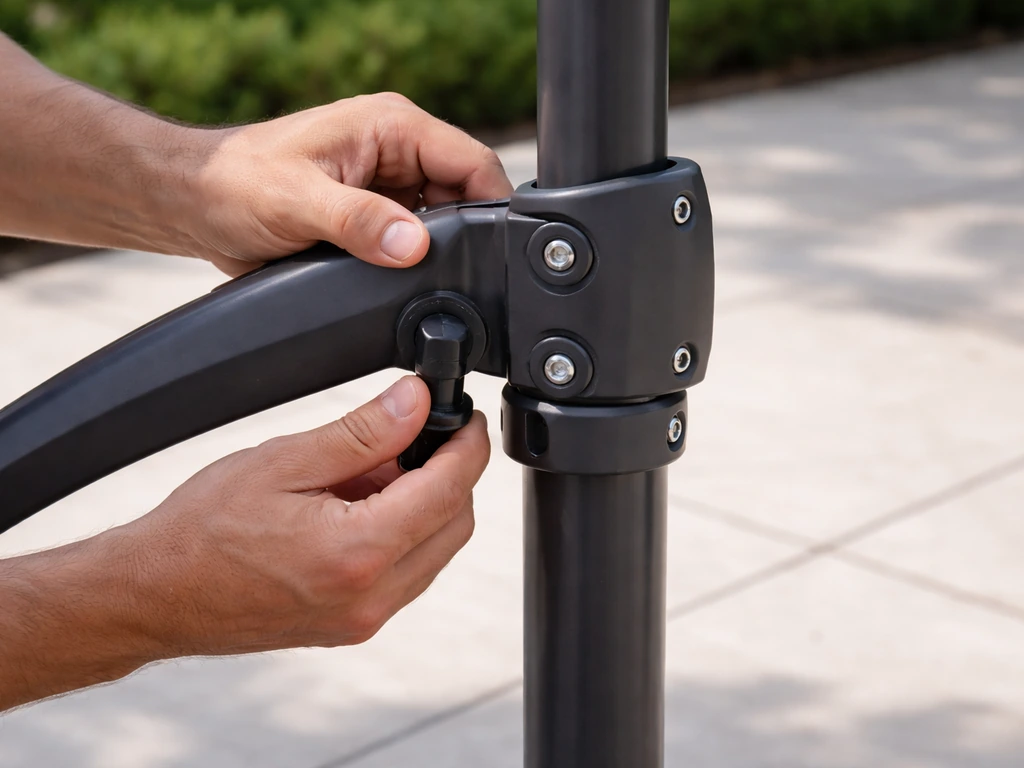
The upper section is the offset arm that creates the cantilever. It connects to the top of the lower pole, usually via a hinge joint or sleeve connection. Some brands (including Home Depot's 10' octagon model) use a plastic locking sleeve on the hinge that you lift to open or lock the extension arm into position. Slide the upper arm in, align the holes, and secure with the appropriate hardware. If your model has a locking sleeve, make sure it's fully seated before moving on. An unlocked hinge at this stage is the number one reason frames feel wobbly after assembly.
Step 4: Attach the canopy frame
The top frame assembly, which is the hub with ribs radiating out, connects to the top of the upper arm. Depending on your brand, this may bolt directly, clip on, or thread on. Get someone to hold the frame steady while you drive the fasteners. The key here, and Home Depot's instructions specifically call this out, is to make sure the canopy is attached to the frame before you set the whole assembly into the base pole. Trying to thread the canopy onto ribs while the pole is already upright is genuinely difficult and risks bending a rib.
Step 5: Attach the canopy

Spread the canopy fabric flat and locate the center hub pocket (it goes over the top of the hub) and then thread each rib through its corresponding canopy sleeve or pocket. Work your way around evenly rather than doing one side completely before the other. When all ribs are seated, fasten any velcro straps, snaps, or cord ties at the canopy perimeter. A canopy that's uneven at this stage will open lopsided, which can put stress on the tilt mechanism.
Step 6: Install the crank handle
The crank handle is a separate assembly step on most cantilever models. On Allen & Roth and similar brands, you insert the crank shaft into the crank housing on the pole and use the included small wrench to tighten the setscrew, creating a solid mechanical connection. For detailed threshold solar patio umbrella instructions, follow the crank-handle steps in your model manual and double-check that the setscrew or crank key is fully locked before use crank handle. On some models like California Umbrella, a crank key inserts into a side hole and locks in position. On Atleisure's rectangle models, you align pin holes on the crank handle with corresponding pins in the mechanism before the handle will function. Whatever your brand, do not skip this step and assume the handle is just resting there. A loose crank handle that slips under load can damage the gear drive inside.
Common assembly problems and how to fix them
The pole or arm won't align with the holes
This almost always means one of two things: either the pole is slightly rotated and you're off by a few degrees, or there's a burr or finish imperfection inside the sleeve. Try rotating the pole slightly while applying light downward pressure. If it's a burr, a quick pass with fine sandpaper on the pole's outer surface (not the sleeve) usually clears it. Don't force it. Forcing aluminum poles into tight sleeves can deform the tube end and make the problem permanent.
Missing or wrong hardware
If you open the hardware bag and something is missing, stop and contact the manufacturer before improvising. Hardware on cantilever umbrellas is load-bearing in a way that patio furniture rarely is. A bolt that's one size too short on a base weight connection is a safety issue, not just an annoyance. Most brands will ship replacement hardware quickly. Take a photo of your parts list page and what you have, then email or call support with the model number.
The umbrella won't tilt
On crank-actuated tilt systems (which covers the majority of cantilever models from Sunnyglade, Proshade, GrandinRoad, and others), tilt engages only after the canopy is fully open. If you're cranking and nothing tilts, you probably haven't cranked far enough to fully extend the canopy first. Keep going. Once it hits the fully-open stop, additional crank turns (or switching to the tilt socket on dual-socket models) engage the tilt. The Sunbrella user manual describes extending the cantilever by inserting the crank handle and turning it clockwise until the umbrella is fully open Sunbrella 11 Feet Deluxe Patio Cantilever Umbrella User Manual. Proshade specifically warns not to force past the fully-open stop, so if you feel hard resistance, don't muscle through it.
If the canopy is fully open and tilt still isn't engaging, the likely culprits are: a gear or slider jammed with grit or packing foam residue from shipping, the lock collar not fully released, or a misaligned tilt cord or strap inside the mechanism. Open the crank housing access point if your model has one and look for debris. A shot of silicone spray lubricant on the pivot and gear points usually clears a brand-new jam.
The crank turns but nothing moves

This means the crank handle isn't actually connected to the drive mechanism. Go back and check your crank installation: is the setscrew tight, is the pin aligned, is the crank key fully seated? On Atleisure models especially, the pin-hole alignment has to be exact before the crank engages. Take the handle off and reinstall it slowly until you feel it click or lock into position.
The canopy opens unevenly or the frame looks crooked
Nine times out of ten this is a canopy threading issue. One rib is in the wrong canopy sleeve, or a rib tip didn't seat into its canopy eyelet. Fully close the umbrella and re-check each rib manually. Also check that all the rib-to-hub connections clicked or bolted in fully. One loose rib will make the whole canopy look off.
How to set up the tilt, crank, and opening and closing system
Once assembly is complete, here's how the operating sequence works on most cantilever umbrellas. Work through it once to confirm everything is functioning before your first real use.
- Insert the crank handle into the open/close socket on the pole. On most brands including Sunbrella's cantilever models, this is a square hole on the main pole. Turn clockwise to open.
- Crank until the canopy is fully extended and you feel the mechanism reach its natural stopping point. Don't force past it.
- To set tilt: on single-socket models like Proshade, continue turning counter-clockwise from the fully-open position to tilt the canopy to your desired angle. On dual-socket models like GrandinRoad, move the crank handle to the Right/Left tilt socket and turn in the appropriate direction — right turns tilt right, left turns tilt left.
- To rotate the umbrella head: models with 360-degree rotation (like Tropitone's cantilever line) lock every 45 degrees. On GrandinRoad models, press the foot pedal to unlock rotation, rotate the canopy to the position you want, then step off the pedal — you'll hear it click into the next lock position.
- To close: tilt back to center first if you've tilted, then turn the crank clockwise (or counter-clockwise depending on brand) until the canopy is fully closed. On Atleisure's rectangle models, after cranking closed you slide the canopy down using the storage handle and engage the release grip to lock it.
The single most common operating mistake is trying to tilt before the canopy is fully open. The tilt mechanism on most cantilever umbrellas physically cannot engage until the drive system hits the fully-open position. If yours feels stuck during tilt, open first, then tilt.
Stability, anchoring, and wind safety
A cantilever umbrella creates massive leverage because the canopy is offset from the base. That's the whole point of the design, but it also means stability is non-negotiable. Here's what to get right:
| Factor | What to do | Why it matters |
|---|---|---|
| Base weights | Use all four weights. Tropitone's system reaches 429 lb combined. Never skip weights or substitute lighter options. | The offset canopy creates significant torque on the base in wind. |
| Assembly location | Build it where it will live. Do not assemble elsewhere and move it. | Fully weighted cantilever bases cannot be safely relocated. |
| Surface | Set up on flat, firm ground. Uneven surfaces shift weight distribution and make the base rock. | A rocking base means the pole connection flexes repeatedly and can fail. |
| Wind | Close the umbrella any time wind picks up, especially above 20 mph. | Open canopies act as a sail. Even well-weighted bases can tip in sustained gusts. |
| Canopy straps | Use the canopy storage straps when closed and stored. | Straps keep the closed canopy from catching wind and rattling the frame. |
| Tilt position | Tilt away from wind direction when in use, not into it. | Angling the canopy reduces the wind load surface area. |
If you're installing on a wood deck and want additional anchoring, some base stands have pre-drilled holes for deck screws or anchor bolts. Check your base stand and manual before drilling, because not all stands support this and drilling in the wrong spot can weaken the stand casting.
Care, maintenance, and seasonal storage
Regular maintenance during the season
After the first few weeks of use, go around every bolt and locking knob with your hex wrench and re-snug them. Tropitone's care documentation calls this out specifically because vibration and thermal expansion from summer heat will loosen hardware that was tight on day one. Make this a monthly habit, it takes five minutes and prevents the kind of bolt failure that lets a 200-lb pole assembly tip.
Lubrication is the single best maintenance investment you can make. Hit the crank gear, all pivot points on the rib hub, the hinge joint between upper and lower pole sections, and the rotation lock mechanism with silicone spray or a dry PTFE lubricant. Tropitone also lubricates the rotation lock mechanism so the canopy's locking intervals keep working smoothly after assembly. Do this every 4 to 6 weeks during the season. Avoid WD-40 as a primary lubricant: it displaces water initially but leaves behind residue that attracts grit and gums up gear teeth over time.
Cleaning the canopy and frame
Clean the canopy with mild soap and warm water, then rinse thoroughly and let it air dry completely before closing and storing. Storing a damp canopy causes mildew that's nearly impossible to fully remove from fabric. Wipe down the pole and frame with a damp cloth to remove pollen, salt air residue, and bird droppings, all of which are corrosive over time on aluminum and zinc fittings.
End-of-season winterizing
- Close the canopy completely and engage any canopy storage straps or locking mechanisms.
- Re-lubricate all pivot points, the crank gear, and the tilt mechanism before storage.
- Tighten all hardware one final time.
- Remove the canopy if your winters involve heavy snow or sustained high winds — canopies stored on the frame in harsh climates can accumulate snow load that bends or snaps ribs.
- Cover the pole and frame with a manufacturer-fit cover or a breathable furniture cover. Avoid plastic tarps that trap moisture.
- If possible, bring the crank handle indoors. It's the most corrosion-prone component and the hardest to source as a replacement part.
- In spring, inspect every bolt, the hinge joint, the crank housing, and all rib-to-hub connections before first use. Replace anything that shows cracking, corrosion, or deformation.
If you're also working with a different umbrella type, the operating and maintenance logic for cantilever models is meaningfully different from standard center-pole umbrellas. Some of the tilt and crank troubleshooting concepts here overlap with auto-tilt patio umbrella systems, and brand-specific quirks (like Sunnyglade's crank placement or Mainstays' hardware choices) are worth checking in their own guides if you have one of those models. If you have an auto-tilt patio umbrella, follow the auto tilt patio umbrella instructions for your specific brand when troubleshooting or adjusting the tilt system. But for the offset cantilever design, the principles above cover the vast majority of assembly and early-life issues you're likely to hit.
FAQ
Can I anchor my cantilever patio umbrella to a deck or patio after assembly?
Yes, but only if your base stand is designed for it. Many stands have optional pre-drilled points, while others are not meant to be drilled (it can weaken the casting). If your model does not specify holes, use the levelness check only, place on a firm surface, and avoid adding aftermarket anchors that change how the base sits.
What should I do if the frame or offset arm feels crooked after assembly?
First confirm you are not mixing an upper and lower arm. If the hinge or sleeve connection sits half-seated, the extension arm will look angled and the frame will wobble when you crank. Loosen, realign the holes, and ensure any plastic locking sleeve is fully seated before tightening. If the canopy opens lopsided, re-thread ribs evenly rather than tightening canopy straps first.
Why does my umbrella feel like it is hitting resistance, and is it okay to force it past the stop?
The safe rule is to crank only until the fully-open stop, then use tilt. If you keep cranking and feel hard resistance, stop and check for a jam or misalignment inside the crank housing access point (debris or packing residue). For crank-actuated systems, forcing past the stop can strain the gear drive and make future tilt engagement unreliable.
If a hardware piece is missing, can I substitute something similar from my toolbox?
You can, but treat it as an emergency-only fix. Do not use a different bolt length or substitute hardware types for load-bearing connections like base weights to stand or hinge joints. If a part is missing, stop, take a photo of your manual parts list and the hardware you received, then request the exact replacement hardware from the manufacturer using your model number.
My crank turns but the umbrella will not tilt, what parts should I verify first?
You usually cannot get proper tilt engagement if the crank is not driving the mechanism. Remove the crank handle and reinstall it carefully, verifying setscrew tightness, pin alignment, or crank key seating depending on your model. You should feel a distinct click or lock into position before trying tilt again.
What lubricant should I use on the crank and tilt mechanism?
Do not lubricate with oil-based sprays like WD-40 as your main lubricant. WD-40 can attract grit and create residue in gears over time. Use silicone spray for pivot points and dry PTFE or silicone for the crank gear and hinge areas, then wipe off excess so it does not collect dust.
When should I re-tighten bolts and locking knobs after the first use?
Yes, but do it at the right time. Recheck fasteners with the hex wrench after the first few weeks, then monthly during the season. Vibration and thermal expansion can loosen knobs and bolts even if the assembly was correct on day one, especially on bases that see wind loads.
How should I clean and store the canopy to prevent mildew and corrosion?
Clean and dry the canopy before storage, fully air-dry it after washing, and avoid storing it while damp. If your umbrella is in coastal or high-pollen conditions, wipe and rinse sooner rather than letting salt or debris sit through the off-season. Mildew often becomes permanent if the fabric stays damp for weeks.
Why does my canopy look uneven when I open it, even though the frame seems locked?
Check rib-to-hub seating and canopy sleeve alignment first. One rib trapped in the wrong sleeve or not fully seated in its canopy eyelet will make the canopy look uneven and can add stress to the tilt/drive system. Fully close the umbrella, then manually verify each rib connection before reopening.
What should I do if my crank handle feels loose while operating the umbrella?
If the crank handle comes loose or slips under load, you likely did not fully secure the setscrew, key, or pin alignment during installation. Reinstall the handle and confirm the crank housing connection is solid before using tilt. A loose crank can damage internal gears because it will not transfer force correctly.
How can I diagnose wobbling that shows up right after I assemble the poles?
For leveling or wobble complaints, look at the base interface before anything else. Confirm the patio surface is level where the stand sits, and verify all four base weights are installed before inserting the poles. Also check that the main pole is snug in the base sleeve and that no debris is in the sleeve, because debris can create a persistent wobble.
Why does tilt engage only after I crank a little more than expected?
If tilt feels delayed or only works after extra cranking, it is often because the canopy is not fully open yet, some models require driving to the fully-open stop before tilt engages. Make sure you crank far enough to extend the canopy fully, then try tilt. If you still cannot engage tilt with the canopy fully open, check the mechanism for a jam or misaligned tilt cord.
Next Articles
Auto Tilt Patio Umbrella Instructions: Setup, Fixes, Maintenance
Auto tilt patio umbrella instructions for setup, tilt troubleshooting, fixes for jams or uneven movement, plus maintenan

How to Fix a Patio Umbrella That Won't Open or Close
Step-by-step fixes for patio umbrellas that won’t open or close, with checks for jams, cords, latches, and lubricating t
How Does a Patio Umbrella Work? Components, Use, and Fixes
Learn how patio umbrellas work: components, open close tilt, stability, and step by step troubleshooting common mechanic