
Most patio umbrella repairs take under an hour, cost less than $40 in parts, and need nothing more than a screwdriver and a pair of pliers. Whether your crank stripped out mid-summer, your tilt knob snapped off, your lift cord frayed through, or a rib bent after a windstorm, you can almost certainly fix it yourself without buying a new umbrella. This guide walks you through every common failure point with step-by-step procedures, a real parts checklist, estimated times, and honest notes on when the repair is worth it versus when you should just replace the unit.
Patio Umbrella Repair Instructions: Complete DIY Step-by-Step Guide

Luca Morrison
30 Jul 2026
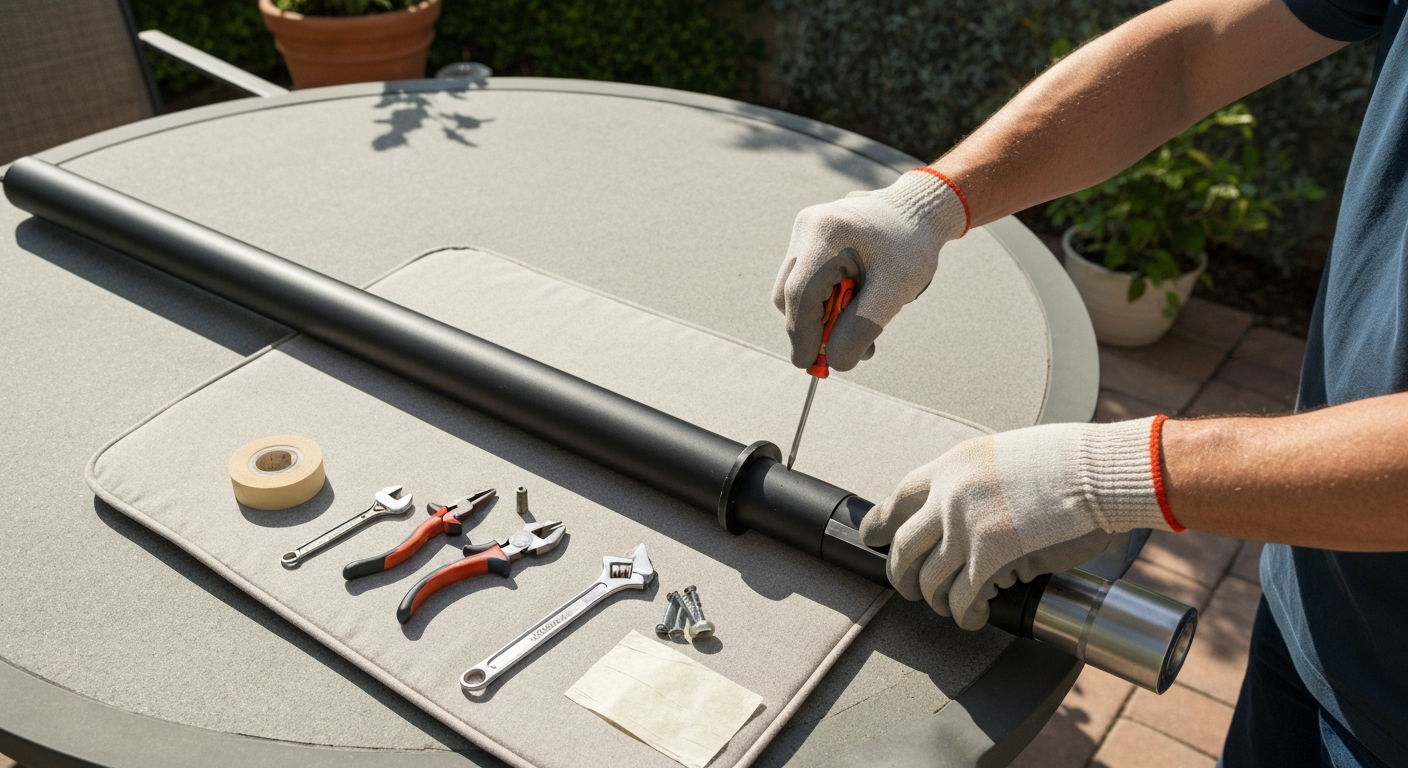
Who this guide is for and what you can realistically fix
This guide is written for homeowners who own a standard market-style or cantilever offset patio umbrella and want to diagnose and fix mechanical problems themselves. If you have a Grand Patio, Grand Patio Napoli, Jearey, Treasure Garden, Allen + Roth, or a generic big-box model, the core components are similar enough that these instructions apply across brands with minor variations. The repairs covered here range from beginner-friendly (swapping a crank handle, re-threading a cord) to moderate (replacing a tilt collar, straightening a bent rib), and I flag difficulty clearly for each one.
What you can do yourself: replace or rebuild a crank mechanism, fix push-button and ratchet tilt assemblies, re-string a lift cord, straighten or swap out a bent rib, patch or replace a canopy, re-tighten a wobbly pole, and clean mold or mildew off fabric. What you generally cannot fix at home: a cracked or sheared pole shaft (replace the umbrella), a stripped hub casting where the ribs mount (replace the umbrella), or any umbrella with a recalled electrical or battery component, which the CPSC advises you stop using immediately, not repair. See the CPSC recall notice 'Pool and Patio Umbrellas Recalled Due to Injury Hazard (CPSC recall alert)' for the SunVilla/Costco solar‑LED umbrella recall involving lithium‑ion battery overheating and a fire hazard.
Safety before you touch anything
The single biggest safety risk with patio umbrellas is wind. Every major manufacturer, including Jearey, Treasure Garden, and Grand Patio, explicitly warns in their manuals to close and stow your umbrella when wind picks up. Warranties at most brands specifically exclude storm damage and damage caused by leaving an umbrella open unsecured, so it is not just a safety issue but a practical one. Close it if you are not right there watching it.
For repairs specifically, follow these ground rules before you start any disassembly work.
- Close and lower the canopy fully before disassembling any part of the mechanism. An open canopy on a loose hub can drop or swing unexpectedly.
- Use a base rated for your umbrella's diameter. A 9-foot umbrella needs at least 50 pounds of base weight; an 11-foot model needs 75 pounds or more. Undersized bases are a leading cause of tip-overs during both use and repair.
- For cantilever umbrellas (offset pole), Treasure Garden and other OEM manuals recommend two-person assembly and repair. The arm and canopy assembly is heavy and will fall if unsupported.
- Wear safety glasses when working with springs, cords under tension, or when using a heat gun near powder-coated metal.
- If your umbrella has integrated LED lights powered by a lithium-ion battery pack, check the CPSC recall database before doing anything. Several solar-LED umbrella models (including a SunVilla line sold at Costco) were recalled for battery fire hazards. Do not attempt to repair electrical components on any recalled unit.
- Do not over-torque aluminum frame fasteners. Snug by hand with a screwdriver is usually enough. Stripping an aluminum threaded hub is a non-recoverable failure.
Your repair kit: tools and parts to have on hand
Having the right parts before you start saves a trip mid-repair. Below is the general toolkit every patio umbrella owner should keep, followed by repair-specific parts lists for each major fix covered later.
General toolkit (keep this in your outdoor shed)
- Phillips-head and flathead screwdrivers (medium and small)
- Needle-nose pliers
- Adjustable wrench or small socket set (8mm, 10mm, 12mm covers most umbrella hardware)
- Utility knife
- Rubber mallet
- Zip ties (assorted sizes)
- Measuring tape
- Masking tape or painter's tape (for marking cord positions before removal)
- Safety glasses
- Work gloves
Repair-specific parts and typical costs
| Part | What it fixes | Typical cost | Where to buy |
|---|---|---|---|
| Replacement crank handle (generic) | Broken or missing crank handle only | $10–$20 | Amazon, Walmart |
| Full crank assembly (generic kit) | Stripped gear, broken handle, missing pawl | $20–$40 | Amazon, Walmart |
| OEM crank assembly (e.g., Treasure Garden P-AGCRANK2-09) | Exact-fit for Treasure Garden models | ~$103 MSRP | Treasure Garden dealer |
| Push-button tilt collar (universal) | Broken push-button tilt | $15–$30 | Amazon, specialty patio parts sites |
| Ratchet tilt collar | Failed ratchet tilt mechanism | $20–$35 | Amazon, specialty patio parts sites |
| Replacement lift cord (polyester braid, ~3/16" dia.) | Frayed or broken lift cord | $5–$15 per spool | Amazon, hardware store |
| OEM Treasure Garden cord (CORD AG28, 187" x .12") | Exact-fit Treasure Garden cord | Listed on OEM parts sheet | Treasure Garden dealer |
| Individual rib (universal fiberglass or aluminum) | Single bent or cracked rib | $10–$25 each | Amazon, canopy repair sites |
| Replacement canopy (universal polyester, 9–11 ft) | Torn, faded, or mildewed canopy | $30–$60 | Walmart, Amazon |
| Replacement canopy (custom Sunbrella fabric) | Premium canopy replacement | $80–$200+ | Sunbrella dealers, custom shops |
| 303 Fabric Guard spray | Re-waterproofing canopy fabric after cleaning | $15–$20 | Hardware stores, Amazon |
| Hitch pin / locking pin (umbrella pole) | Loose or missing pole pin | $3–$8 | Hardware store |
One note on OEM versus generic parts: for Treasure Garden, Grand Patio Napoli, and Jearey models, OEM parts are available through their respective support channels and are worth considering when the umbrella itself is high-end. For a $60 big-box umbrella, a $15 generic crank kit makes more financial sense. I always weigh parts cost against the umbrella's replacement value before ordering.
Diagnosing the problem before you wrench anything
The most efficient way to fix a patio umbrella is to correctly identify the failure before buying any parts. The troubleshooting flow below takes about five minutes and prevents you from ordering the wrong component.
- OBSERVE: With the umbrella closed, try every mechanism (crank, tilt button, cord pull) and note exactly what happens. Does the crank spin freely with no resistance? Does it click but not lift? Does the button depress but nothing moves? Does the cord pull smoothly?
- ISOLATE: Determine whether the problem is in the handle, the gear/hub assembly, the tilt collar, or the cord/pulley system. These are four separate subsystems and rarely fail together.
- INSPECT: Open any access panels or remove the finial cap at the top of the pole to visually confirm what is broken. Most failures are visually obvious once you look.
- FIX: Follow the relevant step-by-step section below.
- TEST: After reassembly, run the mechanism through its full range of motion at least three times before calling it done.
Quick symptom checklist
| Symptom | Most likely cause | Repair section |
|---|---|---|
| Crank spins with no resistance, canopy doesn't move | Stripped crank gear or broken pawl | Broken crank repair |
| Crank handle snapped off or missing | Handle failure only | Broken crank repair |
| Canopy opens partway then stops | Cord tangle, frayed cord, or jammed runner ring | Lift cord replacement |
| Tilt button won't click or stay engaged | Broken push-button tilt collar | Tilt mechanism repair |
| Tilt ratchet slips under canopy weight | Worn ratchet teeth | Tilt mechanism repair |
| Umbrella won't hold tilt angle | Manual collar loose or stripped | Tilt mechanism repair |
| Cord frayed or snapped | Cord wear at pulley point | Lift cord replacement |
| One rib droops or won't stay open | Bent or cracked rib, or stretched stretcher cord | Bent rib repair |
| Canopy torn or has mildew stains | Fabric failure | Canopy care section |
| Pole wobbles in base | Undersized base or loose hitch pin | Check base weight, inspect pole pin |
Fixing a broken crank
The crank is the most commonly replaced part on a market umbrella. There are two distinct failure modes: the handle breaks off the worm shaft (cheap fix, new handle only), or the internal gear or pawl strips out so the crank spins freely without lifting the canopy (requires a full crank assembly replacement). Spin the crank slowly with light resistance from the canopy to determine which problem you have. Free-spinning with no load sensation means gear failure. Handle physically snapped means handle-only replacement.
What you need
- Replacement crank handle or full crank assembly (match the shaft diameter, typically 5/8" or 3/4")
- Phillips-head screwdriver
- Needle-nose pliers
- Adjustable wrench
- Estimated time: 15–30 minutes
- Difficulty: Beginner
Step-by-step crank repair
- Close the canopy as far as it will go and lay the umbrella on a flat surface or lean it safely against a wall so it won't fall.
- Locate the crank housing on the pole. It is typically a plastic or die-cast housing about 12–18 inches above the base, secured with two or three Phillips screws.
- Remove the screws and gently pry the housing halves apart. Set all screws aside in a cup so they don't roll away.
- Pull the crank handle and worm-gear shaft out of the housing as one unit. Take a photo of how it sits before you remove it — this is your reference for reassembly.
- If only the handle is broken: slide the old handle off the shaft end (it is usually held by a small cotter pin or set screw), fit the new handle, and reinsert the pin or tighten the set screw. Reassemble the housing, reinstall screws snug but not over-torqued, and test.
- If the full assembly needs replacement: note the direction the gear teeth face and the position of the pawl spring before removing. Slide out the old worm gear, drop in the new assembly in the same orientation, and confirm the pawl spring seats correctly in its groove.
- Reassemble the housing halves. Start all screws before tightening any (this is a consistent instruction across multiple OEM manuals, including Jearey and Allen + Roth, and it prevents the housing from warping and binding the gear).
- Test: crank open the canopy fully, then crank it closed. The mechanism should engage smoothly with consistent resistance throughout the range. If it skips or pops, the pawl spring is not fully seated — reopen and reseat it.
A note on Treasure Garden models: their OEM crank assembly (part number P-AGCRANK2-09) lists at around $103. Treasure Garden's replacement-parts PDF lists the OEM crank assembly (P-AGCRANK2-09) and shows the part and pricing consistent with an MSRP of about $103 blank" rel="noopener noreferrer">Treasure Garden Replacement Parts List (PDF). Before ordering that, verify your umbrella's model number on the pole label. If you have a Treasure Garden AKZ or AG series, the OEM part ensures an exact fit. For any other brand, a $20–$35 universal kit from Amazon will typically work as long as the shaft diameter matches.
Repairing tilt mechanism failures
Patio umbrellas use one of three tilt systems: a manual collar tilt (twist-to-lock), a push-button tilt (press a button on the pole to release and lock), or a ratchet tilt (click into angled positions with a lever or cord pull). Each fails differently. I'll cover all three.
Manual collar tilt
The manual collar is a threaded or friction-fit sleeve on the pole, about 24 inches from the top. You tilt the canopy by hand and then twist the collar to lock the angle. Failure usually means the collar has stripped threads or the locking teeth have worn smooth.
- Estimated time: 20–30 minutes
- Difficulty: Beginner to moderate
- Close the canopy and remove the finial (the decorative cap at the very top of the pole) by unscrewing it counterclockwise.
- Slide the canopy hub assembly off the pole tip and set it aside safely — it is heavier than it looks.
- Locate the tilt collar on the pole shaft. It is usually two interlocking plastic pieces held by a screw or snap clip.
- If the collar is cracked, replace it with a matching diameter collar. If it is simply loose, check the locking screw and retighten.
- Reassemble in reverse order, sliding the hub back onto the pole and replacing the finial. Test by tilting and locking the canopy at three different angles before calling it done.
Push-button tilt
Push-button tilt is common on mid-range Jearey and Grand Patio models. A spring-loaded button on the pole locks into notches inside the tilt collar. The button either stops springing back (spring failed) or the collar notches strip and the button no longer locks (collar failed).
- Estimated time: 20–40 minutes
- Difficulty: Moderate
- Close the canopy and lower it fully. Identify the push-button location on the pole, usually marked by a visible button approximately 18–24 inches below the hub.
- Remove any retaining screws on the tilt collar housing. Some models require you to remove the finial and slide the hub assembly up and off the pole first to access the collar.
- Slide the tilt collar off the pole. Inspect the spring under the button and the locking notches inside the collar.
- If the spring is collapsed or missing, replace only the spring (these are standard compression springs; bring the old one to a hardware store to match the diameter and free length, or order a replacement tilt collar kit that includes springs).
- If the collar's notches are stripped, replace the full collar. Insert the new collar so the button hole on the pole aligns with the button channel in the collar.
- Reassemble the hub and finial. Test by pressing the button, tilting to each angle, and verifying it locks firmly and holds the canopy weight without slipping.
Ratchet tilt
Ratchet tilts click through fixed angles, typically three to five positions. When a ratchet tilt fails, the canopy either slips back to vertical under load (worn ratchet teeth) or completely locks up and won't move at all (debris in the mechanism or a broken ratchet tooth).
- Estimated time: 30–45 minutes
- Difficulty: Moderate
- Close and lower the canopy. Remove the finial and slide the hub off the pole tip to access the ratchet assembly, which sits just below the hub.
- Use needle-nose pliers to remove the ratchet pawl (the small tooth-shaped piece that clicks into the ratchet wheel).
- Inspect the pawl and the ratchet wheel teeth. Worn-down teeth are visually obvious: the tips will be rounded instead of sharp-edged.
- If debris is the culprit, clean the entire assembly with compressed air or a dry brush, reassemble, and test before ordering parts.
- If teeth are worn, replace the ratchet assembly. When fitting the new assembly, confirm the pawl spring is fully engaged before closing the housing.
- Test through all tilt positions under simulated canopy load. Press down gently on the opened canopy while in each tilt position to confirm it holds without slipping.
Replacing a lift cord
The lift cord runs from the crank mechanism up through the pole, over a pulley at the top, and connects to the runner ring that slides up and down the pole to open and close the canopy. When it frays or snaps, the canopy either drops freely or won't open past a certain point. This is one of the more fiddly repairs but is very achievable with patience.
Cord specs and what to buy
For most market umbrellas, a 3/16-inch braided polyester cord works well. Treasure Garden specifies their cord at 0.12 inches diameter and 187 inches length for the AG28 and AG28SQ series (OEM part number CORD AG28). For generic models, measure the old cord length before discarding it and buy a replacement that matches within a few inches. Braided polyester is more UV and abrasion resistant than nylon, which matters because the cord runs over a metal pulley every time you open the umbrella.
- Estimated time: 30–60 minutes
- Difficulty: Moderate
Step-by-step cord replacement
- Before removing the old cord, use masking tape to mark the cord path at the runner ring connection and at the crank drum. Take a photo from multiple angles. This is the most important prep step — an un-photographed cord routing is a 20-minute puzzle on reassembly.
- Close the canopy and lower it fully. Remove the finial cap at the top of the pole (unscrew counterclockwise) and set it aside.
- At the crank housing, open the housing as described in the crank repair section. The cord attaches to a drum or hook inside the housing. Untie or unhook it.
- At the runner ring (the ring that slides on the pole and connects to the canopy ribs), untie the cord. Note the exact knot type used — most are a simple overhand stopper knot fed through a hole.
- Feed the new cord up through the pole from the crank end, over the pulley at the top of the pole, and back down to the runner ring. Use a stiff wire or a straightened coat hanger as a fish tape to thread the cord through the pole if it won't drop through on its own.
- Tie the cord to the runner ring first using the same knot style as the original. Pull the cord snug so the runner ring sits at the correct lowered position (canopy closed).
- Run the other end back to the crank drum. Tie it off or loop it according to your photo reference. Reassemble the crank housing.
- Test: crank the canopy fully open and fully closed three times. The cord should run smoothly without binding at the pulley, and the runner ring should travel the full length of the pole in both directions. If the canopy stops short of fully open, the cord is tied too short at the runner ring end — untie and add an inch of slack.
If your umbrella is a Jearey cantilever model or a Grand Patio Napoli hanging umbrella, the cord routing differs slightly because the cord must also navigate the side arm or hanging bracket. Both brands include exploded diagrams in their official manuals that show the exact cord path through those arm sections. Reference those diagrams alongside these steps.
Dealing with bent ribs and frame damage
Ribs are the spokes that radiate from the hub and hold the canopy fabric open. They get bent by wind, by the canopy catching on furniture when lowered, or simply by age and UV degradation on cheaper fiberglass models. Before doing anything, you need to decide whether you are straightening a slightly bent rib or replacing a structurally compromised one.
Assess before you act
| Damage type | Repair option | Difficulty | Notes |
|---|---|---|---|
| Slight bend in aluminum rib (less than 15 degrees) | Straighten with hands or rubber mallet | Beginner | Aluminum bends back reasonably well once. Rebend the same rib twice and it will crack. |
| Moderate bend in aluminum rib | Straighten with mallet and backing block | Beginner/Moderate | Use a wood block behind the bend to avoid flattening the rib profile. |
| Cracked or shattered fiberglass rib | Replace the rib | Moderate | Fiberglass doesn't straighten. Attempting to bend it causes further cracking. |
| Kinked or sharply bent aluminum rib (over 30 degrees) | Replace the rib | Moderate | Metal memory is gone at this bend severity; straightening will leave a weak point. |
| Cracked hub where rib mounts | Replace the umbrella | N/A | A cracked hub is a structural failure. The entire frame is unsafe. |
Straightening a bent aluminum rib
- Estimated time: 10–20 minutes
- Difficulty: Beginner
- Close the canopy and detach it from the affected rib by unhooking the canopy pocket from the rib tip (most canopies have a sleeve or pocket that the rib tip slides into).
- Remove the rib from the hub by locating the pivot pin or rivet at the hub connection. Many ribs are held by a small bolt and nut; others use a cotter pin you can pull with needle-nose pliers.
- Lay the rib on a flat, hard surface. Place a wooden block against the bent area to act as a backing support.
- Use a rubber mallet to tap the rib straight, working from the middle of the bend outward in small increments. Do not use a steel hammer, which will dent and flatten the rib.
- Sight down the rib like a pool cue to check for straightness. It doesn't need to be perfect — within a few millimeters is fine.
- Reinstall the rib, reconnect the canopy pocket, and open the canopy fully. Check that the rib sits at the same angle as its neighbors and holds the canopy fabric taut with no sagging.
Replacing a rib
- Estimated time: 20–40 minutes per rib
- Difficulty: Moderate
- Order a replacement rib that matches your umbrella's rib length (measure from hub pivot to tip) and material (aluminum or fiberglass). Universal replacement ribs sold online typically come in 18-inch, 22-inch, and 26-inch lengths to cover 7.5-foot to 11-foot umbrellas.
- Remove the canopy by unhooking all rib tip pockets and sliding the canopy sleeve off the pole. Lay the canopy flat to access the stretcher cord if your model has one connecting the secondary ribs.
- Remove the damaged rib by pulling its pivot pin or unscrewing its hub bolt. Note the orientation of any secondary stretcher rib that connects to it.
- Fit the new rib into the hub pivot point, insert the pin or bolt, and secure it. Do not fully tighten until all components are in place.
- Reattach the canopy pockets to all rib tips. Remount the canopy sleeve to the pole.
- Open the canopy and do an alignment check: all ribs should extend to the same radius and the canopy fabric should be evenly tensioned with no puckering. If one side pulls tighter than the other, the rib is slightly too long or the canopy pocket isn't fully seated — check both before deciding the rib is wrong.
Testing alignment and tension after rib work
Open the umbrella fully and stand back 10 feet. Sight across the canopy from the side. All rib tips should form an even arc with no one rib noticeably higher or lower than its neighbors. Lightly press down on the canopy midpoint between two ribs, it should feel uniformly taut, like a drum. A loose section means a rib isn't seated correctly or a stretcher cord needs adjustment. A rib that pops upward under finger pressure from below indicates the hub pivot is loose and the bolt needs tightening.
Keeping the canopy clean and protected
Mold and mildew are the most common canopy problem, especially in humid climates or when an umbrella gets put away damp. For Sunbrella and most solution-dyed acrylic fabrics, Glen Raven (Sunbrella's manufacturer) recommends a mildew-removal solution of 1 cup bleach plus 1/4 cup mild dish soap per gallon of water. Apply it to the affected area, let it sit for 15 minutes, scrub lightly with a soft brush, and rinse thoroughly with clean water. Always air-dry the canopy completely before folding or storing it. After cleaning, treat the fabric with 303 Fabric Guard spray, which is Sunbrella's specifically recommended re-waterproofing product, to restore water repellency.
For polyester canopies (common on budget models), the same bleach-soap solution works but be more cautious with concentration on cheaper dyed fabrics, test a small corner first. Replacement polyester canopies in universal sizes (9 to 11 feet) typically cost $30 to $60 from big-box retailers, so if mildew has penetrated deeply or the fabric is otherwise deteriorated, replacing the canopy is often the better call.
Seasonal care and winterizing
Closing the season correctly is the single best maintenance step you can take. Most umbrella failures I see in spring trace back to being left open, damp, or improperly stored the previous fall. Here is what to do at the end of the outdoor season.
- Clean the canopy thoroughly using the method above and let it dry completely in open air for at least 24 hours before folding.
- Inspect all hardware while it is clean and visible: check every screw and bolt for corrosion, test the crank under load, check the cord for fraying, and flex each rib gently to catch any cracks before they worsen in storage.
- Treat metal pole and frame sections with a light coat of paste wax or spray silicone lubricant to resist corrosion over winter.
- Lubricate the crank gears and tilt collar with a dry silicone spray (not WD-40, which attracts dust).
- Fold the canopy, close the umbrella, and store it in a protective cover or bag in a dry location. A garage or shed is ideal. Avoid storing against concrete floors without a protective mat, as moisture wicks up from concrete and rusts pole bases.
- Remove the base filler sand or water at the end of the season if you live in a freeze zone — freezing water in a plastic base will crack it.
Every 90 days of active use (or at season start), go around every visible bolt and screw and retighten by hand. Multiple OEM manuals, including generic market-umbrella models and Allen + Roth instructions, include this retorque reminder because vibration from wind and daily use loosens hardware gradually.
When to repair vs. when to replace
I always tell people: compare the parts cost plus your time against the umbrella's replacement value. A $150 umbrella with a $25 crank repair is an easy yes. The same umbrella with a cracked hub casting is a no, the frame is structurally compromised and replacement ribs won't fix the underlying problem. Here is my general decision guide.
| Situation | Recommendation |
|---|---|
| Single mechanical failure (crank, cord, tilt) on an umbrella worth $100+ | Repair — parts are cheap and the fix takes under an hour |
| One or two bent ribs, everything else intact | Repair — ribs are inexpensive and straightforward to replace |
| Mildewed canopy, frame in good shape | Replace canopy only ($30–$60) — much cheaper than a new umbrella |
| Cracked or sheared pole shaft | Replace the umbrella — structural failure |
| Cracked hub casting at rib mounts | Replace the umbrella — unsafe to use |
| Multiple simultaneous failures (crank + cord + 3+ bent ribs) | Replace the umbrella — cumulative repair cost approaches replacement cost |
| Umbrella under active warranty (most brands offer 1-year limited) | Contact manufacturer before any DIY — repairs may void remaining warranty |
| Any recalled model (check CPSC database) | Stop use, do not repair, follow recall instructions |
On the warranty point: Jearey models commonly carry a 1-year limited warranty. Treasure Garden offers 1 to 3 years on frames and accessories depending on the series, and 5 years on Sunbrella and Outdura fabric fading. Their warranty policies explicitly exclude damage from acts of nature and damage caused by improper anchoring, so storm damage is almost never covered regardless of umbrella age. If you are within your warranty window and the failure looks like a manufacturing defect (a crank gear that stripped after one season of light use, for example), contact the manufacturer before opening anything up.
Brand-specific notes for common models
While all these repairs apply broadly, a few differences are worth knowing for the most common brands. Jearey umbrellas (available at Home Depot and Lowe's) use a push-button tilt and crank-lift system across most of their 9-foot and 10-foot consumer SKUs, and their official instruction manual includes clear parts diagrams that make identifying components straightforward. The 1-year limited warranty is standard across most Jearey consumer models. If you are working on a Jearey cantilever, note that both the manual and general OEM guidance for heavy cantilever umbrellas strongly recommend a two-person setup for any disassembly work.
The Grand Patio Napoli is a hanging (cantilever) umbrella with a distinct offset arm and a more involved cord routing than a standard pole umbrella. The official assembly and care manual for the Napoli family includes an exploded diagram that is your best friend for cord replacement and tilt collar work on that model. The repair steps in this guide apply, but follow the Napoli manual's cord routing diagram precisely rather than guessing, because the cord path through the offset arm is not intuitive. For detailed diagrams and steps specific to that model, see the Grand Patio Napoli umbrella instructions for the exact cord routing and maintenance guidance. For detailed assembly and troubleshooting, see the grand patio umbrella instructions for the Napoli and standard models (manufacturer's exploded diagrams and step-by-step guidance). Similarly, for standard Grand Patio models, the instructions covering setup and operation are a useful companion to this repair guide. For step-by-step Jearey setup and assembly guidance that complements these repair procedures, the dedicated Jearey patio umbrella instructions resource covers initial assembly in greater detail.
If you own a generic or store-brand umbrella and can't find a manual, search the model number on Manualzz or manuals.plus, the vast majority of big-box umbrella manuals are available there in PDF form and include the parts diagrams you need to identify components before ordering replacements.
FAQ
What primary source documents are essential to build an accurate, brand‑aware DIY patio umbrella repair guide?
Collect OEM manuals and exploded parts diagrams for each target brand/model (Grand/Grand Napoli, JEAREY, Treasure Garden and similar). Include: assembly/operation manuals, parts lists with part numbers, warranty statements, and any manufacturer safety notices. Add authoritative replacement‑parts catalogs (e.g., Treasure Garden parts PDF) so you can quote exact part numbers, dimensions and OEM MSRPs. Use retailer product/spec pages (Home Depot, Lowe’s, brand sites) to confirm model variants and mechanism types (crank, cantilever, push‑button tilt).
Which regulatory or safety references must be included?
Include CPSC recall pages and safety alerts for patio umbrellas and accessories to identify known failure modes (impact, fire risk from battery/LED add‑ons, structural collapse). Use manufacturer safety warnings (close in wind, weight/base guidance) and any national/local standards cited by OEMs. These justify safety recommendations, when to stop DIY, and documentation to preserve warranty/claims.
What fabric and canopy care sources are required for accurate cleaning, mildew removal and re‑treatment instructions?
Use fabric maker care guides (Sunbrella/Glen Raven) for authoritative cleaning and mildew removal formulas (e.g., 1 cup bleach + 1/4 cup mild soap per gallon of water), rinsing and drying procedures, and re‑treatment recommendations (303® Fabric Guard or Sunbrella Renew). Cross‑reference with OEM canopy care notes for any brand‑specific cautions (colorfastness, removable canopies).
What technical details do I need to make step‑by‑step repair procedures reliable and safe?
Obtain exploded diagrams and part dimensions (cord length/diameter, gear/crank assembly specs), torque/fastening guidance from OEM manuals, and recommended assembly sequences (start screws, align, then snug/final torque). Collect common failure symptoms and the corresponding replacement part numbers. For cantilever systems, include two‑person assembly recommendations and safe handling steps. Where OEM torque values are not provided, use snug‑by‑hand plus 1/8–1/4 turn guidance and advise periodic re‑torque checks (every ~90 days).
Which parts‑availability and cost data should be compiled?
Create a parts table using OEM part numbers and MSRP where available (e.g., Treasure Garden crank assembly P‑AGCRANK2‑09 ~ $100) and examples of aftermarket/basic options (crank handles/kits $10–$40). Include common items: crank assemblies, lift cords, tilt springs/locks, ribs, canopy replacements ($30–$120 depending on material), hub/runner parts, fasteners and replacement ribs. Note lead times and recommended suppliers (OEM, authorized dealers, large retailers/marketplaces).
What tool checklist is necessary for homeowners to complete most repairs?
List hand tools and consumables: adjustable wrenches, hex key/Allen set, Phillips/flat screwdrivers, needle‑nose pliers, wire cutters, awl/pick (for cord routing), cord/rope splicing tools or heat shrink, replacement pins/cotter pins, stainless fasteners, soft mallet, lubricant (dry Teflon), marine‑grade threadlocker (low strength), fabric repair kit/sewing awl, canopy clips and a helper for heavy lifts. Also PPE: gloves and eye protection.
Next Articles
Jearey Patio Umbrella Instructions: Assembly, Repair Guide
Jearey patio umbrella instructions: step-by-step assembly, crank & tilt repairs, troubleshooting, parts, maintenance.
Patio Umbrella Instructions: Assembly, Offset Setup, and Fixes
Step-by-step patio umbrella instructions for center-pole and offset cantilever setups, plus fixes, safety tests, and sto
Grand Patio Napoli Umbrella Instructions: Setup to Repair
Grand Patio Napoli umbrella setup, open close, crank and tilt instructions plus troubleshooting and repair steps for com