Assembling a patio umbrella correctly comes down to three things: getting the pole and base locked in securely, threading the canopy and cord properly before you crank anything, and testing the open/tilt mechanism before you ever leave it unattended. Whether you have a standard center-pole umbrella or a cantilever offset model, the process takes about 20 to 45 minutes if you work through it in the right order. Skipping steps, especially around cord seating and base weight, is where most people run into trouble. If you need step-by-step grand patio umbrella instructions, follow the assembly sequence and double-check the cord seating and crank direction before final testing.
Patio Umbrella Instructions: Assembly, Offset Setup, and Fixes

Luca Morrison
31 May 2026
What you need before you start
Pull everything out of the box and lay it flat on a clean surface, ideally grass or a drop cloth, so small parts don't roll away and the canopy fabric doesn't drag on rough concrete. Give yourself about a 10-foot clear working radius. Before you grab any hardware, do a parts inventory against the manual's parts list. Missing or mislabeled parts are the single most common reason assembly stalls, and it's far easier to call the manufacturer before you've started than after you're halfway in.
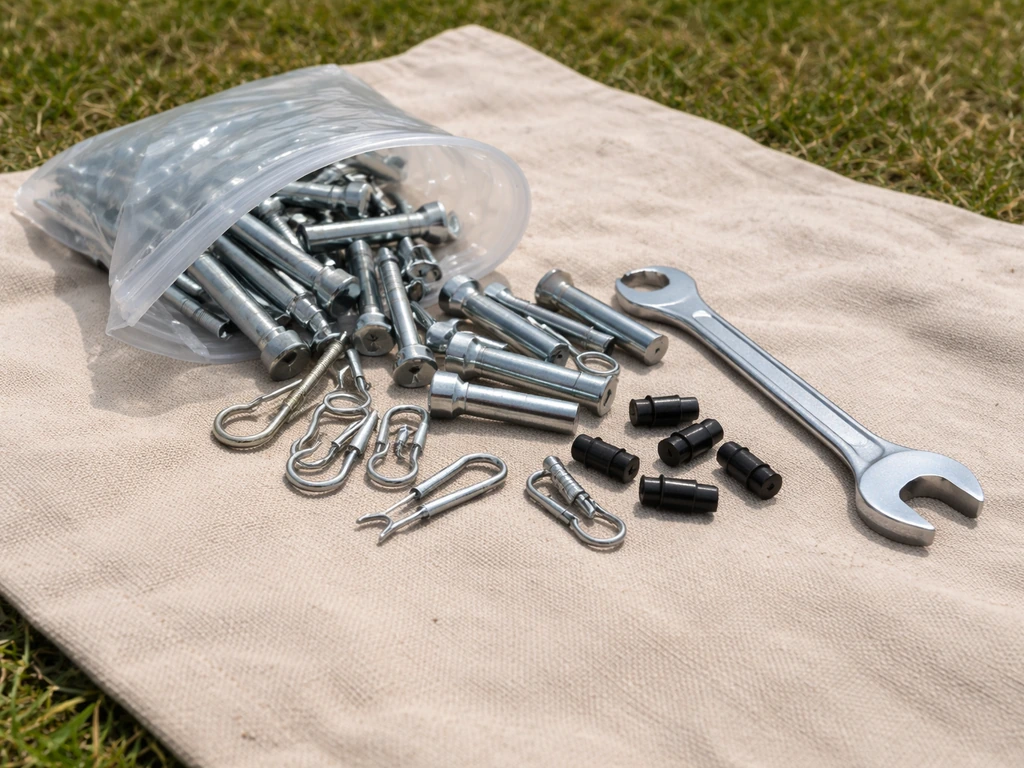
- The included hardware bag: bolts, pins, safety clips, and any set screws
- An M10 wrench (called out explicitly in offset umbrella instructions from several manufacturers; a standard adjustable wrench also works)
- A rubber mallet for seating pole sections that fit snugly
- Sand or water to fill the base (more on weights below)
- A funnel if you're water-filling a plastic base
- Your phone or tablet open to the model-specific manual (photograph the parts diagram page before anything else)
Workspace tip: assemble the upper pole sections and attach the canopy while everything is still horizontal on the ground. This is much easier than trying to thread ribs through canopy sleeves while the pole is vertical and swaying. You'll stand it up as one of the last steps.
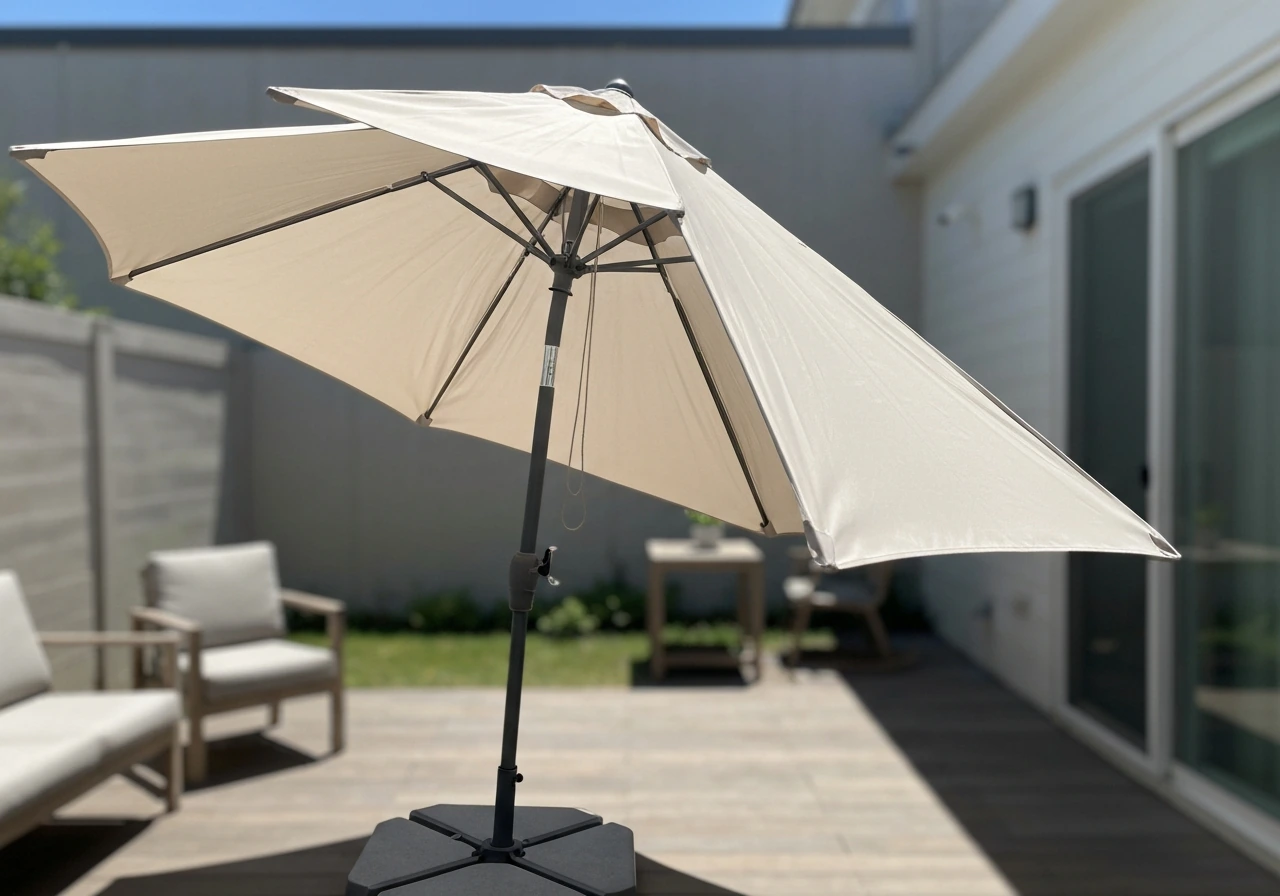
Standard center-pole umbrella: step-by-step assembly
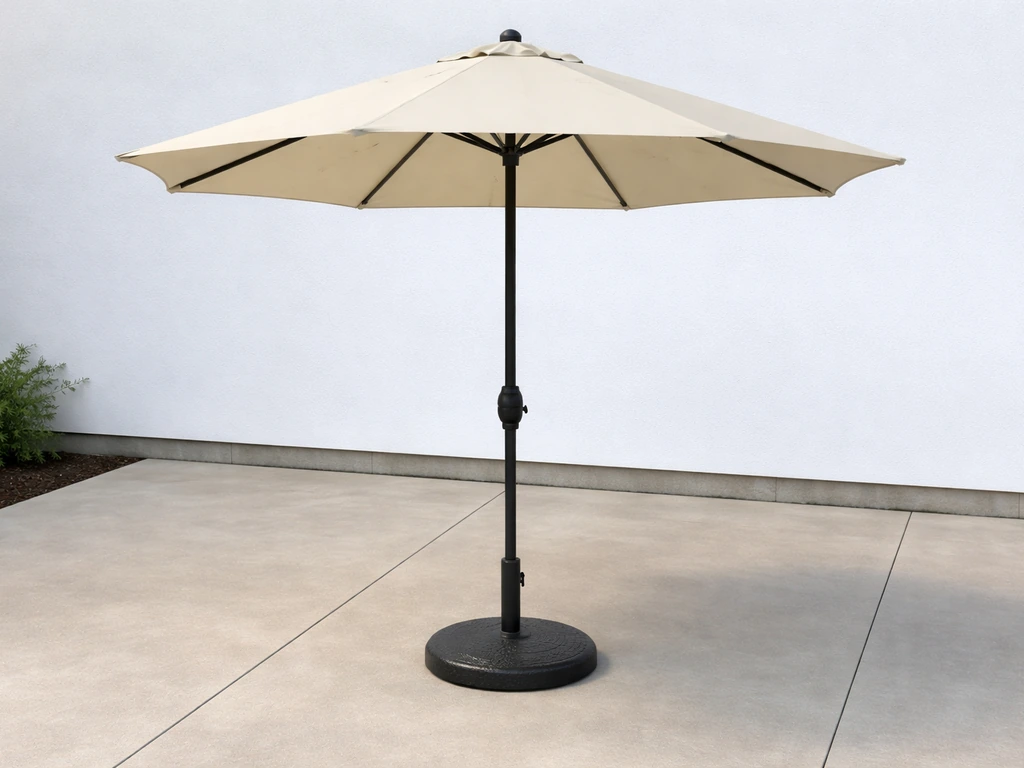
These instructions apply to the most common style: a straight pole that drops into a table hole or a freestanding cross-base, with a crank or push-button tilt on the side of the pole.
- Set up and weight the base first. If you have a cross-base, bolt the legs together at the center hub and tighten firmly. If your base is a fillable plastic container, place it in its final position before filling, because a sand-filled base can weigh 50 pounds or more and is miserable to move. Fill it completely with sand or water. Water alone is convenient but adds less stability than sand, and in freezing conditions, water will crack plastic bases.
- Assemble the pole sections. Most center-pole umbrellas have two or three sections that connect with a twist-lock or pin-and-hole system. Slide them together and confirm the pin clicks into the hole. Give each joint a firm tug before moving on.
- Install the crank mechanism. On most models, the crank housing slides onto the lower pole section before you join it to the upper section. Check your manual now, because this is the step people most often skip and have to redo.
- Attach the rib assembly (also called the hub or spreader). The upper hub sits at the top of the pole; the lower hub (sometimes called the runner or slider) slides up and down when you crank. Connect the ribs to the upper hub first, then attach the support struts from the ribs down to the lower hub. Every strut needs to be clicked or pinned in before you test the crank.
- Thread the canopy. Lay the canopy over the ribs and slide each rib tip through the canopy sleeve or clip it to the loop at each rib end. Work around the canopy in a star pattern (opposite rib to opposite rib) rather than going around in a circle, so the canopy centers evenly.
- Seat the cord or cable. If your umbrella uses an internal cord-and-pulley system to open the canopy, visually confirm the cord is seated in the pulley wheel before cranking. This is the step most responsible for 'crank turns but nothing opens' complaints.
- Insert the pole into the base. Lower the pole into the base tube and insert the safety pin through the pole and base collar. This pin prevents the pole from lifting out in wind. Do not skip it.
- Do a slow first crank. Turn the crank clockwise (on virtually every model) to open. Go slowly on the first rotation and watch the lower hub travel up the pole. If it binds, stop and check that all struts are connected.
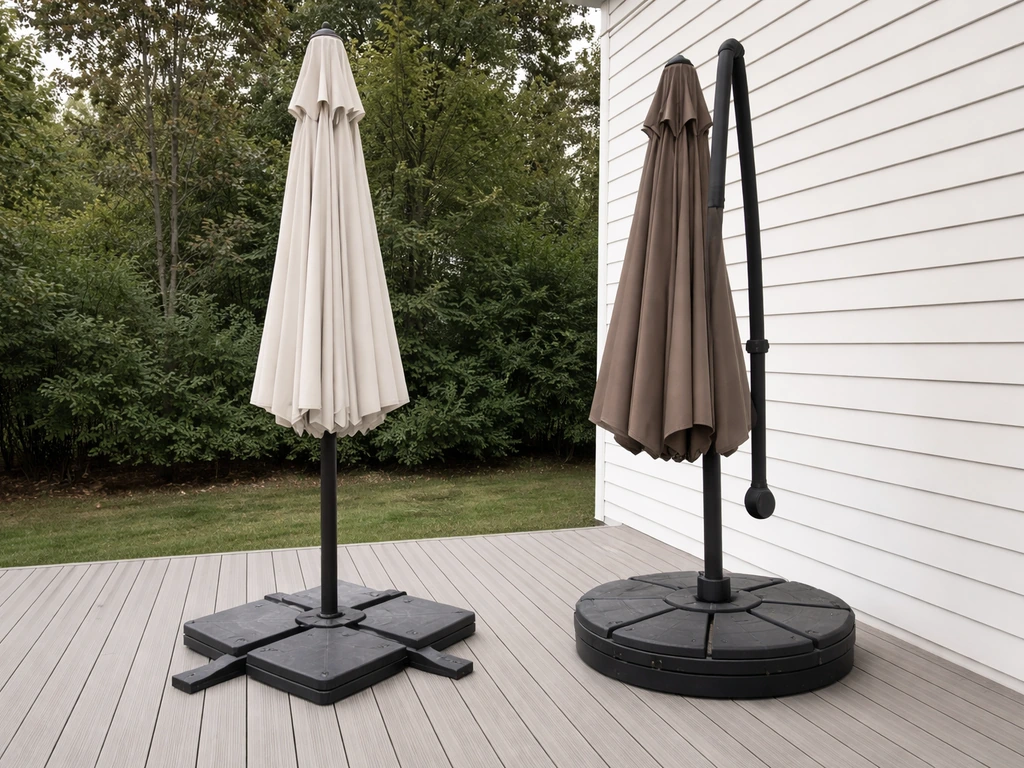
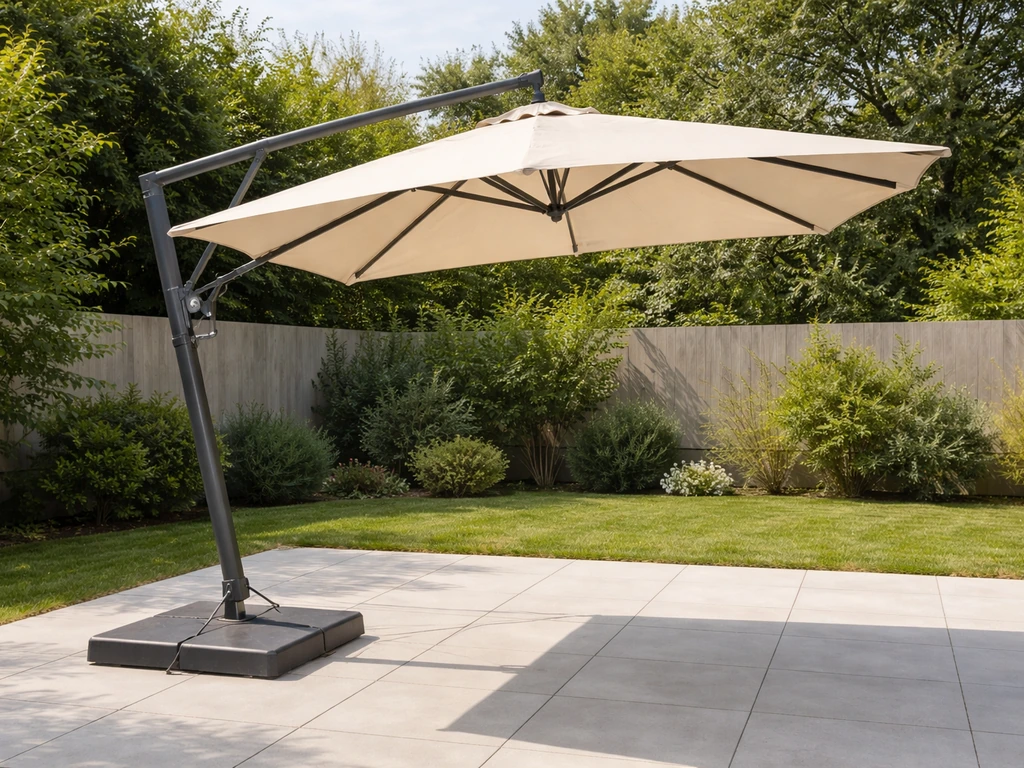
Offset (cantilever) umbrella: how the mechanics differ
An offset or cantilever umbrella has the pole off to the side rather than through the center of the canopy. This gives you shade without a pole in your sightline, but the assembly is meaningfully different and slightly more complex. The canopy hangs from an arm that extends outward from a vertical mast, and both the base system and the crank mechanics work differently.
Base and mast setup
Offset umbrellas generate significant sideways leverage, which means base weight matters even more than with a center-pole design. One Allen + Roth manual states it plainly: 'Water alone will not support the weight of the cantilever.' Most offset models come with multiple fillable plastic base plates that stack or join together. Fill all of them, use sand rather than water where possible, and position the base so the filled sections are on the opposite side from where the arm extends. Assemble the vertical mast pole into the base and confirm it is fully seated and locked before attaching the arm.
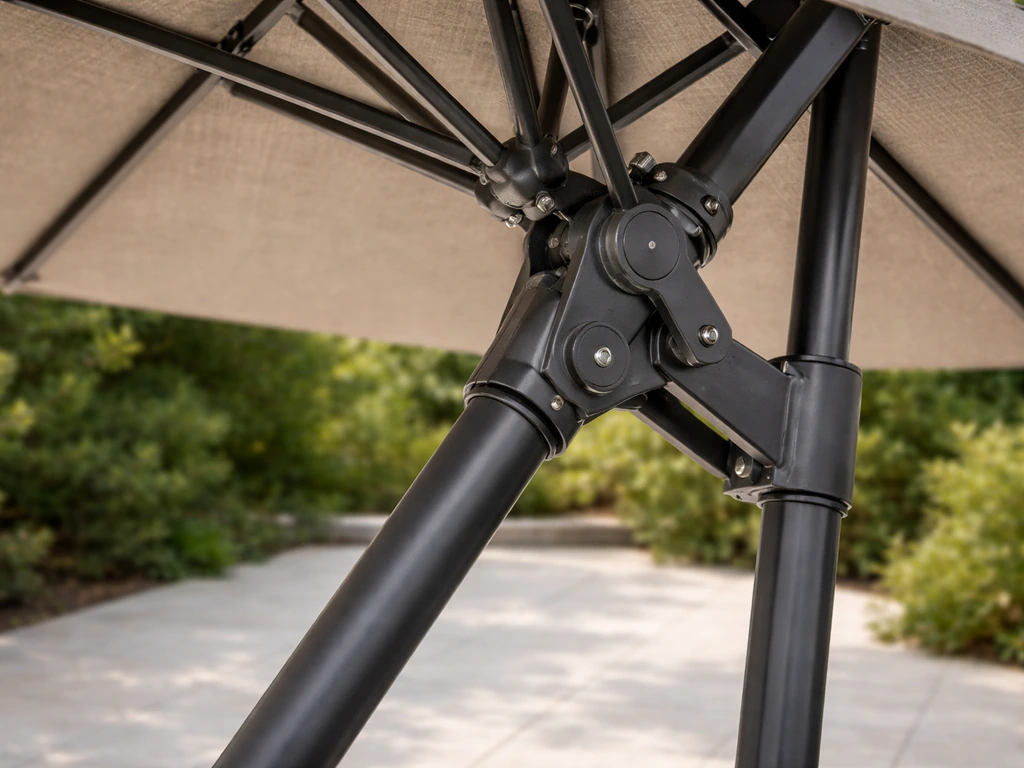
Arm and canopy attachment
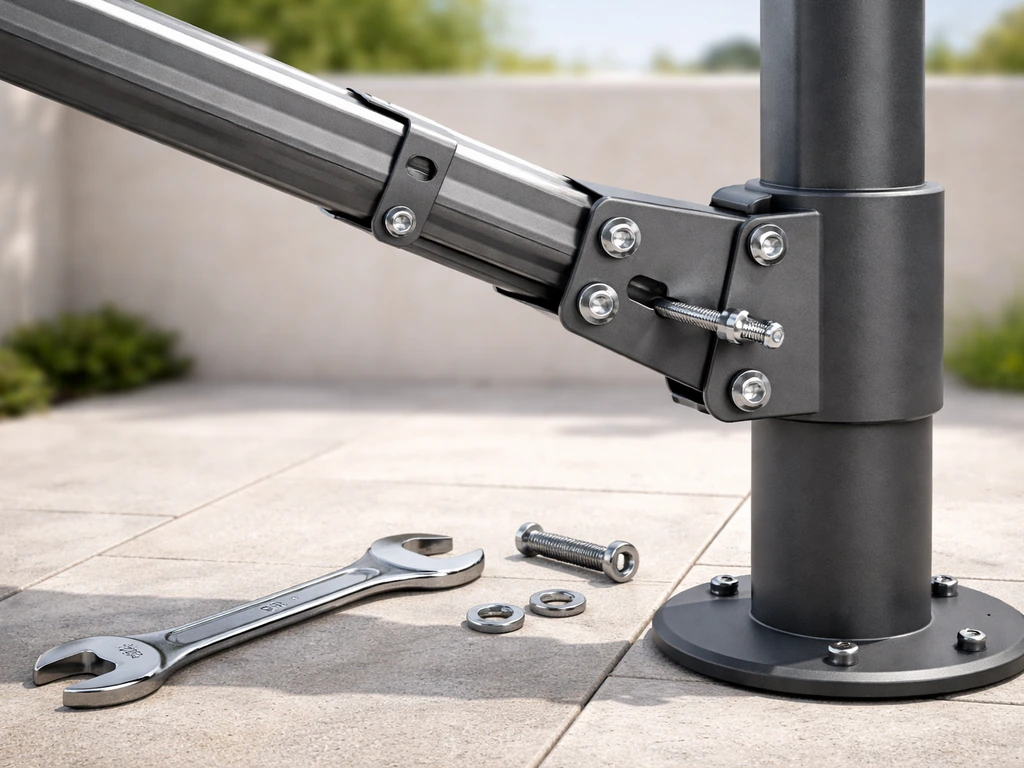
The support arm attaches to the top of the mast and extends outward over your seating area. Most arms are multi-section and connect with bolts (this is where that M10 wrench comes in). Tighten these joints fully because a loose arm joint is a wobble that gets worse over time. The canopy hangs from the end of the arm, and many offset canopies connect at multiple points around a central hub using the same rib-and-sleeve method as a center-pole umbrella. Secure the clamp lever or locking collar at the arm attachment point before you try to open the canopy. Outsunny and similar brands call this out explicitly, and skipping it means the arm can rotate unexpectedly when you crank.
Crank and tilt mechanics on an offset
On a center-pole umbrella, cranking moves the lower hub up the pole to open the ribs. On most offset models, the crank operates a cable-and-pulley system that pulls the canopy hub upward from below. Kingdura's instructions, for example, distinguish between 'up and down' positioning of the canopy head and 'open clockwise' rotation of the crank to spread the ribs. Tropitone's cantilever manual adds that you should 'slowly turn the crank handle' at each stage, because cable-driven systems can jump the pulley if you crank too fast. Once the canopy is fully open, you then adjust the tilt angle using a separate lever on the arm, not the crank. The lever locks the canopy head at the angle you want.
Side-by-side: center-pole vs. offset
| Feature | Center-Pole Umbrella | Offset Cantilever Umbrella |
|---|---|---|
| Base type | Cross-base or table-hole insert | Multi-plate fillable base, must be weighted heavily |
| Pole position | Through center of canopy/table | Offset to the side, canopy hangs from arm |
| Opening mechanism | Crank raises lower hub up pole | Crank pulls cable through pulley to raise hub |
| Tilt adjustment | Collar or push-button on pole | Separate lever on the arm joint |
| Assembly time | 20 to 30 minutes | 30 to 45 minutes |
| Most common failure point | Cord off pulley, safety pin missing | Loose arm joint, pulley jump, insufficient base weight |
Common problems during assembly
Crank turns but canopy doesn't open
This is almost always a cord or cable that has jumped off its pulley. On center-pole umbrellas, open the crank housing cover if there is one and visually check that the cord is seated in the wheel groove. On offset cantilever models, a Home Depot LED cantilever manual specifically calls this out: 'check to see if the rope has come off the pulley.' Re-seating the cord takes about two minutes once you can see what's happening. Also check that you're turning the crank in the correct direction. Clockwise opens on virtually every model, but if the crank is mounted on the opposite side of the pole from what you expect, it can feel backwards.
Canopy won't center or hangs lopsided
This almost always means one or more ribs aren't attached to the lower hub, or a canopy sleeve isn't fully over its rib tip. Lay the umbrella back down horizontally, open the canopy by hand, and work around each rib checking both attachment points: the tip where the rib end meets the canopy loop, and the strut connection at the lower hub. Fixing one missed connection is usually enough to bring everything square.
Crank feels stiff or grinds
A stiff crank on first use is often just paint or manufacturing residue in the gears. A few slow, deliberate turns in each direction usually frees it up. If it stays stiff, confirm you're cranking in the right direction (clockwise to open, counter-clockwise to close) and that no cord or fabric is wrapped around the mechanism. Forcing a stiff crank in the wrong direction is one of the fastest ways to strip the gear teeth.
Missing or mislabeled parts
Hardware bags occasionally ship with extras, which is fine, or with substitutions, which can cause real problems. If a bolt doesn't thread smoothly, don't force it. Take a photo and contact the manufacturer's support line before improvising. Most brands will ship replacement hardware within a few days. Brand-specific instructions for models like the Grand Patio Napoli or Jearey umbrellas can differ noticeably in the hub-and-strut connection style, so always use your model's specific manual rather than a generic guide. These Jearey patio umbrella instructions can help you follow the exact hub, cord, and crank steps for your model. Follow your grand patio napoli umbrella instructions for the exact hub-and-strut connection style on your model.
Safety checks and operation test after assembly
Don't walk away after the first successful open. Run through this checklist while everything is fresh and you still have your tools nearby.
- Confirm the safety pin is in place through the pole and base collar. Grab the pole and try to lift it straight up. It should not lift more than a few millimeters.
- Open the canopy fully by cranking slowly. Listen for any popping or grinding that wasn't there at first.
- Check all rib tips and strut connections visually once the canopy is fully open. Look for anything that appears stressed or partially unclipped.
- Test the tilt function. On a center-pole model, twist or push the collar until the pole tilts, then lock it. On an offset, engage the lever on the arm and move the canopy head to your desired angle, then re-lock. The canopy should hold its angle without drifting.
- Rock the base gently by hand. You should feel very little give. If the umbrella sways noticeably, add more sand or water to the base.
- Keep hands clear of the rib mechanisms and below the canopy edge while cranking. The ribs move with some force and the canopy edge can snap down unexpectedly if a cord slips.
Securing against wind right after setup
A freshly assembled umbrella that hasn't been weighted properly is the one that ends up in your neighbor's yard. Even light wind, around 15 mph, can tip a center-pole umbrella if the base isn't fully filled or the safety pin is missing. For offset umbrellas, the problem is worse because the canopy acts as a sail on a lever arm.
- Fill the base completely. Partial fills are one of the most common reasons umbrellas tip. Don't stop at half-full because it seemed stable enough indoors.
- Use a base anchor strap or weight bag on top of the base if your model supports it. Many offset bases have a slot or tie point for this.
- Close the umbrella any time wind picks up above 20 to 25 mph. No weight system fully compensates for a fully open canopy in strong wind.
- For center-pole umbrellas in table holes, check that the table itself is on level ground and not at risk of sliding on slick surfaces.
- Consider a ground anchor stake for freestanding center-pole cross-base setups on soft ground. Threading a ground stake through the center of the cross-base and into the soil takes a few minutes and makes a significant difference.
Maintenance right after setup
The first week after assembly is a good time to catch anything that didn't seat perfectly. Open and close the umbrella a few times each day for the first several uses, watching for any cord fraying, rib wobble, or crank roughness that develops. A tiny amount of silicone spray on the crank gear and the pole joints keeps everything moving freely and prevents the rust and corrosion that makes cranks seize up after a rainy season.
Seasonal storage and winterizing basics
How you put the umbrella away at the end of the season directly affects whether you're doing a full reassembly troubleshoot next spring or just pulling it out and opening it. The steps below apply to both center-pole and offset models.
- Close the canopy fully and let any moisture dry out completely before storing. SunVilla's offset umbrella manual puts it well: 'Allow a wet canopy to dry in the open position in the sunlight' before closing for storage. Storing a damp canopy leads to mildew that weakens the fabric and smells terrible.
- Clean the canopy fabric with mild soap and water, rinse thoroughly, and let it air dry. Do not fold or bag it while still damp.
- Drain all water from fillable plastic bases before freezing temperatures arrive. Water expands when it freezes and will crack the base. If you used sand, leave it in place but check the drain plug is sealed to keep moisture out.
- Remove the canopy from the frame if possible and store it indoors in a breathable fabric bag. The ribs and pole can stay outdoors under a quality cover if you lack indoor space, but the fabric lasts significantly longer when kept dry and out of UV exposure over winter.
- Apply a light coat of silicone lubricant to the crank mechanism, tilt collar, and all pole joints before covering for winter. This prevents seizing and makes spring setup far easier.
- Do not leave any umbrella, standard or offset, fully open during freezing conditions. Ice loading on the canopy can bend ribs and crack hub connectors.
If you run into a specific mechanical problem after assembly, like a broken crank, stripped gear, or cord that keeps slipping, those issues go beyond initial setup and are worth tackling as dedicated repair projects. Brand-specific assembly guides, like those for Grand Patio or Jearey models, can also clarify steps that differ from the general process covered here. And if you bought an offset model and are finding the mechanics more involved than expected, the repair and troubleshooting side of cantilever umbrellas has its own set of common failure points that are worth knowing before something goes wrong. If you need patio umbrella repair instructions, focus on the specific failure point you see and follow the same step-by-step checks used during troubleshooting.
FAQ
How do I know the base is weighted correctly for an offset/cantilever patio umbrella?
Yes. If the umbrella uses stacked fillable base plates (common on cantilever models), keep the arm positioned over the base side before filling so the filled sections end up on the correct side relative to the arm. Recheck after filling, a partial swap of plate orientation can make the canopy feel “off” even if the crank works.
Can I use oil or lubricant on the crank and cable system to stop skipping?
Never apply grease to cable pulleys. For cable-and-pulley systems, use a dry check first, reseat the rope in the pulley groove, then only apply a tiny amount of recommended lubricant (or silicone spray) to the gear interfaces and pole joints. Grease can attract dust and make the cable slip later.
My offset umbrella opens, but the tilt lever won’t hold its angle. What should I check first?
If the canopy opens but the tilt lever feels loose, lock the collar or clamp at the arm attachment point before adjusting tilt. Also confirm the canopy hub is fully seated on its connections, otherwise the tilt adjustment can keep moving the wrong part and reduce stability.
What do I do if the crank opens the umbrella in the opposite direction of what I expect?
If the crank direction seems backwards, don’t force it. Verify you’re looking at the correct crank side and that the canopy head position markings match the manual. The “clockwise opens” rule is common, but mounting orientation can make it feel reversed.
How can I tell whether ribs or sleeves are connected incorrectly before I try to crank?
Look for mismatches between rib tip loops and the sleeve openings, the canopy loop should sit over the rib tip and the strut connection should be fully clicked or seated at the lower hub. If only one rib is missed, the canopy can open unevenly and create extra stress on the cord/pulley mechanism.
My cord keeps slipping off the pulley when I open the umbrella. How do I fix the root cause?
If the cord keeps jumping off the pulley, slow the crank and inspect pulley seating, check for frayed cord ends, and confirm there is no twist in the cord as it runs to the wheel groove. Jumping usually means mis-seated cord, incorrect crank speed, or a cord that shifted under tension.
Is it safe to add base weight after the umbrella is assembled and standing?
Do not add sand or water after the umbrella is already standing and partly assembled. Fill bases when the umbrella is horizontal or in a stable assembly position, then stand it up and do a full open/close test. Adding weight with the mast loaded can shift seating and make the crank alignment worse.
A bolt won’t thread smoothly during assembly. Should I force it to finish?
If bolts do not thread smoothly, stop. Take a clear photo of the bolt, the hole, and the threaded direction, then contact the manufacturer for the correct hardware or threading method. Forcing mismatched threads is a common way people strip the hub or create a crank stiffness that looks like a pulley problem.
My crank feels stiff on first use. How can I troubleshoot without damaging the gears?
If the crank is stiff, first turn slowly in the correct direction without loading the mechanism, remove any fabric wrap around the hub, and inspect the cord line for tension twists. If it remains stiff, check for paint residue at the gear interface and only then apply a small amount of silicone spray to the approved contact points.
What should I inspect before I open a stored patio umbrella for the first time?
After a season, don’t assume reassembly will “just work.” Inspect cord wear, rib hinge looseness, and pulley alignment before opening fully, then do a controlled first open with the area clear. This catches friction or off-seating issues that only show up after storage.
What’s the safest way to confirm my patio umbrella is ready to use after assembly?
Use the manual’s parts list to confirm you have the correct crank, tilt lever, and hub connection hardware, then verify all locking collars or safety pins are installed before leaving it unattended. For added safety, test open and close fully on a calm day first, high wind increases tipping risk even if the umbrella looks stable.
Next Articles
Grand Patio Napoli Umbrella Instructions: Setup to Repair
Grand Patio Napoli umbrella setup, open close, crank and tilt instructions plus troubleshooting and repair steps for com
Grand Patio Umbrella Instructions: Cantilever Setup, Use, Fix
Step by step Grand patio umbrella instructions for cantilever setup, operation, fixes, and seasonal maintenance troubles

How to Fix a Patio Umbrella That Won't Open or Close
Step-by-step fixes for patio umbrellas that won’t open or close, with checks for jams, cords, latches, and lubricating t