To remove a patio umbrella canopy, close the umbrella fully, release any storage straps or ties, then undo the Velcro tabs, cord loops, or sleeve fasteners that hold the canopy to each rib tip. After the canopy is off, you can focus on removing the umbrella from the base by taking out the clamp or pin that holds the pole in place remove a patio umbrella canopy. Once those are free, slide the canopy fabric up and off the hub (or down and off, depending on your model). That's the basic process, but the exact steps depend heavily on whether you have a standard center-pole umbrella or a cantilever/offset model, and how the canopy attaches to the frame. Get those two things right and the job takes about 10 to 20 minutes with no special tools.
How to Remove a Patio Umbrella Canopy Safely Today

Luca Morrison
20 Jun 2026
Identify your umbrella type and canopy attachment style first
Before you touch a single strap, spend two minutes figuring out what you're working with. The removal approach is genuinely different depending on your setup, and skipping this step is how people bend ribs or tear fabric.
Center-pole vs. cantilever/offset
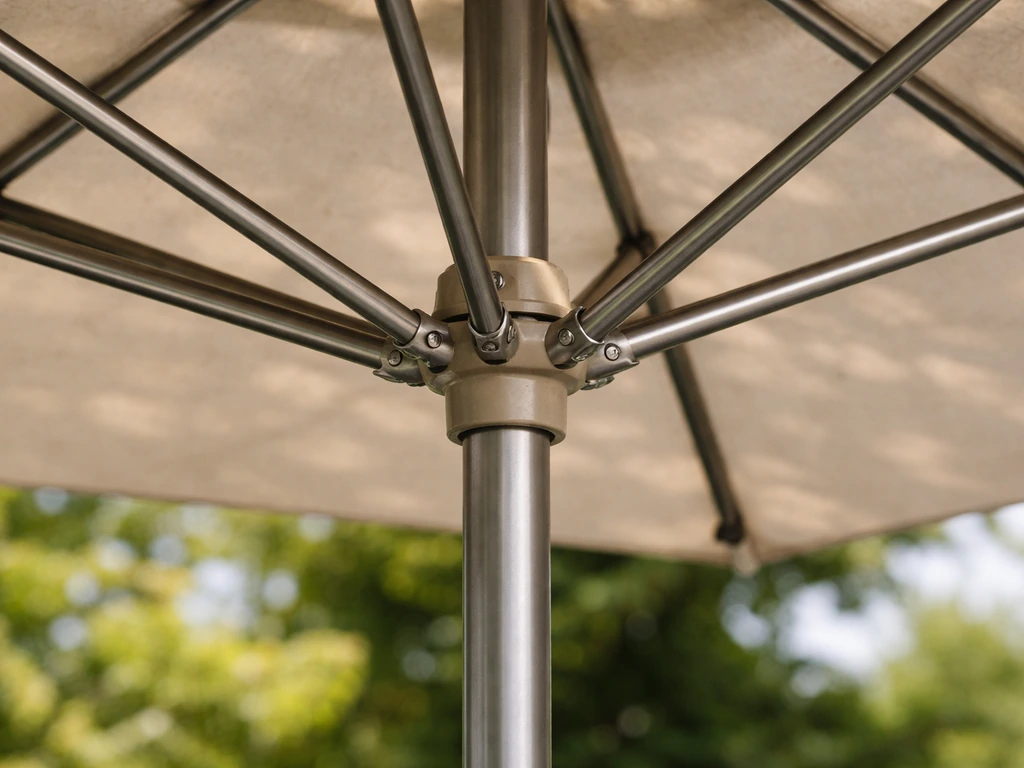
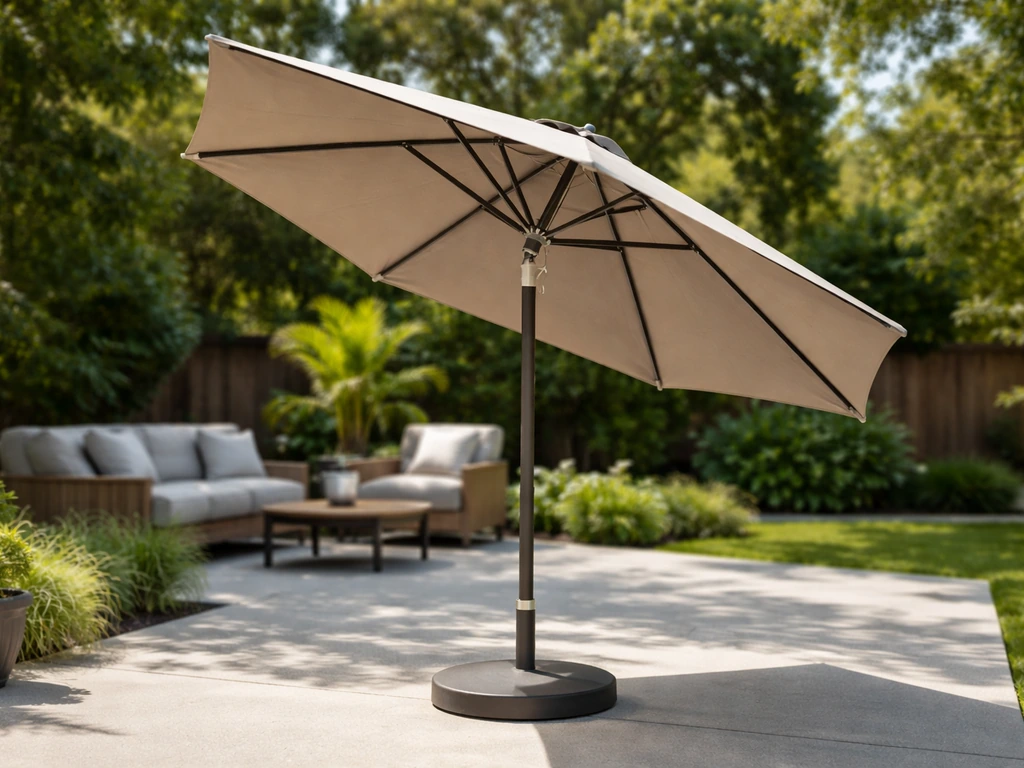
A center-pole umbrella has a single straight pole running up through the middle of the table (or a freestanding base), with ribs that fan out from a hub at the top. A cantilever or offset umbrella has the pole off to one side, with an arm that extends over your seating area. The canopy hangs from that arm's hub. Cantilever models have more moving parts, a different rib orientation, and usually a locking pin or latch you need to engage before handling the canopy.
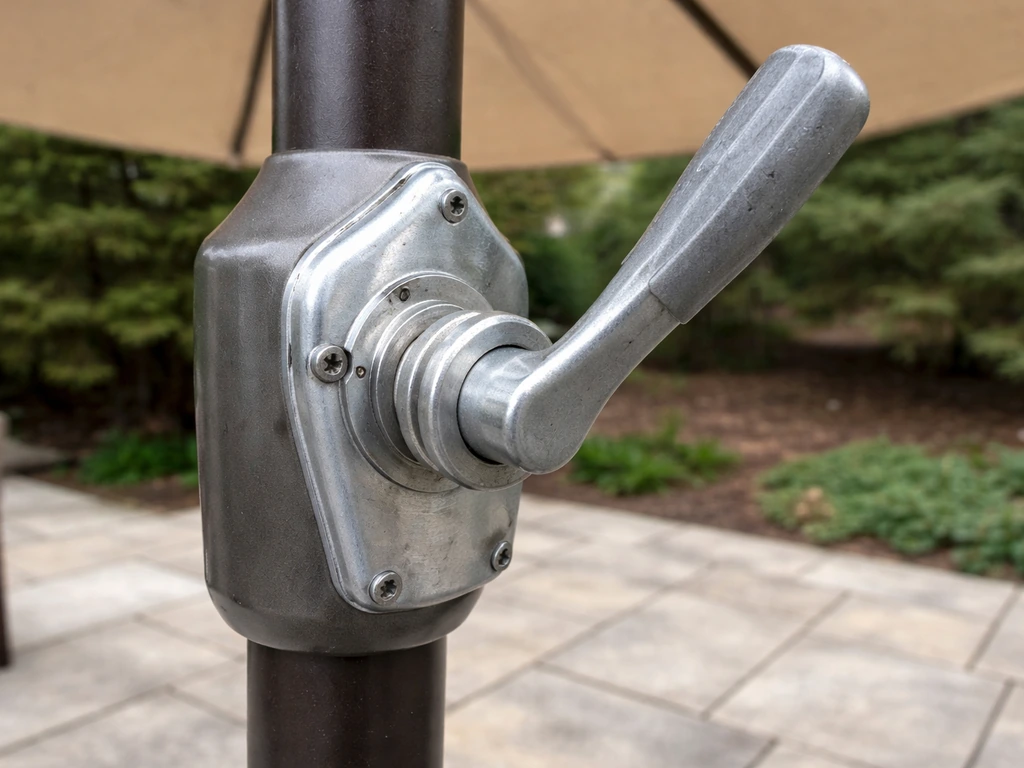
Crank lift vs. push-up lift
Look at the pole about mid-height. If there's a small handle you turn like a crank, that's a crank-lift umbrella. If you push a collar or button up the pole to open it, that's a push-up or pin-lock style. You need to fully close the canopy using whichever mechanism you have before starting removal. On a crank model, keep turning until the ribs are completely folded down. On a push-up model, lower the collar all the way.
How is the canopy actually attached?
This is the part most guides skip, and it's the most important detail. Look closely at where the fabric meets the ribs. You'll typically find one of these attachment systems:
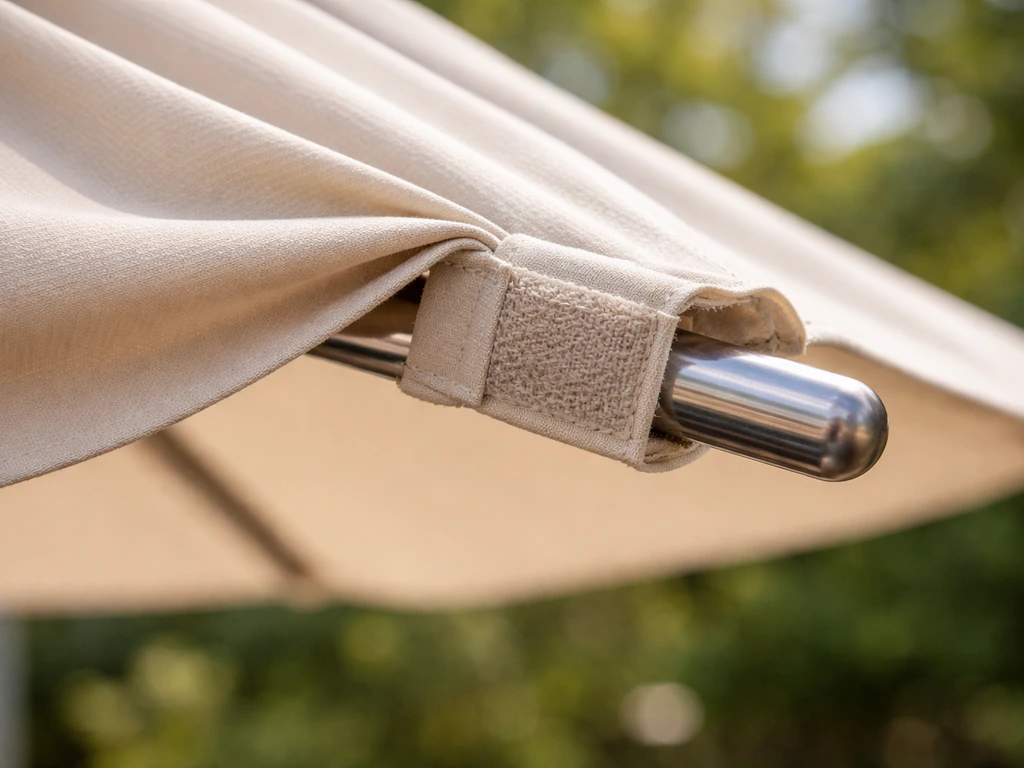
- Velcro tabs or straps: fabric flaps wrap around the rib or rib tip and fasten with Velcro. Very common on mid-range umbrellas.
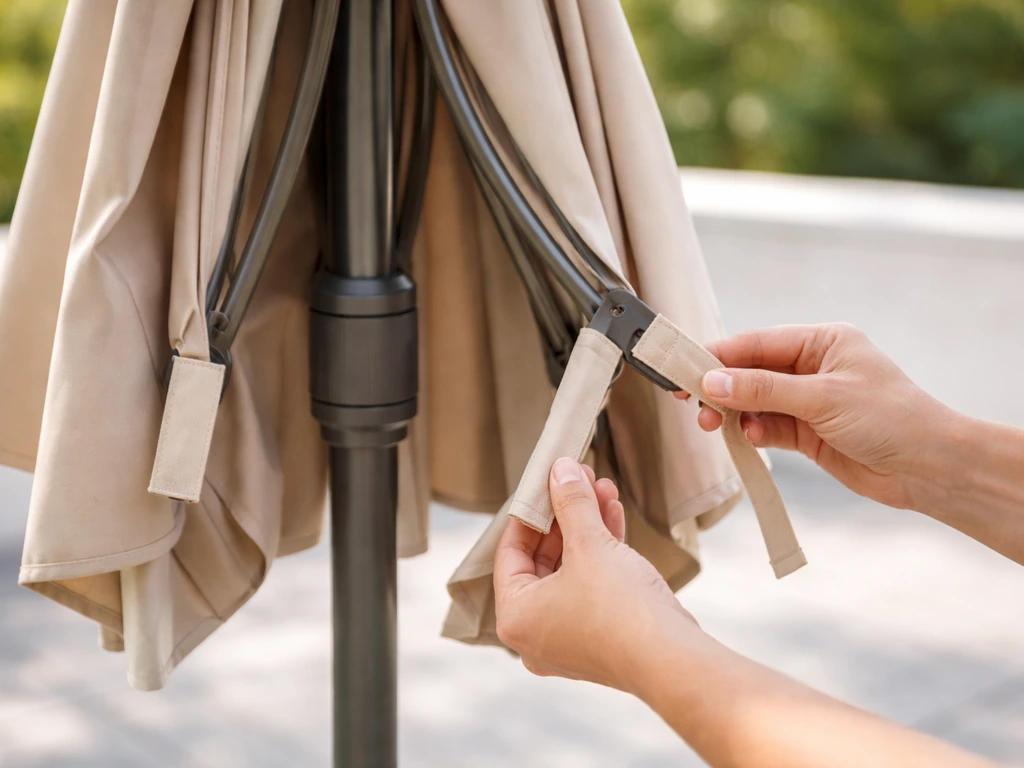
- Tie cords or loops: small fabric ties or cord loops thread through grommets or around the rib ends and tie in a knot or bow.
- Sleeves or pockets: the rib slides into a fabric tube sewn into the canopy panel. To remove, you pull the rib out of the sleeve.
- Hook-and-loop or snap fasteners: less common, but some models use plastic snaps at rib tips.
- Screws or screw-through Velcro straps: seen on some cantilever and supported-bar offset models, where a screw goes through the end of a strap into a hole in the support bar.
Also check the hub at the top. Some canopies have a reinforced opening that just slides down over the hub, while others have a separate cap or collar that holds the top of the canopy in place. Knowing this before you start prevents you from pulling hard on fabric that's still fastened somewhere.
Tools, safety prep, and stabilizing the umbrella
You don't need much for this job, but having the right stuff ready saves trips back to the garage.
- Work gloves: rib tips and some fastener edges are sharp, especially on older or rusty frames
- A flat-head screwdriver: useful for popping open stubborn snap fasteners or prying corroded Velcro straps off support bar holes
- A Phillips screwdriver or small socket set: needed if your cantilever canopy uses screws through the Velcro strap ends
- Penetrating oil (like WD-40 or PB Blaster): for seized fasteners or a stuck crank
- A step stool or low ladder: if your umbrella stands higher than about 7 feet, you'll need to reach the hub area safely
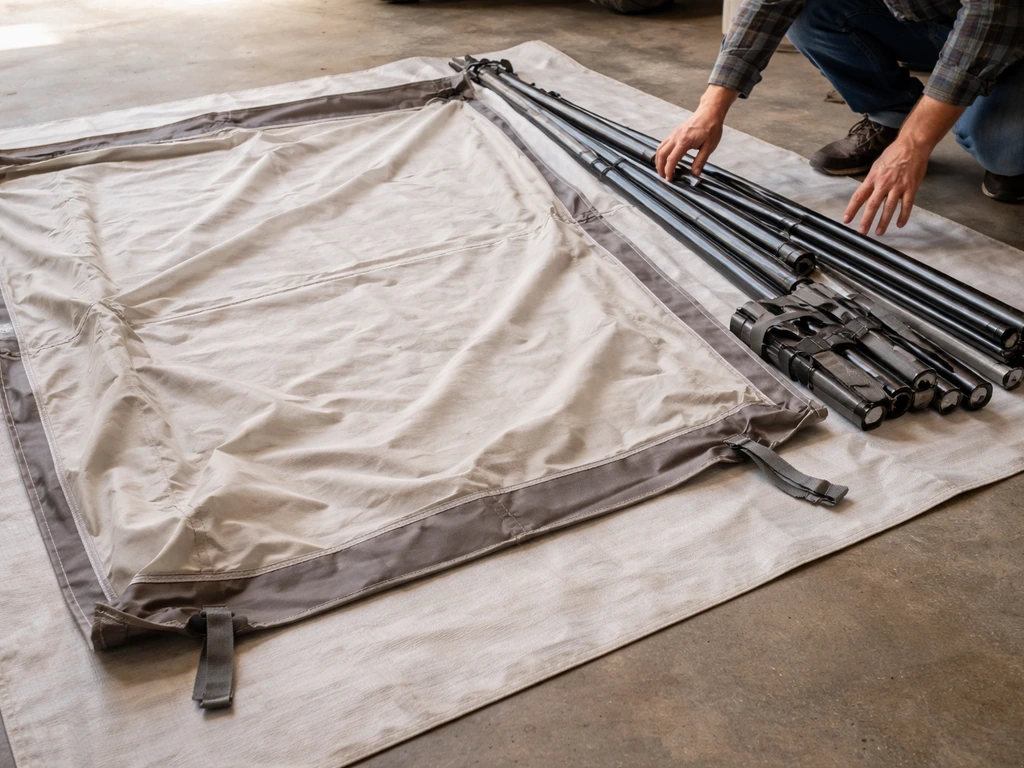
- A clean tarp or old sheet: lay it on the ground so the canopy fabric doesn't land in dirt
- Soft cloth or painter's tape: wrap tape over any pole clamps or hardware you're working near to protect the pole finish
For safety, don't do this in wind. Even a closed umbrella can catch a gust and tip the base over, especially on cantilever models where the arm creates leverage. If you're removing the canopy for winter storage, do it on a calm, dry day. Close and latch any tilt mechanism before you start, and if you have a cantilever, blank" rel="noopener noreferrer">engage the locking pin on the arm so it can't swing or unfurl unexpectedly while your hands are in the fabric. Keep fingers away from the crank joint and tilt collar during the process since those are the main pinch points.
One more thing: remove any storage strap or tie that's still wrapped around the closed canopy before you try to open or move anything. If you need to relocate your umbrella instead of taking it fully apart, start by stabilizing the frame and keeping the canopy supported as you move it move patio umbrella. It sounds obvious, but a surprising number of stuck-canopy problems are just a strap that got overlooked.
Step-by-step: removing the canopy on a standard center-pole umbrella
These instructions cover the most common setup: a center-pole umbrella with a crank or push-up lift, where the canopy is held by Velcro tabs, ties, or sleeves at the rib tips.
- Close the umbrella completely. Use the crank or lower the push-up collar until all ribs are folded down and the canopy is fully collapsed around the pole.
- Place your tarp or sheet on the ground directly below or beside the umbrella to catch the canopy.
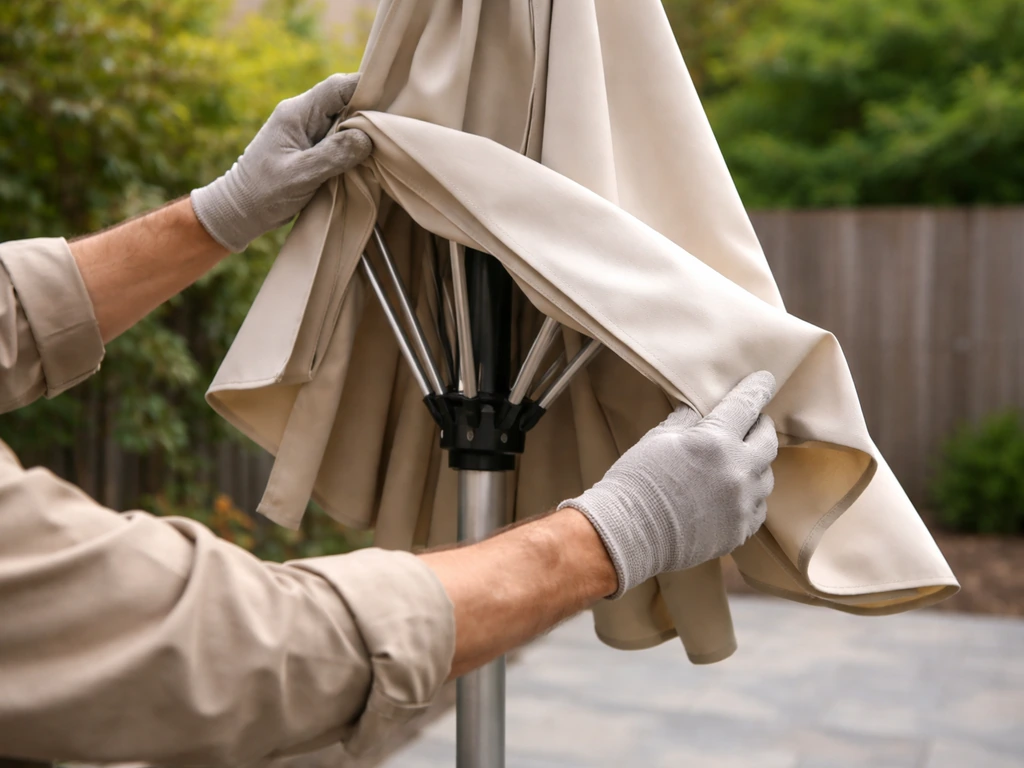
- Put on your gloves. Starting at one rib, locate the attachment at the rib tip. If it's Velcro, press the strap flat and peel it apart. If it's a tie, untie the knot or snip the cord (only if you're replacing the canopy). If it's a sleeve, you'll skip this step and deal with sleeves at the end.
- Work your way around all the ribs, releasing every rib-tip fastener before you try to pull the fabric. Releasing them one at a time while pulling is how fabric tears.
- Check the top hub. Look for a cap, collar, or screw holding the top of the canopy to the hub. If there's a cap, unscrew it or lift it off. If the canopy has a reinforced hole that simply sits over the hub, it will slide free once the rib tips are all released.
- Grip the canopy near the hub opening and slide it upward and off the hub, or let it fall down the pole if the design allows. Do not yank. The opening at the top is only slightly larger than the hub on most models, so ease it over carefully.
- For sleeve-style canopies: with all other fasteners undone, gently flex each rib slightly and slide it out of its fabric sleeve. Work one rib at a time and support the fabric so its weight doesn't pull against the remaining attached ribs.
- Fold the canopy loosely and set it on your tarp. Don't stuff it or roll it tightly until you've cleaned and inspected it.
Step-by-step: removing the canopy on a cantilever or offset umbrella
Cantilever umbrellas take a bit more care because the arm, the tilt joint, and the locking hardware all need to be managed before and during canopy removal. The canopy itself often attaches the same way (Velcro tabs or ties at the rib tips), but getting to those fasteners safely is the tricky part. After you’ve removed the canopy safely, you can follow the same general approach for taking down the entire patio umbrella for cleaning or storage removing the canopy.
- Close the canopy using the crank or lift mechanism until all ribs are folded completely against the arm.
- Engage the locking pin or latch on the arm joint so the arm cannot swing or rotate. If your model has a tilt feature, lock the tilt in the neutral (straight) position. This prevents the whole arm from shifting while you're working on the fabric.
- Use a strap or bungee cord to bind the folded ribs and canopy tightly to the arm. This stops the canopy from flopping open if a rib pops loose mid-removal.
- Hold the cord (the rope or pull-cord used to operate the lift) and keep it from slipping back into the mechanism. On cantilever models, a cord that disappears into the housing is difficult to retrieve without partial disassembly.
- Starting at the rib tips farthest from the hub, undo all Velcro tabs or tie cords around each rib. Work methodically around the frame before pulling anything.
- For supported-bar offset cantilever models that use screws through Velcro strap ends: use a Phillips screwdriver to back out each screw, then peel the strap away from the support bar hole. Keep the screws together in a small container so they don't get lost.
- Once all rib-tip fasteners are free, move to the top hub. On Treasure Garden and similar cantilever models, the canopy slides down from under the top cap rather than lifting off. Slide the canopy fabric downward and off the hub, pulling it toward you along the arm.
- If the canopy has a Velcro closure near the top that keeps it from sliding back down the ribs during normal use, undo that Velcro before attempting to pull the fabric off the hub area.
- Once the canopy is free of the hub, slide it off the ribs one at a time, supporting the weight of the fabric as you go. Lay it flat on your tarp.
Troubleshooting common removal problems
The crank is stuck and the umbrella won't close
A seized crank is almost always rust, debris, or a dried-out bearing. Spray penetrating oil directly into the crank housing and the point where the crank shaft enters the pole. Wait 10 to 15 minutes, then try again with firm, steady pressure (not jerky force). If the crank turns but the canopy doesn't move, the problem is usually a broken cord inside the pole rather than the crank itself. In that case, you can still close the ribs manually by pressing them down by hand and tying them temporarily with a bungee before removing the canopy.
The tilt mechanism is locked and the canopy is stuck at an angle
Most tilt joints have a button, a collar, or a lever you press to release the tilt before rotating the joint back to neutral. If yours is stuck, try pressing the release button while gently rotating the canopy by hand rather than cranking. If the joint is corroded, apply penetrating oil to the tilt collar, wait a few minutes, and try again. Don't force the ribs flat while the tilt is locked at an angle, as this can bend the rib-to-hub connections.
Velcro won't release or fabric seems stuck to the rib
Old Velcro can become nearly fused if it's been outdoors for several seasons. Don't pull the fabric itself. Instead, press the Velcro strap flat against the rib to break the initial hold, then peel it back slowly from one edge. If it's genuinely matted down with debris, use a stiff brush to clean the Velcro pile before trying again. A flat-head screwdriver can help lever a stubborn Velcro strap away from a support bar hole on cantilever models.
Ribs are snagging on the canopy fabric during removal
This happens when a rib tip has a burr, a bent tip, or a broken end cap. Run your gloved finger along each rib tip before you start pulling fabric. If you feel a sharp edge, wrap it with a layer of painter's tape before sliding the rib out of a sleeve. If a rib is bent and won't flex out cleanly, gently straighten it by hand just enough to clear the sleeve or pocket, then note it for replacement.
The cord or pulley is jamming
If the cord is bunching inside the pole or getting caught as you try to close the ribs, the safest move is to stop cranking and manually fold the ribs down by hand. Tie them in place, then remove the canopy. Continuing to crank against a jammed cord can strip the crank gear or snap the cord entirely. Cord and pulley repair is a separate job, but removing the canopy first gives you clear access to deal with it afterward.
The canopy hub opening won't slide over or off the top hub
The top opening of many canopies is only slightly larger than the hub, so it can feel stuck even when all the rib fasteners are free. Check that you've fully released every rib-tip attachment first. Then, gently rotate the canopy fabric as you ease it off the hub rather than pulling straight. Never force it, as tearing the reinforced hub ring is a common and avoidable mistake.
Handling ribs, ties, straps, and fasteners for cleaning or replacement
Whether you're removing the canopy to wash it or to swap in a new one, a few handling habits will save you a lot of frustration.
Lay the removed canopy flat on your tarp and photograph the underside before folding it. This gives you a reference for how the panels, ties, and Velcro tabs were oriented when you reinstall. This is especially useful on cantilever canopies where panels are asymmetrical and the canopy only fits correctly one way.
For tie cords: if the ties are still in good shape, untie them completely and thread them out of the grommets for washing. If you're replacing the canopy and the ties are attached to the new canopy, just cut the old ones flush. Don't leave knotted cord stumps on the ribs.
For Velcro straps: if the Velcro is worn out and barely holding, now is a good time to replace it before reinstalling. Self-adhesive replacement Velcro tape in 1-inch width works on most rib applications and takes about five minutes per rib to apply.
For screw-through strap fasteners on cantilever models: put the screws in a labeled bag or tape them to the arm with painter's tape. These screws are small and non-standard, and losing them means a hardware store trip at best or an unusable umbrella at worst.
For sleeve-style canopies: after all ribs are slid out, inspect each fabric sleeve opening for fraying or torn stitching. A frayed sleeve won't hold the rib properly on reinstall and can cause the canopy to sag or detach in wind.
After removal: inspect, clean, store, and reinstall
Inspect the ribs and hardware while you have access
With the canopy off, you have the best possible access to the ribs, hub, runner, and all the mechanical parts. This is the time to look for bent ribs (even a slight bend can cause canopy panels to pull unevenly), cracked rib-to-hub connections, worn cord or pulley grooves, and any rust on fasteners or joints. If a rib is bent more than about 15 degrees out of line with the others, plan to replace it before reinstalling the canopy.
Cleaning the canopy fabric
Most patio umbrella canopies are made from solution-dyed acrylic (like Sunbrella), polyester, or coated canvas. For routine cleaning, brush off loose debris, then scrub with a soft brush using a solution of mild dish soap and cool water. Rinse thoroughly with a garden hose and let the canopy air dry completely before folding or storing. For mildew, a mixture of 1 cup of bleach and 1/4 cup of mild soap per gallon of water applied with a soft brush works well on most synthetic fabrics, but check your canopy's care tag first as some coated fabrics are bleach-sensitive.
Storage and winterizing
The canopy must be fully dry before storage. Even slightly damp fabric stored folded in a bag will develop mildew within days. Once dry, fold the canopy loosely along its natural panel seams rather than cramming it into a tight roll. If you want the umbrella to fold neatly and stay protected for storage, follow the same approach described in our guide on how to fold patio umbrellas fold the canopy loosely along its natural panel seams. Store it in a breathable bag or pillowcase inside, not in a sealed plastic bag that traps any residual moisture. A climate-controlled garage or basement is ideal. If you're leaving the pole and frame outside, use a strap or bungee to secure the folded ribs tightly against the pole and cover the frame with a vented umbrella cover to keep it clean and dry through winter.
Reinstalling the canopy
Reinstallation is basically the removal steps in reverse, but a few alignment details matter. For center-pole umbrellas, slide the hub opening over the top of the pole and down onto the hub first, making sure the hub ring seats flat. Then spread the ribs slightly and attach the canopy at each rib tip before fully opening. Attach all Velcro tabs or tie cords snugly but not so tight that the fabric is pulled or puckered. For cantilever models, refer to your photo from removal for panel orientation. Slide the canopy up under the top cap first, Velcro the top together to keep the fabric from sliding back down the ribs, then work outward along each rib to secure the rib-tip fasteners. On supported-bar offset models, reinsert and tighten the screws through the Velcro strap ends before opening the umbrella. Once everything is fastened, open the umbrella slowly to check that all panels are seated evenly and no fabric is bunched or pulling at an angle. To actually get a patio umbrella raised and usable again, follow the same orientation checks and fasten everything securely before you open it slowly open the umbrella slowly.
If you're doing a full canopy replacement rather than reinstalling the original, make sure the replacement canopy is sized and designed for your specific model. Canopy openings, panel counts, and rib-tip attachment styles vary by brand and frame size. Using a close-but-not-exact replacement is one of the more common reasons a new canopy fits poorly or wears out faster than it should. If you still need to deal with taking the whole umbrella apart further for repairs, or want guidance on fully taking it down from the base for off-season storage, those are related jobs worth tackling as separate tasks once the canopy is safely removed. For the full step-by-step on how to take apart a patio umbrella beyond the canopy, follow the removal and disassembly guidance for your exact model taking the whole umbrella apart further.
FAQ
Can I remove the patio umbrella canopy without taking the umbrella fully down?
Yes, but only if the canopy is already fully closed and latched, and you can keep the hub supported while you release the rib-tip fasteners. Avoid pulling the fabric down or sideways, since the hub opening is often only slightly larger than the hub and the reinforced ring can tear if you force it.
What should I do if the crank moves but the canopy does not?
If the crank turns but the canopy will not close or lift, stop immediately. The article notes this is often a broken or jammed cord inside the pole. Try closing the ribs by hand and bungee them temporarily, then remove the canopy while the ribs are supported so you do not strain the crank gear.
How do I handle Velcro that feels fused or permanently stuck?
Do not use heat guns or boiling water. For stuck Velcro, use a brush to remove debris from the hook and loop surfaces, press the Velcro flat first to break the initial bond, then peel slowly from an edge. If you need leverage, a plastic tool works better than metal to avoid cutting the rib strap material.
My rib tips feel sharp, what’s the safest way to keep from damaging the canopy?
If a rib tip feels sharp, tape over it with painter’s tape before you slide it out of a sleeve or pocket. That small step prevents accidental punctures and also reduces the chance of tearing the sleeve fabric while you remove the canopy.
Can I reinstall the canopy if one rib is slightly bent?
If one rib is bent and will not sit correctly, do the minimum straightening needed just to clear the sleeve, then mark that rib for replacement later. Reinstalling with a noticeably misaligned rib (about 15 degrees or more) can cause uneven panel tension and faster wear at the rib-to-hub connections.
Why does my canopy feel harder to remove than expected even after closing it?
On crank and push-up models, fully close the canopy first, then check for any storage straps still wrapped around it. Even a small strap left on can stop you from getting the ribs fully folded, which makes canopy fasteners harder to reach and more likely to tear fabric.
What’s the best way to avoid losing the small screws on a cantilever umbrella?
If screws are missing on a cantilever supported-bar model, do not improvise with random hardware that is the wrong length or thread pitch. Use the photo you took during removal, then replace with the exact screw type and length so the strap can sit flush and hold tension without loosening in wind.
What if the internal cord seems to jam while I’m trying to close the ribs?
If you see the cord bunching inside the pole or you feel resistance while closing the ribs, stop cranking and fold ribs down by hand, then tie them in place for removal. Continuing to crank against a jam increases the risk of stripping gears or snapping the cord.
Should I remove and reuse tie cords and Velcro straps, or cut them off?
Take them off in a way that preserves orientation. Untie and remove tie cords if they are in good condition and plan to reuse them, and if the Velcro straps are worn, replace them before reinstalling. Keeping the same attachment method prevents panel sag or uneven tension.
Why is the canopy still stuck at the top hub after I removed the rib fasteners?
If the canopy feels stuck at the hub even after all rib-tip attachments are released, gently rotate the fabric as you ease it off. Do not pull straight down with force, since the reinforced hub ring can tear even when the fasteners are already free.
How long should I dry the canopy before storing it?
You should let the canopy air dry completely before folding, storage bagging, or reinstalling. Even slightly damp fabric stored folded can develop mildew quickly, especially in cool indoor areas without airflow.
How can I tell during reinstallation whether the canopy is aligned correctly?
For reinstallation, seat the hub ring flat before attaching rib tips, and open slowly to confirm panels are evenly seated with no bunching. If panels look angled or uneven during the first slow opening, close it again and recheck one rib-tip attachment before fully raising.
What safety checks should I do before starting on a cantilever umbrella?
Wear gloves, keep fingers away from pinch points like the crank joint and tilt collar, and engage the cantilever locking pin so the arm cannot swing. Also do canopy work on a calm day, since wind can tip the base and create leverage that makes fingers more likely to get caught.
Do I really need photos before removing the canopy, especially for a standard center-pole umbrella?
Yes, take a photo of the underside and note panel orientation, then fold loosely along natural panel seams. When reinstalling, use that photo to place asymmetrical panels correctly on cantilever models, since the canopy often only fits one way.
What should I inspect on the canopy fabric once it’s removed?
If you plan to wash or replace the canopy, inspect sleeve openings and stitched areas for fraying after the canopy is off. A frayed sleeve will not hold the rib properly on reinstall and can lead to sagging or detachment in wind.
Next Articles

How to Fix a Patio Umbrella That Won't Open or Close
Step-by-step fixes for patio umbrellas that won’t open or close, with checks for jams, cords, latches, and lubricating t
How Does a Patio Umbrella Work? Components, Use, and Fixes
Learn how patio umbrellas work: components, open close tilt, stability, and step by step troubleshooting common mechanic
Patio Umbrella Crank Not Working: DIY Fix Guide
Fix a patio umbrella crank that won’t work with safe step-by-step jam, gear, and base troubleshooting and repair tips.