
To position a patio umbrella correctly, center it so the canopy extends at least 2 feet past the edge of your table or seating area on the sun-facing side, insert the pole fully into the table hole or base stem until it bottoms out, tighten all locking knobs or set screws firmly, and angle the tilt mechanism toward the sun's current position. That single setup takes about five minutes and prevents most of the wobbling, tipping, and canopy wear that sends umbrellas to the trash bin after one season.
How to Position Patio Umbrella: Setup, Tilt, Anchoring Guide

Luca Morrison
28 Jul 2026
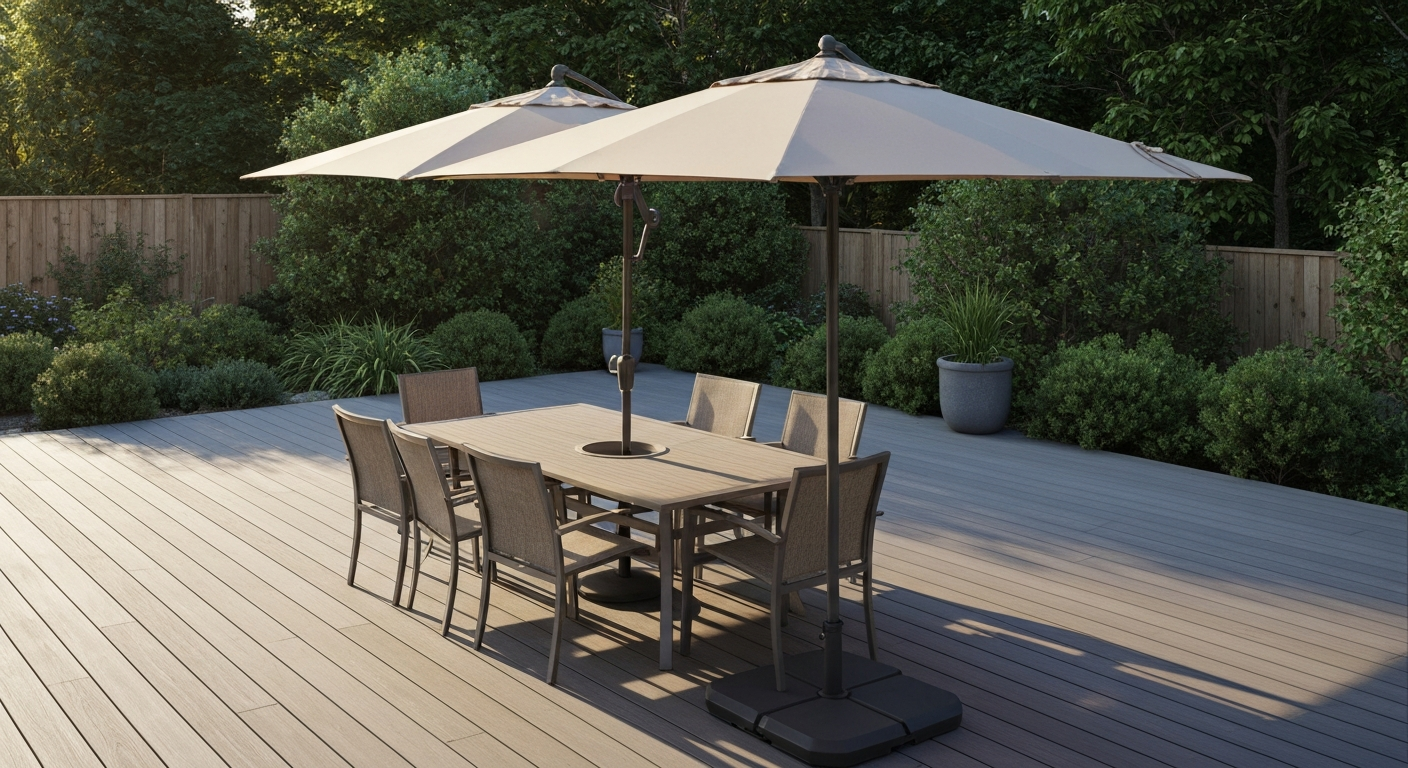
Why getting the position right actually matters
Most homeowners treat umbrella positioning as an afterthought, but it directly affects three things: how much useful shade you get, whether the umbrella tips over in a gust and damages something (or someone), and how long the canopy and frame last. A poorly seated pole rocks in its hole, wearing down the collar and cracking the canopy fabric near the hub. An undersized or incorrectly placed base is the number-one reason umbrellas tip, and manufacturers like Treasure Garden explicitly exclude wind damage from their warranties when the wrong base weight is used. Getting the setup right the first time saves you from a frustrating cycle of repairs, and if you do end up needing to fix a stuck crank, a broken tilt, or a snapped rib, you want to start from a correctly positioned umbrella rather than one that has been working against its hardware from day one.
Quick-check positioning checklist
Run through this before you open the canopy for the first time each season or any time you move the umbrella to a new spot. It takes under two minutes and catches almost every setup mistake I see in the field.
- Pole is fully inserted: bottom of pole touches the base of the stem or table sleeve, not floating mid-hole.
- All locking knobs or set screws are hand-tight plus a quarter-turn with a wrench (do not overtighten plastic knobs).
- Base weight meets or exceeds the minimum for your umbrella size (see the base-weight table below).
- Canopy overhang covers your seating: at least 2 ft of canopy extends past the outer edge of your table or chairs.
- Tilt direction faces the sun's current angle (morning = east tilt, afternoon = west tilt).
- No overhead obstruction within 12 inches of the open canopy edge (eaves, branches, string lights).
- Wind forecast check: close and store or lower the canopy if sustained winds are forecast above 20 mph.
- For freestanding bases on hard surfaces: rubber mat or non-slip pad is under the base to prevent creep.
- For deck or concrete anchoring: mounting hardware is corrosion-rated (hot-dipped galvanized or stainless steel).
- Canopy vents (if present) are unobstructed and oriented upward for wind relief.
Tools and parts you'll want on hand
Whether you're doing a first-time install, switching bases, or troubleshooting a positioning problem, having the right tools nearby prevents a trip back to the garage mid-job. Here's what I keep on hand for typical umbrella setup and light repair work.
| Item | What It's For | Notes |
|---|---|---|
| Tape measure | Measuring pole diameter, hole diameter, insertion depth | A digital caliper is better for pole/hole fit |
| Digital caliper or calipers | Exact pole OD and table-hole ID measurements | Critical for adapter wedge or conversion sizing |
| Adjustable wrench or pliers | Tightening locking knobs and set screws | Wrap jaws with tape to avoid scratching finish |
| Rubber mallet | Seating pole fully into a tight base stem | Tap the pole cap, not bare metal |
| Adapter wedge / cone insert | Fitting a smaller pole into a larger table hole | Available in 1.5" to 2.5" diameter ranges |
| Thread-locking compound (medium, e.g. blue Loctite) | Securing set screws that back out repeatedly | Do not use on plastic threads |
| Replacement set screw or locking knob | If the original strips or cracks | Match thread pitch before ordering |
| Corrosion-inhibiting lubricant (silicone spray or marine grease) | Pole entry and crank/tilt pivot points | Avoid WD-40 on plastic parts long-term |
| Sand bags or weight bags (fillable) | Adding or adjusting base weight on freestanding stands | More convenient than cast-iron for moving |
| Lag screws or through-bolts (hot-dipped galvanized or SS, 1/2" dia.) | Anchoring base plates to decks or concrete | Follow IRC deck fastener specs for deck anchoring |
| Zip ties or hook-and-loop straps | Temporarily securing canopy when partially closed in wind | Not a substitute for closing the umbrella fully |
Measurements and fit: pole diameters, hole sizes, and tolerances
This is where most setup headaches start. Patio table holes and umbrella poles are not standardized across brands, so you need to measure both before you assume they fit. Typical factory umbrella hole diameters in retail patio tables run from about 1.5 inches up to 1.9 inches, with 1.75 to 1.9 inches being the most common range I encounter on standard dining sets. Umbrella poles, meanwhile, range from about 1.5 inches (38 mm) on small 7 to 9 ft models up to 1.58 inches (40 mm) and 1.8 inches on larger 10 to 11 ft market umbrellas. Treasure Garden's catalog lists common bottom-pole diameters at 1.58 inches (40 mm) across many of their market and cantilever series, while SunVilla's 11 ft market umbrella publishes a 1.8-inch pole diameter on its spec sheet.
The practical rule is this: the table hole should be no more than about 0.25 inches larger than the pole diameter. Any more gap than that and the pole rocks, accelerating wear on the hole ring and the pole collar. If your hole is too large, use a plastic adapter cone or wedge insert, which are sold to bridge sizes from 1.5-inch poles up to 2.5-inch holes. If your pole is too large for the hole, you either need a different table or you need to look at a freestanding base instead. Never force an oversized pole into a hole with a hammer because you'll crack the table or the pole sleeve. For insertion depth, the pole should seat all the way to the bottom of the stem in a freestanding base, or pass through the full depth of the table sleeve, typically 4 to 6 inches. A pole that only sits 2 inches deep in a 5-inch sleeve has roughly 40 percent less anchoring surface and will pivot under canopy load.
| Pole Diameter (in) | Common Table Hole Size (in) | Adapter Needed? | Typical Umbrella Size |
|---|---|---|---|
| 1.5" | 1.5" – 1.75" | No (snug fit) / wedge if hole is 1.75" | 6 ft – 9 ft |
| 1.58" (40 mm) | 1.75" – 1.9" | Adapter cone recommended for 1.9" holes | 9 ft – 11 ft (Treasure Garden range) |
| 1.8" | 1.9" – 2.0" | Usually no adapter needed in 1.9" holes | 10 ft – 11 ft market umbrellas |
| 2.0" – 2.5" | 2.0" – 2.5" | Freestanding base recommended; table mount rare | Large market / commercial 11 ft+ |
Step-by-step: installing a patio umbrella in a table hole
This covers the most common setup: a center-pole market umbrella going through the hole in a patio dining table and into a weighted base or umbrella stand sitting on the ground below. Keep the canopy closed (furled) the entire time you're seating and securing the pole. For a step-by-step guide on how to put umbrella in patio table, see the how to put umbrella in patio table resource. Opening the canopy before the pole is locked in is how people accidentally tip the whole assembly.
- Measure your table hole diameter and pole diameter with a caliper before you start. Confirm the fit is within 0.25 inches, and have an adapter wedge ready if the gap is larger.
- Position the freestanding base directly under the table's umbrella hole. Center it so the base's stem aligns with the hole. The base should be fully on the ground, not teetering on a table leg or unevenness.
- With a helper holding the umbrella upright, guide the lower end of the pole down through the table hole from above. Keep the canopy closed and the pole vertical.
- Continue lowering the pole through the hole until the tip contacts the inside of the base stem. You'll feel it touch bottom — don't stop early.
- If there's more than 0.25 inches of gap between the pole and the table hole ring, slide your adapter cone or wedge around the pole and down into the hole now, before tightening anything. Push it flush with the table surface.
- Tighten the locking knob(s) on the base stem. Most bases have one or two knobs located on the stem collar. Turn them clockwise until snug, then add a firm quarter-turn with an adjustable wrench. For models with a set screw instead of a knob, use the provided hex key.
- If the table has a separate hole ring clamp or locking collar (some premium tables do), tighten that now as well.
- Give the pole a firm lateral push in four directions. It should not rock more than about 1/8 inch at the pole. If it rocks noticeably, check whether the adapter wedge is fully seated or whether the base locking knob needs another quarter-turn.
- Open the canopy using the crank or push-button mechanism and confirm the canopy clears all table edges and chair backs by at least a few inches.
- Check shade coverage: stand or sit at each seat position and verify the canopy shadow covers you. Adjust tilt if needed (see the tilt and crank section below).
Step-by-step: setting up a freestanding base or stand
Freestanding setups are what you use when there's no table, when you're shading a lounger or conversation set, or when the table doesn't have a hole. Base type matters here because each one anchors differently and carries different weight requirements.
Types of freestanding bases
- Cast-iron decorative base: heavy and stable on its own (Treasure Garden's cast-iron 50 lb models are a good example), best for smaller umbrellas up to about 9 ft.
- Fillable plastic base: lightweight to move, filled with sand or water on-site. Sand is heavier than water (roughly 100 lb vs. 60 lb for the same volume) and is the better choice for permanent placement.
- Cross-style metal stand with weight ring: a center stem with a weighted ring or removable weight plates. Easy to adjust weight incrementally.
- In-ground anchor sleeve: a sleeve cemented into the ground or concrete; the umbrella pole slides into the sleeve. Ideal for permanent poolside or patio placements.
- Cantilever/offset base: a large weighted sled or block system (Treasure Garden's AG19 cantilever model specifies four 50 lb counterweights, totaling 200 lb) with a side arm to hold an offset umbrella.
Installing a freestanding base
- Choose a flat, stable surface. On a deck, confirm the boards can support the concentrated weight of the base; for a 100 lb or heavier base, spread the load with a rubber mat or a small plywood pad under the base feet.
- If using a fillable base, fill it before inserting the umbrella pole. Fill with dry sand for maximum weight. Replace the fill cap tightly and check for cracks before putting weight on it.
- For an in-ground sleeve, dig a hole to the depth specified in the sleeve instructions (typically 18 to 24 inches for a residential setup), set the sleeve plumb using a level, and pack with concrete mix. Allow full cure time (typically 24 to 48 hours) before loading.
- For a cantilever/offset base, position the sled so the offset arm can swing freely over your intended seating area. Attach all counterweight plates before inserting the umbrella pole. Never operate a cantilever umbrella with incomplete counterweights.
- Insert the pole into the base stem until it bottoms out. Use a rubber mallet on the pole cap if the fit is snug. Do not strike bare pole metal.
- Tighten all locking knobs or set screws on the stem collar. On most Treasure Garden bases there are two knobs; tighten both.
- On hard surfaces (concrete, pavers), place a non-slip rubber mat under the base to prevent the base from walking outward under load.
- For deck anchoring: if the base includes mounting holes in the feet, use 1/2-inch hot-dipped galvanized or stainless steel lag screws into the deck framing (not just the decking boards). This is especially important on elevated decks or in areas with regular afternoon wind.
- Open the canopy slowly and confirm the canopy clears any nearby structures. Check that the counterweight or base weight is fully loaded before leaving the umbrella unattended.
Base weight vs. umbrella size: what you actually need
This is the question I get most often and the one most people get wrong by underweighting. A useful starting rule: multiply your canopy diameter in feet by 10 to get a rough minimum base weight in pounds for a center-pole umbrella. For cantilever or offset umbrellas, multiply by 20 instead, because the canopy is out on a lever arm rather than centered over the base. These are empirical guidelines used by many retailers, and they align closely with manufacturer published minimums. Close the umbrella and bring it inside whenever sustained winds approach 20 mph. No base weight fully compensates for an open canopy in high wind.
| Canopy Diameter | Umbrella Type | Minimum Base Weight | Recommended Base Weight | Notes |
|---|---|---|---|---|
| 6 ft – 7.5 ft | Center-pole, table or freestanding | 20 – 30 lb | 30 – 50 lb | Small bistro/café umbrella; cast-iron or filled base |
| 8 ft – 9 ft | Center-pole market umbrella | 40 – 50 lb | 50 – 75 lb | Most common residential dining size |
| 10 ft – 11 ft | Center-pole market umbrella | 50 – 75 lb | 75 – 100 lb | Large base needed; 1.58"–1.8" pole typical |
| 10 ft – 11 ft | Offset / cantilever umbrella | 100 – 150 lb | 150 – 200 lb | Treasure Garden AG19 specifies 4 x 50 lb = 200 lb |
| 12 ft+ | Offset / cantilever or commercial | 150 – 200 lb | 200 lb+ | Commercial-grade base or in-ground anchor required |
These weights assume a standard canopy in flat or lightly exposed conditions. If your patio is on an elevated deck, at the coast, or in an area with frequent afternoon gusts, go one step up from the recommended weight. Salt and chloride exposure from pools or ocean air also accelerate corrosion on metal bases and hardware; Treasure Garden's own care documentation calls out this issue and recommends additional corrosion protection in those environments.
Converting a beach umbrella for patio use
If you have a beach umbrella and want to use it on a patio, it can work, but there are real mechanical and sizing differences to sort out first. Beach umbrella poles are typically narrower (around 1 inch to 1.25 inches) and are designed to spike into sand, not sit in a weighted base stem. Patio table holes and base stems are designed for 1.5-inch to 1.8-inch poles. That gap is too large to just wedge with a rag and hope for the best. You'll also need to verify canopy height: many beach umbrellas have a shorter hub height than a patio model, which can create clearance issues over a dining table.
Measurements to check before you start
- Beach pole outer diameter: measure with a caliper at the lower third of the pole. Typical range is 0.9 inches to 1.25 inches.
- Target table hole or base stem inner diameter: as established above, usually 1.5 inches to 1.9 inches.
- Pole length: confirm there is enough pole below the canopy hub to pass through the table depth (at least 4 inches) and still extend into the base stem another 4 to 6 inches.
- Canopy diameter: beach umbrella canopies commonly run 6 ft to 7.5 ft, which works for a bistro or small dining table but will under-shade a 48-inch or larger dining set.
Step-by-step conversion
- Remove the sand spike from the beach umbrella pole if it's a separate piece (usually a push-pin or twist-off connection). Keep it aside in case you want to reverse the conversion later.
- If the spike is permanently attached or welded, use a hacksaw or angle grinder to cut it flush at the base of the pole. File the cut end smooth and deburr it so it won't damage the base stem interior.
- Measure the gap between your beach pole OD and the target patio table hole or base stem ID. Purchase a sleeve adapter or reducer bushing that matches. These are sold as 'umbrella pole adapters' and come in sets covering the 1-inch to 2.5-inch range. An adapter cone that sits in the table hole and has the correct inside diameter for the beach pole is the simplest solution.
- Slide the adapter cone onto the beach pole and position it about 1 inch above where the pole will exit the top of the table hole. This way it wedges into the hole ring rather than dropping through.
- Insert the pole through the table hole with adapter in place, or into the freestanding base stem (for freestanding use, wrap the lower pole with two or three layers of self-amalgamating silicone tape until the wrapped diameter snugly enters the base stem).
- Tighten the base stem locking knob against the adapter-wrapped section of the pole. Check for lateral play as described in the table installation steps above.
- Because beach umbrella poles are often thinner-walled aluminum than patio poles, avoid over-tightening. If you feel the pole deforming under the locking knob, back off and add another layer of protective tape before re-tightening.
- Open the canopy and assess shade coverage and clearance. A 7 ft beach canopy over a 42-inch round table works well. For a 48-inch or 60-inch table, the coverage will be marginal; consider this a temporary solution and look at a proper patio umbrella for long-term use.
For a deeper look at compatibility differences and whether a beach umbrella is worth converting for your specific patio setup, the related guides on how to use a beach umbrella on a patio and how to convert a beach umbrella to a patio umbrella walk through additional scenarios including canopy venting and spike-to-base hardware options.
Operating and adjusting your umbrella's mechanisms
Getting the position right also means knowing how to work the tilt, crank, and offset arm mechanisms correctly. Using them wrong is the most common way to break them, and most of the repairs I see on crank and tilt hardware trace back to someone forcing a mechanism that was already partially engaged or misaligned.
Crank mechanisms
A crank umbrella opens by turning a handle on the pole, which winds a cord that raises the canopy runner. To open, turn the crank handle clockwise (looking down at it from above on most models) with smooth, even turns. Never crank past the mechanical stop. When you feel resistance that suddenly increases, stop immediately: that means the runner has reached the top and the ribs are fully extended. Forcing past this point bends the rib connectors or strips the cord drum. To close, turn counterclockwise until the canopy is fully furled and the runner has dropped. If the crank feels stiff or gritty, a small amount of silicone lubricant on the cord drum shaft and pawl teeth usually frees it. A crank that skips or won't hold is usually a worn pawl spring, which is a small part worth replacing rather than buying a new umbrella.
Tilt mechanisms
Most residential market umbrellas use one of three tilt systems: a collar-tilt (you rotate a collar on the pole to tilt), a push-button tilt (a button on the pole engages a notch-and-pawl to lock the angle), or an auto-tilt (the crank itself engages tilt when the canopy reaches the top of its travel). For collar-tilt: loosen the collar by turning it counterclockwise, push the upper pole to the desired angle, then tighten the collar clockwise. For push-button tilt: press and hold the button, tilt the upper pole to the angle you want, then release the button to lock. If the button doesn't release cleanly, the detent spring may be corroded; a drop of penetrating lubricant on the button shaft usually fixes this. Auto-tilt models tilt by continuing to crank after the canopy is fully open. Stop cranking when you reach the desired tilt angle. The most common failure on auto-tilt models is a stripped gear in the tilt head, which produces a clicking sound when you try to hold the tilt angle. That gear is available as a replacement part from most major manufacturers.
Cantilever and offset arm adjustments
An offset or cantilever umbrella has its pole to one side and an arm that extends the canopy over your seating area. Most residential cantilever umbrellas allow three adjustments: the rotation of the canopy around the vertical pole (swing), the tilt angle of the canopy face, and sometimes a side-to-side tilt as well. To rotate the canopy arc, loosen the rotation collar at the top of the base pole, swing the arm to the desired position, and retighten. To adjust canopy tilt on a cantilever model, locate the tilt locking knob or lever on the horizontal arm joint, loosen it, set the angle, and retighten firmly. On Treasure Garden cantilever models the tilt lock is typically a knob on the outer arm pivot. A tip I always give: adjust the cantilever tilt when the canopy is closed or at minimum extension. Trying to tilt a fully open canopy puts enormous leverage on the arm joint and accelerates wear on the pivot hardware. As a safety note, always verify that all counterweights are in place before swinging the arm to a new position, especially when the canopy is open.
Aligning for sun movement throughout the day
The sun tracks from east (morning) to west (afternoon) and reaches its highest point roughly mid-day. For a center-pole umbrella with tilt: tilt toward the east in the morning for breakfast shade, set the canopy vertical at midday, and tilt toward the west in the late afternoon. For a cantilever umbrella: rotate the arm so the canopy swings toward whichever side the sun is coming from. A canopy tilted 10 to 15 degrees toward the sun blocks significantly more direct glare than a vertical canopy, which matters most in the late afternoon when the sun angle is lower and comes in under a flat canopy edge.
Wind safety and when to close up
Close your patio umbrella when sustained winds are at or approaching 20 mph. At that speed, the lateral force on an open 9 ft canopy is enough to overcome most residential base weights if there's any gusting, and gusts can spike well above the sustained wind reading. This isn't excessive caution: Treasure Garden and virtually every major umbrella manufacturer exclude wind and storm damage from their warranties, and there's a reason for that. The engineering reality is straightforward: a 9 ft canopy has roughly 64 square feet of surface area. At 20 mph winds, the velocity pressure (using blank" rel="noopener noreferrer">the ASCE 7 relationship) is roughly 1 pound per square foot, meaning about 64 pounds of lateral force pushing on that surface. Free Wind Load Calculator, ASCE 7 Velocity Pressure & MWFRS (SteelCalculator.app) provides an ASCE‑based calculator showing how qz depends on basic wind speed and exposure coefficients, useful when deriving overturning moment and base‑weight requirements from canopy area and lever arm blank" rel="noopener noreferrer">Free Wind Load Calculator — ASCE 7 Velocity Pressure & MWFRS (SteelCalculator.app). A 50-pound base sitting on a hard surface with its center of mass near the ground can handle that, but add a gust to 30 mph and the force nearly doubles. When wind picks up, close the canopy, engage the crank lock or cord tie, and if the umbrella is in a table hole rather than a ground-anchored base, consider removing the pole entirely and storing it flat.
For patios in persistently windy locations, look for canopies with open vents or double-vent panels at the top. These release upward pressure through the canopy rather than letting wind catch the full sail area. Venting makes a real difference and is one of the features testing guides consistently cite when evaluating umbrellas for windy conditions. Combined with a properly weighted base, a vented canopy is the most effective passive wind-resistance system you can use without anchoring into the ground.
Troubleshooting common positioning and mechanical problems
Pole won't stay centered or wobbles in the table hole
This almost always means the gap between the pole and hole is too large. Fit an adapter cone or wedge insert. If one is already in and still wobbling, try a thicker adapter or wrap the lower pole with two layers of self-amalgamating silicone tape before inserting. If the table hole ring is cracked or the inner edge is worn smooth, the ring itself may need replacement; most patio table manufacturers sell replacement hole rings as spare parts.
Crank is stuck or won't turn
First, check whether the cord is tangled around the drum. Remove the crank handle and inspect the drum visually; you may need to open a small access cover on the pole housing. If the cord is fouled, unwind it by hand before re-engaging the crank. If the crank turns but the canopy doesn't move, the cord has likely broken at the runner attachment or at the drum anchor. A replacement cord (sized to your pole model) is a straightforward repair: thread the new cord through the pole following the original path, tie off at the runner, and re-anchor at the drum. If the crank mechanism is seized from corrosion, soak the drum shaft with penetrating oil for 15 minutes before trying to turn it again.
Tilt mechanism won't lock or hold angle
On collar-tilt models, a tilt that won't hold usually means the collar threads are stripped. Inspect the collar inside threads; if they're gone, the collar needs replacement, which is a roughly $10 to $20 part. On push-button models, a button that won't engage means the detent spring is either corroded or broken. Treasure Garden publishes exploded-diagram parts lists for their collar-tilt, push-button, and crank series, which makes identifying the correct spring or detent part much simpler. On auto-tilt models, clicking or slipping during tilt hold points to a worn tilt gear. Replace the gear rather than the whole head assembly.
Snapped or bent rib
A single snapped rib makes the canopy sag on one side and puts stress on adjacent ribs. This is worth repairing rather than replacing the whole umbrella. Treasure Garden's parts and manuals include step-by-step rib replacement instructions with exploded diagrams for their collar-tilt, push-button, and crank series. The process involves releasing the rib from the runner and the hub cap, sliding out the broken rib section, sliding in the replacement, and re-riveting or re-pinning at the hub. Replacement ribs are sold by model number and are typically $5 to $15 per rib. Attempting to open the umbrella with a snapped rib accelerates tearing at the canopy panel near the broken rib tip, so repair it promptly.
Maintenance, seasonal storage, and winterizing
At the end of each season (and honestly after any heavy rain), close the umbrella, brush off loose debris, and wipe down the pole and all metal hardware with a mild soap and water solution. Pay attention to locking knobs, crank housing, and rib connectors. Dry everything thoroughly before closing the canopy fully, because trapping moisture inside a furled canopy is the main cause of mildew on fabric and corrosion on hub rivets. If you're in a coastal or poolside environment, rinse with fresh water after any salt or chloride exposure.
For winter storage, remove the canopy from the frame if possible (on models with a removable canopy), wash the fabric in cold water with a mild detergent, and let it air dry completely before folding. Store the folded canopy in a dry bag or container, not a sealed plastic bin that can trap residual moisture. Store the pole and hardware in a dry location; if space is limited, wrap the metal parts in breathable cloth, not plastic wrap. Lubricate all pivot points, the crank drum shaft, and tilt collar threads with a thin coat of silicone spray or marine-grade grease before storage. This is a 20-minute job that prevents most of the spring startup problems I see every year: frozen cranks, seized tilt collars, and corroded locking knobs that snap off when homeowners try to open them after a wet winter.
Simple styling tips for your umbrella and table
Once the umbrella is correctly positioned and secured, a few small adjustments make it look intentional rather than just functional. Match canopy color to your cushion or outdoor rug tones for a cohesive look, or use a contrasting color as a focal point if the rest of the patio furniture is neutral. For a dining table, the umbrella canopy should overhang all seats fairly evenly, which often means centering it slightly toward the sun-facing side of the table rather than dead center. If you're working with a smaller canopy on a larger table, angling the tilt slightly inward (toward the table center) helps cover more seating surface. String lights looped around the outer rib tips are popular right now and look good in the evening, but make sure they don't restrict canopy vents and that all connections are outdoor-rated. For a full guide on arranging table settings and accessories around an open patio umbrella, the related guide on how to decorate a patio table with an umbrella covers color pairing, centerpiece clearance, and accessory placement in detail.
FAQ
What essential facts and authoritative sources should be cited when writing a repair‑aware homeowner guide on positioning and securing patio umbrellas?
Cite manufacturer manuals/spec sheets (assembly, base weight, pole diameters, parts diagrams — e.g., Treasure Garden manuals and catalogs), retailer product specs for pole/hole dimensions, independent test/guides on wind behavior (BobVila, buyer guides), building‑code/engineering references for wind loads (ASCE 7 velocity‑pressure qz and IBC/IRC referencing ASCE), and deck/ledger fastener tables from the IRC when anchoring to structures. Also reference corrosion/warranty cautions from manufacturers for seaside/pool use.
What concise quick‑check positioning checklist should appear at the top of the article?
Checklist: 1) Measure pole diameter and table hole; confirm compatible sleeve/adapters. 2) Choose base rated for canopy size and location (see weight rules below). 3) Center pole straight in table or stem, tighten knobs/bolts to manufacturer torque. 4) Verify tilt/crank operation and test full rotation. 5) Close umbrella if wind > ~20 mph or gusty; secure or store. 6) Anchor freestanding/cantilever bases per manufacturer and deck codes. 7) Inspect hardware, ribs, and canopy before/after each season.
What exact measurements and tools should homeowners use to insert and anchor an umbrella in a patio table?
Measurements: pole outer diameter (typical 1.5–1.9 in / 38–48 mm), table hole diameter (typical ~1.5–1.9 in; some tables up to 2.5 in). Tolerances: aim for ≤0.25 in clearance; use adapter cone/wedge if larger. Tools: tape measure, rubber mallet, screwdriver (Phillips/flat), adjustable wrench, socket set, torque wrench (for through‑bolts), exterior silicone or nylon shims, and anti‑corrosion spray. Parts: rubber sleeve/adapter cone, tabletop washer or flange, set screws or thumbscrews per manufacturer.
What are step‑by‑step insertion and anchoring procedures for table‑mounted umbrellas?
1) Measure pole and hole; fit adapter or sleeve if needed. 2) Insert pole through tabletop to center; if table has under‑table stem, slide pole into stem. 3) Ensure pole is vertical; hand‑tighten set/knobs per manual, then snug with wrench but do not over‑torque. 4) If table requires through‑bolt anchoring, follow table/IRC fastener tables for bolt size and spacing (use stainless or hot‑dip galvanized fasteners). 5) Add weight under table (sandbag or base) for additional stability if recommended. 6) Operate tilt/crank to confirm clearance and that canopy clears table edge.
How should homeowners install and anchor freestanding bases and convert a beach umbrella for patio use?
Freestanding bases: match stem diameter and sleeve depth; insert pole into stem and tighten knobs/sets per manufacturer. Base weight guidance below. Use cemented in‑ground sleeves or deck‑mounted anchors for permanent installs — use through‑bolts sized per IRC ledger/fastener tables and stainless/hot‑dip fasteners. Beach‑to‑patio conversion: replace sand‑spike tip with a patio pole end or use an adapter sleeve to fit patio base; never rely on sand anchors for patio wind loads. Verify pole straightness and sleeve compatibility; fit into an approved heavy base or deck anchor rather than burying the beach spike.
What tool and parts lists should the article include for typical repairs and installations?
Tools: tape measure, Philips/flat screwdrivers, Allen keys, adjustable wrench, socket set, torque wrench, rubber mallet, needle‑nose pliers, reciprocating saw or hacksaw (for trimmed poles), silicone lubricant, penetrating oil, sewing needle and UV thread (canopy quick fix). Parts to source: replacement ribs and runners, tilt/collar mechanisms, crank gear sets, set screws/thumbscrews, adapter cones/sleeves (1.5"–2.5"), stem inserts, cast iron/concrete base weights, stainless/hot‑dip fasteners, canopy fabric patches/zippers, spare canopy and tilt springs. Provide vendor types: manufacturer OEM parts, umbrella repair specialists, general hardware suppliers.
Next Articles
How to Decorate Patio Table with Umbrella: Install, Style & Secure
Step-by-step guide to choose, install, style and secure a patio table umbrella, hole fit, bases, adapters, repairs.
How to Put Umbrella in Patio Table: Fit, Install & Secure
Install, secure, and troubleshoot a patio-table umbrella: measurements, adapters, wind safety, and seasonal care.
Patio Umbrella Setup: Step-by-Step Assembly and Secure
Step-by-step patio umbrella setup with fixes for jammed cranks, misaligned ribs, cords, and secure wind protection.