
Most patio umbrellas stop staying up because of one of four things: a snapped or tangled lift cord, a stripped crank gear, a worn pin-lock or push-button, or a tilt mechanism that has seized or lost its detent spring. In most cases you can fix the problem yourself in under an hour with basic hand tools and a few dollars in replacement parts. This guide walks you through every common failure, from a crank that spins freely to a canopy that won't hold its angle, with step-by-step repairs for push-button, crank/winch, and tilt-style umbrellas.
How to Get Patio Umbrella to Stay Up: Fixes & Prevention

Luca Morrison
12 Aug 2026
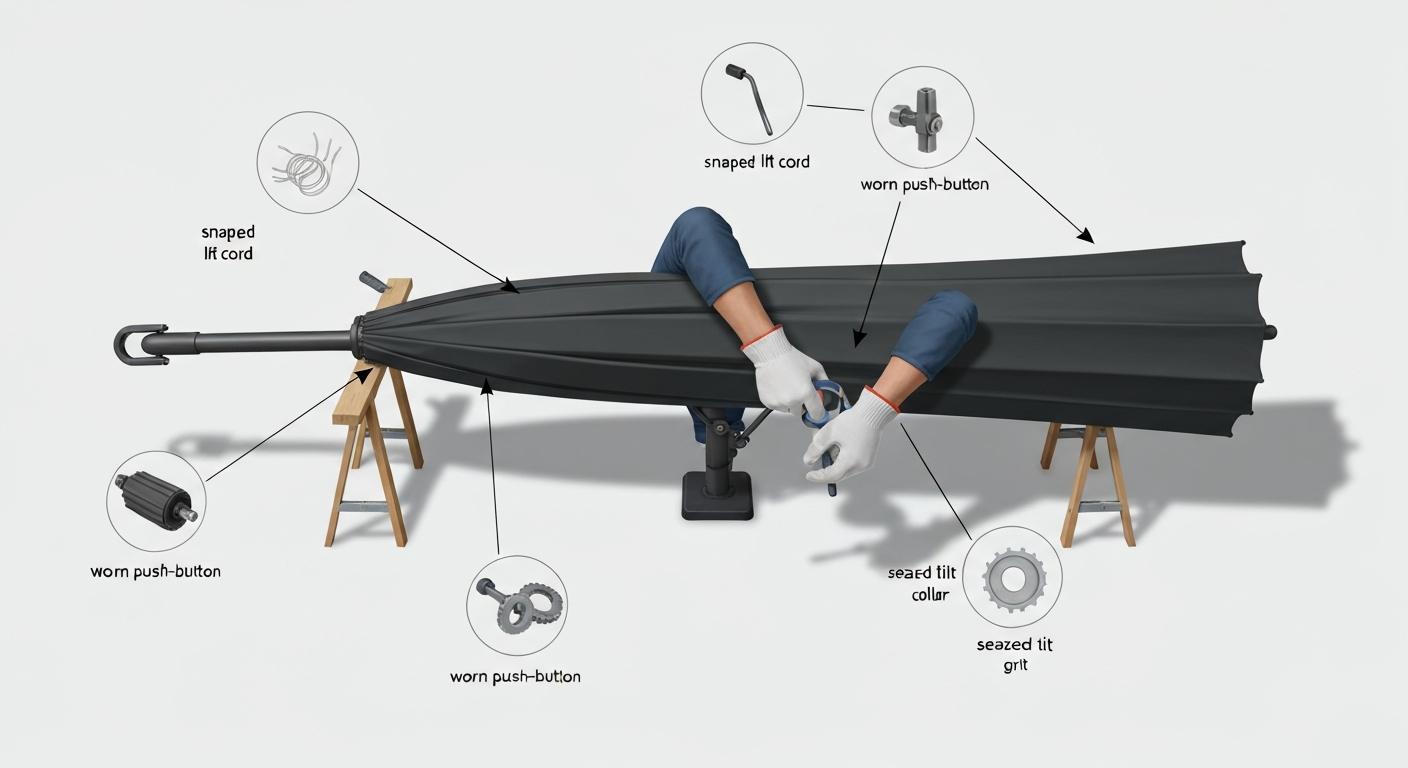
What this guide covers and your one-minute quick fixes
Before we get into the full repair procedures, here are the fastest things to check if your umbrella just stopped staying up today. Run through these in order, one of them fixes the problem about half the time.
- Check the push-button or pin: press the button while pushing the runner (the sliding collar on the pole) upward firmly. Sometimes the button just needs to seat into a clean hole.
- Inspect the lift cord for slack: open the crank housing cover and look at the cord on the drum. If it has jumped off the spool, re-seat it, close the housing, and try the crank again.
- Lubricate stiff pivots: spray a silicone lubricant (not WD-40) on the crank pivot, tilt collar, and runner. Wait 60 seconds and try again.
- Check that the runner is fully seated: on collar-tilt and rib-lock designs, the runner must click or lock into its top position before the canopy stays open.
- Look for a bent rib: open the canopy and sight down each rib. A single bent or snapped rib can allow the whole canopy to fold back under its own weight.
If none of those quick checks solve it, keep reading. The sections below cover every failure mode in detail. This guide also touches on related issues like stopping the umbrella from blowing over entirely and keeping pests from damaging the canopy, both of which can cause a 'won't stay up' symptom that looks mechanical but is actually a structural or anchoring issue. For tips on deterring birds and preventing them from soiling or damaging the canopy, see our companion piece on how to keep birds off a patio umbrella. For advice on deterring bees specifically, see our short guide on how to keep bees out of a patio umbrella.
Safety warnings and before-you-begin checklist
Patio umbrella repairs are low-risk compared to most home DIY projects, but there are a few genuinely important cautions. Ignore these and you can strip parts that are expensive or hard to source, or, in wind, create a projectile situation.
- Never force a stuck crank or tilt. Forcing a jammed crank will strip the worm gear or shear the gear teeth. If it won't turn with normal hand pressure, stop and diagnose first.
- Close and store the umbrella before any repair work. Never repair an open, canopy-up umbrella in any wind. Even a 10 mph gust can torque the pole while your hands are inside the mechanism.
- Disconnect the canopy before disassembling the hub or runner. Canopy fabric under tension can spring suddenly when rib tabs are released.
- Keep crank handles out of reach of children. Multiple OEM manuals (California Umbrella, Treasure Garden) call this out explicitly. Removable handles can become dangerous levers if a child cranks a loaded umbrella.
- Use gloves when working with cut cable ends. Steel lift cables have sharp wire ends that can puncture skin.
- Photograph internal cord routing before you remove anything. Once a cord jumps off its pulleys it is very hard to re-route without a reference photo.
- Do not leave a temporarily-repaired umbrella open and unattended. Zip-tie or dowel emergency fixes are not wind-rated — they are for getting through one afternoon.
Before-you-begin checklist
- Close the umbrella fully and lay the pole horizontal on a stable work surface or sawhorses.
- Remove the canopy fabric (unclip or unvelcro it from the ribs) if you need access to the hub area.
- Have a small container ready to hold screws, pins, and washers as you remove them — these parts are tiny and easy to lose.
- Check whether your umbrella is under warranty before starting. Many brands void coverage if you open the crank housing yourself.
- Look up your model number (usually stamped or labeled on the pole base or crank housing) and download the OEM parts diagram if one is available online.
Tools, materials, and replacement parts you'll likely need
The good news is that the complete tool kit for most umbrella repairs is probably already in your garage. The parts side is where you may need to order something. OEM parts lists (for example, FIM C‑SERIES Patio Umbrella User Manual, Parts List (Manualzz)) document fastener and part dimensions such as stainless‑steel bolts specified as 5/16" for cantilever/pole connections and list named crank/crank‑box assemblies OEM parts lists (for example, FIM C‑SERIES Patio Umbrella User Manual — Parts List (Manualzz)) document fastener and part dimensions such as stainless‑steel bolts specified as 5/16" for cantilever/pole connections and list named crank/crank‑box assemblies.. Here is everything a thorough repair job may call for.
| Item | Size / Spec | What it's used for |
|---|---|---|
| Phillips screwdriver | #1 and #2 | Crank housing screws, hub cover screws |
| Flat screwdriver | Medium | Prying tabs, seating cotter pins |
| Needle-nose pliers | Standard | Bending/removing cotter pins, pulling cord through tight spaces |
| Adjustable wrench | Medium | Pole connection bolts, crank housing nuts |
| Socket/ratchet set | Metric and SAE | Cantilever base and pole bolts (FIM and similar use 5/16" SS bolts) |
| Drill with bits | 1/8" bit minimum | Pilot holes for rib splint bolts |
| 5/8" copper tubing (short section) | ~4" length | Rib splint sleeve — flatten and drill for a permanent rib repair |
| Small bolts, washers, nuts | M3–M4 or 1/8"–3/16" SAE | Securing rib splint sleeve |
| Replacement lift cord | 1/8" (3 mm) braided polyester/nylon | Replacing snapped or worn lift cord |
| Sewing needle and strong thread | Upholstery thread | Splicing new cord to old to pull through the pole |
| Silicone spray lubricant | Any brand | Pivot points, tilt collar, runner, pulley bearings |
| Zip ties | Heavy duty | Temporary rib support, cord management |
| Hose clamp / metal band clamp | Sized to pole diameter | Temporarily stabilizing a loose tilt collar |
| Replacement crank assembly | Match OEM model number | If gear is stripped — order via OEM parts diagram |
| Replacement tilt detent spring | Model-specific | If tilt won't hold angle |
| Replacement push-button / pin-lock | Match pole diameter | If button is broken or spring is dead |
A word on cord: always buy braided polyester (Dacron) or braided nylon rated for outdoor use. Braided construction, either double-braid or tight single-braid, handles abrasion and UV far better than cheap twisted cord, and polyester stretches less than nylon under load. For more on rope materials and why double-braid polyester outperforms twisted nylon in UV and abrasion resistance, see Twisted Rope vs Braided Rope: Which Should You Buy? (RIOOP guide). Marine-grade or outdoor-rated cord is worth the slight price premium. Avoid re-using the old cord even if it looks intact; if it snapped once, the rest of the run is fatigued.
Know your umbrella type before you start wrenching
The repair procedure you need depends entirely on what type of opening and tilting mechanism your umbrella uses. Open the umbrella (if it still opens at all) and identify which of these systems you have.
Opening mechanism types
| Mechanism type | How to identify it | How it works |
|---|---|---|
| Push-button / pin-lock | A spring-loaded button or pin on the pole that pops into a hole in the runner (sliding collar) | You push the runner up by hand, the button clicks into the hole in the runner, and that locks the canopy open. No crank involved. |
| Crank / winch (standard) | A handle with a small crank box mounted on the pole, usually mid-pole | Turning the handle rotates a drum or worm gear inside the housing, which winds a cord/cable that pulls the runner up the pole, opening the ribs. |
| Pulley / rope lift | A rope running through an external or internal pulley at the top of the pole, with a cleat or knot to lock it off | Pulling the rope raises the runner; the rope ties off or cleats at a fixed point. Common on older and simple umbrellas. |
| Cantilever / side-post winch | No center pole — offset arm with a winch (usually on the base frame) | A winch winds a steel cable routed through pulleys in the arm to raise and position the canopy. FIM C-Series and similar use this system. |
Tilt mechanism types
| Tilt type | How to identify it | How it works |
|---|---|---|
| Auto-tilt (crank-tilt) | Tilt engages automatically as you keep cranking past fully-open | The crank engages a second gear or cam after the canopy is fully open, which pivots the upper hub. |
| Collar tilt | A rotating collar with a lever or knob just below the canopy | You push a button or flip a lever on the collar and physically push the pole to tilt; a detent pin locks it in position. |
| Push-button tilt | A button on the pole that releases the tilt lock | Press and hold the tilt button while tilting the canopy by hand; release the button to lock. |
| No tilt | Canopy and pole are rigid — no pivot point below the canopy | The pole and canopy move as one unit; only the base angle can be adjusted. |
Once you know which combination you have, say, a crank-lift with collar tilt, or a push-button lift with no tilt, you can skip directly to the right repair section below.
Diagnosing the problem: symptoms matched to likely failures
Before you touch a single screw, spend two minutes running this diagnostic. The symptom you are seeing points almost directly to one failure mode, and knowing the failure mode saves you from opening the wrong part of the umbrella.
| Symptom | Most likely cause | Section to go to |
|---|---|---|
| Crank handle turns freely with no resistance and canopy doesn't move | Snapped lift cord or cord jumped off drum/spool | Crank and winch repair |
| Crank turns but with grinding/crunching noise | Stripped worm gear or broken gear teeth inside crank box | Crank and winch repair |
| Push-button pops up but runner slides back down | Worn push-button spring or button tip broken | Push-button and pin-lock repair |
| Canopy opens partway but won't go fully open | Cord fraying and partially snapped, or pulley jammed mid-travel | Crank and winch repair, or rope/pulley repair |
| Canopy sags or one side droops when open | Bent or snapped rib, or broken strut tab at hub | Rib repair section within tilt/rope section |
| Tilt won't hold angle — slowly creeps back to vertical | Worn detent spring, stripped collar ratchet, or loose adjustment screw | Tilt mechanism repair |
| Tilt lever/collar spins freely with no click | Detent pin or spring completely failed | Tilt mechanism repair |
| Rope-lift umbrella won't stay open — rope slides | Cleat worn or knot slipped; rope fraying | Rope and pulley repair |
| Runner slides up fine but drops immediately when released | Push-button spring dead, or cord not tied at runner hole | Push-button and pin-lock repair |
| Whole umbrella tilts and blows over (not a mechanism issue) | Undersized or overloaded base | Base and wind-stability section |
Repairing push-button and pin-lock umbrellas
Push-button and pin-lock designs are the simplest umbrella opening systems, which makes them easy to repair. The entire mechanism is just a spring-loaded button or pin mounted through the pole that snaps into a matching hole in the runner (the sliding collar that travels up and down the pole). When the system fails, it is almost always one of three things: the spring inside the button has weakened or broken, the button tip has worn down so it no longer reaches the runner hole, or the runner hole has elongated and worn so the button can't hold.
Push-button repair: step by step
- Close the umbrella and lay the pole flat on a stable work surface.
- Slide the runner down the pole until the push-button is fully exposed above it.
- Use a small flat screwdriver to pry off the button cap (on most designs it is a snap-fit plastic cap) or unscrew the small Phillips screw holding the button housing to the pole.
- Remove the button and spring assembly from the hole in the pole. Note the orientation — the spring sits behind the button inside the pole cavity.
- Test the spring by pressing it with your finger. A healthy spring should bounce back firmly. If it feels weak, compress easily, or is visibly kinked, replace it. Hardware stores carry assorted small compression springs; match the diameter of the original.
- Inspect the button tip. If it is rounded off, cracked, or shortened, replace the whole button assembly. Replacement push-button kits are available from umbrella parts suppliers for a few dollars — order by pole diameter (common sizes are 1", 1.5", and 1.75" OD).
- Reinstall the spring and button. Push the button in from outside the pole, seat the spring behind it, and replace the cap or housing screw.
- Slide the runner up to the button location and press. You should hear and feel a clean click as the button seats into the runner hole.
- If the button clicks in but the runner still slides down, inspect the runner hole. If the hole is elongated or cracked, the runner needs replacement — these are sold by pole diameter as well.
Pin-lock repair
A pin-lock is slightly different: instead of a spring-loaded button, a separate pin (usually a cotter pin or a small bolt with a wing nut) is inserted manually through holes in both the runner and the pole to lock the runner in position. If the pin is lost, a hardware-store cotter pin of the right diameter (match the hole diameter in the runner) works perfectly. If the holes in the runner have elongated over time, the runner needs replacing. Pin-lock systems are extremely reliable once the pin is the right fit, the most common failure is simply losing the pin.
Repairing crank, winch, and cable systems
Crank systems break in a predictable order: the lift cord snaps first (most common), then the cord slips off the drum, then the gears strip. I'll walk through cord replacement first since it covers the majority of cases, then cover gear replacement.
Replacing the lift cord: full procedure
This procedure follows the documented Treasure Garden cord-replacement method (UM810x/UM812x and similar), which is representative of most standard crank umbrellas. The steps apply broadly to California Umbrella, Galtech, and similar OEM designs.
- Remove the canopy fabric from the ribs and set it aside. You need clear access to the upper hub.
- Unscrew the bottom section of the pole from the main pole (usually a threaded joint or set-screw connection). Set the bottom section aside.
- Locate the crank housing on the main pole — it is a small plastic or metal box with the handle attached. Remove the screws holding the housing to the pole (typically two to four Phillips screws).
- Take a photo of the cord routing inside the housing before touching anything. This is important. The cord path through the drum, internal pulleys, and out the pole is hard to remember.
- Straighten the cotter pin or retaining clip that secures the crank drum/gear assembly to the shaft. Use needle-nose pliers to unbend the cotter pin legs.
- Pull the cotter pin out and set it aside (or have a replacement ready — cotter pins are cheap and the old one bends, so it is good practice to use a new one).
- Remove the crank handle from the shaft, then slide off the washer and gear/drum.
- Untie or cut the old cord from the drum anchor point. Note exactly where and how it was attached.
- Thread the new cord: if the old cord still runs through the pole interior, use a needle and upholstery-weight thread to sew the tail of the new cord to the tail of the old cord, making a smooth, low-profile splice. Pull the old cord from the top hub end to draw the new cord through the internal routing. This is much easier than trying to feed new cord through blind from scratch.
- Once the new cord is routed through the pole and out at the crank housing, tie a figure-eight knot at the drum anchor point. A figure-eight knot is bulky enough to not slip through the small hole in the drum.
- Route the other end of the cord up through the runner and tie it off at the upper hub per your photo reference.
- Reassemble the drum/gear onto the shaft, slide on the washer, and thread on the retaining nut. Reinstall the cotter pin through the shaft hole and bend both legs outward with needle-nose pliers to secure it.
- Reattach the crank housing to the pole and replace the screws.
- Reattach the bottom pole section.
- Test by cranking slowly. The cord should wind smoothly onto the drum and the runner should travel up the pole evenly. If it skips or bunches, open the housing and check that the cord is seated in the drum groove.
- Reinstall the canopy and do a full open/close test.
If the cord is gone and you can't splice it through
If the old cord is completely gone from the pole interior, meaning nothing to splice to, you need to feed new cord from scratch. On most standard umbrellas, the pole is a hollow tube. Attach a small weight (a metal nut works) to the end of the new cord and drop it from the top hub opening, letting gravity pull it down to the crank housing exit. For longer runs or tight internal guides, a thin steel fish tape (like an electrician's wire fish) can push the cord through. Take your time, this step frustrates most people because the cord catches on internal pulley edges. Wiggling the pole gently while feeding helps.
Stripped crank gear: replacement procedure
- Remove the crank housing following steps 1–6 above.
- Inspect the worm gear and the mating gear wheel. Stripped teeth look like the flat, almost-smooth bumps where sharp gear points used to be.
- If only the worm gear (on the handle shaft) is stripped, you may be able to order a replacement worm gear for your model. Check the OEM parts diagram for your specific crank assembly part number.
- If both gears are damaged, or if you cannot source individual gears, order a complete replacement crank box assembly. Most manufacturers sell a 'crank box with S/S cable, complete' as a single assembly — this is easier and usually not much more expensive than sourcing individual gears.
- Swap in the new assembly in the reverse of removal order.
- For cantilever umbrellas with a winch and steel cable (such as FIM C-Series): undo the specified screws to free the steel cable from the pulley, release the retaining tabs from the ribs, and remove the whole winch/crank assembly. Replacement involves installing the new crank box and re-routing the steel cable through the arm pulleys per the OEM diagram.
Repairing tilt mechanisms, ropes, pulleys, and bent ribs
Tilt mechanism repair
The diagnostic logic for any tilt type is the same: first check for a disconnected linkage or snapped internal cord (easy fix), then check for a seized or dirty pivot (clean and lubricate), and finally check for a worn or broken detent spring or ratchet (part replacement needed). Work through these in order.
- Check the linkage first: on auto-tilt (crank-tilt) designs, the tilt engages through a secondary cam inside the crank housing. Open the crank housing and look for a disconnected rod, tab, or lever. Reconnect any loose linkage before proceeding.
- For collar-tilt designs: look at the collar assembly below the canopy. Press the release button and feel for resistance. If the collar spins completely freely with no clicking sensation at all, the detent pin or spring has failed. If it clicks but won't hold the angle, the detent notch in the collar body may be worn smooth.
- Clean the tilt pivot: spray silicone lubricant onto the pivot point and work the tilt through its full range of motion several times. Grit and oxidation cause a huge percentage of tilt failures that people mistake for broken parts. Give the lubrication 10–15 minutes to penetrate, then test again.
- If cleaning doesn't fix it, remove the collar assembly. Most collar tilts unscrew with two to four screws. Inside you will find the detent spring (a small coil or leaf spring that pushes a pin into notch positions on the collar body).
- Inspect the spring: if it is bent, compressed flat, or broken, replace it. These springs are not model-specific — a hardware store assorted-spring kit usually contains a match. The key measurements are the wire diameter, free length, and diameter of the coil.
- Inspect the detent notches on the collar body: if they are worn smooth, the collar body needs replacement. Order the collar part using the OEM parts diagram for your model.
- For push-button tilt: if the button releases but the canopy tilts back immediately, the locking pin behind the button is not engaging the pivot hole. Remove the button assembly, check the pin length, and replace if worn short.
- Reassemble and test: the tilt should click into at least two or three defined positions and stay there with moderate hand pressure on the canopy.
Rope and pulley system repair
- Inspect the full rope run from the cleat or tie-off point at the pole base, up through any external or internal pulleys, to where it connects at the runner. Look for fraying, kinks at pulley entry points, or rope that has jumped off a pulley wheel.
- If the rope has jumped off a pulley, re-seat it in the pulley groove. Most external pulleys have a hinged or removable side plate — open it, seat the rope, and close. Internal pulleys may require partial pole disassembly.
- If the rope is frayed at a pulley point, cut out the damaged section and splice in new rope, or replace the full run. Use 1/8" (3 mm) braided polyester for replacement.
- Check the cleat or lock-off point: if the rope slides on the cleat, the cleat jaws may be worn. Rope cleats are inexpensive hardware items — replace the whole cleat if the locking teeth are worn flat.
- If the rope was knotted to hold the runner in position and the knot slipped, re-tie with a figure-eight stopper knot plus a half-hitch above it for redundancy.
- Inspect all pulleys for cracked sheaves or seized bearings. A pulley that doesn't turn puts enormous friction on the rope and will cause premature rope wear. Replace any seized pulley — marine hardware stores stock small block pulleys that fit most umbrella poles.
Bent or snapped rib repair
A bent rib causes one section of the canopy to sag, which can also prevent the whole umbrella from latching open because the canopy weight is asymmetrical. There are three repair options depending on how bad the damage is.
| Damage level | Repair method | Longevity |
|---|---|---|
| Slight bend, rib not cracked | Straighten by hand or with pliers over a workbench edge; use a vice to hold while you apply steady pressure | Good if metal is not stress-cracked |
| Cracked or partially snapped rib | Metal sleeve splint: flatten a 4" section of 5/8" copper tubing, center it over the crack, drill 1/8" pilot holes through sleeve and rib, fasten with small bolts, washers, and nuts | Permanent — this is the recommended DIY repair |
| Completely snapped rib | Replace the rib: unclip the rib tabs from the hub (use a flat screwdriver to release the retaining tab), disconnect the strut connection, and swap in a matching replacement rib from the OEM or a compatible aftermarket rib set | Permanent |
For a temporary emergency fix only, meaning you need the umbrella up for today's event, a wooden dowel zip-tied alongside the damaged section of rib will get you through an afternoon. Do not leave this fix in place permanently and do not use the umbrella in any wind with a zip-tied rib. It will fail.
Lubrication maintenance: do this every season
Most of the 'won't stay up' calls I see could have been prevented with ten minutes of annual lubrication. At the start of each season, spray silicone lubricant on the runner (where it contacts the pole), the tilt pivot point, all pulley axles, the crank pivot, and the push-button spring cavity. Work each mechanism through its full range of motion after applying lubricant. Do not use WD-40 for this maintenance, it is a solvent and degreaser, not a long-term lubricant. WD-40 will actually strip existing lubrication and attract grit, leaving you worse off in a few weeks. Use a dedicated silicone spray or light machine oil.
Keeping the umbrella from blowing over in the first place
A mechanical fix that keeps the canopy open does not help if a gust tips the whole umbrella over. A tipping umbrella is also a safety hazard, a large market umbrella can weigh 15–25 lbs and hit speeds that injure people. The solution is matching base weight to canopy size and adding ballast or anchoring when needed. For detailed guidance on base selection, ballast calculations, and anchoring options, see the companion guide on why does my patio umbrella keeps blowing over.
- General rule: a standard 9-foot umbrella needs a minimum 50 lb base; an 11-foot umbrella needs at least 75 lb; cantilever/offset umbrellas with longer arm leverage need 100–150 lb bases.
- Add ballast: fillable bases that accept sand or water are practical — fill them to the rated capacity. Water weighs 8.3 lb/gallon; sand weighs roughly 13 lb/gallon.
- Use anchor straps for in-ground poles: a ground socket anchor rated for your pole diameter eliminates tipping risk entirely for permanent installations.
- Close the canopy when not in active use and anytime wind picks up past a steady 15–20 mph. Nearly every OEM manual lists this as the primary wind-safety instruction.
- Tilt the canopy into the wind slightly rather than running it perpendicular — a canopy at an angle to the wind presents less surface area.
If tipping and blowing over is your primary problem rather than a mechanical failure, that topic is covered in detail in the companion guide on why patio umbrellas keep blowing over, which goes deeper into base selection, ballast calculations, and anchoring options. For detailed methods to keep the canopy secured and upright in wind, see how to keep patio umbrella open.
When repair is worth it vs. when to replace
I try to repair rather than replace whenever possible, that is the whole point of this site, but there are situations where replacement is the honest answer.
| Situation | Repair or replace? | Reasoning |
|---|---|---|
| Snapped lift cord, crank and hub are intact | Repair | Parts cost under $10; job takes under an hour |
| Stripped crank gear, crank box available from OEM | Repair | Crank assemblies typically cost $15–35; frame is still good |
| Multiple snapped ribs on a cheap ($60–80) umbrella | Replace | Replacement rib sets often cost more than the umbrella; frame may be corroded too |
| Tilt spring or detent pin broken | Repair | Small parts; 20-minute job with the right spring from a hardware store |
| Pole is bent or cracked | Replace | A bent pole is a structural failure; repair is not reliable |
| Canopy fabric is torn, faded or mildewed beyond cleaning | Replace canopy only | Many frames accept replacement canopies sold separately by size and rib count |
| Crank housing is cracked or melted (UV degraded) | Repair with OEM housing or replace umbrella | Depends on whether OEM housing is available; if not, full replacement may be more cost-effective |
| Cantilever arm is bent or welded joint cracked | Replace | Cantilever arm failures are structural and welding repairs on aluminum are specialized work |
Seasonal maintenance to prevent repeat failures
The repairs above fix what is already broken. The following routine, done at the start and end of each outdoor season, prevents most failures from happening in the first place.
- Open the umbrella fully and inspect every rib for bends, cracks, or loose strut connections. Tighten any loose hub screws or tab fasteners.
- Inspect the full length of the lift cord (visible where it exits the hub and enters the crank housing) for fraying, discoloration, or stiff sections. Replace proactively if you see wear — cord is cheap, replacement mid-season is not.
- Lubricate all moving parts with silicone spray: runner, tilt pivot, crank pivot, all pulley axles, push-button spring cavity.
- Clean the crank housing: remove the cover, wipe out any grit or debris with a dry cloth, and apply a small amount of silicone spray to the gear surfaces before reassembling.
- Check all pole connection joints: pole sections should be firmly seated. A wobbly upper pole section puts side-load on the crank housing and accelerates gear wear.
- Inspect the base: check that fill weights are fully seated and not cracked. Refill fillable bases if they have lost water or sand over the season.
- At season end, close the umbrella, remove the canopy if possible, cover with a fitted umbrella cover, and store vertically in a garage or shed. Leaving the umbrella open and uncovered over winter guarantees UV cord damage and tilt mechanism seizure.
FAQ
What are the common reasons a patio umbrella won’t stay up?
Typical causes: broken or stretched lift cord/cable, stripped crank or winch gears, seized or dirty tilt pivots/collar, worn or loose detent/pin springs, bent or broken ribs that let the canopy sag, and a loose/failed runner (sliding collar) or top hub. Diagnose by testing the crank/handle, inspecting the runner and tilt collar, and checking for visible rib damage.
How do I quickly hold an umbrella open temporarily in an emergency?
Temporary fixes: clasp the runner with a heavy-duty hose clamp or adjustable metal band, use multiple heavy-duty zip ties around the runner and pole to stop it sliding down, insert a wooden dowel or broom handle between ribs to prop the canopy, or secure the runner with a locking collar clamp. These are short-term only — don’t leave the umbrella unattended or open in wind and remove temporary clamps before attempting mechanical repairs.
How do I fix a snapped or loose lift cord in a crank umbrella?
Tools: Phillips/flat screwdriver, needle-nose pliers, replacement 1/8" braided outdoor cord, needle and thread. Steps: remove the canopy and bottom pole per your manual, open the crank housing, photograph cord routing, undo retaining pin/cotter, splice the new cord to the old one (sew and pull) to route it through internal pulleys, tie a figure‑eight or service knot at the drum/hub, reassemble washers/gears and secure with the cotter pin. Use marine-rated polyester cord for longevity.
What should I do if the crank handle spins but the umbrella doesn’t lift?
This usually means stripped gear teeth or the cord slipped off the drum. Open the crank box, inspect the gear and drum for stripped teeth or a disconnected cord, check for a loose or missing washer/retainer/cotter pin, then replace the crank/gear assembly or reattach/tension the cord. If gears are stripped, replacement crank-box assemblies are often the correct fix.
How can I repair a seized or sticky tilt mechanism so the umbrella will stay up?
First, do not force the mechanism. Inspect for disconnected linkages or a snapped internal cord. Clean the pivot/ collar with mild cleaner, apply a silicone spray lubricant (non‑staining) to pivots and sliding parts, and cycle the mechanism. If detent springs or ratchet parts are worn, replace those parts or the tilt collar assembly. Hose clamps can be a temporary clamp until you replace worn components.
How do I repair bent ribs that prevent the canopy from staying taut?
Temporary: use zip ties or a wooden splint. Permanent DIY: use a metal sleeve splint (commonly 5/8" copper tubing flattened) sized to the rib, drill 1/8" pilot holes through sleeve and rib, fasten with small bolts/washers/nuts, or swap in an OEM replacement rib if available. Ensure rib ends and hub tabs are properly seated during reassembly.
Next Articles
Why Does My Patio Umbrella Keeps Blowing Over, Repair & Anchor Tips
Find why your patio umbrella keeps blowing over and get easy DIY fixes, anchoring tips, and safety steps.
How to Keep Bees Out of Patio Umbrella: Safe DIY Steps
Keep bees off your patio umbrella: safe deterrents, sealing tips, humane removal, and when to call a pro.
How to Keep Patio Umbrella Open: Fixes, Maintenance & Tips
How to keep patio umbrella open: quick fixes, repair steps, tools list, safety tips & when to replace.