
Most patio umbrellas stop staying open because of one small, fixable problem: a worn push-pin, a snapped lift cord, a stripped crank gear, or a tired tilt latch. In the majority of cases you can diagnose the fault in under five minutes and fix it in under an hour with basic tools and a $5–$20 replacement part. This guide walks you through exactly that, from a fast triage checklist you can run right now, to full step-by-step repairs for every common umbrella mechanism.
How to Keep Patio Umbrella Open: Fixes, Maintenance & Tips

Luca Morrison
16 Jul 2026
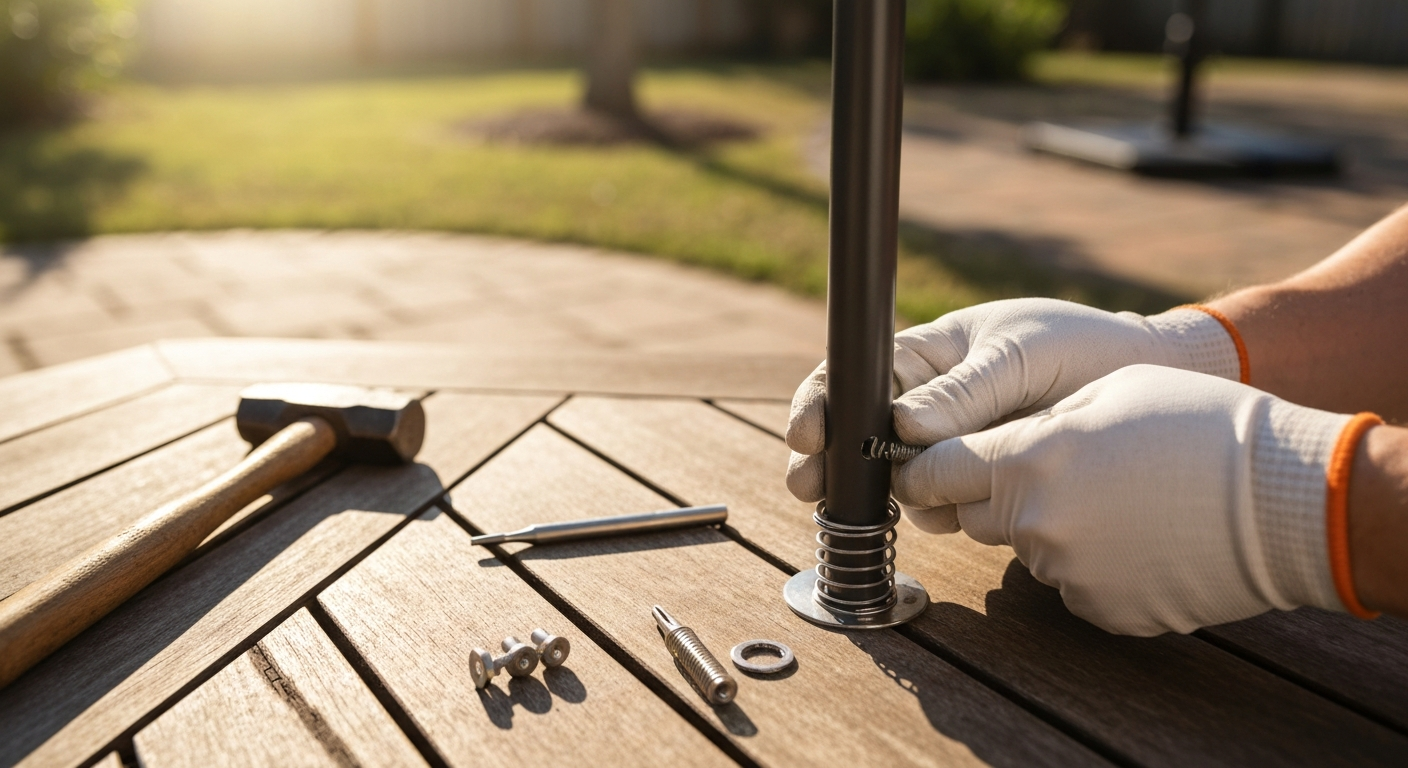
Quick-fix checklist: keep your umbrella open right now
Before you pull out any tools, run through this checklist. A surprising number of umbrellas that 'won't stay open' are one small adjustment away from working fine.
- Check the push-pin or collar button: press it in firmly, open the canopy fully, then release. If the pin doesn't spring back out and seat in its hole, the pin is worn or bent — skip to the push-pin repair section below.
- Check for a loose set screw on the collar: look for a small hex screw on the sliding collar ring; if it's loose, the collar slides down under canopy weight. Tighten it with a 2.5 mm or 3 mm hex key.
- Check the crank for free-spin: turn the crank handle with the canopy partly open. If it spins without resistance and the canopy doesn't move, the lift cord is broken or detached — skip to the crank repair section.
- Check the cord/pulley: look up the center pole and find the top pulley. A frayed, knotted, or missing cord is the culprit — skip to the pulley and cord repair section.
- Check rib connections: push each rib outward with one finger at the hub. If one rib folds back immediately or a connector is cracked, that rib or hub tab is broken — skip to the rib repair section.
- Temporary prop fix: if you need the umbrella open today while you wait for parts, wedge a short length of 3/4-inch wooden dowel or a folded furniture shim between the collar and the pole stop. This holds the canopy up without putting stress on the mechanism. Remove it before any wind picks up.
- Check the base weight: an umbrella that tilts or tips in a breeze may simply need more ballast. A 9-foot market umbrella needs at least 50 lb of base weight; a 10–11-foot cantilever typically needs 150–200 lb minimum, and larger cantilever models (like the Treasure Garden AKZ series) specify 200–400 lb depending on size.
Safety first: warnings and before-you-begin checklist
Patio umbrella repairs look gentle but there are a few real hazards. A canopy dropping unexpectedly while you're leaning over the pole can hit hard. Cordless umbrellas with stored spring tension can snap ribs upward if the mechanism releases under load. And if you're working on a large cantilever umbrella, the arm and canopy together can weigh 30–60 lb, enough to cause a sprain if it shifts while you're holding it.
- Wear safety glasses when punching out old pins, drilling rivets, or cutting cord under tension.
- Work with the canopy closed and latched before disassembling any load-bearing part.
- Check the CPSC recall database (cpsc.gov) before repairing an older umbrella — there have been documented recalls for arm fractures and canopy collapses (including Umbrosa/Shadescapes models in 2018 and 2021, and Home Depot offset umbrellas in 2009). If your model is listed, stop and contact the manufacturer.
- Never work on an open umbrella in wind above about 20 mph (Beaufort scale 5). The NOAA Beaufort scale puts 'fresh breeze' at 19–24 mph — most residential umbrellas should be closed before you reach that range. Large or cantilever umbrellas should come down even sooner, around 13–18 mph (Beaufort 4).
- Keep the umbrella tied to its base pole or table hole during any repair — even a slight gust can knock an untethered umbrella over.
- Wear work gloves when handling cut cord ends, sharp rib tips, or metal splint sleeves.
- Check your manufacturer warranty before any repair. Treasure Garden and most other brands explicitly state that wind damage and damage from 'misuse' (leaving the umbrella open in wind) are not covered — a DIY repair won't void what's already excluded, but opening a sealed gearbox may affect warranty claims on new umbrellas.
Diagnose your umbrella: figure out what you're working with
There are four common lift mechanisms and one structural failure type. Identifying yours takes about 30 seconds and tells you exactly which repair section to jump to.
The five mechanism types
| Mechanism type | How to identify it | Common symptom when broken |
|---|---|---|
| Push-pin / push-button collar | A spring-loaded button or pin on a sliding collar ring; you push it in, slide the collar up, and release it to lock | Umbrella slides back down slowly or won't lock open; pin stays depressed or rattles loose |
| Crank (worm-gear) | A handle on the side of the pole that you wind to raise/lower the canopy; often has a plastic housing | Crank handle spins freely with no canopy movement; canopy rises unevenly or stops partway |
| Pulley / cord (rope-runner) | A cord that runs up through the pole to a pulley at the top hub; you pull the cord to open and secure it to a cleat or knot | Cord snaps, frays, or slips the cleat; canopy won't rise or drops when released |
| Ratchet / tilt latch | A tilt mechanism — usually a side-facing lever or rotating collar near the top of the pole — that locks the canopy at different angles; often combined with a crank base unit | Canopy tilts but won't lock; umbrella slowly droops forward after setting the tilt |
| Broken ribs or hub | Physical damage — a rib that folds down, a hub connector that's cracked, or a canopy that sags on one side | One or more panels sag; a rib drops down even when the umbrella is fully open |
Quick diagnostic flow
- Look at the pole above the table hole: is there a collar ring with a button on it? → Push-pin/push-button system.
- Is there a horizontal handle crank mounted to a housing on the pole? → Crank (worm-gear) system.
- Do you see a cord running up through or along the pole with a cleat or hook at the bottom? → Pulley/cord system.
- Is there a tilting joint and a lever or collar near the top of the pole? → Ratchet/tilt latch system.
- Does the canopy sag or collapse on one side regardless of mechanism? → Check ribs and hub connections.
Repair: push-pin and push-button systems
Push-pin collars are the most common lift system on budget and mid-range market umbrellas. The collar is a ring that slides up the pole; a spring-loaded pin or button pops into a hole drilled in the pole shaft to lock the canopy open. When this stops working, either the pin is worn down, the spring behind it is dead, or the hole in the pole has wallowed out from repeated use.
Inspect the pin
- Close and lower the canopy. Remove the collar from the pole by pressing the button and sliding the collar all the way down and off the bottom of the pole (on most models the pole base unscrews or the collar simply slides off the tip).
- Look at the pin itself: it should protrude cleanly and spring back when you press it. If it stays depressed, the spring is broken. If it wobbles side-to-side, the pin shaft is bent or the housing bore is worn.
- Measure the pin diameter with a digital caliper or a drill bit gauge. Most residential umbrella pins are in the 3/16-inch (≈5 mm) or 1/4-inch (≈6 mm) range, though some budget units use metric pins closer to 4 mm or 5 mm.
- Measure the pin length — you need the replacement to protrude the same distance to reach the pole hole.
Remove and replace the pin
- Most push pins are retained by a small cotter pin, a roll pin (also called a slotted spring pin), or a cross-drilled set screw through the collar housing. Use a punch and hammer to drive out a roll pin; use needle-nose pliers to straighten and pull a cotter pin.
- Once the retaining pin is removed, the push-pin and its spring slide straight out of the collar bore.
- Take the old pin and spring to a hardware store or measure carefully before ordering online. McMaster-Carr lists slotted/roll/spring pins by diameter and length — order the exact size or the next standard size up if the bore is wallowed (you may need to enlarge the bore slightly with a matching drill bit).
- For outdoor use, specify Type 316 stainless steel — it resists salt air corrosion significantly better than standard 18-8 stainless or zinc-plated steel.
- Slide the new spring in first, then the new pin. Reinstall the cotter pin or roll pin to retain it. Test the action: the pin should snap out smartly when released.
- If the pole hole itself is wallowed (enlarged and no longer circular), use a rat-tail file to clean up the edge, or apply a drop of JB Weld to the hole perimeter, let it cure 24 hours, and re-drill to the correct diameter.
Set screw adjustment
Some collar systems use a set screw (a small headless hex screw that threads into the collar and presses against the pole) rather than a spring-loaded pin. If your umbrella drifts down, look for a hex socket on the underside of the collar ring. Tighten the set screw clockwise with a 2.5 mm or 3 mm hex key until the collar grips firmly but still slides smoothly. Apply a small dot of blue (medium-strength) threadlocker to the threads so vibration doesn't back it out again.
Repair: crank systems
Crank umbrellas are convenient until the gear train inside that plastic housing strips out, and then the handle just spins and spins while the canopy sits there. The good news is that most crank failures are either a detached cord (easy fix) or a stripped worm-gear assembly (moderate fix, cheap part). I'll walk you through the diagnostic order before you decide whether to replace the cord or the whole crank unit.
Tighten loose crank components first
- With the canopy fully closed, check the crank handle for side-to-side wobble. A loose handle is often held by a single cross-pin or a hex set screw. Tighten or replace it before proceeding.
- Check the crank housing mounting screws. On most units, two or three Phillips or hex screws hold the housing to the pole collar. If these are loose, the housing can shift and the internal cord tension changes. Tighten with a #2 Phillips or the appropriate hex key (Treasure Garden AG/AKZ manuals specify 8 mm and 6 mm hex keys for their assemblies).
- Try the crank again: if there's resistance and the canopy moves, you may just have had a loose mount.
Access the crank housing
- Remove the crank handle by pulling the retaining pin or unscrewing the set screw on the handle shaft.
- Remove the housing screws and lift the housing cover off. On some units the cover snaps together — use a flat-blade screwdriver to gently pry the seam, working around the perimeter.
- Inside you'll see a spool (the drum the cord winds onto), a worm gear (a helical screw that drives the spool), and often a small idler pulley at the cord exit point.
Diagnose and fix cord failures
- If the crank spins freely with zero resistance: look at the spool. Is the cord sitting loose and unwound? The anchor knot at the spool's center post has slipped. Re-tie the cord through the anchor hole in the spool using a figure-eight knot or an overhand loop knot — pull it tight and take up any slack by winding the cord onto the spool by hand before reassembling.
- If the cord is broken: see the pulley and cord section below for re-threading instructions. Cut and replace the full cord rather than tying a splice mid-run — mid-cord knots can jam in the pulley.
- If the cord is intact but frayed near the spool exit, cut back to healthy cord and re-anchor at the spool.
Diagnose and replace the gearbox
- With the housing open, rotate the worm gear shaft by hand (or turn the crank slowly). Watch the spool: it should rotate. If the shaft turns but the spool doesn't, the worm gear teeth are stripped.
- Inspect the gear teeth visually. Worn or rounded teeth look shiny and smooth rather than sharp-edged. A cracked housing will show a visible fracture line.
- If the gears are chewed or the housing cracked, replace the entire crank assembly — it's a single part that slides onto the pole collar. Universal crank replacement kits run $15–$35 online and at most hardware stores. Measure the pole diameter (common sizes are 1-inch, 1.5-inch, and 38 mm) before ordering.
- Slide the new assembly onto the pole, align the cord path to the top pulley, re-thread, and reinstall the housing screws.
Lubricate the crank mechanism
Once everything is working, lubricate before closing up. For the plastic housing and plastic gear surfaces, use a dry PTFE spray or silicone spray, these don't attract grit the way wet oils do. For any exposed metal-on-metal gear contact, a light smear of white lithium grease works well. Avoid heavy petroleum oil on plastic parts; it can swell some polymer housings over time. Repeat this lubrication at the start of each season and once mid-season if you use the umbrella daily.
Repair: pulley and cord systems
Pulley-and-cord umbrellas are mechanically simple but the cord takes a beating from UV exposure, repetitive bending around the pulley, and general weathering. Most failures are the cord itself, either frayed through, slipped off the pulley, or knotted up inside the pole. Re-threading a new cord is a 20–30 minute job the first time you do it. Measure the pulley outer diameter and bore before ordering; universal replacement pulleys are inexpensive ($5–$15) and commonly sold as umbrella pulley replacement kits (product listing example), Walmart product page Umbrella pulley replacement kits (product listing example) — Walmart product page.
Choose the right replacement cord
Measure the original cord diameter before buying anything. Most residential umbrella cords are in the 3/16-inch to 1/4-inch (roughly 5–6 mm) range. A 4 mm Type III '550' paracord works well for lighter canopies, its nominal 550 lb breaking strength is far more than any umbrella needs. For heavier canopies or if you just want something more durable, a 1/8-inch or 3/16-inch UHMWPE (Dyneema or AmSteel) braid has several thousand pounds of breaking strength at a fraction of the diameter. The trade-off with UHMWPE is that it's very slippery and standard knots can slip, use a figure-eight follow-through or a double fisherman's knot and pull the tail long. Avoid natural fibers like cotton or manila; they rot fast outdoors.
Re-thread the cord
- Lower and close the canopy fully. Remove the finial (the decorative cap at the top of the pole) — it usually unscrews counterclockwise or pulls off with a firm tug.
- If the old cord is still in place, tape a length of new cord to its end before pulling it out. That way the old cord guides the new one through the pole channel as you pull.
- If the old cord is gone, feed the new cord down from the top: tape one end to a stiff wire or a fish tape and thread it through the pole, down to the crank housing or cord cleat at the base.
- At the top hub, loop the cord over the pulley wheel and tie it off to the hub anchor point using an overhand loop or a bowline knot. Pull the knot snug and tug firmly to seat it.
- At the base end, tie the cord to the cleat or thread it through the locking mechanism according to your umbrella's original routing.
- Open the canopy slowly to take up cord slack, checking that the cord tracks correctly on the pulley groove without jumping off.
Replace a worn pulley
- Inspect the pulley wheel for cracks, a frozen axle (it should spin freely with a finger), or a worn groove that's cut so deep the cord can't track properly.
- Measure the pulley outer diameter and bore diameter before ordering. A typical residential replacement pulley is about 2.5 inches outer diameter with a 0.39-inch bore — but confirm against your unit. Universal umbrella replacement pulley kits are available from big-box stores and online retailers for $5–$15.
- To remove the pulley: the axle is usually a small roll pin or bolt through the hub casting. Drive out the roll pin with a punch, swap the pulley wheel, and reinstall.
- Once the pulley is replaced, re-thread the cord as described above.
Repair: ratchet, tilt latches and spring mechanisms
The tilt mechanism lets you angle the canopy to block sun at different times of day. It typically sits as a separate joint 12–18 inches below the hub, and it works via a ratchet (a toothed ring locked by a spring-loaded pawl) or a friction collar with a locking lever. When these wear out, the canopy droops forward over a few minutes, one of the most annoying umbrella problems to live with.
Diagnose the tilt fault
- Set the tilt to a 45-degree angle and watch it for 60 seconds without touching it. If it slowly droops back to vertical, the pawl is not seating in the ratchet tooth — either the spring is weak, the pawl is worn smooth, or debris is preventing engagement.
- If the tilt lever or collar spins but nothing moves, the locking arm that connects lever to ratchet is broken or has jumped out of its channel.
- If you hear a grinding sound when tilting, the ratchet ring teeth are worn down.
Clean and adjust the ratchet
- Close the canopy so there's no load on the tilt joint.
- Remove the tilt housing cover (usually two to four Phillips screws or hex screws). On Treasure Garden units, a 2.5 mm or 6 mm hex key is typically needed.
- Brush out any grit, dead insects, or old dried grease from the ratchet teeth and the pawl channel with a stiff toothbrush.
- Test the pawl spring by pressing the pawl with a finger — it should snap back firmly. If it's sluggish, stretch the spring slightly or replace it. Small torsion springs in this size are available at most hardware stores; measure the wire diameter and coil diameter before buying.
- Apply a small amount of white lithium grease to the ratchet teeth only. Keep grease off the friction surfaces if your unit uses a friction-lock collar — grease there will make it slip immediately.
- Reassemble and test. The tilt should lock with a positive click at each tooth.
Replace a worn pawl or ratchet ring
If the pawl tip is visibly rounded (it should be sharply pointed or flat-angled to seat in the tooth valley), the pawl needs replacing. Pawls for common brands are available as individual parts from the manufacturer or as part of a tilt repair kit. Search your umbrella model number plus 'tilt pawl kit' or 'ratchet collar replacement.' If brand-specific parts aren't available, a local machine shop can fabricate a pawl from a photo and measurement for under $20 in most cases. If the ratchet ring itself is worn, you'll usually need to replace the entire tilt collar assembly, which runs $20–$50 for most residential brands.
Repair: broken ribs, hub failures and canopy attachments
A broken rib or cracked hub connector is a structural failure, the canopy won't stay open because the frame can't support it. The good news is that a single broken rib almost never means the whole umbrella is done. Here's how to assess and fix it.
Identify the rib material and break type
Most residential umbrella ribs are aluminum, steel, fiberglass, or wood. The repair approach differs significantly by material. Aluminum ribs can be spliced with a tubular sleeve. Steel ribs can be spliced or welded. Wooden ribs respond well to waterproof wood glue and a dowel splint. Fiberglass ribs are the trickiest, small cracks can be wrapped with fiberglass cloth and epoxy as a temporary fix, but a fully snapped fiberglass rib usually needs full replacement rather than a permanent field splice because the repaired joint won't flex the same way and can fail again suddenly.
Temporary field fix for any rib
- If a rib breaks mid-session and you need the umbrella up today, fold a strip of aluminum flashing or a short piece of metal strapping around the break point and wrap it tightly with self-fusing silicone tape or duct tape. This is a same-day fix only — do not leave it unattended or rely on it in wind.
- For a hub connector tab that's cracked but not fully broken, apply a bead of marine-grade epoxy (like West System or similar two-part epoxy) around the cracked area, reinforce with a wrap of aluminum foil tape, and let it cure 24 hours before opening the canopy. This buys you a few weeks to order a proper replacement hub.
Splice or replace aluminum and steel ribs
- Measure the outer diameter of your rib. Common aluminum rib sizes are 3/8 inch, 7/16 inch, and 1/2 inch outer diameter. Buy a short length of aluminum or steel tube (from a hardware store or online metal supplier) with an inner diameter that slides snugly over your rib tubing.
- Cut the sleeve to about 4–6 inches long. Slide it over both broken ends, centering it on the break. Drill two small holes through sleeve and rib on each side of the break, and secure with pop rivets. This is a structurally solid repair for umbrella load levels.
- If the rib is too far gone to splice (crushed, badly bent, or corroded through), order a replacement rib by measuring hub-to-tip length and rib diameter. Many umbrella brands sell replacement ribs directly; universal aluminum ribs are also available online in common lengths.
Repair wooden ribs
- Clean the break surfaces and let them dry completely.
- Apply Titebond III or another waterproof wood glue to both faces. Clamp tightly and let cure at least 8 hours.
- Drill a pilot hole lengthwise through the joint and insert a 1/4-inch hardwood dowel coated in glue as an internal reinforcement. Wipe off squeeze-out and let cure another 12 hours before use.
- Coat the repaired area with a waterproof exterior wood finish or paint to seal the grain against future moisture.
Replace canopy ties and ferrules
Canopy ties, the fabric loops or Velcro tabs that attach the canopy to the ribs, tear away from UV exposure and repeated wind stress. Cut away the old tie and sew or glue a replacement loop using UV-resistant outdoor fabric or nylon webbing. For Sunbrella canopies, follow Sunbrella's own cleaning and spot-treatment instructions before any sewing or adhesive work, their solution-dyed acrylic responds differently from printed or coated fabrics. Ferrules are the small metal or plastic caps at the rib tips. If one is cracked or missing, a rib tip will poke through the canopy panel over time. Replace ferrules with standard rubber or plastic chair-leg caps of the matching diameter, or order tip caps from the umbrella manufacturer.
Routine maintenance to prevent future failures
The repairs above fix problems that have already happened. This short maintenance routine prevents most of them from occurring in the first place.
- Start of season: wipe all metal parts with a damp cloth, inspect the cord or push-pin for wear, apply dry PTFE spray to the push-pin bore and crank housing, and apply white lithium grease to metal gear/ratchet teeth.
- Monthly during use: check that base weight is still in place and that the pole anchor screw or set screw hasn't vibrated loose.
- After any wind event above 20 mph: inspect all ribs at their hub connections — this is where stress fractures start. Look for cracks at the tab root, not just along the rib length.
- Clean the canopy with mild soap and water (or follow Sunbrella's instructions for Sunbrella fabric). Rinse thoroughly and let dry fully before storing — storing a damp canopy causes mildew that weakens the weave over time.
- End of season: loosen all set screws before storage so threads don't seize from corrosion; store the umbrella in a protective bag or bring it inside; leave the crank mechanism in the 'open' position (no tension on the cord spool) rather than fully wound.
- Every two to three years: replace the lift cord proactively even if it looks okay — UV degradation is invisible until the cord breaks suddenly under load.
Wind and base weight: keeping the umbrella from blowing over
An umbrella that won't stay open because it keeps blowing over is a different problem from a mechanical failure, it's a ballast and wind-management problem. The NOAA Beaufort scale is a practical guide: at Beaufort 4 (13–18 mph) a large or cantilever umbrella should come down. At Beaufort 5 (19–24 mph), any residential umbrella should be closed and ideally stored. For base weights, bigger is always better but here are practical minimums:
| Umbrella type | Minimum base weight | Notes |
|---|---|---|
| 6–8 ft market umbrella (in-table mount) | 35–50 lb | Use a table-mount base; in-table mount is most secure |
| 9 ft market umbrella (freestanding) | 50–75 lb | Heavier base needed if on a hard surface vs. grass |
| 10–11 ft freestanding market umbrella | 75–100 lb | Consider a cross-base with ballast tray |
| 10 ft cantilever / offset umbrella | 150–200 lb | Distributed over a wide base footprint |
| Treasure Garden AKZ/AKZP large cantilever | 200–400 lb depending on size | Manufacturer-specified minimums from assembly guide |
If your umbrella blows over repeatedly despite adequate base weight, the issue may be a bent or loose pole collar that prevents the canopy from locking fully open, a partially open canopy catches wind at a worse angle than a fully deployed one. That's another reason to fix the locking mechanism before adding more ballast. There's a separate guide on this site covering why patio umbrellas blow over and keep falling, which goes deeper on base selection and anchoring strategies. For a deeper dive on selecting bases and anchoring, see our guide on why does my patio umbrella keep blowing over. For step-by-step tips on how to get patio umbrella to stay up, see our dedicated guide on practical base, anchoring, and locking solutions.
Quick pest-deterrent tips for bees and birds
Bees and birds can make an umbrella unusable fast, either you avoid going near it, or the mess and weight of nests starts stressing the canopy and ribs. These are physical, non-chemical deterrents that actually work at the patio scale. See our short guide on how to keep birds off patio umbrella for practical, non-chemical deterrents and setup tips.
- Birds: attach reflective flash tape or holographic pinwheels to the finial and rib tips — movement and light reflection disturb most perching birds. Remove bird feeders from within 15 feet of the umbrella.
- Birds: if pigeons or starlings are roosting on the ribs, attach a series of 4-inch stainless steel spikes (the kind sold for window ledges) along the top hub casting — they prevent landing without damaging the canopy.
- Bees: close the umbrella when not in use. Bees primarily move into umbrella folds looking for sheltered cavities; a closed canopy eliminates the opening entirely. Check inside the folds before opening at the start of each day.
- Bees: place a decoy wasp nest (paper bag filled loosely with newspaper, hung near the umbrella) — many bee species are territorial and avoid areas where another colony appears to be established.
- Both: store the umbrella in a zip-up storage bag during the off-season and during extended periods of non-use. This prevents any nest-building and also extends canopy life significantly.
For more detailed strategies on both of these issues, this site has dedicated guides on keeping bees out of patio umbrellas and keeping birds off patio umbrellas, both cover specific species and seasonal timing.
Repair vs. replace: when to call it done
Most umbrella problems are worth repairing, a $15 crank assembly or a $5 replacement cord extends a $200–$500 umbrella's life by several more seasons. But there are a few situations where replacement makes more sense than repair.
| Situation | Repair or replace? | Reasoning |
|---|---|---|
| Single broken rib, all other parts sound | Repair | A splice sleeve or replacement rib costs $5–$20 |
| Worn push-pin or dead spring | Repair | Parts under $10; 30-minute job |
| Snapped lift cord | Repair | Cord costs $3–$8; re-threading takes 20–30 min |
| Stripped crank gearbox, housing intact | Repair | Replacement crank assembly: $15–$35 |
| Multiple broken ribs, hub cracked | Replace | Hub failure compromises structural integrity |
| Canopy fabric shredded or heavily mildewed | Canopy replacement or new umbrella | Replacement canopies available for many models; compare cost vs. full umbrella |
| Model on CPSC recall list | Replace | Safety risk; do not repair and return to use |
| Pole bent or kinked at base | Replace | A bent pole will fail again under load; not safely repairable at home |
| Umbrella more than 8–10 years old with multiple failures | Replace | Cumulative UV/weathering degradation on all parts; repair cost approaches replacement cost |
One honest note on warranty: if your umbrella is still within its warranty period, contact the manufacturer before doing any disassembly. Treasure Garden, Assembly & Operation Guide (Care, safety and warranty notes) advises closing and storing umbrellas in windy conditions, keeping umbrellas secured to their base at all times, and notes that damage from wind or misuse is typically not covered by warranty blank" rel="noopener noreferrer">Treasure Garden — Assembly & Operation Guide (Care, safety and warranty notes). Most brands will send replacement parts for free for legitimate failures, and opening the gearbox or drilling out a hub rivet could give them grounds to deny the claim. If the umbrella is out of warranty, repair confidently, the parts are standard and the risk is yours to manage.
Tools and parts reference
Here's everything you're likely to need across all the repairs above. You don't need all of this before you start, diagnose first, then buy only what applies to your mechanism.
| Part or tool | Spec or size to look for | Where to find it |
|---|---|---|
| Replacement push-pin / roll pin | Match existing diameter (common: 3/16" or 1/4"); specify Type 316 stainless | McMaster-Carr, local hardware store |
| Replacement crank assembly | Match pole diameter (1", 1.5", or 38 mm) | Amazon, big-box stores, umbrella parts suppliers |
| Lift cord replacement | 3/16"–1/4" braided nylon or paracord; or 1/8" UHMWPE for heavy canopies | Hardware stores, Amazon, rope suppliers |
| Replacement pulley | Measure OD and bore; typical: ~2.5" OD, ~0.39" bore | Amazon, Walmart, umbrella parts suppliers ($5–$15 kit) |
| Rib splice sleeve | Aluminum tube, ID matching rib OD (common: 3/8" to 1/2") | Metal suppliers, hardware stores |
| Pop rivets | Match sleeve and rib wall thickness; 1/8" aluminum pop rivets typical | Any hardware store |
| Hex key set | Include 2.5 mm, 3 mm, 6 mm, 8 mm for common brands including Treasure Garden | Any hardware store |
| Digital caliper | Any brand; use to measure pin/cord/rib diameters before ordering | Hardware stores, Amazon |
| PTFE dry spray | Any brand; not WD-40 | Hardware stores, Amazon |
| White lithium grease | Any brand; tube or spray | Hardware stores, auto parts stores |
| Blue (medium) threadlocker | Loctite 243 or equivalent | Hardware stores, auto parts stores |
| Marine-grade epoxy | West System 105/205 or equivalent two-part | Marine suppliers, hardware stores |
FAQ
Quick‑fix checklist — immediate steps when your patio umbrella won’t stay open
Close and secure the umbrella first. Check the locking collar, push‑pin/button, or crank for obvious faults. Look for broken/loose ribs, detached cords, or a spinning crank. Try the simplest fixes: reinsert a pin, retighten set screws, rewrap a slipped cord on the spool, or prop the runner temporarily. If wind is above ~13 mph (Beaufort 4) close the umbrella and remove from the base. Photograph the problem (model/serial if visible) before disassembly to help parts ordering.
How do I identify which lift/tilt mechanism my umbrella uses (diagnostic flow)
Follow this quick flow: 1) Try opening: does a collar/push button lock the runner? If yes → push‑pin/push‑button type. 2) If there’s a crank handle → crank/worm‑gear spool system. 3) If there’s a rope/cleat or pulley at the top → pulley/cord system. 4) If the runner locks in stages/ratchets as you open → ratchet/tilt assembly. 5) If ribs collapse or canopy tilts/misshapes → inspect ribs/springs/tilt latch. Use symptom mapping: “crank spins freely” → cord or internal gear fault; “runner slips down” → worn detent/retainer; “rope frays” → pulley/cord replacement likely.
Step‑by‑step repair: push‑pin / push‑button collar systems
1) Close umbrella and remove canopy stress. 2) Inspect the collar, pin, and detent holes for wear or debris. 3) Clean the shaft and holes with a brush; remove rust. 4) Replace damaged roll/slotted pin or spring pin with same diameter stainless (measure before ordering). 5) If the collar spring is weak or button fractured, replace collar assembly. 6) Reassemble, test at low height, and apply corrosion‑resistant lubricant to moving surfaces (light silicone spray).
Step‑by‑step repair: crank (worm‑gear/spool) systems
1) Close and secure umbrella. 2) Remove crank handle and housing screws (keep screws in a container). 3) Open housing and inspect the spool, cord, knot, worm gear, and teeth. 4) If the cord slipped: retie the cord to the spool, wind it neatly and test. 5) If the cord is frayed, replace with similar diameter cord (see cord sizes). 6) If gears are stripped, replace the crank assembly or gearbox—chewed plastic/metal teeth are not reliable. 7) Clean the gearbox and apply a dry PTFE or silicone spray for plastic/metal parts; use a small amount of white lithium grease on metal gear teeth only if manufacturer permits. 8) Reassemble and test slowly.
Step‑by‑step repair: pulley / cord systems
1) Close umbrella and inspect entire rope path (pulley bore, top cap, runner eyelets). 2) Remove frayed/broken cord and measure the original routing. 3) Select replacement cord: braided nylon/paracord (3/16"–1/4" / ~4–6 mm) or UHMWPE line for higher strength. 4) Re‑thread the cord through the pulleys and secure with a reinforced knot or small splice; if using synthetic rope, melt ends to prevent unraveling (if safe for the material) or use heat‑shrink. 5) Replace worn pulleys with a matching bore/OD size; order universal umbrella pulleys if unknown size and test fit. 6) Test under load and trim excess.
Step‑by‑step repair: ratchet / tilt and tilt‑latch assemblies
1) Close umbrella and locate tilt latch/pawl. 2) Remove debris and inspect the spring and pawl tip for wear. 3) Tighten set screws on the pivot/tilt clamp. 4) Replace the spring or pawl if broken—many tilt kits are inexpensive. 5) If tilt is loose because of worn clamp bolts, replace bolts with the correct diameter stainless bolts and lock washers. 6) Reassemble, confirm the tilt clicks into positions, and lubricate pivot points lightly with silicone spray.
Next Articles
How to Keep Birds Off Patio Umbrella: Step by Step
Step-by-step layered tips to keep birds off patio umbrellas, including quick deterrents, setup changes, and long-term pr
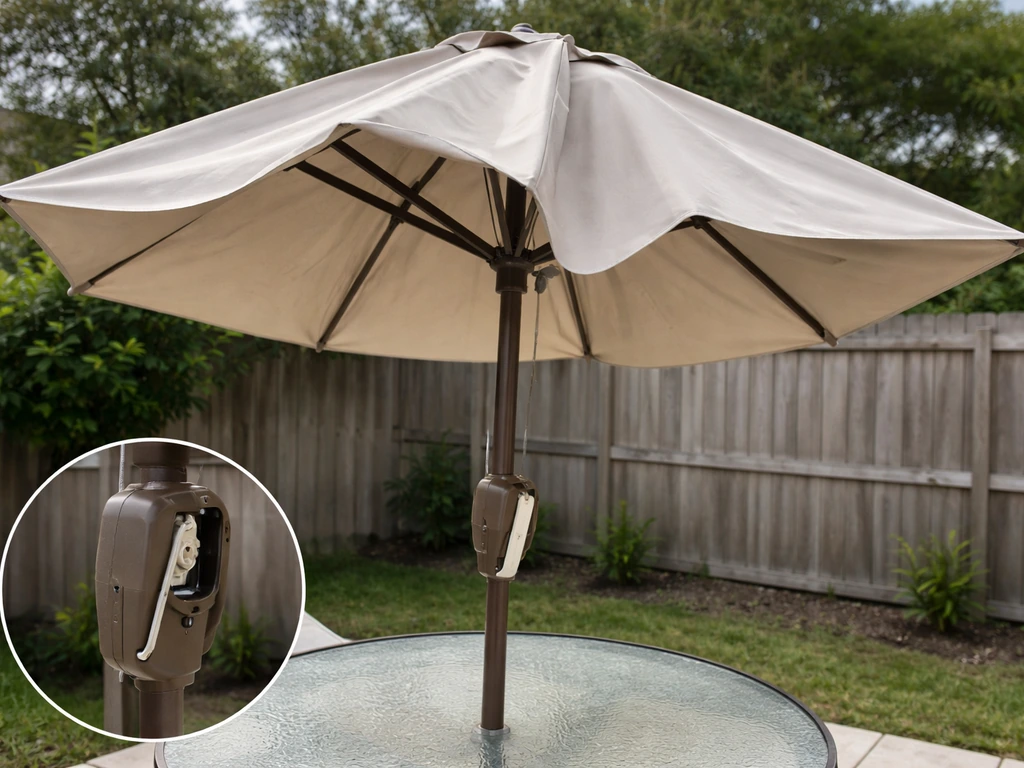
How to Fix a Patio Umbrella That Won't Open or Close
Step-by-step fixes for patio umbrellas that won’t open or close, with checks for jams, cords, latches, and lubricating t
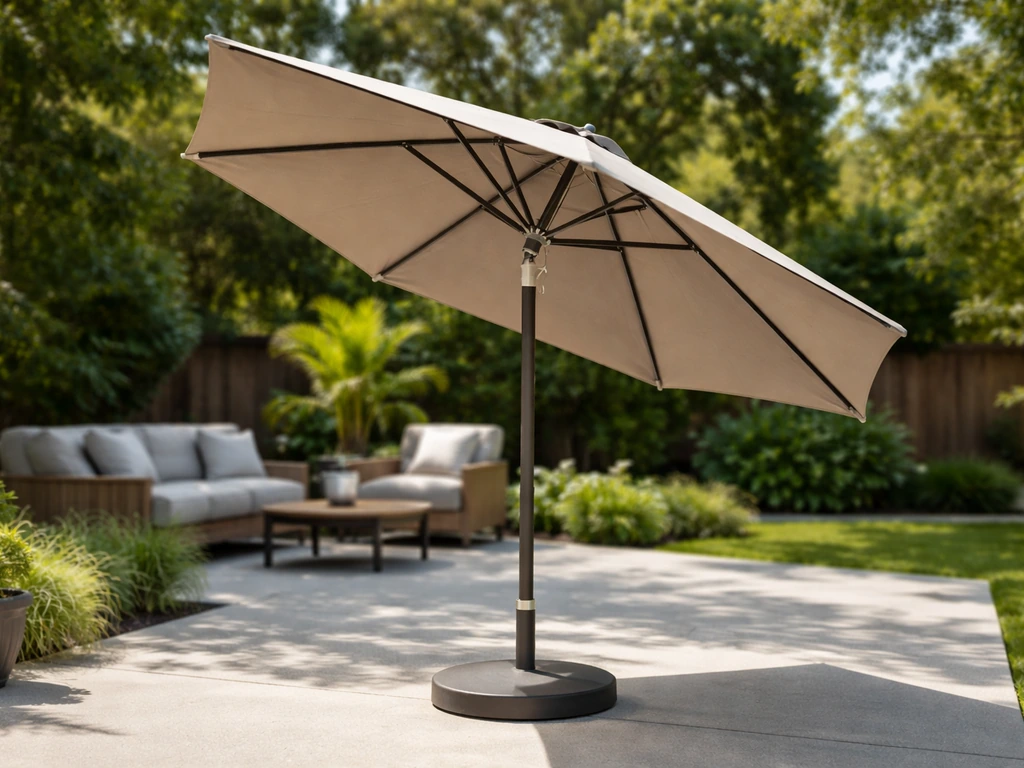
How Does a Patio Umbrella Work? Components, Use, and Fixes
Learn how patio umbrellas work: components, open close tilt, stability, and step by step troubleshooting common mechanic