
BluU patio umbrella instructions are available as free downloadable PDF manuals directly from bluu.com/pages/user-guide, where you can find model-specific guides for the Maple Pro, Banyan, Oak Auto Tilt, Sequoia, Redwood, and other models. If you just need to get your umbrella standing and open, the core process is the same across almost every BluU center-pole market umbrella: drop the pole sections together, seat the top cap, slide the canopy on, set it in a weighted base, and crank it open. The details below will walk you through every step, plus how to keep it running, fix common problems, and know when to call it.
BluU Patio Umbrella Instructions: Assemble, Repair, Maintain

Luca Morrison
20 Jul 2026
Quick-start: what you need and a 5-minute assembly overview
Before you touch a single part, run through these safety checks. Make sure you are assembling in calm conditions: BluU explicitly states not to assemble or operate the umbrella in heavy wind, rain, thunderstorms, or snow. See the BluU Maple Pro Market Umbrella User Guide, safety & care pages (PDF) for explicit instructions: do not assemble or operate in heavy wind, rain, thunderstorms, or snow; keep children and pets away during setup; do not light fires under or near the umbrella; close and cover when not in use; and ensure the umbrella is secured with weights or bolted down BluU Maple Pro market umbrella user guide — safety & care pages (PDF). Keep children and pets away from the work area during setup. Never light any fire underneath or near the umbrella once it is open. Check that the base you have is the correct type for your model (market umbrella bases differ from cantilever bases) and that it is heavy enough to hold the umbrella safely. More on base weight is in the tools and parts section below.
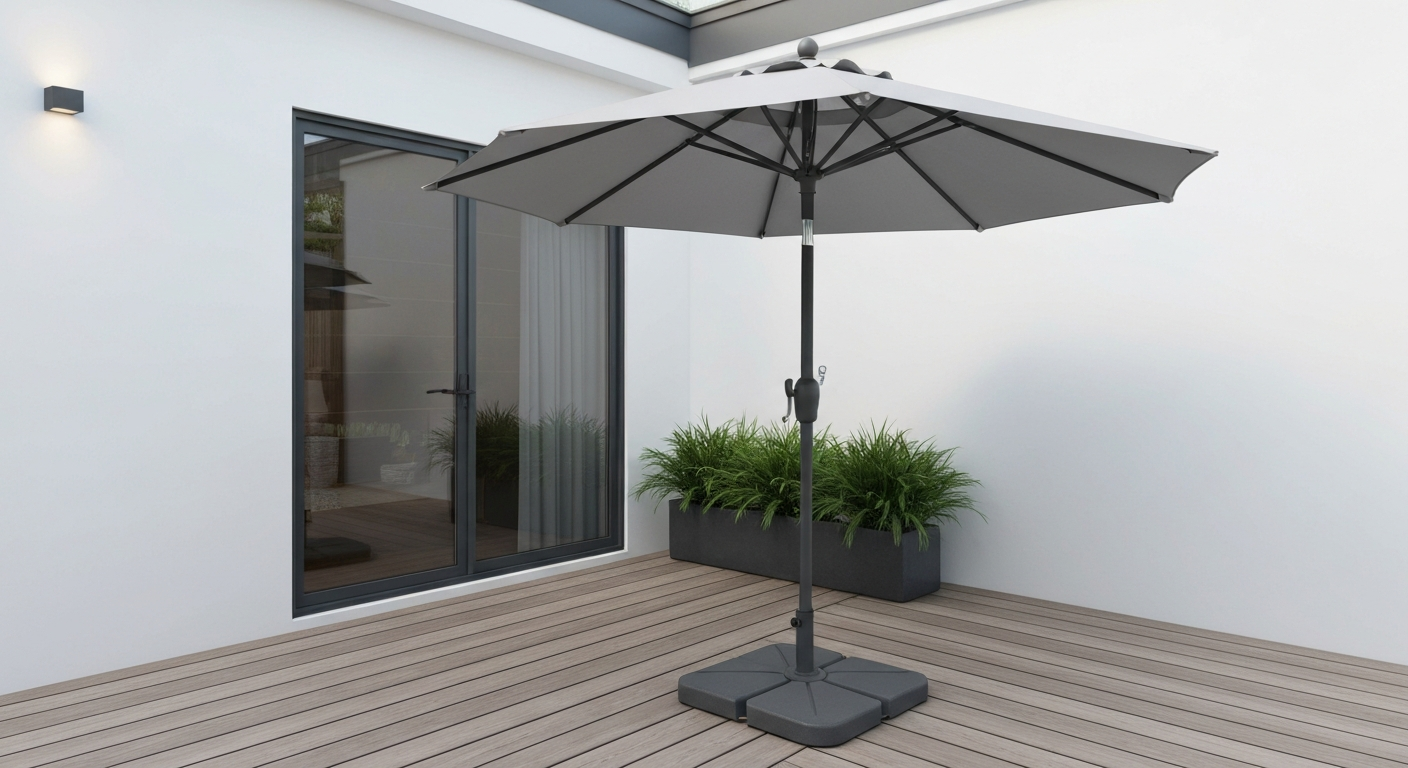
For a center-pole market umbrella like the Maple Pro, the five-minute version goes like this: connect the lower and upper pole sections, push the top cap onto the crown of the upper pole until it pins or locks, thread the canopy sleeve over the pole from the top, fan the ribs out by hand, seat the pole in the base, secure the base collar, and crank the umbrella open using the handle on the side of the pole. The security latch on the runner (the sliding collar that pushes the ribs up) clicks into place once the canopy is fully raised. That is it. Everything else in this guide is about doing it right, maintaining it, and fixing it when something goes sideways.
How to identify your BluU model and find the official manual
The single best starting point is bluu.com/pages/user-guide. BluU (sold under M.B.P Inc, 1255 Corona St, Denver, CO 80218) keeps a centralized User Guide page that links downloadable PDF manuals and how-to videos for each current model. If the page does not immediately show your umbrella, look at the label on your umbrella's pole or the box it shipped in. The model name is usually printed there, and it will match one of the named product lines on the User Guide page.
If you have a serial number or SKU from the original order confirmation, that is your fastest route to the right PDF. BluU model names to look for include the Maple Pro (center-pole market umbrella), Oak Auto Tilt (cantilever), Banyan, Sequoia, and Redwood. Automatic or motorized models have separate manuals that include electrical, LED, and power-supply warnings, so it is important not to use a manual umbrella PDF for an automatic model. If your canopy has integrated solar LED panels, the standard PDF will not cover the wiring or the control module. For those, check manuals.plus as a mirror source if bluu.com is temporarily unavailable, but always cross-reference with the official BluU page. You can also email [email protected] to request your specific manual by model name and purchase date.
Tools and parts checklist before you begin
Most BluU umbrellas ship with the hardware you need for first assembly, including a hex key (the Oak Auto Tilt manual specifies a 6# hex key included in the box). That said, having a few extra items on hand saves a trip back inside.
- Hex key set (metric; the Oak model uses M8x25 bolts and M8 washers, so a standard metric set covers you)
- Phillips and flathead screwdrivers
- Adjustable wrench or pliers with a cloth wrap (to protect powder-coated finishes)
- Mild dish soap and warm water (for canopy cleaning during or after assembly)
- White lithium grease or marine grease (for metal gears and crank mechanism)
- Silicone spray lubricant (for plastic runners, tilt joints, and rubber seals)
- Penetrating oil such as WD-40 (to free any stuck bolts or corroded joints before greasing)
- Replacement lift cord: 3 to 4 mm braided polyester or nylon, cut to the length of your pole plus about 18 inches of working slack
- A small zip-lock bag and marker for labeling hardware during disassembly
- Camera or phone for photographing parts before disassembly
- Appropriate base: for a center-pole market umbrella, a general industry rule of thumb is roughly 10 pounds of base weight per foot of canopy diameter, so a 9-foot umbrella calls for approximately 90 pounds of ballast; cantilever and offset umbrellas require considerably more, and the specific minimum for your model will be listed in your PDF manual
One thing worth knowing before you buy a base separately: the center-pole diameter for BluU market umbrellas is 1.5 inches. Make sure any aftermarket base you purchase matches that diameter. For cantilever models, base sizing is specific to the arm length and canopy weight, so check the BluU FAQ and your model's spec sheet before purchasing a third-party base.
Pre-assembly inspection: check everything before you build
Opening the box on a new umbrella or pulling one out of storage deserves a few minutes of proper inspection. Lay all components out on a clean surface or lawn. Identify each part against the parts diagram in your PDF manual (the Oak Auto Tilt manual, for example, has a detailed exploded diagram with numbered callouts). If anything looks bent, cracked, or missing, stop and contact [email protected] before assembling. Proceeding with a damaged rib or a cracked gearbox housing will make the problem harder to fix later.
Photograph everything before you start. Lay out the ribs, pole sections, hub, runner, crank housing, and hardware separately and take a clear photo of the whole spread. This takes 60 seconds and has saved me hours of confusion when reassembling something I had to take apart for a repair. Drop each batch of bolts or screws into a labeled zip-lock bag as you work. For returned or stored umbrellas, check the canopy fabric for mildew, fraying at the seams, or tears at the rib attachment points. Inspect each aluminum rib for visible bends. Check the lift cord (the string or cable that runs inside the pole) for fraying at either end. Lightly flex each rib attachment pivot to feel for looseness. Identifying these issues before assembly means you fix them once.
Step-by-step assembly: base to canopy
Step 1: Set up the base
Position the base on a stable, level surface. If you are using a freestanding weighted base, fill or confirm it is weighted to the minimum recommended for your model. Tighten any fill plug or collar before proceeding. If you are bolting a surface-mount base to a deck, use the hardware specified by the base manufacturer and confirm the deck framing can handle the load. For cantilever models, the BluU Oak manual shows a specific sequence for assembling the base frame and gearbox housing: follow that exploded diagram step by step, inserting bolts in the order shown rather than hand-tightening everything at once.
Step 2: Assemble the pole
Most BluU center-pole umbrellas use a two-section pole. Align the connection joint so the crank housing opening faces outward (typically toward you when you are standing at the base). Slide the sections together and, if your model uses a locking pin or bolt at the joint, insert and tighten it now. Do not crank the umbrella open before the pole is fully seated and locked: the lift cord runs through the interior of both sections, and a loose joint can pinch or snap that cord.
Step 3: Install the top cap and ribs
Push the top cap onto the crown of the upper pole. On the Maple Pro, it pushes down and pins into place. Each rib slots into a notch or socket on the hub at the top and the runner (the sliding collar partway down the pole). Insert the ribs one at a time, working around the hub in a star pattern rather than going consecutively, to keep even tension. Once all ribs are seated at both ends, manually slide the runner upward a few inches to confirm each rib lifts evenly. If one rib does not lift or sits lower than the others, it is not fully seated in the hub socket.
Step 4: Attach the canopy
Most BluU canopies attach via fabric sleeves that slip over each rib, plus a central sleeve or Velcro loop at the crown. With the umbrella in the closed position (runner down, ribs folded), slide each rib through its corresponding sleeve from the hub outward, working your way around the canopy. Once all ribs are sleeved, attach the crown loop or flap over the top cap. Check that the canopy is not twisted: the seams and panels should run straight from the crown to each rib tip.
Step 5: Install the crank and tilt mechanism
For market umbrellas with a side crank: thread the crank handle into the crank housing on the pole and turn clockwise a few rotations to confirm the cord or gear engages and the runner begins to move upward. For auto-tilt models: the tilt function is typically activated after the canopy is fully open, by continuing to crank past the open position until you feel or hear the tilt engage, or by a secondary button or collar depending on the model. Check your specific PDF for the tilt activation sequence. For cantilever models: the gearbox is assembled onto the arm housing during base assembly (see the Oak manual's exploded diagram), and the crank engages rotation of the arm independently from canopy height.
Step 6: Seat the pole in the base and do a final check
Lower the assembled pole into the base tube. Tighten the base collar or set screw so the pole does not rotate or wobble. Give the canopy one complete open-close-open cycle with the crank before you consider assembly done. The runner should travel smoothly, all ribs should lift evenly, and the security latch should click into place at the fully open position. If anything catches, binds, or sounds wrong, close the umbrella and work back through the steps above rather than forcing it.
Operating your BluU umbrella the right way
Opening: always crank slowly and watch the ribs as they rise. If a rib hangs up or the crank feels stiff, stop and identify the cause before continuing. Once fully open, engage the security latch on the runner. Opening the umbrella in a strong breeze is the single fastest way to bend a rib or damage the canopy fabric, so tilt the umbrella into the wind direction before cranking if you are in a light breeze.
Tilt use: tilt is designed to redirect shade as the sun moves, not to hold the umbrella at a sharp angle in wind. Use tilt adjustments only after the umbrella is fully open and latched. Return the umbrella to vertical before closing it: trying to close a tilted umbrella binds the runner and strains the cord.
Wind safety: BluU advises closing the umbrella when wind speed reaches 10.8 to 18.5 meters per second, which is roughly 24 to 41 miles per hour. If you are in a coastal or consistently windy area, err toward the lower end of that range. Iron fasteners on aluminum frames (the small screws used in some BluU models) are susceptible to salt-air corrosion, so coastal owners should inspect and replace fasteners annually. Close and cover the umbrella whenever it is not in active use, not just in storms. A closed umbrella under a quality cover lasts years longer than one left open overnight.
Maintenance schedule: what to do and when
| Task | Frequency | What to use / notes |
|---|---|---|
| Clean canopy fabric | Monthly or after heavy use | Mild soap and warm water; avoid solvents, alkaline, or acidic detergents per BluU spec. For Sunbrella fabric: dilute bleach solution (1 cup bleach + 1/4 cup dish soap per gallon of water) is acceptable for mildew. |
| Lubricate crank gears and pulley | Every 3 months or at start of season | White lithium grease or marine grease for metal-on-metal. Silicone spray for plastic runners and tilt collars. Do not use standard WD-40 as a long-term lubricant; it attracts dust. |
| Inspect lift cord | Start and end of each season | Look for fraying, kinking, or wear at the crank housing entry and at the top cap pulley. Replace at first sign of fraying. |
| Check and tighten all fasteners | Start of each season | Use the correct hex key or screwdriver; do not overtighten aluminum fittings. Note: small iron screws corrode in salt air and should be replaced with stainless equivalents if you are near the coast. |
| Inspect ribs and hub | Start of each season | Flex each rib gently; look for hairline cracks at pivot holes. Inspect hub sockets for wear or cracking. |
| Clean and inspect base | Start of each season | Check fill level on weighted bases; inspect for cracks. Confirm collar set screw holds the pole without play. |
| Seasonal storage (fall/winter) | Before first frost or extended non-use | Close fully, allow canopy to dry completely, apply waterproof cover, store in a cool and dry location. Never store a damp canopy: mildew sets in quickly. |
| Inspect solar/LED wiring (if applicable) | Start of each season | Check connections for corrosion or cracking insulation. Disconnect and store the power module indoors for winter. |
On canopy fabric warranties: BluU's Bluu Care extended warranty covers Olefin and solution-dyed polyester canopies for 3 years, and Outtra or Sunbrella fabrics for 5 years, with exclusions for misuse or improper cleaning. Using the wrong detergent (anything acidic, alkaline, or solvent-based) can void that coverage. Keep your purchase receipt and the model/fabric type documented somewhere easy to find. If you also own umbrellas from other brands, the cleaning chemistry principles are broadly similar across the category, though specific instructions vary by manufacturer.
Troubleshooting: diagnosing what's actually wrong
Before you order parts or call anyone, work through these diagnostic questions. Most BluU failures fall into four categories: the umbrella will not open, it will not close, the canopy sags or droops, or the whole assembly wobbles. Here is how to read each symptom.
Umbrella won't open (crank spins freely or feels jammed)
- Crank spins freely with no movement: the gearbox is likely stripped or the gear housing is cracked. Open the crank housing cover and inspect the gear. A stripped worm gear or cracked housing means gearbox replacement, not just lubrication. Order a replacement gearbox unit that matches your pole diameter.
- Crank is very stiff or grinding: the lift cord may be kinked inside the pole, or the gears are dry and corroded. Apply penetrating oil to the crank shaft and let it sit 15 minutes, then try again. If it frees up, follow with white lithium grease and work the crank through several cycles.
- Crank turns but canopy barely moves: the lift cord has slipped off the pulley at the top cap or the cord has stretched. Lower the runner completely, open the top cap, and reseat the cord on the pulley. If the cord is frayed, replace it: thread the new 3 to 4 mm braided cord through the pole using the old cord as a pull-through guide.
Umbrella won't close (runner won't descend or canopy won't fold)
- Runner is stuck partway down: the security latch is still engaged. Look for a small spring-loaded button or pin on the runner collar and press or lift it to release.
- Ribs catch or cross each other when folding: one or more ribs are bent slightly outward at the tip. Fold the umbrella by hand, guiding each rib down in sequence rather than relying on the crank alone.
- Canopy fabric is bunched or wrapped around a rib: open the umbrella again fully, straighten the canopy fabric by hand, and close more slowly.
Canopy sags or one panel droops
- One rib is not fully seated in the hub socket: open the umbrella, locate the drooping panel, and push the rib into its hub socket from the underside. You should feel or hear it seat.
- A rib is bent at the pivot point: bent ribs can sometimes be straightened carefully with two hands applying slow, even pressure, but aluminum fatigues quickly. If the rib has been bent and re-bent, replace it.
- The canopy sleeve has slipped off that rib tip: close the umbrella, re-thread the sleeve over the rib, and reopen.
The whole umbrella wobbles in the base
- Base collar set screw is loose: tighten it with the appropriate hex key. If it will not tighten, the threads may be stripped and the set screw needs replacement.
- Base is underweight for the umbrella size: re-check the base weight against the 10 pounds per foot rule of thumb for center-pole umbrellas, or your model's specific minimum base weight from the PDF manual. Add supplemental weight or upgrade the base.
- Pole joint is not fully seated or locked: collapse and reseat the pole connection, ensuring the locking pin or bolt is fully engaged.
- The base itself is cracking or deformed: a base that has been left outdoors through freeze-thaw cycles may have failed structurally. Replace it rather than trying to repair it.
Securing your umbrella in wind and storing it for winter
If you live somewhere with frequent afternoon gusts, a base weight that just meets the minimum is not enough. Go heavier. Bolt-down bases or in-ground sleeves are the most secure long-term option for a fixed patio setup. For table-through-the-hole umbrellas, make sure the table itself is weighted or anchored, because the umbrella and table will move together in a strong gust. Never leave the umbrella open and unattended in conditions where you would not sit outside yourself.
For winter storage: close the umbrella fully, let the canopy dry out completely before covering it (this is non-negotiable if you want to avoid a mildew problem), slip on a waterproof storage cover, and move it to a cool, dry location. If you have a solar LED model, disconnect and bring the power module and any USB or battery components indoors. Aluminum frames handle freezing temperatures reasonably well, but iron fasteners and plastic pivot covers do not appreciate being wet and frozen repeatedly. A quick inspection in early spring before the first use of the season takes ten minutes and catches most problems before they become expensive ones.
Canopy replacement and sourcing parts
This is a genuinely confusing area with BluU. Their FAQ has contradictory language: one section states BluU does not sell canopies separately, while other sections describe canopy fabric warranties and replacement options. My honest advice is to email [email protected] with your model name and purchase date before assuming a replacement canopy is or is not available. Document the model, the fabric type (printed on the product page or packaging), and when you bought it. Having this information ready will also speed up any warranty claim. For the record, the 365-day product warranty and the Bluu Care fabric warranty are separate programs, so a canopy failure within the fabric warranty period may be covered even after the base product warranty has expired.
For replacement hardware (bolts, set screws, crank handles, lift cord), most standard metric fasteners and 3 to 4 mm braided cord are available at hardware stores without going through BluU. The Oak model uses M8x25 bolts and M8 washers as confirmed in the PDF parts list. Just bring the original fastener to the store and match it.
Adapting steps when the BluU manual isn't available
If you cannot locate your BluU PDF and the model page is temporarily down, the assembly logic for center-pole crank umbrellas is broadly consistent across most brands in the market umbrella category. Guides written for similar products can help you orient yourself while you track down the official document. If needed, Blissun patio umbrella instructions are another readily available set of assembly and troubleshooting guides you can consult while you obtain the official BluU manual. If you need another manufacturer perspective, see allen roth patio umbrella instructions for compatible assembly steps and diagrams. Instructions for umbrellas like the Abba Patio, Allen Roth, and Blissun market umbrellas follow the same base-pole-rib-canopy-crank sequence, and the troubleshooting principles for crank, cord, and rib failures apply across all of them. Real Living umbrellas, including the Solar and Triple Vent models, follow the same core assembly logic though they have proprietary features. For model-specific steps, consult the Real Living triple vent patio umbrella instructions for the Solar and Triple Vent models. If you need model-specific steps, consult real living solar patio umbrella instructions for detailed assembly and solar-panel guidance. Use any comparable guide as a structural reference, but always verify fastener sizes and tilt-activation sequences against the official BluU documentation before making physical adjustments.
When repair isn't worth it: a few honest decision points
A stripped gearbox, a replacement lift cord, or a new set screw: those are all reasonable repairs that cost less than $20 in parts and an hour of your time. A cracked center-pole hub, a severely bent main pole section, or a canopy that has delaminated or torn at multiple rib attachment points: those push the cost-benefit math toward replacement, especially if the umbrella is more than three or four seasons old. The labor involved in sourcing and fitting major structural components often exceeds the cost of a comparable new umbrella. BluU's customer reviews note some delays in warranty service, so if you are within the 365-day window, file the warranty claim with photos and proof of purchase rather than attempting a structural repair yourself. Document everything, send it to [email protected], and keep a copy.
One final note on ladder use: if your umbrella is large enough that servicing the top cap, hub, or solar LED panel requires you to climb a ladder, treat it like any ladder task. Use a stable, correctly rated ladder, maintain three points of contact at all times, have a second person present, and do not overreach. It sounds basic, but umbrella hubs are not designed to be worked on at height and most can be accessed by lowering the pole out of the base and laying it on the ground.
FAQ
What core manufacturer documents and model data must I gather before creating a model‑agnostic BluU umbrella how‑to guide?
Download the official BluU user manual and parts PDF for the exact model (Maple Pro, Oak auto‑tilt, cantilever, etc.). Record model name, SKU, serial number, canopy diameter, canopy fabric type, crank/tilt type (crank, pulley, auto), pole diameters (center pole and upper/lower sections), rib count and material, and any electronics (solar/LED). Capture exploded parts diagrams, hardware callouts (bolt sizes such as M8x25, washer specs, included hex key size), and the BluU safety section and warranty page. Source: BluU product pages and downloadable manuals (BluU User Guide and model PDFs).
Which authoritative external sources should be collected to support safe assembly, maintenance and repair instructions?
Collect industry/manufacturer references: BluU official manuals and FAQ; Sunbrella fabric cleaning/maintenance pages for solution‑dyed and acrylic fabrics; Treasure Garden or similar OEM spec pages for base‑weight examples; OSHA ladder safety standards (29 CFR 1926.1053); independent repair guides for crank/gearbox/cable replacement; lubricant guidance (white lithium/marine grease vs silicone) from reputable maintenance sites; and consumer feedback repositories (Trustpilot, Reddit) to identify common failure modes and warranty experience. Include links and citation details for each source.
What exact measurements and photos should I take of a BluU umbrella before editing instructions or ordering parts?
Record: model name/SKU/serial, canopy diameter, rib count and length, center‑pole outer diameter (e.g., BluU market = 1.5 in), wall thickness if possible, distance between runner and top cap, crank/tilt type, and base mounting style. Photograph: whole umbrella (closed and open), canopy underside showing rib attachment, crank/gearbox area, tilt mechanism, hub/runner, top cap/finial, any damaged parts, and the interior of the pole (holes/slots). Note label/sticker images showing manufacture date/part numbers. These support parts cross‑matching and warranty claims.
What tools, consumables and spare parts list must be assembled so homeowners can perform common repairs?
Tools: adjustable wrench set, metric socket set (including M8 size), hex key set (including 6mm/6#), long‑nose pliers, wire cutters, needle file, fish tape or thin wire, flat and Phillips screwdrivers, cordless drill with small bits, rubber mallet, measuring tape, work gloves, safety glasses, and ladder (follow OSHA). Consumables/parts: spare lift cable (braided polyester/nylon ~3–4 mm), replacement gearbox/crank assembly (model specific), replacement ribs or rib repair splints, canopy repair patches and UV‑resistant fabric adhesive, replacement hub/runner or split pins, stainless steel fasteners, washers, marine or white lithium grease, silicone spray, penetrating oil, stainless/galvanized replacement cable crimps, replacement finials/top caps, replacement canopy (if available) and waterproof cover. Pack spare base weights/ballast materials if securing umbrella.
What factual tech specs and operating limits must the guide include for safety and design decisions?
Include BluU published specs: center pole diameter for market umbrellas = 1.5 in; recommended wind‑close guidance (close at ~10.8–18.5 m/s ≈24–41 mph depending on model); frame materials (aluminum with powder coat; small screws iron at risk of rust); BluU warranty terms (365‑day limited; canopy fabric warranties vary: Outtra/Sunbrella 3–5 years per model). Also include base‑weight heuristics (industry rule of thumb: ~10 lb per foot of canopy diameter; cantilevers need much more and may require bolting to patio or concrete). Cite Treasure Garden and industry base‑weight guidance.
What stepwise data‑gathering sequence should be followed to produce accurate repair/assembly instructions for a given umbrella?
1) Identify model and download official manual and parts list. 2) Photograph and measure the umbrella (see measurements list). 3) Inspect and document failure symptoms (photos/video of crank motion, tilt, cable fraying, ribs bent). 4) Compare measured fastener sizes and part shapes to manual diagrams. 5) Source matching replacement parts from BluU or equivalent OEMs (note inconsistencies in BluU FAQ about separate canopies — confirm with support). 6) Draft repair steps using OEM torque/hardware specs where provided; if absent, use common fastener practice and clearly flag assumptions. 7) Add safety/lift/ladder notes and decision points. 8) Test procedure on a sample umbrella or via user feedback before publishing.
Next Articles
ABBA Patio Umbrella Instructions: Assembly, Tilt, Setup
Step by step ABBA patio umbrella setup, assembly, tilt, cantilever and canopy adjustments, plus carport shade safety tip
Allen Roth Patio Umbrella Instructions: Setup, Use, Fixes
Step-by-step Allen Roth patio umbrella instructions for setup, tilt, stability, and quick fixes for common issues.
How to Fix a Patio Umbrella That Won't Open or Close
Step-by-step fixes for patio umbrellas that won’t open or close, with checks for jams, cords, latches, and lubricating t