Assembling an ABBA patio umbrella correctly comes down to three things: getting the pole sections seated and locked properly, attaching the canopy ribs before you try to open it, and understanding which tilt button or crank action your specific model uses. Most ABBA umbrellas use a push-button tilt combined with a crank handle, while the Vienna cantilever model adds a swing-and-lock mechanism that works differently. If yours won't tilt or stay put after setup, the fix is almost always a loose set screw near the tilt joint or a cord that jumped its pulley during assembly. This guide walks you through the whole process, model by model, so you can get it done without guessing.
ABBA Patio Umbrella Instructions: Assembly, Tilt, Setup

Luca Morrison
4 Jun 2026

Quick safety checks before you start
Before touching a single bolt, run through these checks. They take about two minutes and prevent the most common assembly injuries and equipment damage.
- Check the base weight rating. ABBA umbrellas require a base of at least 50 lbs for standard 9 ft models and 100+ lbs for 10 ft cantilever models. A light base is the number one cause of tip-overs.
- Inspect the pole for shipping damage. Run your hand along the full length of the main pole and look for dents, cracks, or bent sections. A bent pole will bind in the tilt mechanism.
- Look at all hardware bags before starting. ABBA ships separate bags for screws, the crank handle, and the tilt button assembly. Confirm you have all of them before you open any.
- Clear a 12-foot radius around your work area. You need room to lay the canopy flat and raise the frame without catching ribs on furniture or fencing.
- Do not assemble in wind over 10 mph. An open canopy acts like a sail and can yank the frame out of your hands, bending ribs on impact.
- If your model is a cantilever, make sure the base is filled or weighted before you attach the arm. An empty base with a cantilever arm attached will tip without any canopy weight at all.
Assembling the frame and canopy step by step
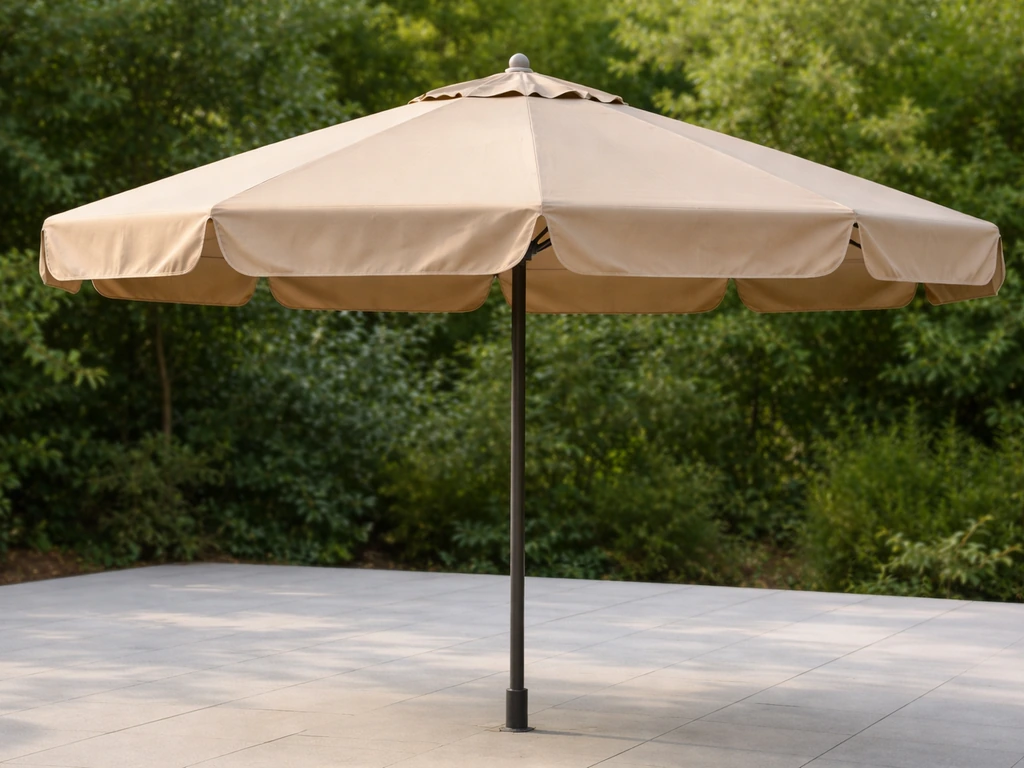
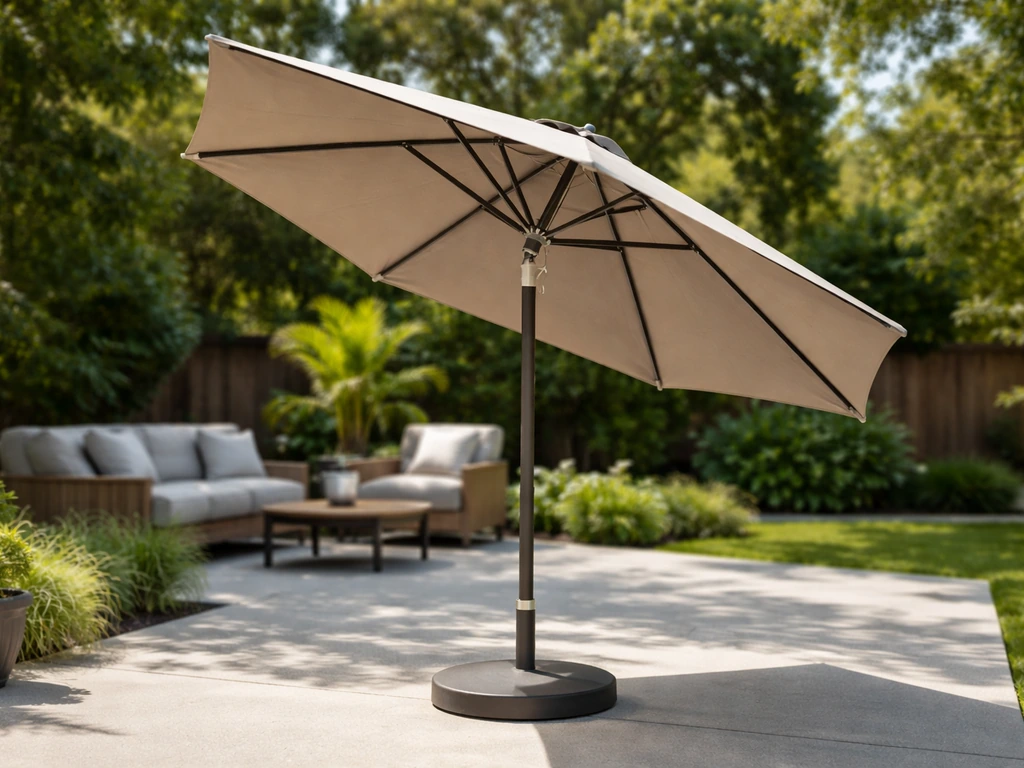
The AP9388CT (9 ft tilt and crank) is ABBA's most common market umbrella, and the assembly sequence below applies to it and most similar ABBA pole-style models. If you have the Vienna cantilever, skip ahead to the cantilever section after completing steps 1 through 4 here.
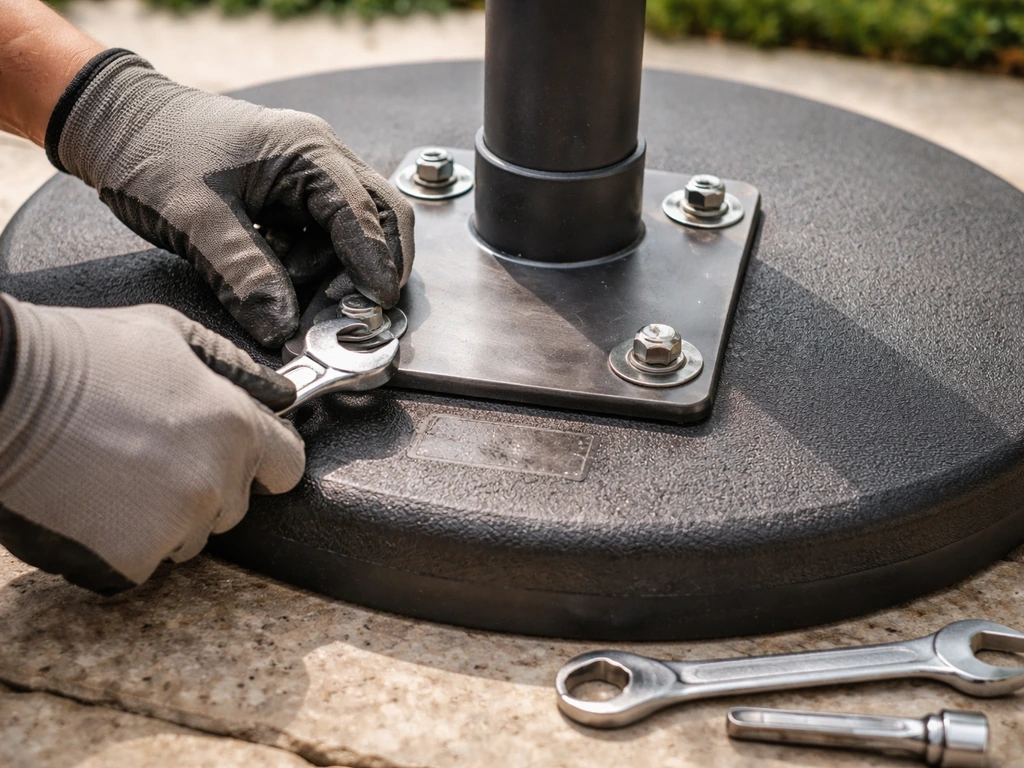
- Set the base in its final position first. You cannot move a properly weighted base after the pole is in, so place it exactly where you want the umbrella before doing anything else.
- Insert the lower pole (holder pole) into the base tube. It should drop in with about 2 to 3 inches of play before you tighten the base collar. Hand-tighten the collar screw at this stage only.
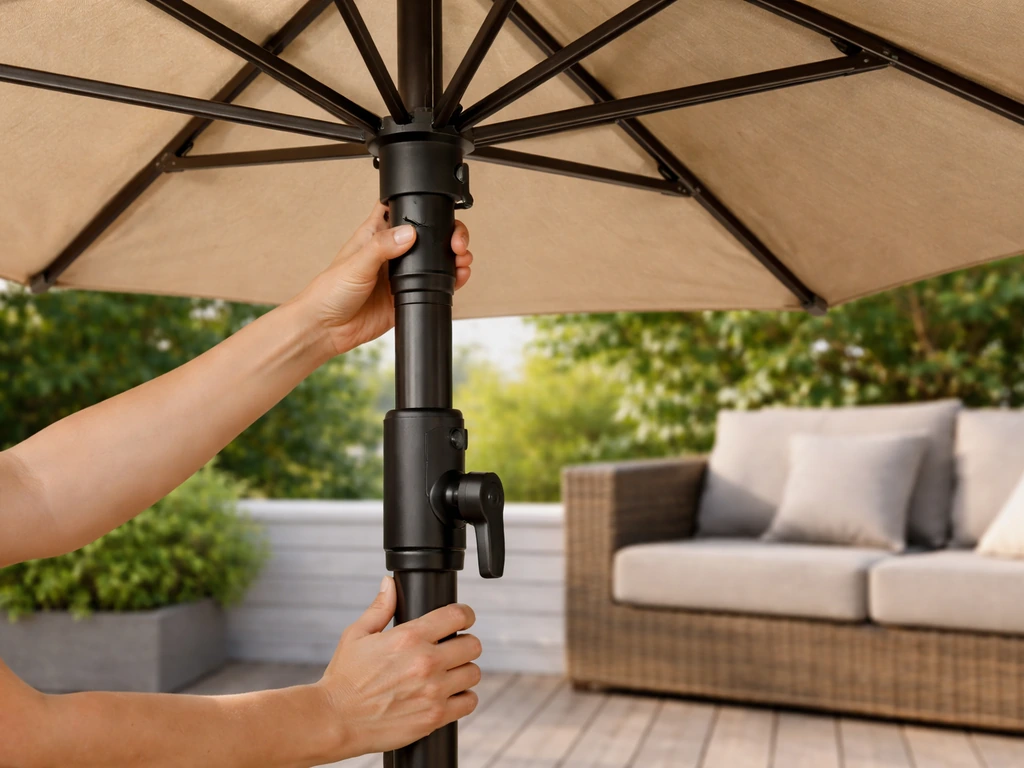
- Attach the tilt mechanism housing to the lower pole. On the AP9388CT this is a collar with a set screw on the side. Slide it to the top of the lower pole section, align the screw hole, and hand-tighten the included screw. You will lock it fully after the canopy is on.
- Connect the upper pole to the tilt housing. The upper pole slides into the tilt collar from above. You should feel a small detent click when it seats correctly. If it does not click, the tilt button (the small spring-loaded pin on the upper pole) is probably compressed. Press it inward with your thumb while sliding the pole down, then release it once seated.
- Lay the canopy face-down on a clean surface. Identify the hub at the top center (the metal cap with 8 or 10 rib slots) and the valance hem at the outer edge.
- Attach each rib to the hub. ABBA canopies use a pin-and-slot connection. Slide the inner tip of each rib into its numbered slot and push until the pin catches. Work around the hub in order, not randomly, to keep even tension.
- Connect the lower rib arms (the secondary struts that fold outward) to the runner ring on the pole. The runner ring slides up and down the pole and is what the crank actually moves. Each lower arm has a small loop end that clips onto a pin on the runner ring.
- Thread the canopy panels onto the ribs if your model uses a sleeve-style canopy. Slide each panel sleeve over its corresponding rib from hub to tip before attaching the outer Velcro or tie closure.
- Raise the canopy using the crank handle. Insert the crank into the socket on the lower pole (just above the base) and turn clockwise. Watch the runner ring rise and the ribs spread outward. Stop cranking when the ribs are fully extended and the canopy is taut.
- Now fully tighten the set screw on the tilt mechanism housing. Use the included Allen key (usually 4mm). Do not overtighten, just snug it until it stops turning easily.
Canopy fit check
Once fully open, the canopy should be taut with no deep sags between ribs. A small amount of scalloping at the valance is normal. If you see a large sag over one or two panels, the rib for that panel is not fully locked into the hub. Close the canopy partially, reach up to the hub, and push that rib tip firmly until you feel the pin seat. Then re-crank.
How to tilt your ABBA umbrella correctly
ABBA's standard pole models use a push-button tilt, which is one of the simplest tilt systems out there once you understand the motion. If you want the best results, follow the real living solar patio umbrella instructions for your specific model’s setup steps and troubleshooting tips. The button is a spring-loaded pin built into the upper pole. Pressing it disengages the pole from a fixed detent in the tilt collar, which lets you pivot the entire upper section forward.
- Make sure the canopy is fully open and the crank is locked. Trying to tilt a partially open canopy puts diagonal stress on the ribs and can bend them.
- Locate the tilt button on the pole. On most ABBA models it sits about 6 to 8 inches above the tilt collar housing, on the side of the pole facing you.
- Press and hold the tilt button with your thumb. You will feel the upper pole become free to pivot.
- With your other hand, lean the top of the pole in the direction you want shade coverage. Tilt toward the sun, not away from it, so the canopy blocks the angle of incoming light.
- Release the tilt button when you reach the angle you want. You should feel and hear a click as the pin re-engages in the next detent position.
- Give the pole a gentle shake to confirm it is locked. If it wobbles, the button did not fully seat. Press and release the button again, adjusting the angle slightly until it locks clean.
- To return to vertical, press the button again and lean the pole back upright until it clicks into the center detent.
Most ABBA tilt collars have two or three detent positions (roughly 15 degrees and 30 degrees from vertical). You cannot stop at an arbitrary angle, only at the built-in detent positions. If you need a more precise angle, the Vienna cantilever model is the one to look at, since it offers a full adjustable swing range.
Setting up the ABBA Vienna cantilever
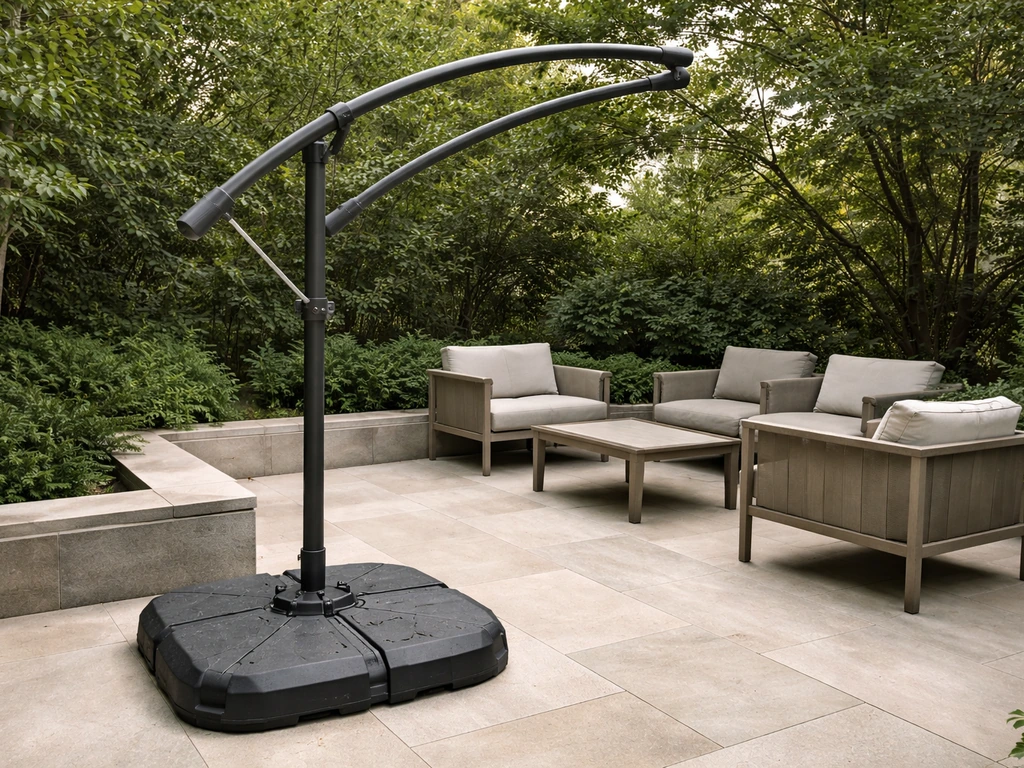
The blank" rel="noopener noreferrer">Vienna 10 ft cantilever is a different animal from the pole umbrellas. The base goes to the side of your seating area, a curved arm extends over the top, and the canopy hangs from the end of that arm. This gives you shade without a center pole in your way, but the tilt system is more complex. For step-by-step Vienna tilt adjustments, use the bluu patio umbrella instructions alongside this setup section.
Base and main pole assembly
- Fill the base with sand or water before attaching anything. The Vienna base is designed to be filled, and an empty base with a loaded arm will tip. Most users need to fill to about 80 percent capacity for stability on a patio.
- Insert the vertical main pole into the base tube and tighten the collar bolt with the included wrench. This pole needs to be firmly vertical, so use a small level on the side of the pole before tightening.
- Attach the horizontal arm to the top of the main pole. It connects with a pivot bolt that you hand-tighten first, then lock with the wrench once the arm is pointed in the correct direction.
- Hang the canopy assembly from the end of the arm. The canopy frame on the Vienna uses a hub-and-rib system similar to the pole models, but the entire frame hangs from a hook or pin at the arm tip. Confirm the pin is fully engaged before releasing the frame.
Tilt adjustments on the Vienna cantilever
The Vienna gives you two independent tilt axes, which is what makes it stand out. You can swing the canopy side to side (approximately 35 degrees left or right of center) and you can angle it vertically (the canopy face can tilt between roughly 108 and 148 degrees from the arm, which translates to a 40-degree range of forward tilt). On the Abba Patio Vienna cantilever, the canopy can swing side to side by approximately 35 degrees left or right of center. Here is how to adjust each one.
- For side-to-side swing: locate the pivot knob or locking lever at the point where the canopy frame meets the arm. Loosen it, rotate the canopy left or right to your desired position, then retighten firmly.
- For vertical tilt: find the tilt lock bolt at the top of the canopy frame hub. Loosen a quarter-turn, push or pull the canopy face to the desired forward angle, then retighten. The 108 to 148 degree range means you can tilt the canopy face from nearly flat (great for blocking low morning sun) to moderately angled.
- Use the crank on the main pole or arm to raise and lower the canopy height. Clockwise raises, counterclockwise lowers on most Vienna configurations.
- After any tilt adjustment, tug the outer edge of the canopy firmly in four spots to confirm the frame is locked and not drifting. If it drifts, the lock bolt needs another quarter-turn.
Cantilever placement tip
Position the base so the arm extends in the direction of the afternoon sun (usually southwest in North America). This gives you the maximum useful shade window from roughly noon to early evening without having to re-adjust the arm direction daily.
Troubleshooting tilt, cord, crank, and canopy issues
Here are the problems ABBA owners run into most often, and the fastest way to solve each one.
Tilt button won't press or won't release
This is almost always a dirt or corrosion issue. Spray a small amount of silicone lubricant (not WD-40, which attracts dirt) directly into the button housing. Press and release the button 10 to 15 times rapidly to work the lubricant in. If the button still sticks, remove the upper pole from the tilt collar, inspect the pin for corrosion or bending, and straighten it carefully with needle-nose pliers. A bent pin will never spring back correctly and the part needs replacement.
Umbrella won't stay tilted (pops back to vertical)
If the tilt button clicks but the umbrella slowly drifts back to vertical, the set screw on the tilt collar housing has come loose. Tighten it with the 4mm Allen key. If the problem persists, the detent notch inside the collar may be worn smooth. You can apply a thin bead of waterproof thread-lock compound (like Loctite Blue 242) to the set screw threads to hold the collar position more firmly.
Crank is hard to turn or skips
A stiff crank usually means the cord or lift mechanism is binding. Open the umbrella fully, then look at the cord path from the crank drum up through the pole to the runner ring. On most ABBA models the cord runs through a small guide ring inside the pole. If the cord jumped that guide, it will bunch up and make cranking feel gritty or locked.
Lower the umbrella completely, remove the crank handle, and check that the cord is seated in the guide. Re-seat it with a thin wire hook if needed, then re-crank slowly. If the crank skips (ratchets without raising the canopy), the cord is likely frayed at the drum. Replacement cords are inexpensive and ABBA customer support (customer@abbapatio.
com) can confirm the correct part number for your model.
Canopy won't open fully or sags on one side
A canopy that opens 80 percent and then stops usually has one lower rib arm that did not clip onto the runner ring correctly. Close the canopy, look at each lower arm clip on the runner ring, and press any loose clips back onto their pins. If the canopy sags on one side after fully opening, one of the main ribs did not lock into the hub. Close the canopy halfway, reach up to the hub, find the loose rib, and push it firmly until the pin seats.
Canopy fabric won't stay on the ribs
ABBA sleeve-style canopies can work their way off the rib tips in wind. Each rib tip should have a small end cap or Velcro tab that holds the sleeve hem. If the end cap is missing, a piece of 1/2-inch hook-and-loop tape wrapped around the rib tip works as a permanent fix. For canopies that use tie closures, retie them tightly after every opening.
Cantilever arm drifts after locking
If the Vienna arm slowly rotates or the canopy tilts on its own over time, the pivot bolt at the arm-to-pole junction is slightly loose. Tighten the nut a half-turn at a time until the arm holds position when you apply moderate hand pressure. Do not overtighten, since the bolt also needs to allow deliberate repositioning. If tightening does not hold the arm, the washer under the bolt head may be compressed flat. Replace it with a standard M10 stainless steel washer and retighten.
Using an ABBA umbrella for carport-style shade coverage
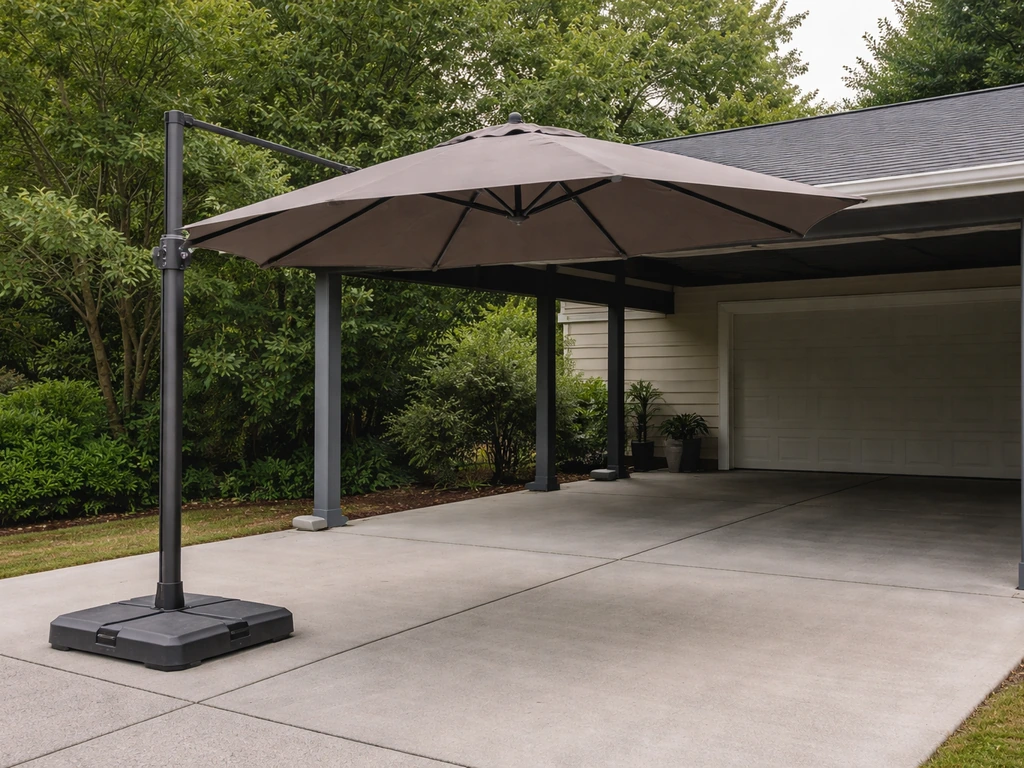
A true carport is a freestanding structure with posts and a roof panel rated for snow load and wind uplift. An ABBA patio umbrella, including the Vienna cantilever, is not designed or rated for that use. Using one over a vehicle as a permanent or semi-permanent carport replacement is a safety problem: umbrella canopies are not waterproof enough to protect a car in hard rain, the frames are not engineered for sustained overhead load, and an umbrella that tips onto a vehicle can cause real damage.
That said, people do use large patio umbrellas for temporary carport-style shade coverage, meaning blocking sun off a parked car or a driveway workspace for a few hours. If that is your goal, here is how to do it safely with an ABBA umbrella.
- Use only the Vienna 10 ft cantilever for this purpose. Its offset design lets you position the base entirely outside the vehicle footprint so you do not have to drive over or around the base.
- Position the base at least 3 feet from the vehicle. The arm extends over the car's hood or roof, but the base and pole stay on the driveway or adjacent surface beside the vehicle.
- Never leave the umbrella unattended over a vehicle in any wind. ABBA recommends closing all umbrellas in winds above 20 mph. Over a car, close it at anything above 10 mph because a tip-over onto a vehicle happens faster than you can react.
- Do not tilt the canopy toward the vehicle. Keep the canopy face horizontal or tilted slightly away. Tilting it toward the car creates a sail effect that dramatically increases tip-over risk.
- Use a secondary anchor if your driveway is sloped. Loop a ratchet strap from the base frame to a fixed ground anchor (a concrete block or stake) on the downhill side.
- Close and secure the umbrella the moment you are done using it. Do not leave it open over a parked vehicle overnight or while unattended.
For genuinely permanent shade over a vehicle or workspace, a tension shade sail anchored to posts or your home's exterior is a more practical and more stable solution than any patio umbrella.
Where to find your exact ABBA manual
ABBA maintains a dedicated manual hub at abbapatio. If you need allen roth patio umbrella instructions for your setup questions, that model-specific manual hub is a good place to start by comparison manual hub at abbapatio. com/pages/manual. If you are looking for model-specific blissun patio umbrella instructions, start by checking the manual hub for your exact PDF ABBA patio umbrella manual.
com/pages/manual. You can find model-specific PDFs there, and if your model is not listed, you can email customer@abbapatio. com with your model number (printed on the sticker near the base of the pole or on the original box) and they will send you the correct PDF. The AP9388CT manual, for example, covers the full assembly diagram, hardware list, and tilt mechanism detail in one document.
The AP9388CT (9 Feet Umbrella with Tilt and Crank) installation manual identifies the umbrella as an assembled frame and canopy (1pc), a holder pole (1pc), and describes the tilt mechanism connected via screws along with the crank handle and press-button tilt AP9388CT manual.
Having that in front of you while assembling is genuinely useful, especially for confirming screw torque specs and cord routing.
Seasonal storage and maintenance to keep it working
Most ABBA umbrella issues (sticky tilt buttons, stiff cranks, bent ribs) are preventable with a basic end-of-season routine. Close the canopy fully and tie the canopy wrap strap if your model has one. Remove the canopy from the frame if you are storing it for more than six weeks, since fabric left compressed on the frame for months will develop permanent fold creases and weaken the seams. Store poles horizontally or vertically in a dry location.
Wipe down all metal hardware with a dry cloth and apply a thin coat of silicone spray to the tilt button housing, crank socket, and rib pivot pins before storage. When you bring the umbrella out in spring, run through the pre-assembly safety checklist at the top of this guide before opening it.
If you need real living triple vent patio umbrella instructions, match the same general steps: check the tilt or crank parts, confirm the ribs lock in place, then test-open before fully mounting.
If you work through this guide and still have a specific mechanical problem, comparing notes with instructions for similar market umbrella brands can sometimes point you toward a solution, since many tilt collar and crank designs are shared across brands even under different names.
FAQ
Can I set my ABBA tilt umbrella to an exact angle other than the preset positions?
No, ABBA pole umbrellas are designed to stop only at the built-in tilt detent positions in the tilt collar. If you try to force the upper pole past a detent, you can bend the spring-loaded pin or notch the collar. If you need a different angle, set it at the nearest detent and, for more fine control, consider the Vienna cantilever model’s wider swing range.
What’s the best way to verify a rib lock before I fully open the umbrella?
Before opening for the first time, confirm the ribs are fully seated by checking that each rib end pin clicks into the hub when you partially open. After that, do one short test open and close, then re-check the rib locks. This catches mis-seated ribs early, so you do not crank against a partially locked runner ring.
My ABBA tilt button won’t release the tilt collar. What should I inspect first?
If the tilt button presses but the upper pole will not release into the next detent, check for a stuck pin caused by dirt or corrosion, then verify the tilt collar is not obstructed by misrouted cord or fabric. Clean and lubricate the button housing first, then if it still will not disengage, inspect the pin for bending and replace it if it does not spring cleanly.
Is it safe to keep cranking if the umbrella ratchets but the canopy does not lift?
Stop if the crank feels gritty or you hear ratcheting without lifting, because that usually indicates cord seating or cord wear. Do not keep cranking, since a frayed cord at the drum can bind and cause the canopy to jerk when it finally moves. Lower the umbrella fully, remove the handle, and re-seat the cord in the guide ring before testing again.
Can I use WD-40 in the tilt button housing instead of silicone lubricant?
For stuck tilt or delayed movement after lubrication, use silicone lubricant in the button housing only, and press and release the button rapidly to distribute it. Avoid WD-40 for this, because it can bring more grit into the housing and make sticking worse over time.
How should I adjust the Vienna cantilever tilt without letting it move unpredictably?
Yes, but do it deliberately. If you are adjusting the Vienna’s side-to-side or vertical tilt, apply hand pressure to hold the canopy while you reposition, then release and let it settle into its functional range. If the arm rotates on its own later, that points to a slightly loose pivot bolt or washer compression that needs correction.
One panel sags, but the rest opens correctly. What’s the fastest fix?
If only one side sags after opening, close the canopy halfway and push the specific loose rib into the hub until the pin seats. Do not try to “pull tension” from the fabric, because the underlying issue is almost always a rib end not locked into place.
My canopy shifts in wind. What should I check on the rib tips?
In wind, sleeve-style canopies can shift if the end caps or Velcro tabs are missing or loose. Check each rib tip after assembly, and if any cap is missing, add hook-and-loop tape around the rib tip to prevent the sleeve hem from walking off.
How tight should I make the Vienna arm pivot bolt, and what if tightening doesn’t fix it?
Correct torque matters for the Vienna pivot. Tighten the pivot nut in small increments, about a half-turn at a time, until the arm holds position with moderate hand pressure. Overtightening can prevent intended repositioning, and if tightening does not hold, replace a flattened washer under the bolt head.
What’s the best end-of-season storage routine to prevent permanent canopy creases?
A common mistake is storing the canopy compressed on the frame for long periods. If storage will last more than about six weeks, remove the canopy from the frame to prevent permanent fold creases and seam weakening, then store poles in a dry location.
Where should I apply silicone before storing the umbrella, and should I avoid over-lubricating?
Routine lubrication should be limited to the tilt button housing and key pivot/connection points. Before storage, wipe hardware dry and apply a thin silicone coat to the tilt button housing, crank socket, and rib pivot pins. Over-lubricating can attract dirt and increase future stiffness.
Can I use my ABBA umbrella as a temporary carport over a parked car?
ABBA umbrellas are not rated for carport use over vehicles because overhead loads, rain exposure, and tip risk are not engineered for that scenario. If you only need temporary shade for a short period, keep the umbrella low profile when possible, never leave it unattended in gusty wind, and plan to remove it immediately during heavy rain.
Next Articles
Allen Roth Patio Umbrella Instructions: Setup, Use, Fixes
Step-by-step Allen Roth patio umbrella instructions for setup, tilt, stability, and quick fixes for common issues.

How to Fix a Patio Umbrella That Won't Open or Close
Step-by-step fixes for patio umbrellas that won’t open or close, with checks for jams, cords, latches, and lubricating t
How Does a Patio Umbrella Work? Components, Use, and Fixes
Learn how patio umbrellas work: components, open close tilt, stability, and step by step troubleshooting common mechanic