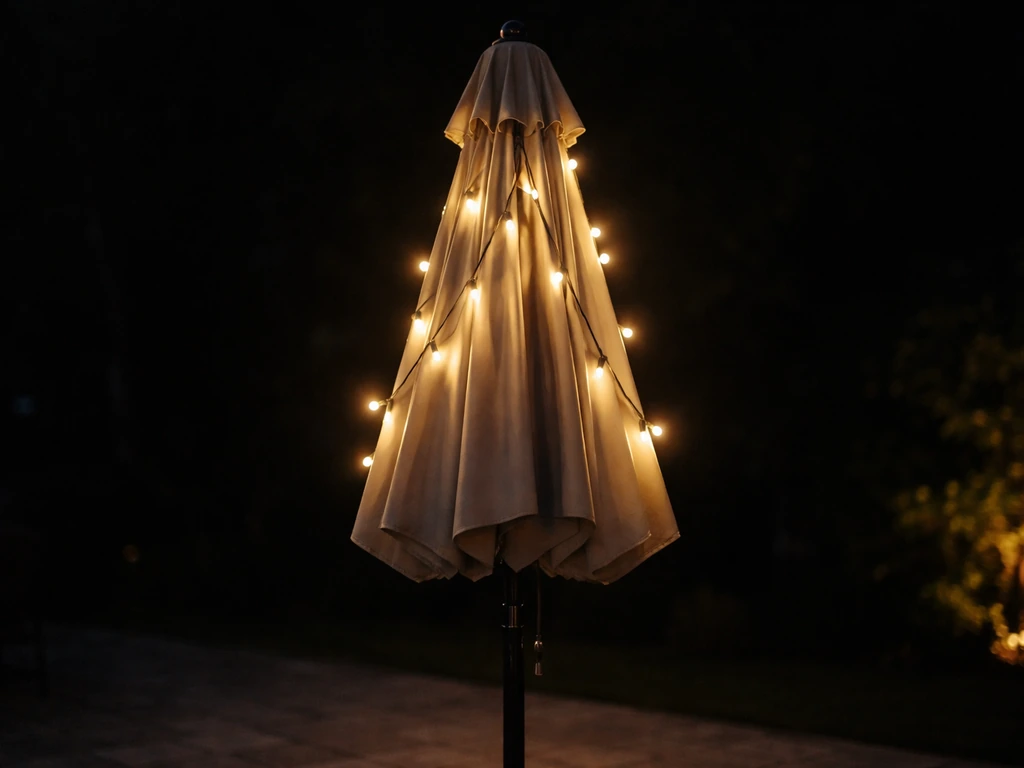
Nine times out of ten, patio umbrella solar lights stop working because the solar panel isn't getting enough direct sun to keep the battery charged. To permanently address it, you can add or re-route patio umbrella lights correctly so they receive consistent power and trigger properly at night solar panel. Clean the panel, make sure nothing is shading it, and give it a full day of sun before you assume anything is broken. If that doesn't fix it, the most likely culprits are a dead rechargeable battery (especially if the unit is over 12 months old), corroded contacts from rain exposure, or a setting that has the lights stuck in off or daytime mode. If the battery is charged but the light still won't come on in complete darkness, focus troubleshooting on the lighting circuit such as the LEDs, driver, or switch blank" rel="noopener noreferrer">Solar Lighting Troubleshooting and Cleaning. This guide will walk you through every check, from the 2-minute fixes to the deeper electrical stuff, so you can pinpoint exactly which part failed.
Patio Umbrella Solar Lights Not Working: Fix Guide

What 'Not Working' Actually Means (and Why It Matters)
Before you start pulling things apart, it helps to name exactly what your lights are doing, because the symptom points directly to the cause. Here are the five patterns you'll typically see with patio umbrella solar lights, and what each one usually means.
| Symptom | Most Likely Cause |
|---|---|
| Completely dead, no light at all | Battery fully drained, switch in OFF position, or daylight sensor active |
| Dim or short runtime (fades early in the night) | Battery degraded or not fully charging due to panel position or shade |
| Flickering or flashing | Low charge from dirty/obstructed panel, or loose wiring connection |
| Intermittent (works sometimes, not others) | Loose connector, water-damaged contact, or inconsistent panel exposure |
| Only one side lights up | Wiring disconnected at one rib, loose LED module on that side, or uneven panel tilt |
The reason this matters is that 'completely dead' and 'only one side' have very different fixes. A completely dead light often means you need to check the switch or charge the battery first. A one-sided failure almost always points to a wiring or connection issue specific to the umbrella's rib structure. Keep your symptom in mind as you work through the steps below.
How the System Actually Works
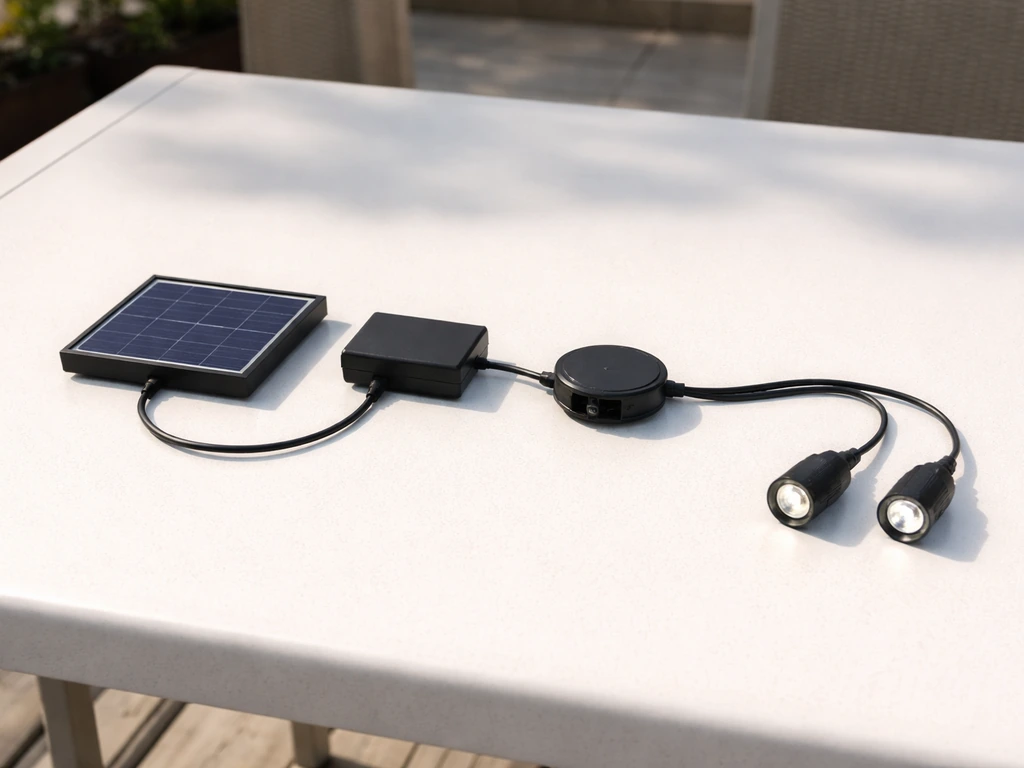
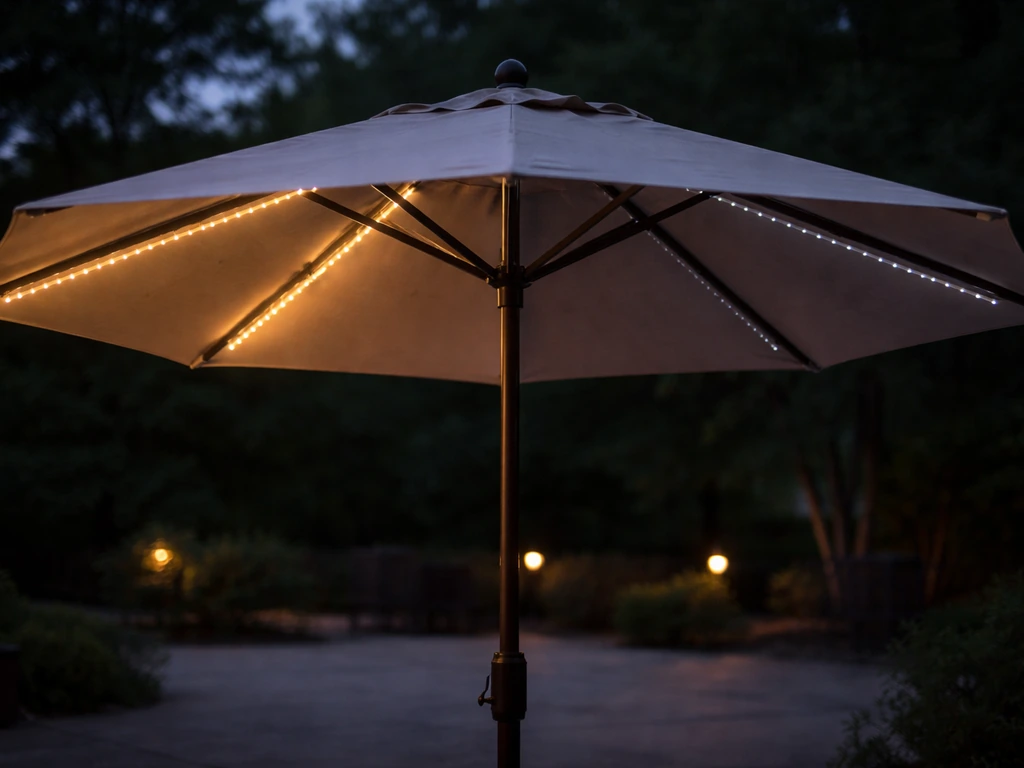
A patio umbrella solar light system has four core components: the solar panel (usually mounted on top of the canopy or built into the hub), a rechargeable battery (typically a 3.7V lithium-ion cell, often an 18650-style with a capacity somewhere in the 2000-3500mAh range), a light sensor that detects darkness and tells the LEDs to switch on, and the LED lights themselves, which are usually wired through the umbrella's ribs. When any one of these four parts fails or isn't performing, you get one of the five symptoms above.
The solar panel charges the battery during daylight hours. The battery has to hold enough charge to run the LEDs through the night. The light sensor triggers the LEDs when it detects darkness. If the panel is dirty, shaded, or tilted away from the sun, the battery doesn't get a full charge, and the lights die early, run dim, or don't come on at all. This is the most common failure chain by a wide margin.
Panel Position and Charging Time
The solar panel needs direct, unobstructed sunlight for at least 6-8 hours to give the battery a full charge. 'Partial shade' is not good enough. Even a patio cover, tree branch, or nearby building casting a shadow for a few hours during peak sun can cut your runtime in half. On patio umbrellas specifically, the panel is often built into the top of the canopy, which means the angle of the umbrella tilt has a direct effect on how much sun the panel receives. If you've recently adjusted the tilt for shade, the panel may now be facing away from the sun.
The Switch and Sensor Modes
Most patio umbrella solar lights have a physical on/off switch, usually located on the pole or the light module itself. The light will not come on at night if that switch is in the OFF position. Some models also have a daytime-inhibit sensor built in, meaning the LEDs are designed to stay off while it's bright and only activate in darkness. If you're testing the lights during the day, they may appear dead even when everything is working perfectly. Check the switch first, always.
Quick Checks You Can Do Right Now
Run through these before you do anything else. They take under 10 minutes and fix the majority of solar umbrella light failures.
- Check the switch: Find the on/off switch on the pole or light module and make sure it's in the ON position. This sounds obvious, but many people forget the switch gets bumped to OFF when folding the umbrella for storage.
- Clean the solar panel: Wipe the panel surface with a damp cloth to remove dust, bird droppings, pollen, and grime. A dirty panel can reduce charging efficiency dramatically. Don't use abrasive cleaners; just water and a soft cloth is fine.
- Remove obstructions: Stand back and look at where the umbrella sits during the sunniest part of the day (usually 10am-3pm). Is anything casting a shadow on the panel? Adjust the umbrella's tilt or reposition the base if needed.
- Give it a full day of sun: If the battery ran completely flat, it may need a full day of charging before the lights will come on. Leave the switch ON and let it charge in direct sun for 6-8 hours, then check again after dark.
- Reset the light: Turn the switch OFF, wait 10 seconds, then turn it back ON. On some modules, this clears a fault state that can make the light appear dead.
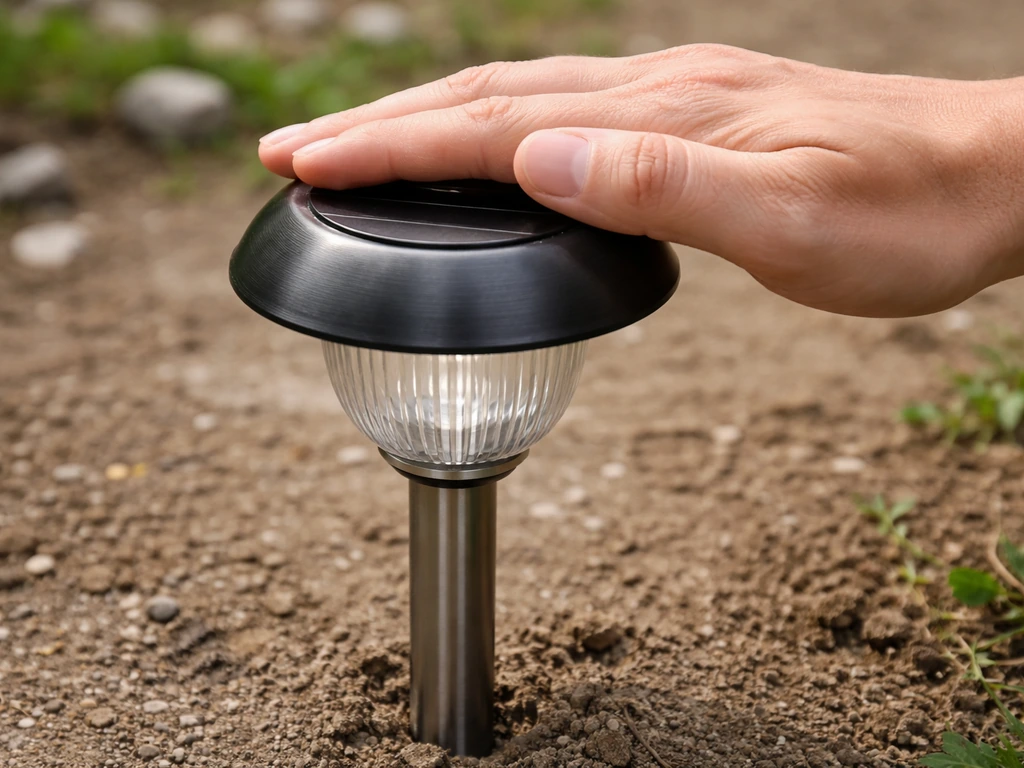
- Check the light sensor isn't confused: If you're testing during the day, try covering the solar panel with your hand or a dark cloth for about 30 seconds. If the LEDs turn on when covered, the charging and LED circuit are both working fine, and your only issue may have been insufficient sun exposure.
Electrical Troubleshooting: Going Deeper
If the quick checks didn't fix it, the issue is almost certainly electrical: a failing battery, dirty or corroded contacts, or a loose wiring connection somewhere along the rib. Here's how to approach each one.
Battery Replacement
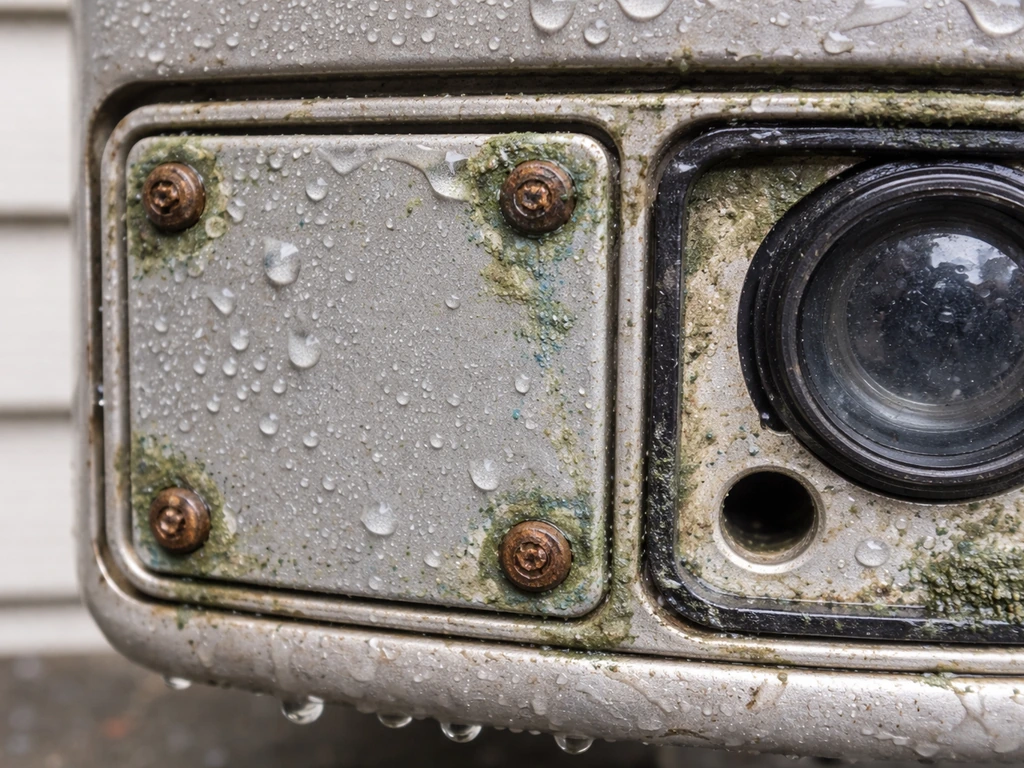
Lithium-ion batteries in solar lights typically last about 12 months before their capacity drops enough to cause noticeable dimming or short runtimes. If your unit is older than that and the lights fade out within an hour or two of darkness, the battery is almost certainly the culprit. The fix is straightforward on most umbrella light modules: open the battery compartment (usually secured by a small Phillips screw), pull the old battery, and swap in a new one that matches the original voltage and chemistry. Most use a 3.7V Li-ion cell. Write down the battery model number printed on the old cell before you go shopping. A word of caution: some solar light modules have sealed or wired-in batteries that aren't meant to be user-replaced. If you can't find a battery door or access panel, check the product manual before forcing anything open.
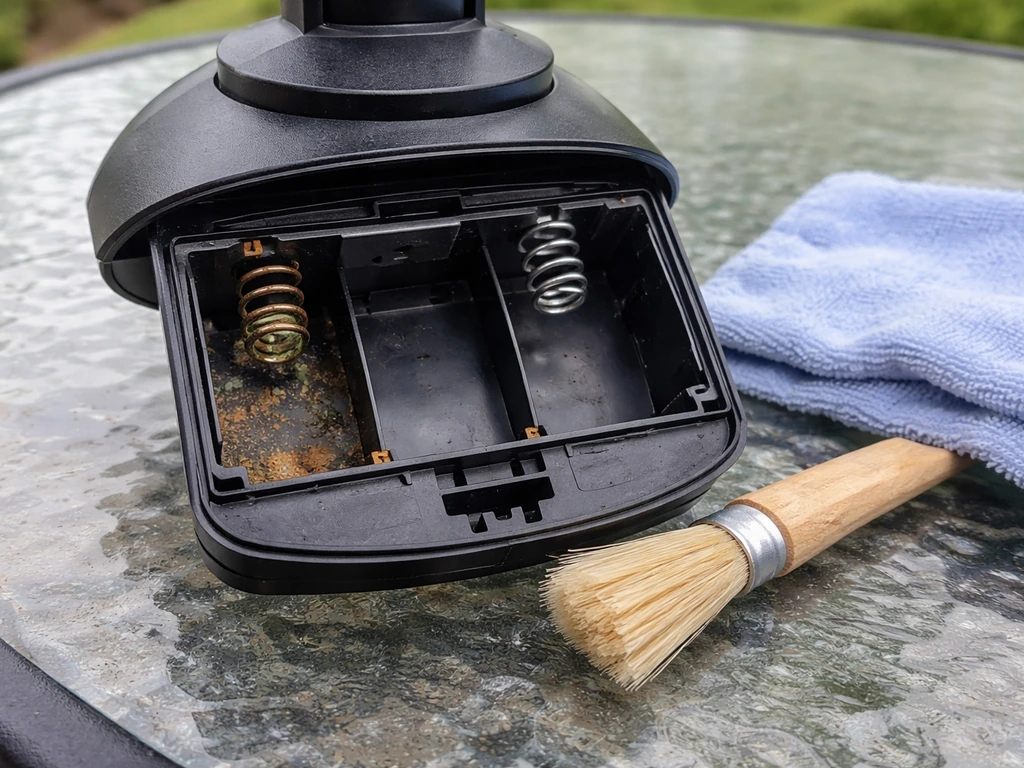
Cleaning Corroded Contacts
Water and outdoor exposure are brutal on battery contacts. If you open the battery compartment and see white, green, or orange crusty buildup on the spring contacts or the battery terminals, that corrosion is blocking the electrical connection. Waymark’s low-voltage solar lighting troubleshooting instructions also advise removing batteries and the LED light panel for cleaning and inspection when grime or buildup is blocking proper charging white, green, or orange crusty buildup on the spring contacts or the battery terminals. To clean it: dab a small amount of white vinegar on a cotton swab and work it into the corroded area to neutralize the buildup, then wipe it away. Follow up with isopropyl alcohol (70% or higher) on a clean swab to remove residue and help the contacts dry quickly. Let everything air dry completely before reassembling. Don't use water alone, it won't remove corrosion and will just add more moisture.
Wiring and LED Connection Checks
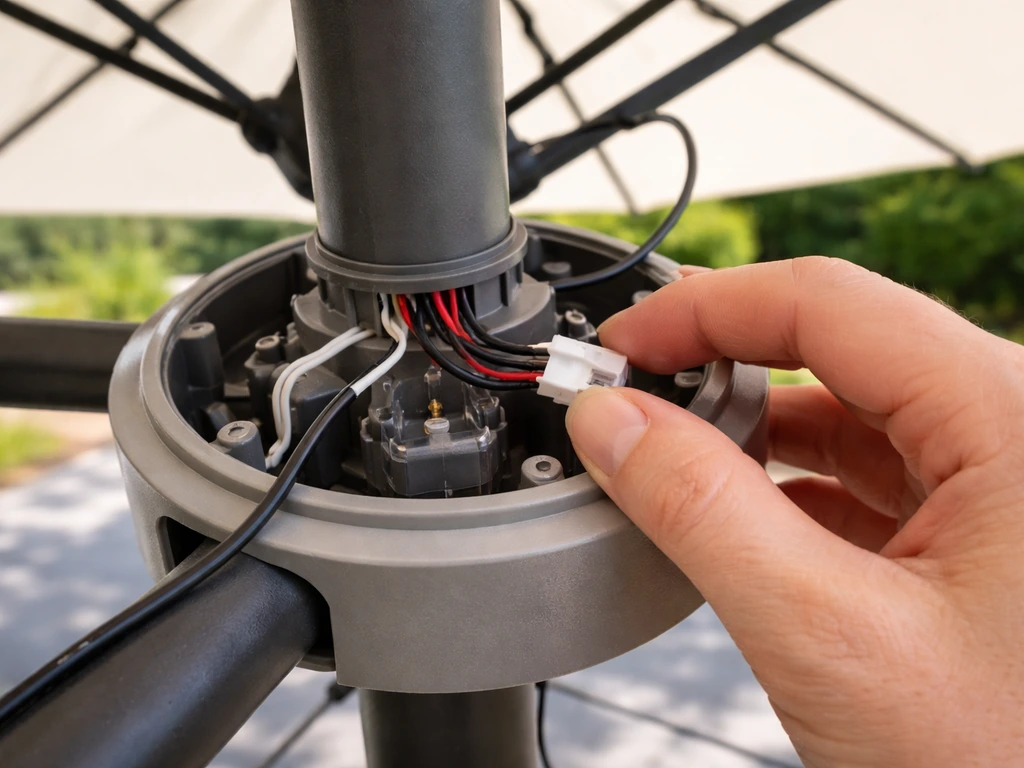
On patio umbrellas, the wiring runs from the central hub or pole out through each rib to the LED modules. Every time you open, close, tilt, or crank the umbrella, those wires flex and move. Over time, connections can work loose at the junction points, especially where the wire meets the LED module clip or the main harness connector at the hub. Inspect these connectors visually for any obvious disconnection, then firmly reseat them. If your umbrella has a separate panel-to-body cable (common on models where the solar panel is a standalone piece rather than fabric-integrated), unplug and firmly reconnect that cable too. A partially seated connector is a frequent cause of intermittent behavior.
Umbrella-Specific Failures to Watch For
Generic solar light troubleshooting gets you most of the way there, but patio umbrellas have a few failure points that are unique to their design.
Built-In Solar Light Modules Coming Loose
Many patio umbrella designs use clip-on or snap-in LED modules that attach to the ribs. These can loosen over time from wind movement and the repeated opening and closing of the canopy. A loose module often causes one side to go dark or flicker. Check each module and press it firmly back onto its mounting point. Some modules have a small locking tab you need to engage. If the module feels secure but still doesn't work, it may have a loose connector at the point where it meets the rib wire, and a gentle reseat of that connector is the fix.
Wiring Stressed by Tilt and Crank Mechanisms
The tilt mechanism is a known stress point for umbrella wiring. The wire harness has to route around or through the tilt joint, and repeated tilting can cause wire fatigue or pull a connection loose at the joint. If your lights stopped working around the same time you started using the tilt feature more, this is the first place to look. In a Reddit r/fixit discussion about a cantilever umbrella, commenters noted that the umbrella’s setup and alignment, especially hub orientation and how the components line up, can affect operation and troubleshooting If your lights stopped working around the same time you started using the tilt feature more. Open the tilt mechanism housing (usually a few screws) and inspect the wire routing for any pinched, frayed, or disconnected sections. Similarly, crank mechanisms on larger umbrellas create movement at the pole that can stress wires routed through the center. If you see a wire with worn insulation near a moving part, wrap it with self-amalgamating (self-fusing) tape as a temporary fix, but plan to replace the wiring run if the damage is significant.
Water Ingress and Corrosion
This is probably the sneakiest failure mode. Water gets in through solar panel seams, around the lens gasket, through screw holes in the battery cover, or around the photocell opening. Once moisture reaches the battery bay or any circuit board, it accelerates corrosion and can cause short circuits in the LED driver or controller. Signs of water ingress include: visible condensation inside the lens, rust or green/white corrosion on any metal contact, erratic behavior that gets worse after rain, or a burning smell from the module. If you suspect water damage, turn the switch OFF before doing anything else to avoid shorts, then open the unit and inspect thoroughly. Clean corroded contacts as described above. If the circuit board shows signs of water damage (white residue, rust, or pitting on solder joints), the module itself likely needs replacement.
Testing and Isolating the Exact Fault
Once you've done the basic checks, this systematic approach will tell you exactly which component is the problem: the solar panel and charging system, the battery, or the LED circuit.
- Test the light sensor and LED circuit: Cover the solar panel completely with your hand or a dark cloth for 30 seconds. If the LEDs light up, the LED circuit and light sensor are both working. Your problem is in the solar panel or charging system, not the lights themselves.
- Test the charging system: Look for any indicator LED on the module (common on many brands). During daylight, a red or blinking indicator LED usually means the panel is actively charging the battery. No indicator at all, even in direct sun, points to a panel fault or disconnected cable. Check your manual for what the indicator colors mean on your specific model.
- Test the battery: If you can access the battery, pull it out and, if possible, test it with a multimeter (set to DC voltage). A 3.7V Li-ion battery should read at least 3.5V after a full day of sun. Below 3V means the battery is depleted or degraded. If the battery reads 0V, it may have entered a deep-discharge protection state and may not accept a normal charge, meaning it needs replacement.
- Isolate one-side failures: If only one side of the umbrella lights up, disconnect and reconnect each LED module's wire connector individually. The dead side will have either a disconnected wire, a failed LED module, or a break in the wire run between that rib and the hub. Reconnecting connectors and checking for pinched wires at the hub joint will usually find it.
- Check under full sun vs. shade: If the light works intermittently, observe whether the failures correlate with cloudy days or partial shade during charging hours. If the light works reliably after clear sunny days but fails after overcast days, the battery capacity is just too low to compensate for reduced charging, and battery replacement will fix it.
Fixes, Repairs, and What's Worth Doing
Here's the honest assessment on what to repair versus replace. If the issue is a dead battery, dirty contacts, a loose connector, or a mispositioned panel, repair is 100% worth it and cheap. If you’re also trying to mount a patio umbrella on a deck, you’ll want a stable attachment method that doesn’t interfere with safe setup or the umbrella’s tilt patio umbrella to deck. If the issue is a failed LED module and you can buy a replacement module for your umbrella model, that's also worth it. If you're dealing with a corroded circuit board inside a sealed module that can't be serviced, replacement of the entire light assembly makes more sense than trying to resurrect it.
| Problem | Fix | Cost/Effort |
|---|---|---|
| Dirty solar panel | Clean with damp cloth | Free, 2 minutes |
| Switch in OFF position | Flip switch to ON | Free, 10 seconds |
| Dead battery (over 12 months old) | Replace with matching 3.7V Li-ion cell | ~$5-15, 10 minutes |
| Corroded battery contacts | Clean with vinegar and isopropyl alcohol | Free, 10 minutes |
| Loose rib connector or module | Reseat firmly | Free, 5 minutes |
| Wiring frayed at tilt joint | Wrap with self-fusing tape or replace wire run | ~$5-20, 30+ minutes |
| Water-damaged circuit board | Replace light module assembly | ~$20-50, 30 minutes |
| Failed LED module (one side) | Replace individual module if available | ~$10-30, 15 minutes |
Preventing the Problem Next Time
Most solar umbrella light failures are entirely preventable with a few habits. Here's what actually makes a difference long-term.
Placement and Daily Habits
Position the umbrella so the solar panel faces south (in the northern hemisphere) and gets full sun from mid-morning through mid-afternoon. If you are mounting an umbrella to a fence, use a stable bracket and weather-resistant hardware so the pole stays secure and the solar panel can still get sunlight how to attach patio umbrella to fence. When you tilt the canopy for shade, be aware that you may be tilting the panel away from the sun at the same time. Some umbrellas let you adjust the panel orientation independently of the canopy, which solves this problem entirely. Turn the switch OFF when you're not using the lights, particularly during multi-day overcast stretches when the battery may not fully recharge. This prevents the battery from deep-discharging, which is one of the fastest ways to kill it permanently.
Weather Sealing
Every few months, especially heading into fall and spring (the wet seasons for most climates), inspect the solar module for any cracked or degraded sealing around the panel seams and battery cover. A thin bead of clear silicone sealant applied around any compromised seam will keep water out and dramatically extend the life of the electronics. Pay particular attention to screw holes in the battery cover; these are a very common water entry point that most people never think to seal.
Seasonal Storage
If you're storing the umbrella for winter, turn the light switch to OFF and, if your model has an accessible battery, consider removing it and storing it indoors. Cold temperatures are hard on lithium-ion batteries, and a battery left at a very low charge state in freezing temperatures degrades significantly faster. Bring the light module indoors if it detaches easily, or at minimum store the folded umbrella in a protective cover that keeps moisture away from the light assembly. When you bring it back out in spring, clean the panel before the first use and give it a full day of sun before expecting the lights to work. This is a good time to add solar lights to a patio umbrella if you're upgrading an older model that didn't come with them. For umbrellas that are permanently installed, the approach for attaching and protecting the light system depends quite a bit on how the umbrella is mounted.
Monthly Maintenance
- Wipe the solar panel surface with a damp cloth to remove dust, pollen, and bird droppings
- Inspect visible wiring at the hub and rib junction points for any wear or loosening
- Check that all LED module clips are seated firmly on their rib mounts
- Look for any new corrosion on contacts and clean immediately before it spreads
- Confirm the umbrella position still gives the panel adequate sun exposure as trees grow and seasonal sun angles shift
FAQ
Why do my patio umbrella solar lights only work for 30 to 60 minutes, even after a full day of sun?
Most of the time, the rechargeable battery is no longer holding enough charge. If the lights dim quickly after sunset and your panel gets clear sun for 6 to 8 hours, swap in a new battery that matches the original voltage and chemistry (often 3.7V Li-ion). If your module is sealed with no battery access, you may need to replace the light assembly.
Can I test if the lights are bad by covering the solar panel or running the umbrella in the daytime?
Yes, but do it correctly. Solar LEDs often have a built-in darkness sensor and a daytime inhibit behavior. Covering the panel for a few minutes or shutting off ambient light around the sensor should trigger the LEDs. If nothing happens after deliberate darkness exposure, the issue is likely the switch setting, a failed battery, corroded contacts, or a bad LED module.
What’s the difference between “stuck in daytime mode” and a dead battery?
Stuck daytime mode usually means the lights do not turn on at night at all, even after prolonged charging. A dead or failing battery often allows brief runtime or very dim output before shutting off. If your lights never come on but the indicator behavior (if any) suggests they are not powering the LEDs, check the physical on/off switch and any mode button first.
Do I need to fully expose the solar panel to direct sun, or will afternoon sun be enough?
Direct, unobstructed sun is what matters, and it usually requires both enough hours and enough angle. Partial shade, even from a nearby tree branch or part of the umbrella tilt, can cut charging dramatically. If your panel is angled away due to canopy tilt, you may need to reposition the umbrella or adjust the panel orientation if the model allows it.
My umbrella lights work on windy days but fail after rain. What should I check first?
Water ingress to the battery bay or circuit board is a common cause. Look for condensation inside the lens, green or white crust on terminals, and rust near screws or gasket areas. After turning the switch off, open the module, clean corroded contacts with vinegar then isopropyl alcohol, and dry fully before reassembly. If you see board damage like pitting or severe residue, replacement is usually safer than repair.
One side of the umbrella lights is out, while the other side still works. What does that usually mean?
A one-sided failure commonly points to a loose or damaged connection specific to that side’s LED modules or rib wiring. Reseat the connector where the rib harness meets the main wiring at the hub or central pole, then press and lock each clip-in LED module firmly onto its mounting point. If the issue started after using tilt more, inspect wiring at the tilt joint for pinched or fatigued cables.
How long should I wait after cleaning the solar panel before testing the lights?
After cleaning and reassembly, let the umbrella charge for a full day of unobstructed sun before judging results, especially if you recently drained the battery while troubleshooting. During testing, confirm the physical switch is on and avoid early nighttime checks where the battery may not yet have recovered.
Is it safe to replace the battery on every patio umbrella solar light?
Not always. Some modules use sealed designs or wired-in batteries that are not meant to be user-replaced. Before opening anything, look for a battery compartment door or access screws in the light module. If there is no access panel, force-free checks and connector reseating are the safer next steps, and the manufacturer manual should guide whether replacement is intended.
Can I use battery charging devices or replace the battery with a different brand to make it work again?
Avoid using chargers not designed for the exact battery type and avoid mixing different voltage cells. The safer rule is to match the original voltage and chemistry printed on the battery label. If you cannot identify the specifications, the best next step is to use the model number from the light module and replace with the recommended battery or assembly.
How do I prevent corrosion from coming back after I clean the contacts?
Reduce moisture exposure and seal likely entry points. After cleaning, allow full dry time, then check the battery cover gasket and screw holes for gaps. For any compromised seams, applying a thin bead of clear silicone sealant around the affected areas can help block water intrusion. Reinspect every few months during wet seasons.
What should I do if the lights smell like burning or look melted?
Turn the switch off immediately and stop using the unit. Burning smell can indicate a short circuit from water ingress or a failing component. Do not keep testing repeatedly, instead open the module to check for melted wiring, heavy board residue, or damaged connectors. In many cases with circuit damage, replacement of the light assembly is the practical fix.
Do cold temperatures in winter permanently damage the battery?
Cold can accelerate battery degradation, especially if the battery is left at a low charge state. For winter storage, set the switch to off. If your model allows battery access, remove the battery and store it indoors. If not, store the folded umbrella in a protective cover that keeps moisture away from the light assembly, then clean the panel and charge for a full day in spring.
Step-by-step how to add string, solar, or battery lights to patio umbrellas safely with no interference or damage.
Step-by-step ways to attach a patio umbrella to a deck post with clamps, mounts, and stability tips plus troubleshooting

Step-by-step guide to install solar lights on a patio umbrella, including mounting, wiring, wind-safe securing, and trou