Restringing a patio umbrella comes down to three things: knowing which mechanism you have (crank, crank-and-tilt, tilt-only, or offset/cantilever), threading the new cord along the exact same path the old one traveled, and getting the spool tension right before you button everything back up. Get those three things right and your umbrella will open, close, and tilt smoothly again. Miss one and you'll end up with a cord that slips, binds, or refuses to spool. This guide walks you through each umbrella type step by step so you can tackle it today. If you need to restore smooth operation, fixing the patio umbrella cord often comes down to correcting the cord path, tension, and where it seats in the spool and pulley fix patio umbrella cord.
How to Restring Patio Umbrella Lift and Tilt Cords

Luca Morrison
29 Apr 2026
Identify your patio umbrella mechanism and parts
Before you touch a single screw, you need to know what you're working with. Most residential patio umbrellas fall into one of four mechanical categories, and the cord path is completely different for each one. Getting this wrong is the number one reason people end up with a cord that doesn't work after they've already put everything back together.
| Mechanism type | How you open it | Cord does what? | Key hardware |
|---|---|---|---|
| Crank-only | Turn a side-mounted handle | Lifts the canopy via a spool | Crank housing, spool, lift cord, pulley at hub |
| Crank & tilt | Crank to open, push button or collar to tilt | Lifts AND routes through a tilt cam or collar | Crank housing, spool, tilt cam/collar, guide blocks |
| Tilt-only (push-button or collar) | Manual push/pull to open, tilt via collar or button | Routes through a tilt linkage inside the pole | Tilt cam, inner sleeve, cord anchor at top |
| Offset / cantilever | Crank on the side arm, sometimes auto-tilt | Lifts through the cantilever arm with pulleys | Cantilever arm pulleys, tilt degree mechanism, crank case brass insert |
To confirm your type, look at the pole where it enters the base. A crank handle sticking out of the pole side is a crank or crank-and-tilt model. If you only see a collar (a rotating ring) or a push button somewhere along the pole, that's a tilt-only mechanism. If the umbrella hangs off a side arm that extends over your table from a separate weighted base, you have an offset or cantilever umbrella. Note the brand and model number printed on the canopy hem, crank housing, or base plate before you buy replacement cord, Treasure Garden Auto Tilt models (UM810x, UM812x), for example, require a specific cord routing sequence that doesn't work with generic instructions.
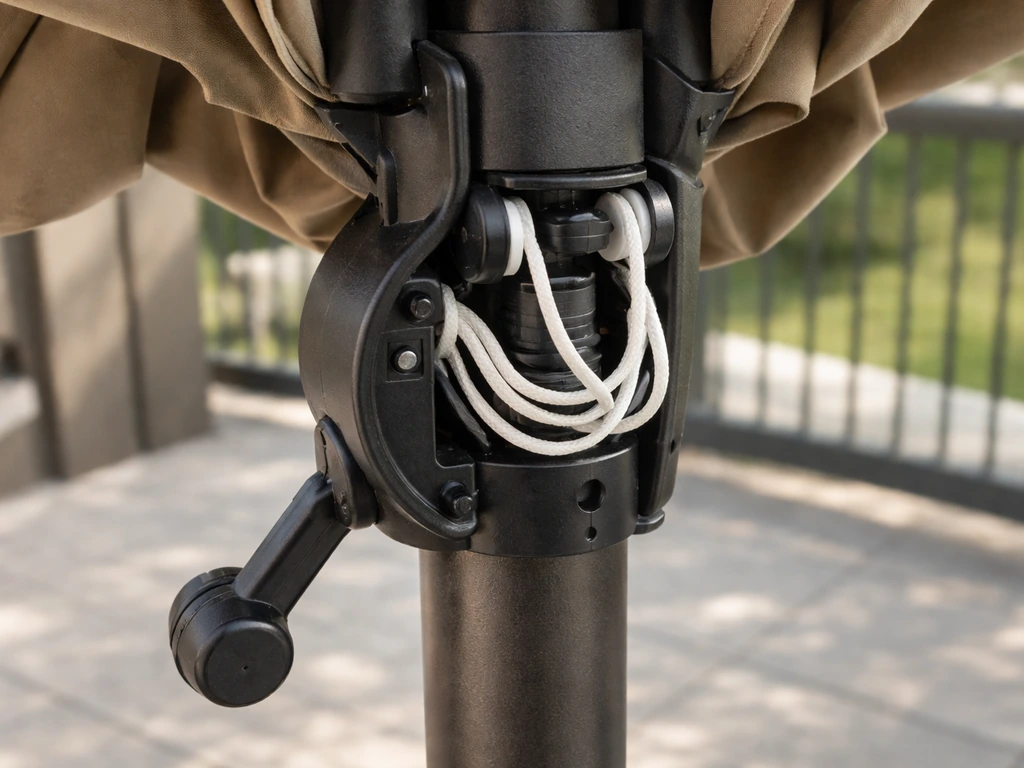
Quick anatomy check: the spool is the cylindrical drum inside the crank housing that the cord winds onto. The pulley is the small grooved wheel, often at the hub (center top of the umbrella), that redirects the cord from vertical to horizontal. Guide blocks are small plastic or metal pieces along the pole that keep the cord in its channel. The tilt cam is the mechanical piece (sometimes brass, sometimes plastic) that lets the canopy angle sideways when the cord reaches a certain position. Knowing these by name will make the steps below much easier to follow.
Tools, replacement cord, and safety prep
You don't need a workshop full of tools for this job. Here's what to gather before you start:
- Replacement lift cord: match the diameter (most residential umbrellas use 3mm or 4mm braided polyester cord; Treasure Garden TWIST series uses 100% Kevlar mesh lift cord, so check your manual before substituting). Buy at least 20% more length than the original so you have working room.
- Needle-nose pliers: for pulling cord through tight channels and removing cotter pins
- Flathead and Phillips screwdrivers: for the crank housing screws
- A cotter pin (if your model uses one to secure the spool — very common on Auto Tilt models)
- Scissors or a cord cutter and a lighter: to cut the cord cleanly and melt the end so it doesn't fray
- Masking tape: to label the cord end and temporarily hold it in position while routing
- A marker or tape measure: to mark spool position for tension calibration
- A helper (optional but genuinely useful for offset umbrellas)
Safety is simple but worth saying: lay the umbrella flat on a clean surface or a blanket before you open the crank housing. Working on an umbrella that's still mounted in the base means hardware can fall into the base tube and become impossible to retrieve. Close the canopy completely before disassembly so the ribs are under no tension. If your replacement cord is a different material than the original, check that it's rated for the load, a sagging or heavy canopy puts real force on the cord, especially on larger 11-foot or 13-foot canopies.
Restring a crank and tilt patio umbrella
This is the most common setup in mid-range and premium patio umbrellas, and it's the most involved to restring because the cord serves double duty: it lifts the canopy AND engages the tilt mechanism. Take photos of the cord path before you remove anything, seriously, do this even if the cord looks simple.
- Lay the umbrella flat with the crank housing facing up. Remove the crank handle if it detaches (usually a screw or clip on the handle base).
- Unscrew the crank housing cover — typically two to four Phillips screws. Lift the cover off carefully and set the screws somewhere they won't roll away.
- Look at the spool. Note how many wraps of cord remain and which direction the cord winds (clockwise or counterclockwise when facing the spool). Take a photo.
- Locate and remove the cotter pin securing the spool to the axle using needle-nose pliers. Straighten the pin, pull it out, and set it aside. On Auto Tilt models (like the Treasure Garden UM810x), this is explicitly required before the spool can be freed.
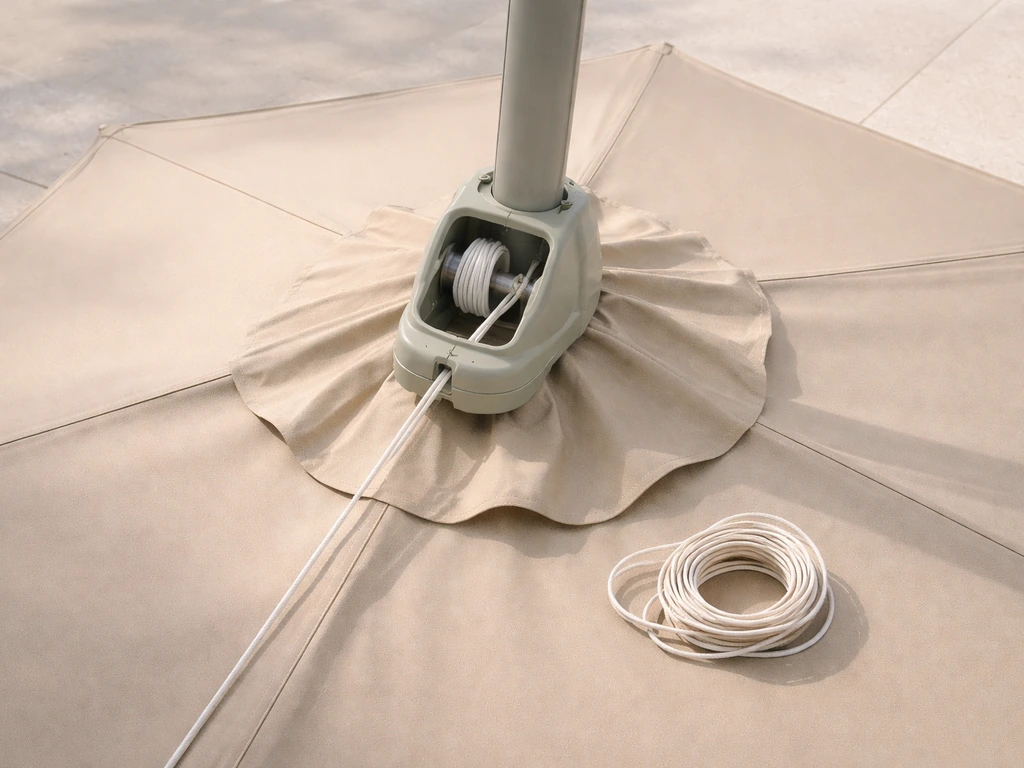
- Lift the spool out of the housing. Thread the old cord off and note every point where the cord passed through a guide block, around a pulley, or through the pole interior. This is your routing map.
- If the cord is not visible outside the frame at any point (fully internal break), check whether re-routing is actually possible before proceeding. On some Auto Tilt models, if the cord has snapped completely inside the pole with no tail visible, the manufacturer notes that cord replacement cannot be completed without factory service.
- Cut your new cord, melt both ends lightly with a lighter, and thread one end through the tilt cam or collar first — this is the top portion of the route. Work the cord down through the pole, through each guide block, using a stiff wire or a bent coat hanger as a threading needle if the channel is tight.
- Route the cord out through the crank housing port and tie it to the spool anchor point (usually a small hole or post on the spool drum). Wrap the cord onto the spool in the same direction and number of turns as the original — your photo from Step 3 is your guide here.
- Replace the spool on the axle, reinsert and bend the cotter pin to secure it, and reassemble the crank housing cover.
- Test the crank before closing everything up: turn it slowly and watch that the cord spools evenly and that the tilt cam engages when the canopy reaches full open position.
Restring a tilt-only patio umbrella
Tilt-only umbrellas open by lifting the canopy manually (you push the runner up the pole by hand) and tilt using either a push-button pin or a rotating collar on the pole. If you need to open the patio umbrella using the string on these models, follow the same manual runner lift and then tilt using the button or collar. The cord on these models is shorter and simpler than on crank models, but it's often buried inside the pole between the collar and the hub, which makes it awkward to access.
- Collapse the canopy fully and remove the umbrella from the base. Lay it flat.
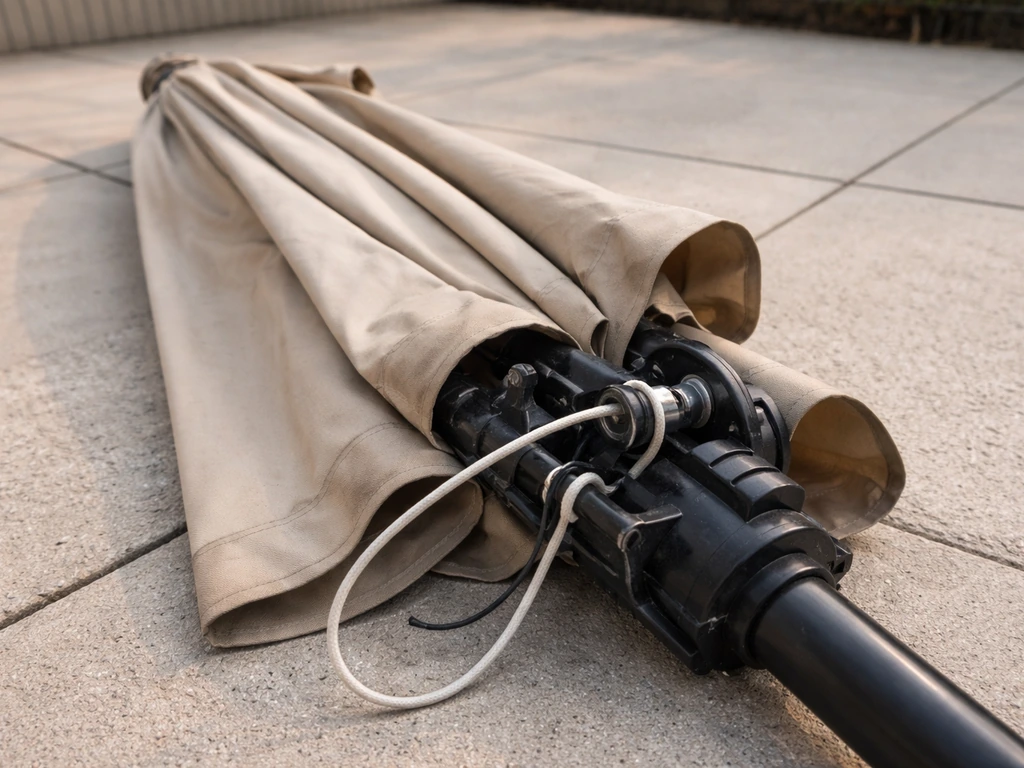
- Locate the tilt collar or push-button housing on the pole. Most collar-tilt models have a small screw or pin holding the collar in place — remove it and slide the collar off.
- Inside or just below the collar, you'll find where the cord anchors to the tilt linkage. This linkage is usually a small cam or slotted sleeve that rotates when you twist or push the collar. Note how the cord is threaded through it before removing anything.
- Untie or cut the old cord at the anchor point. Feed the new cord through the inner sleeve of the pole from the top (hub end) down to the collar housing, using tape on the cord tip and a stiff wire to guide it if needed.
- Thread the cord through the tilt cam slot or anchor hole and tie a secure overhand knot large enough that it won't pull back through the slot. Trim the tail and melt the end.
- Slide the collar back onto the pole, align the screw hole, and reinstall the securing pin or screw.
- Test the tilt action by manually pushing the canopy to full open, then engaging the collar or push button. The canopy should lock in tilt position without the cord going slack.
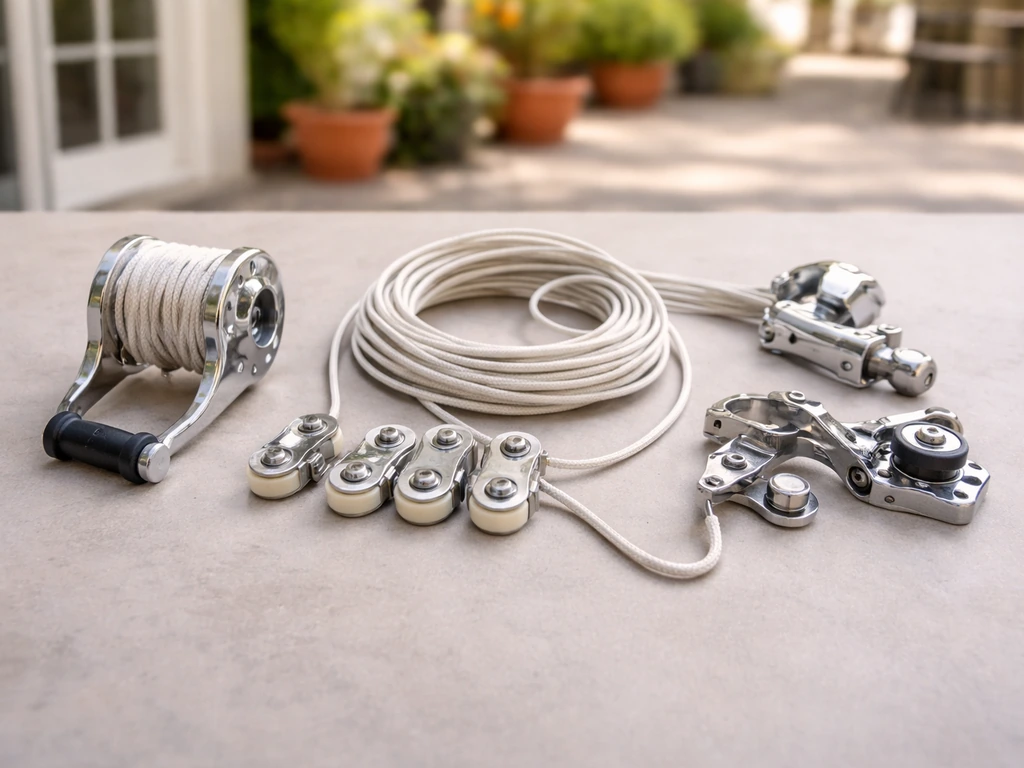
Restring an offset (cantilever) patio umbrella
Offset umbrellas are a different animal. The cord runs through a horizontal or angled cantilever arm before it ever reaches the canopy, and most cantilever models also have a blank" rel="noopener noreferrer">tilt degree mechanism, a hardware component that lets you angle the canopy to different positions. Treasure Garden's AG19 cantilever re-cording procedure is a good reference model for the typical sequence.
- Lower the canopy completely and tilt it to its neutral (flat) position. If the arm has a locking pin for the tilt degree mechanism, disengage it so the arm can move freely.
- Open the crank housing on the side arm (usually at the base of the arm where it meets the support pole). Remove the cover screws, note the spool direction, and photograph the cord path.
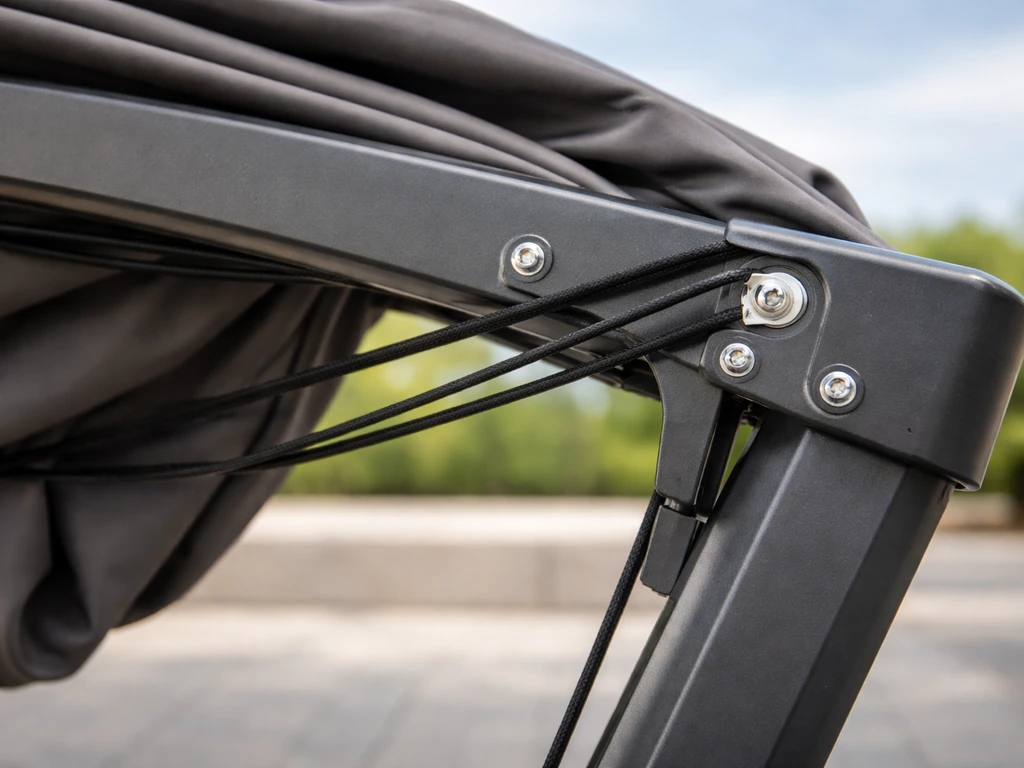
- The cord on most cantilever models exits the crank housing, travels along the interior channel of the cantilever arm, passes through a pulley or a series of pulleys at the arm joints, and finally connects to the hub at the canopy.
- Remove the brass insert or anchor piece from the crank housing (on AG19-style models this is a small brass fitting that must be pulled out before the cord can be fully freed). Set it aside without losing it.
- Cut the old cord. Tape a new cord end to the old cord tail before fully removing it, so you can use the old cord to pull the new cord through the arm channel. This is the easiest routing method for any umbrella with a long enclosed cord path.
- If the old cord is already gone, use a flexible fish tape or a stiff wire to thread the new cord from the crank housing end through the arm, out through each pulley point, and up to the canopy hub.
- Guide the cord through the tilt degree mechanism area carefully — the cord must sit on the correct side of this mechanism, or the tilt function won't engage properly. When you reach the tilt mechanism, stop and confirm the cord is routed as shown in your reference photo before continuing.
- Tie off the cord at the hub, wrap the correct number of turns onto the spool, reinsert the brass fitting into the crank housing, and reinstall the cover.
- Test by cranking slowly. The cord should feed through the arm pulleys cleanly, and the canopy should rise evenly across all ribs.
Troubleshooting common restringing problems
Cord won't spool, it just bunches up
This almost always means the cord is anchored incorrectly at the spool drum, or you wound it the wrong direction. If your patio umbrella cord stuck issue is happening right after reassembly, it usually traces back to the spool anchor and wind direction problems described here. Open the housing, check that the cord end is actually tied or knotted into the spool anchor hole (not just looped around), and confirm the wind direction matches your original photo. If you didn't take a photo, wind clockwise first, test, and reverse if it bunches.
Canopy lifts unevenly, one side rises before the other
Uneven lift usually means the cord is bypassing the hub pulley on one side, or the cord skipped off the pulley groove entirely. After restringing, always confirm the cord is seated in the pulley wheel groove and running over the wheel rather than beside it. This is a key post-restringing check: watch the cord at the hub pulley during a slow test crank and confirm it's tracking in the groove.
Tilt won't engage after restringing
On crank-and-tilt models, the tilt engages when the cord reaches a specific tension point at full open. If the tilt cam isn't clicking into position, the cord is either too long (not enough tension at full open) or routed on the wrong side of the cam. Re-open the housing, check that the cord passes through the cam slot rather than around it, and try adjusting spool tension by adding one extra half-wrap of cord onto the drum.
Cord slips off the pulley
A cord that repeatedly jumps off the hub pulley usually means the pulley itself is worn, cracked, or the pulley axle pin is loose. Hub single pulleys are a standard replacement part available from most patio umbrella parts retailers, they're inexpensive and worth replacing rather than fighting. Seat the pulley firmly on its pin before threading the cord.
Cord binds mid-way, crank gets stiff before canopy is fully open
Binding mid-cycle usually means the cord is pinched at a guide block or caught on a burr inside the pole. Run your finger along the pole exterior while someone else cranks slowly, you'll often feel the bind point. If a guide block is cracked or shifted out of alignment, it can act like a clamp on the cord. Remove the block, smooth any rough edges with fine sandpaper, and reseat it before rethreading.
Tension is wrong, too loose or too tight at rest
Correct spool tension means the cord is snug (not floppy) when the canopy is fully closed, and the crank doesn't feel like it's fighting resistance when you start turning. To calibrate, open the crank housing and count the number of wraps on the spool. Remove or add one wrap at a time and retest until the feel is right at both ends of travel. Some brands use a tape mark or reference line on the spool as a factory calibration point, if you see a mark, that's your target.
Test, adjust tension, and keep it working longer
Once everything is reassembled, run the umbrella through three complete open-and-close cycles slowly before you trust it. Watch the cord at every visible point during each cycle: the spool wrap, the guide blocks, and the hub pulley. After the third cycle, confirm the cord has seated fully into all grooves and isn't riding up on any hardware edge. On offset umbrellas, also confirm the tilt degree mechanism clicks positively into each angle position and doesn't drift under light hand pressure.
Tension check: with the canopy fully closed, the cord should have minimal slack, you shouldn't be able to pull more than about half an inch of cord free from the housing port. If there's more slack than that, open the housing and add one more wrap to the spool. If the crank feels stiff from the very first turn, remove one wrap.
To prevent needing to do this again in six months, two habits make a real difference. First, always close your umbrella completely before leaving it unattended or in wind, an open canopy under wind load puts constant stress on the cord and spool, and repeated strain is the top cause of cord fatigue. Second, at the start and end of each season, open the crank housing cover (just two screws on most models), look at the cord where it meets the spool, and check for fraying, kinking, or glazing (a shiny, stiff section that has started to harden). Catching a weakening cord early is a five-minute cord replacement job; letting it snap means full disassembly mid-season.
One more practical note: if your umbrella opens fine but the string action feels stiff or sticky even after restringing, a small amount of silicone spray (not WD-40, which attracts dust) on the cord at the guide blocks will smooth things out considerably. Apply it with the canopy open so the cord is extended, wipe off the excess, and cycle it a few times to work it in.
If you ran into trouble before restringing, a cord that was stuck, wouldn't pull, or the umbrella wouldn't open at all, those symptoms point to related issues like a jammed cord channel or a seized pulley that are worth sorting out separately. Getting familiar with how the cord behaves when things go wrong will help you catch future problems before they leave you stranded with a canopy that won't budge. If you specifically need how to fix a patio umbrella cord that won't work, start by inspecting the cord path and the pulley seating before adjusting tension.
FAQ
What should I do if I did not take photos of the original cord path before restringing?
Start by fully opening the crank housing and tracing the cable’s likely route from the spool to the hub pulley, through the guide blocks, then to the tilt cam (if present). Use the hub pulley groove as the first “truth point,” because the cord must ride in the wheel groove, not beside it. Then do a slow hand-crank test and adjust routing until the cord tracks consistently across the full open and close travel.
How can I tell whether my problem is spool tension versus a wrong cord direction?
If the cord bunches or winds unevenly immediately after reassembly, wind direction is usually wrong. If the cord tracks correctly but the crank feels too loose when closed (too much slack) or too stiff from the first turn (too tight), tension is the issue. Adjust in small steps by one half-wrap, retesting after each change.
Is it okay to replace the cord with a different thickness or material than the original?
Only if the replacement is specifically rated for patio umbrella load and matches the original’s behavior, slack, and stiffness. A stiffer or heavier cord can require different tension to reach the same open position, and a softer cord can create extra slack at closed, which leads to slipping or inconsistent tilt engagement.
My cord won’t spool evenly onto the drum. What are the most common causes?
Uneven spooling is usually from incorrect guide block seating, cord running beside the hub pulley groove, or the cord end not being anchored into the spool’s anchor point (for example, tied/knotted into the anchor hole rather than just looped). Verify all cord segments are aligned with their channels before you close the housing.
What if the umbrella opens but tilting never engages on a crank-and-tilt model?
Re-check two items: the cord routing relative to the tilt cam (it must pass through the cam slot, not around it), and whether you achieved the correct tension at full open. If the cam does not click into position, try adjusting spool tension by one extra half-wrap, then test again through a full open to confirm tilt engagement.
Can I restring just the cord without removing the pulley or spool?
Often yes, but if the cord repeatedly jumps off the hub pulley, the pulley or axle pin may be worn or loose. In that case, replacing the hub single pulley is typically more reliable than repeatedly trying to “force” correct tracking, because a cracked pulley groove will keep catching the cord.
What safety steps matter if the umbrella is still mounted in its base?
Avoid it. Hardware can drop into the base tube during housing removal and become nearly impossible to retrieve. Also keep the canopy fully closed while disassembling so the ribs are not under tension, which reduces the risk of snagging and makes cord routing adjustments easier.
How do I check for pinched cord areas during the first test cycles?
During slow open-and-close cycles, watch both the guide blocks and the cord at the hub. If you feel binding, stop and inspect for a pinched spot, a cracked guide block, or a burr inside the pole. A quick finger run along the pole exterior during a slow crank often helps you locate the bind point.
How tight should the crank feel at the start, and how do I measure correct slack?
With the canopy fully closed, the cord should have minimal slack, typically you should not be able to pull more than about half an inch free from the housing port. If the crank is stiff from the very first turn, remove one wrap from the spool and retest.
What should I do if the cord feels sticky even after restringing?
If the mechanism binds despite correct routing and tension, check for rough guide blocks, misalignment, or cord glazing. A small amount of silicone spray applied to the cord at the guide blocks (with the canopy open so the cord is extended) can reduce stickiness, but avoid heavy overspray and wipe off excess to prevent dust buildup.
How often should I inspect the cord after restringing to prevent another failure?
At least at the start and end of each season, open the crank housing cover and look for fraying, kinking, or glazing (shiny, stiff hardening). Early cord weakening is usually a quick replacement, while a snapped cord can require mid-season disassembly.
What changes for offset or cantilever umbrellas compared to typical crank setups?
Offset models route the cord through a horizontal or angled cantilever arm before reaching the canopy, and many also include a tilt degree mechanism. If the issue appears right after reassembly, focus first on anchoring at the spool and the wind direction, then confirm the cord path through the cantilever arm matches the original routing sequence for your specific brand and model.
Next Articles
Patio Umbrella Cord Stuck: Fix It Safely Today
Safe, step-by-step fixes for a patio umbrella cord stuck open, jammed mid-way, or won’t retract, plus replacement and pr

How to Fix a Patio Umbrella That Won't Open or Close
Step-by-step fixes for patio umbrellas that won’t open or close, with checks for jams, cords, latches, and lubricating t
How Does a Patio Umbrella Work? Components, Use, and Fixes
Learn how patio umbrellas work: components, open close tilt, stability, and step by step troubleshooting common mechanic