
The Diensweek 12 x 10 patio awning retractable manual model is a wall-mounted shade structure with a 3380 x 2950 mm fabric panel, T5-grade aluminum arms and roller tube, a hand-crank gearbox, and an adjustable pitch range of 5 to 45 degrees. You install it yourself with basic hand tools in a few hours, as long as you mount it into solid masonry or reinforced concrete and have at least three adults on site for the lift. This guide walks you through every stage: parts identification, mounting decisions, assembly, correct crank operation, and what to do when the awning refuses to retract.
Diensweek 12 x10 Patio Awning Retractable Manual DIY Guide

Luca Morrison
10 Aug 2026
Who this guide is for
If you just received a Diensweek 12 x 10 manual retractable awning and the instructions feel thin, or if you already have one installed and something has gone wrong with the crank or retraction, this guide is written for you. It also applies closely to other 10 ft manual retractable awnings, including free-standing and garden canopy styles, because the core mechanics (roller tube, scissor arms, gearbox, front bar) are nearly identical across brands at this size. Where specific numbers appear, they come from the Diensweek EM3430 installation documentation and comparable OEM service manuals.
Safety first, before you touch a single bolt
A 12 x 10 awning is heavy, and the roller tube and arm springs are under significant tension even when the awning is fully retracted. Respect that tension before you start any work.
PPE and personal safety
- Wear safety glasses during drilling and bracket installation — concrete dust and metal chips travel fast
- Use work gloves when handling the roller tube, arms, and front bar; edges are sharp
- Wear non-slip, closed-toe shoes on any elevated surface
- Do not work alone: the OEM documentation recommends a minimum of three healthy adults for moving and installing the assembled awning
- Keep bystanders and children away from the work area during assembly and any spring or gearbox work
Ladder and fall hazards
Most wall brackets mount at or above head height. Use a rated step ladder or extension ladder with a second person stabilizing the base at all times. OSHA walking-working surface standards (29 CFR 1910 Subpart D) require three points of contact on a ladder, both feet and one hand, which means you cannot safely lift a bracket and hold the ladder simultaneously. Stage each part on the ladder shelf or have a helper hand items up to you.
Roof and structural warnings
Diensweek's OEM installation documentation states explicitly: mount only to reinforced concrete or solid brickwork unless a professional evaluates the wall construction first. Vinyl siding over studs, exterior insulation systems (EIFS), hollow-core block, and double-brick cavity walls are not suitable without engineering review. The awning generates both downward (gravity) and outward (wind uplift) loads on the brackets, the anchors must handle both. For specifying concrete or masonry anchors (embedment depths, recommended installation torques and characteristic/design resistances for wedge, expansion and adhesive anchors), consult Hilti, Anchor Systems / Anchor Fastening Technology Manual (technical & load tables) Hilti — Anchor Systems / Anchor Fastening Technology Manual (technical & load tables). If you are not certain about your wall construction, stop and consult a structural engineer or licensed contractor before drilling.
Spring and roller tube tension warning
The internal torsion springs inside the roller tube store a large amount of mechanical energy. Professional service manuals (including those for comparable Girard/Lippert awnings) explicitly warn that roller tubes and arm springs must be serviced only by experienced technicians. Do not attempt to disassemble the roller tube end caps or adjust spring tension yourself. If spring tension is the suspected problem, that job goes to a pro.
Parts checklist and tools you will need
What should be in the box
The EM3430 packing list includes the following numbered components. Check every item off before you begin; a missing bracket or hardware bag will stop the installation cold.
| Component | Qty | Notes |
|---|---|---|
| Roller tube with fabric (pre-rolled) | 1 | 3380 mm wide; handle carefully — do not drop |
| Lateral (scissor) arms | 2 | Left and right; check elbow pivot moves freely |
| Front bar (lead rail) | 1 | Attaches to fabric hem and arm tips |
| Wall mounting brackets | 2 | Verify left/right orientation |
| Roller support brackets | 2 | Support the ends of the roller tube |
| Hand crank (gear loop) | 1 | Engages gearbox at one end of roller tube |
| End caps | 2 | Cover roller tube ends; snap or screw fit |
| Hardware bag (bolts, lag screws, anchors, washers) | 1 | Count all fasteners before starting |
| Hexagon wrench / Allen key set | 1 | For arm set screws and pitch adjustment |
| Installation manual | 1 | Keep accessible throughout assembly |
Tools you need to supply
- Hammer drill with masonry bits (sized to match the supplied anchor diameter)
- Rotary drill / screwdriver
- Level (48-inch preferred for bracket alignment)
- Tape measure
- Pencil or chalk line
- Torque wrench or calibrated impact driver (do not overtorque masonry anchors)
- Adjustable wrench and socket set (M8/M10 common on this model)
- Step ladder or extension ladder rated for your combined weight plus tools
- Safety glasses and work gloves
- Two or three additional adults for the lifting steps
Getting to know the parts, a visual reference guide
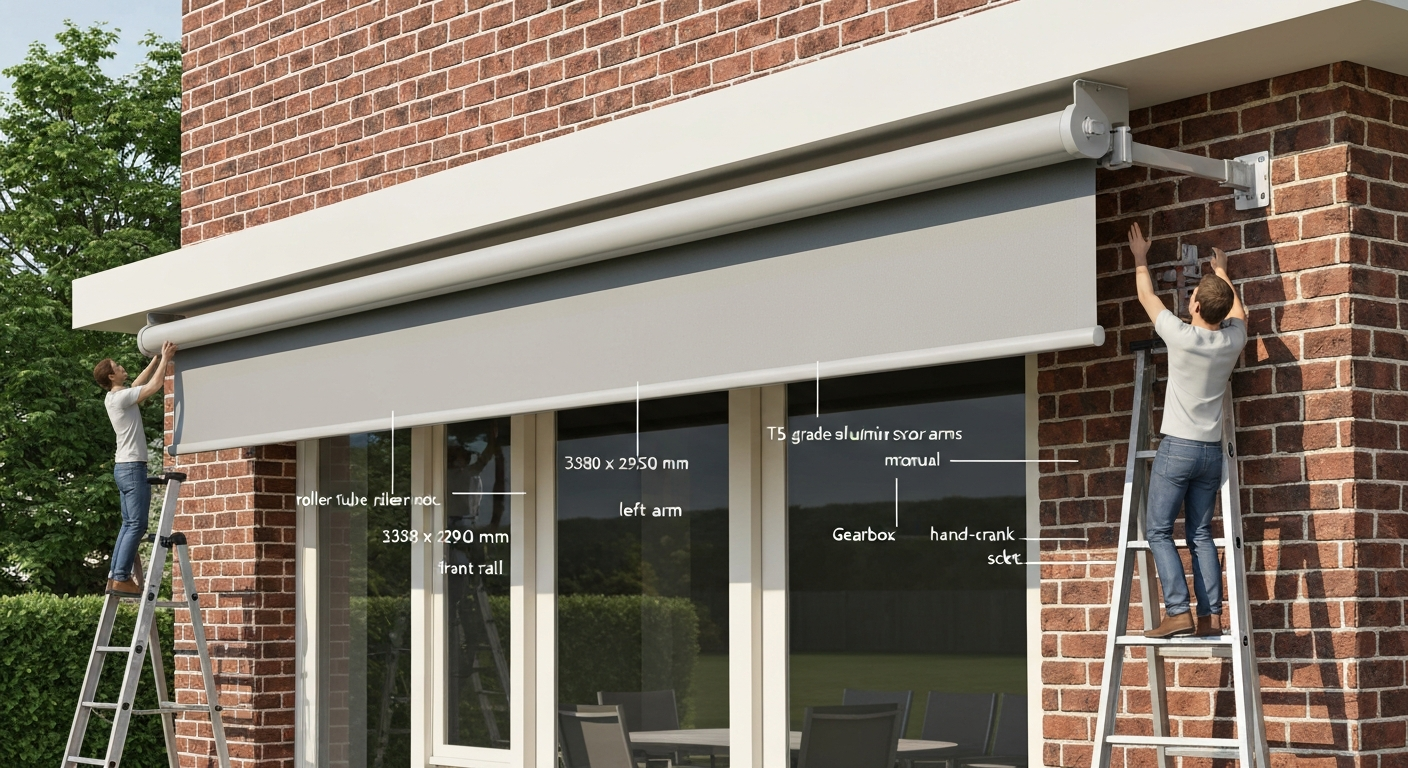
Before you touch anything, spend five minutes identifying the major parts on your actual awning. The EM3430 documentation includes a numbered exploded-view callout, and that illustration is your single most useful reference for ordering replacements or describing a problem to a supplier. The Diensweek EM3430 PDF includes numbered exploded-view part callouts (roller, front bar, brackets, roller support, hand crank/gear loop) and a packing list useful for parts identification and spare‑part sourcing EM3430 Instructions Manual (Diensweek) — Packing list & parts illustration (exploded callout). If your copy arrived without a printed manual, search for the Diensweek EM3430 PDF (it is hosted on the Wayfair assets server) and print the parts-callout page.
Here is what to photograph if you ever need to order a replacement part or ask a repair question. Good reference photos will save you hours of back-and-forth with suppliers.
- The gearbox end of the roller tube: photograph the gearbox housing, the crank socket opening, and any visible model/serial sticker on the tube
- Both arm elbow pivots: open the awning to about 45 degrees and photograph the elbow joint from the side
- The front bar connection points where the arm tips clip or bolt to the front bar
- The wall bracket profile (side view) showing the slot or pin that holds the roller support bracket
- Any corrosion, cracking, or deformation you can see — close-up, in good daylight
- The full fabric panel when extended, so a replacement supplier can confirm the color and weave match
Recommended image for this section: a labeled overhead photo showing the roller tube, left and right arms, front bar, gearbox end, and wall brackets, with callout arrows matching the EM3430 parts numbers. If you are publishing a repair log or asking for help online, this is the photo to take first.
Wall-mount vs. free-standing: picking the right setup
The Diensweek 12 x 10 is designed as a wall-mount awning, and that is the setup covered in the EM3430 manual. However, many homeowners look at free-standing retractable awning frames (on posts) when they lack a suitable mounting wall or want the awning away from the house. If you lack a suitable mounting wall, consider an advaning 10 manual free standing retractable patio awning as a ready-made post-mounted alternative. Here is how the two approaches compare.
| Factor | Wall-Mount | Free-Standing Frame |
|---|---|---|
| Structural requirement | Solid masonry or reinforced concrete wall required | Footings or ballast bases required; post sizing matters |
| Typical cost | Lower — uses existing structure | Higher — posts, footings, or weighted bases add cost |
| Wind stability | Good if properly anchored into masonry | Depends entirely on footing or ballast design |
| Portability | Permanent once installed | Some freestanding frames can be moved seasonally |
| Best for | Houses with solid brick or concrete rear wall | Pergolas, decks away from walls, rental properties |
| DIY difficulty | Moderate (drilling into masonry) | Moderate-to-hard (footing work or heavy ballast) |
| Diensweek 12x10 compatibility | Native design — use OEM brackets as supplied | Requires third-party freestanding adapter frame |
My recommendation: if you have a solid brick or poured-concrete wall within reach of where you want shade, wall-mount every time. The brackets are already in the box, the load path is straightforward, and you will finish faster. If your only wall is vinyl-clad over wood studs, get a structural engineer to assess it or switch to a free-standing frame, do not guess on this one.
Measuring for the wall-mount position
The fabric panel is 3380 mm (roughly 133 inches) wide. Mount the two wall brackets so the roller tube sits level, centered on your desired shade zone, with at least 50 mm (2 inches) of clearance above any door or window header. Measure bracket center-to-center against the roller tube end-to-end dimension shown in your EM3430 diagram. Mark both bracket locations with a pencil, snap a horizontal chalk line between them, and verify with a level before drilling a single hole.
Pre-assembly inspection and site prep
Do not rush into drilling. Ten minutes of prep work here prevents two hours of remediation later.
- Unbox everything and lay it out on a clean, flat surface. Compare every item against the packing list in the EM3430 manual. If anything is missing or visibly damaged, contact Diensweek before proceeding — the warranty period is 1 year from purchase.
- Inspect the roller tube for straightness. Set it on a flat surface and sight down its length. A bow of more than about 5 mm will cause uneven fabric winding and future retraction problems.
- Check both arm elbow pivots. Open each arm by hand (no tools) and confirm the elbow joint folds and extends smoothly with no grinding or lateral play.
- Tap the wall surface at both proposed bracket locations with a knuckle. Solid brick and poured concrete produce a dull thud. Hollow sounds, soft drywall, or EIFS board mean stop and reassess the mounting location.
- Confirm wall stud or anchor locations if working with a wood-framed wall (not recommended without engineering review). Mark stud centers clearly.
- Stage your ladder, tools, and hardware at the base of the wall. Have your three helpers ready before you start the lift sequence.
Full assembly and initial setup, step by step
Follow these steps in order. The sequence matters because some parts become inaccessible once others are installed.
Step 1: Install the wall mounting brackets
- Hold the first wall bracket at your marked location and use a pencil to transfer the anchor hole positions onto the wall.
- Drill pilot holes to the depth specified in the EM3430 hardware table (or to the embedment depth stamped on your anchor type). Clear dust from each hole with compressed air or a squeeze bulb before inserting anchors.
- Insert the supplied masonry anchors or wedge anchors. For concrete, expansion anchors (such as Simpson Strong-Tie wedge anchors or equivalent) require the hole diameter to match the anchor body exactly — check this. Do not use an impact driver at final tightening if the anchor manufacturer specifies a torque wrench.
- Bolt the bracket to the wall and torque to the value in the hardware table. Repeat for the second bracket.
- Check both brackets with a level. They must be at exactly the same height. A 5 mm difference will cause the roller tube to sit crooked and the fabric to track unevenly.
Step 2: Attach the roller support brackets
- Slide or clip the roller support brackets onto the wall mounting brackets per the EM3430 diagram. These are the saddles that actually cradle the roller tube ends.
- Leave the locking bolts finger-tight for now — you will fine-tune position once the roller tube is seated.
Step 3: Mount the roller tube
- This is the heavy lift. The roller tube with fabric rolls pre-wound on it is the bulkiest single piece. You need at least two people on ladders (one at each end) and one person on the ground managing the center sag.
- Lift the roller tube horizontally and lower each end into its roller support bracket saddle simultaneously. Do not let one end drop — even a short drop can bend the tube or knock it off the saddle on the other side.
- Once seated, tighten the roller support bracket locking bolts to secure the tube in place.
- Confirm the tube is level end to end.
Step 4: Attach the lateral arms
- Each arm has a fixed end (attaches to the wall bracket or arm-mount bracket) and a free end (connects to the front bar). Identify left and right arms — they are mirror images.
- Connect the fixed end of each arm to its bracket mount point. Follow the EM3430 diagram for pin orientation.
- Fold each arm in the retracted position for now. You will extend them during the first crank operation.
Step 5: Install the front bar (lead rail)
- The front bar attaches to the free hem of the fabric and to the tip of each arm. On most manual 10 ft awnings, the fabric hem slides into a channel on the front bar.
- Confirm the fabric is seated fully and evenly in the front bar channel before securing the end screws.
- Connect the arm tips to the front bar brackets. These usually use a pin-and-clip or bolt-and-washer arrangement per the EM3430 callout.
Step 6: Install the hand crank gearbox and end caps
- Insert the hand crank into the gearbox socket at the designated end of the roller tube (the EM3430 diagram shows which end — it is typically the right side when facing the awning from outside).
- Test that the crank seats fully and does not wobble.
- Snap or screw the end caps onto both ends of the roller tube to seal the tube interior against insects and moisture.
- Do a dry-run crank of two full rotations in the extend direction before applying any load — confirm the gearbox engages smoothly.
Step 7: Set the pitch angle
- The adjustable pitch range on the EM3430 is 5 to 45 degrees. Diensweek recommends a minimum of 14 degrees when rain is expected to ensure runoff.
- Find the arm pitch adjustment bolts (usually on the fixed-end arm mount or a separate tilt bracket). Loosen them, set the angle with a level or angle finder, and retighten.
- Set the same angle on both arms — uneven pitch causes the front bar to hang crooked and will eventually distort the fabric.
How to operate the awning manually, the right way
Manual retractable awnings get damaged most often by incorrect operation, not by weather. The crank mechanism is simple but not forceful, it is not a come-along winch. Here is the correct procedure.
Extending the awning
- Insert the hand crank fully into the gearbox socket. It should click or seat without forcing.
- Turn the crank slowly in the extend direction (consult your EM3430 diagram — typically counterclockwise when facing the gearbox end). Use a smooth, steady pace.
- Stop every meter or so and visually check that both arms are extending evenly. If one arm lags behind the other, stop and check for a binding pivot or misaligned fabric.
- Extend to your desired position and stop. Do not over-extend beyond the arm's full open position — you will hear a hard stop or feel sharp resistance.
- Remove and store the crank in a dry location. Do not leave it in the gearbox socket where it can become a trip hazard or be knocked loose.
Retracting the awning
- Confirm no one is standing under the awning and that no objects are on top of the fabric.
- Insert the crank into the gearbox socket.
- Turn in the retract direction (typically clockwise when facing the gearbox end). Again: slow and steady. On a 12 x 10 span, the fabric and arm weight is considerable — do not crank fast.
- For larger spans, a second person stationed at the center of the front bar, applying gentle inward guidance, helps the fabric wind evenly and prevents the center from sagging and snagging.
- Once the awning is fully retracted and the front bar is resting in its closed position, give the crank two additional slow turns to confirm the roller tube has taken up all slack.
- Remove and store the crank.
- Never leave the awning extended when you leave home for more than a few hours, or when rain or wind above Beaufort 4 (approximately 20 to 28 km/h) is forecast. The EM3430 technical data lists a wind resistance of Beaufort 4, meaning this is the design limit — not a safe operating speed.
Pitch adjustment reminder
If you change the pitch angle mid-season, always retract the awning first. Adjusting the arm angle under load (with fabric extended) puts uneven stress on the elbow pivots and can bend or crack the arm housing over time.
Troubleshooting when the awning won't retract
A manual awning that refuses to retract almost always has one of five root causes: a binding front bar or arm, a jammed or stripped gearbox, a fabric jam on the roller tube, seized pivot hardware, or (less commonly) a broken internal spring. For step-by-step help specific to a manual patio awning that won't retract, see the manual patio awning won't retract guide for targeted troubleshooting. Work through these checks in order from easiest to hardest.
Step 1: Confirm the crank is fully seated (2 minutes, very easy)
Remove the crank, reinsert it firmly, and try again. A partially seated crank will slip in the gearbox socket and feel like mechanical resistance. If it now turns freely, you are done.
Step 2: Check for visible obstructions on the fabric or arms (5 minutes, easy)
Walk around the awning and look for anything caught in the roller: a twig, a bird nest fragment, a pooled water pocket in the fabric (this happens after rain if the pitch was set below 14 degrees). Clear any debris by hand. If the fabric has a water pocket, tilt the front bar slightly to drain it before retracting.
Step 3: Check front bar and arm alignment (10 minutes, easy)
A front bar that has shifted sideways will jam the arm tips and bind the retraction. Stand back and look at the front bar from the ground: it should be parallel to the wall. If it is canted at an angle, one arm tip may have come loose from its front bar mount. Inspect both connection points and reseat any loose pins or bolts. Comparable OEM service procedures (Girard/Lippert manuals) list front bar misalignment as one of the most common retraction failure causes on 10 ft to 16 ft awnings.
Step 4: Inspect the arm elbow pivots for binding (10 minutes, easy)
With the awning at partial extension, try pushing each arm elbow joint inward by hand (no crank force). If one elbow is stiff or will not compress, it is binding. The fix in most cases is cleaning out grit with a brush and applying a silicone spray lubricant to the pivot bolt. Do not use WD-40 as a long-term lubricant, it displaces moisture initially but leaves residue that attracts more grit.
Step 5: Check the gearbox for stripped teeth or a slipping clutch (15 minutes, moderate)
If the crank turns but nothing moves, or the crank turns in the retract direction with almost no resistance, the gearbox is likely stripped or its internal clutch has failed. Remove the end cap on the gearbox side and visually inspect the gear interface where the crank engages. Stripped plastic or aluminum gears will show obvious chewing. A damaged gearbox on this model is a replacement-part job, not a repair job, the internal gear geometry is precision-matched at the factory.
Step 6: Check for fabric jamming on the roller tube (15 minutes, moderate)
If the fabric has wound unevenly (one side tighter than the other), it can bunch and catch on the arm bracket or roller support bracket. Fully extend the awning first to relieve the jam, then retract slowly while watching the fabric at both ends of the roller. If one side winds faster, the front bar hem may be pulling out of its channel on one side. Reseat the hem and re-tension evenly.
Step 7: Suspect a broken or low-tension internal spring, call a pro (professional)
If all of the above checks pass and the awning still will not retract, or if it retracts but the fabric remains loose and sags heavily, the torsion spring inside the roller tube has likely lost tension or broken. This is not a DIY repair. As noted in professional awning service manuals (Girard/Lippert GG750 series), roller tube springs are under heavy stored energy and must be serviced only by technicians with proper training and containment tools. Attempting to remove end caps to access the spring can result in sudden uncontrolled release and serious injury.
| Problem | Most Likely Cause | DIY Fix? | Difficulty |
|---|---|---|---|
| Crank slips, nothing moves | Partially seated crank | Yes — reseat crank | Very Easy |
| Crank turns, fabric doesn't move | Stripped gearbox gears | Replacement part needed | Moderate |
| One arm won't compress | Dirty/seized elbow pivot | Yes — clean and lubricate | Easy |
| Front bar at an angle | Loose arm-tip connection | Yes — repin/rebolt | Easy |
| Fabric bunches on one side | Hem slipped from front bar | Yes — reseat hem | Moderate |
| Awning retracts but sags badly | Low spring tension or broken spring | No — call a pro | Pro only |
| Water pocket preventing retraction | Pitch set below 14 degrees | Yes — drain and adjust pitch | Easy |
Routine maintenance, cleaning, and winterizing
Most awning failures I have seen are the result of zero maintenance for two or three seasons, not manufacturing defects. A 30-minute check-up twice a year will genuinely extend the life of this awning by years.
Every 3 months (or after heavy storms)
- Inspect all arm pivot bolts for looseness — tighten to the torque specified in your hardware table
- Check the wall bracket anchor bolts. Masonry anchors can work slightly loose over freeze-thaw cycles
- Brush debris (leaves, pollen, grit) off the fabric with a soft-bristle brush while the awning is extended
- Apply silicone spray to the arm elbow pivot points and the roller support bracket saddles — wipe off any overspray before it contacts the fabric
Cleaning the fabric
The EM3430 uses dope-dyed acrylic or PU-coated polyester fabric. Clean it with lukewarm water and a mild soap (dish soap works fine). Extend the awning fully, scrub gently with a soft brush, rinse thoroughly, and let it dry completely in the open position before retracting. Storing wet fabric accelerates mold and can cause the PU coating to delaminate. Never use bleach, solvent-based cleaners, or a pressure washer on the fabric.
Winterizing
- Give the fabric a thorough cleaning and let it dry completely — at least 48 hours in dry weather.
- Retract the awning fully and check the retracted position for any gaps where the fabric edge might catch wind.
- Apply a fabric-specific water repellent spray (products designed for outdoor awning acrylic work well) while the awning is extended, then let dry before retracting.
- Lubricate all pivot points, the gearbox socket, and the roller support bracket saddles with a silicone spray or a manufacturer-recommended grease that will not freeze.
- In climates with heavy snow or ice, consider removing the hand crank and storing it indoors — a frozen crank socket can crack the gearbox housing.
- If you live in a climate with extended sub-zero winters, removing the awning entirely and storing it in a garage or shed is the most reliable way to prevent damage.
Replacing the canopy fabric and ordering parts
Fabric is the component most likely to need replacement before anything mechanical fails. UV degradation, mold staining, and tears from wind events are the common reasons. The good news is that the fabric on the EM3430 is a standard roll-in-channel design and is replaceable without replacing the whole awning. For replacement canopies and compatible parts, search for garden patio manual awning canopy to find fabric cutters and third‑party suppliers that match the EM3430 roll‑in‑channel design.
What to measure and photograph before ordering
- Overall fabric width (from roller tube end to end, not just the visible panel) — on the 12 x 10 model this is 3380 mm
- Fabric projection depth (from roller tube center to front bar hem) — 2950 mm on the EM3430
- Front bar hem channel width (measure the slot inside the front bar where the fabric hem bead seats)
- Roller tube diameter (measure the tube OD where the fabric attaches)
- Color/weave reference from your current fabric, or the color code from your original order documentation
Diensweek does not publish a detailed OEM spare-parts catalog with individual part numbers as of the time this guide was written. Your best sourcing options are: (1) contact Diensweek directly via their website support channel, referencing the model EM3430 and the specific part from the packing list; (2) search awning fabric suppliers using the exact dimensions above, many independent suppliers will cut and hem to order; (3) for mechanical parts (gearbox, arms, brackets), check whether an awning hardware wholesaler carries compatible components by providing your tube diameter and bracket profile photos. Comparable service manuals from Girard/Lippert provide useful cross-reference for gearbox and arm geometry if you are sourcing third-party components.
Fabric replacement procedure overview
- Fully extend the awning to expose the full fabric panel.
- Mark the hem orientation with a piece of tape before detaching anything, so the new fabric goes in the same direction.
- Release the front bar hem by loosening the end screws and sliding the hem bead out of the channel.
- Detach the roller-end attachment (usually a fabric bead or velcro strip secured to the roller tube with set screws).
- Unroll and remove the old fabric.
- Attach the new fabric to the roller tube first, wind two full turns onto the tube by hand to create initial spring pre-load, then feed the free hem into the front bar channel.
- Extend and retract twice to check even winding and hem seating before putting the awning into regular use.
When to call a professional
I am a strong believer in DIY repair for patio equipment, most issues on a manual awning this size are genuinely fixable at home. But there are clear lines where professional help is the right call, and crossing those lines costs more money (and sometimes causes injury) than just calling someone from the start.
- Internal torsion spring failure or any need to open the roller tube end caps — spring tension is dangerous without specialist tools
- Wall anchor failure (anchors pulling out of the wall) — this requires structural assessment before re-drilling
- Bent or cracked aluminum roller tube — the tube must be replaced, not straightened, and the spring inside must be handled by a technician
- Any work on a wall that is not confirmed solid masonry or reinforced concrete
- Cracked or fractured arm housing where the elbow pivot bolt passes through — the arm needs replacement, not patching
- Any situation where you are not confident working at height — the cost of a professional installation is far less than a fall injury
If the awning is approaching the end of its 1-year warranty and a mechanical component has failed through normal use, contact Diensweek before spending money on professional repair, the warranty may cover it.
FAQ
What primary OEM documents do I need to create an accurate DIY guide for the Diensweek 12×10 manual retractable awning?
The OEM Installation & Assembly manual for the exact model (EM3430 / Diensweek 12×10) — includes packing/parts list, exploded callouts, mounting/bracket locations, crank/gearbox insertion, tilt/angle specs, recommended fasteners, safety warnings and recommended crew size. Use the OEM PDF pages for verbatim safety cautions, crank operation steps, and the parts callout illustration as the foundational source.
Which service and repair manuals are required to cover ‘won’t retract’ troubleshooting and mechanical repairs?
At least one professional service/repair manual from an established awning OEM (e.g., Girard / Lippert GG750 or Girard Ultra) that contains exploded views, gearbox/limit procedures, arm-elbow and spring servicing steps, and explicit safety warnings about tensioned rollers and springs. Use these to fill gaps when Diensweek OEM docs lack repair-level detail (gearbox internals, roller removal).
What technical data on fasteners and anchors must be included for safe mounting guidance?
Manufacturer technical tables for anchors and connectors (Simpson Strong‑Tie anchor catalogs and Hilti Anchor Fastening Technology Manual) providing anchor types, embedment depths, allowable loads, installation torques and spacing recommendations — used to specify concrete/brick anchors (wedge, sleeve, adhesive) and to produce torque/anchor-sizing tables for the awning bracket loads.
Which safety and regulatory references should be cited for ladder use, PPE and working‑at‑height guidance?
OSHA walking‑working surfaces and ladder standards (29 CFR 1910 Subpart D) or equivalent national/regional fall-protection regulations. Cite these for mandatory PPE, ladder selection/angle/inspection, two‑person handling recommendations and fall‑hazard control steps during installation and maintenance.
What meteorological/wind references are needed to create clear open/close criteria?
Authoritative Beaufort/wind‑speed tables from the Met Office or NOAA/NWS to translate manufacturer Beaufort ratings (e.g., Beaufort 4/5) into explicit wind‑speed thresholds (km/h or mph). Use these to give unambiguous 'close at > X km/h' guidance and to define wind‑secure and storage thresholds.
What hands‑on references (photos, teardown videos, measurements) are required to make the guide actionable?
High‑resolution photos of the actual Diensweek 12×10 parts (brackets, roller tube ends, gearbox, front bar, arms, hand crank interface) and stepwise assembly photos; short teardown/service videos showing roller removal, spring inspection, gearbox access and crank override; measured key dimensions (roller tube outer/inner diameter, wall thickness, bracket hole centers, pivot bolt sizes) so readers can order correct spares.
Next Articles
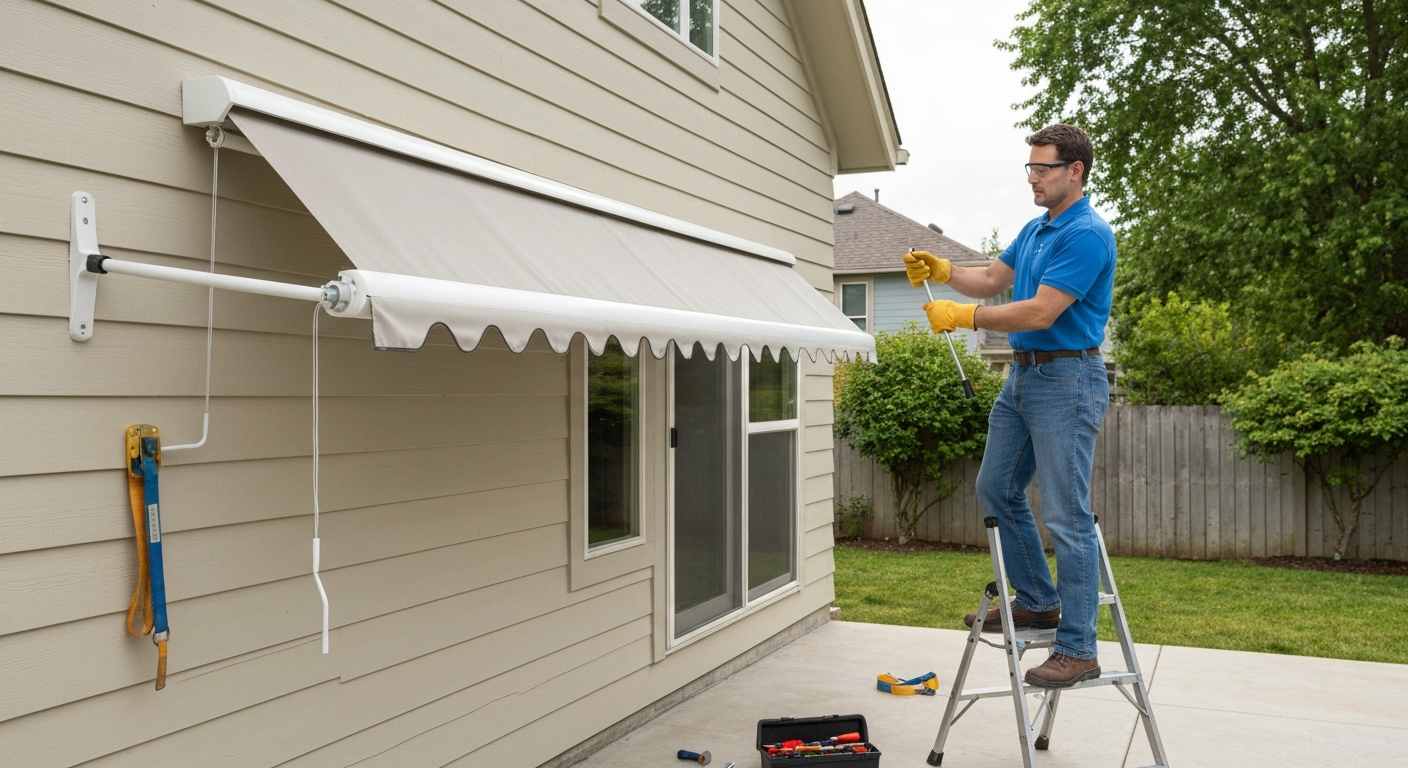
Manual patio awning won t retract? Troubleshooting & Fixes
Manual patio awning won't retract? Step-by-step troubleshooting, fixes, parts list, and when to call a pro.
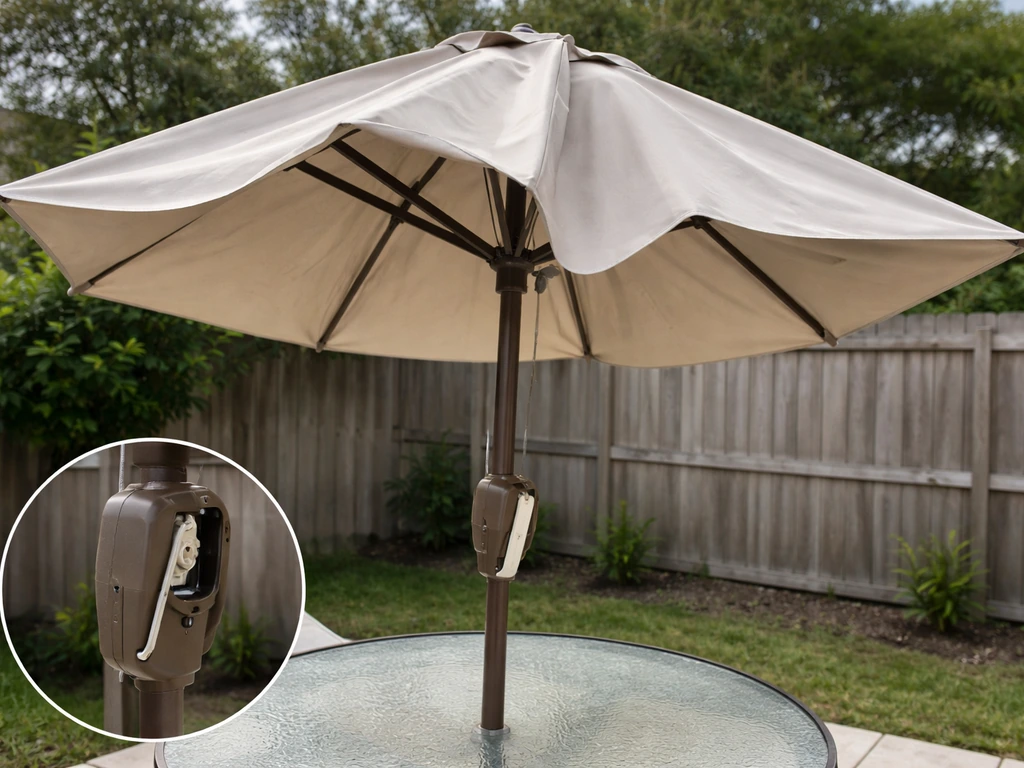
How to Fix a Patio Umbrella That Won't Open or Close
Step-by-step fixes for patio umbrellas that won’t open or close, with checks for jams, cords, latches, and lubricating t
How Does a Patio Umbrella Work? Components, Use, and Fixes
Learn how patio umbrellas work: components, open close tilt, stability, and step by step troubleshooting common mechanic