Most patio umbrella repairs come down to one of two things: the fabric is damaged (torn, ripped, or holes have formed) or something mechanical has failed (the crank won't turn, the tilt locks up, or the cord snaps). Figure out which category your problem falls into first, then follow the right fix. In most cases you can restore a broken patio umbrella yourself in an afternoon with basic tools and under $30 in materials. If you are dealing with a fully broken umbrella and want step-by-step guidance, follow this process for how to recover a patio umbrella safely restore a broken patio umbrella yourself. If the damage is beyond a quick DIY fix, a local patio furniture repair person or the umbrella manufacturer can also help with repairs restore a broken patio umbrella yourself. Here's exactly how to do it.
How to Repair Patio Umbrellas: Step-by-Step Fixes


Fabric or frame? Start here before doing anything else
Before you grab any tools, do a quick walkthrough of the umbrella to pinpoint what actually broke. Open the umbrella fully (if the mechanism allows it), stand back, and look at it from a few angles. This two-minute triage saves you from fixing the wrong thing.
Check the canopy fabric first. If you end up with fabric tears, rips, or punctures, the steps in how to patch patio umbrella are the best related next option to follow. If you end up finding tears, rips, or fraying, follow the steps in how to repair patio umbrella fabric to make the fix last. Look for tears along the seams, rips across a panel, small holes from UV degradation or punctures, and fraying around the rib pockets or hem. Then look at the frame: are any ribs bent or snapped? Is the pole cracked or noticeably bowed? Now try the mechanism. Does the crank handle turn smoothly? Does the tilt lock click and hold? Does the cord (if present) move freely without fraying or slipping?
- Fabric damage only (tears, holes, fraying): repair is almost always worth doing yourself
- Single bent rib: repairable with a replacement rib from the manufacturer or a universal replacement kit
- Broken crank, stripped tilt collar, or snapped cord: usually fixable with replacement parts
- Cracked or snapped center pole: generally not worth repairing; replacement is safer
- Multiple structural failures at once: Lowe's recommends replacing the umbrella outright if you can't make it safe to use again
One honest note: if the umbrella is structurally compromised in a way that makes it unstable, do not use it until it is fixed or replaced. The manufacturer guidance I've seen across multiple brands is consistent on this: inspect for damage before every use, and if it's not safe, don't open it. A blown-over umbrella in moderate wind can injure someone or destroy nearby furniture.
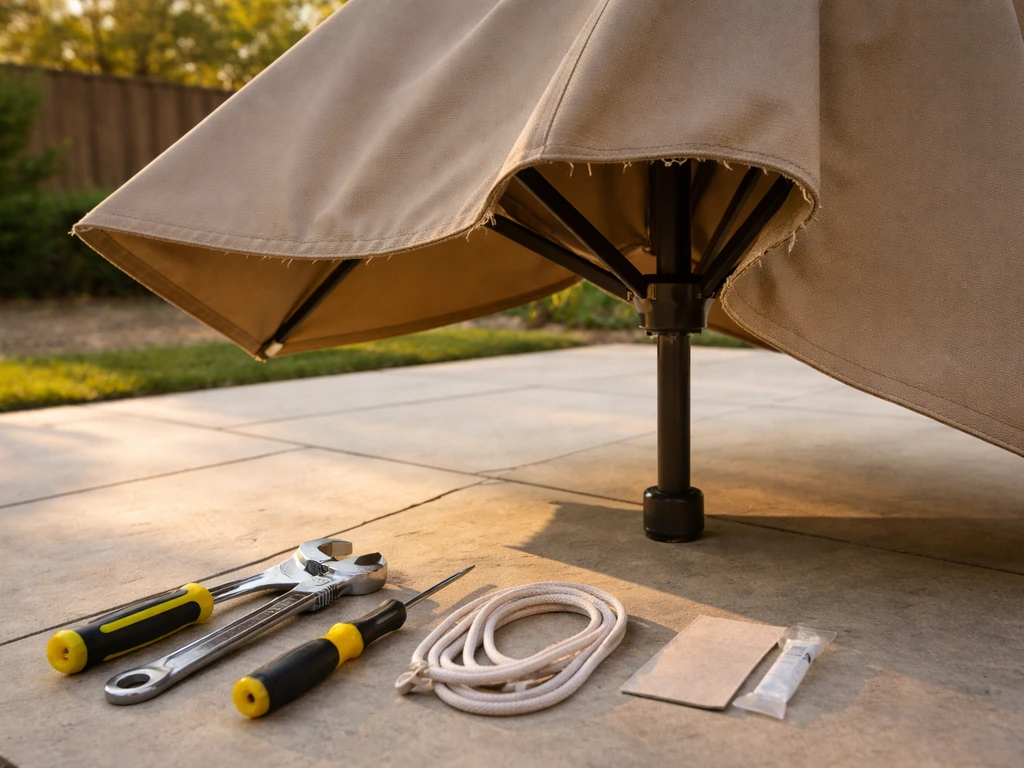
Tools and materials you'll actually need
Gather everything before you start. There's nothing worse than having the umbrella half-apart and realizing you need to make a hardware run.
| Item | What it's for | Approximate cost |
|---|---|---|
| Outdoor fabric repair tape (ripstop nylon or vinyl) | Quick patching of tears and holes | $8–$15 |
| Sail repair patch kit (self-adhesive) | Reinforced patches for larger rips | $10–$20 |
| UV-resistant outdoor thread (polyester) | Sewing seam repairs | $5–$8 |
| Curved upholstery needle | Sewing through thick canopy fabric | $4–$8 |
| Seam ripper | Opening stitched seams without tearing fabric | $3–$6 |
| Replacement umbrella cord (braided polyester, 3mm) | Replacing a broken crank cord | $6–$12 |
| Replacement tilt collar or crank assembly | Fixing mechanism failures | $10–$30 |
| Flathead and Phillips screwdrivers | Disassembling the crank housing | Likely already have |
| Needle-nose pliers | Gripping small parts in the mechanism | Likely already have |
| Rubbing alcohol and cloth | Cleaning fabric before applying adhesive patches | $2–$4 |
| Marine-grade silicone sealant (clear) | Sealing edges of patches against moisture | $6–$10 |
For most fabric fixes, the self-adhesive outdoor repair tape is your first move. It bonds to polyester, acrylic (like Sunbrella), and vinyl canopy materials and holds up through rain and UV exposure when applied correctly. For mechanism repairs, try to source OEM replacement parts from the manufacturer before buying generic, especially for cranks and tilt assemblies. Many brands sell these directly for $10–$25.
How to repair torn or ripped patio umbrella fabric
Tears and rips in canopy panels are the most common repair you'll run into, and the approach depends on where the damage is and how big it is. Once you’ve identified the failure point, you can fix a patio umbrella by following the matching fabric or mechanism section in this guide. A 2-inch rip in the middle of a panel is a different fix than a seam that's blown out along a rib pocket.
Seam and rib-pocket tears
When a seam separates or a rib pocket tears away from the panel, you'll need to sew it back. This is the strongest fix and the one that actually lasts.
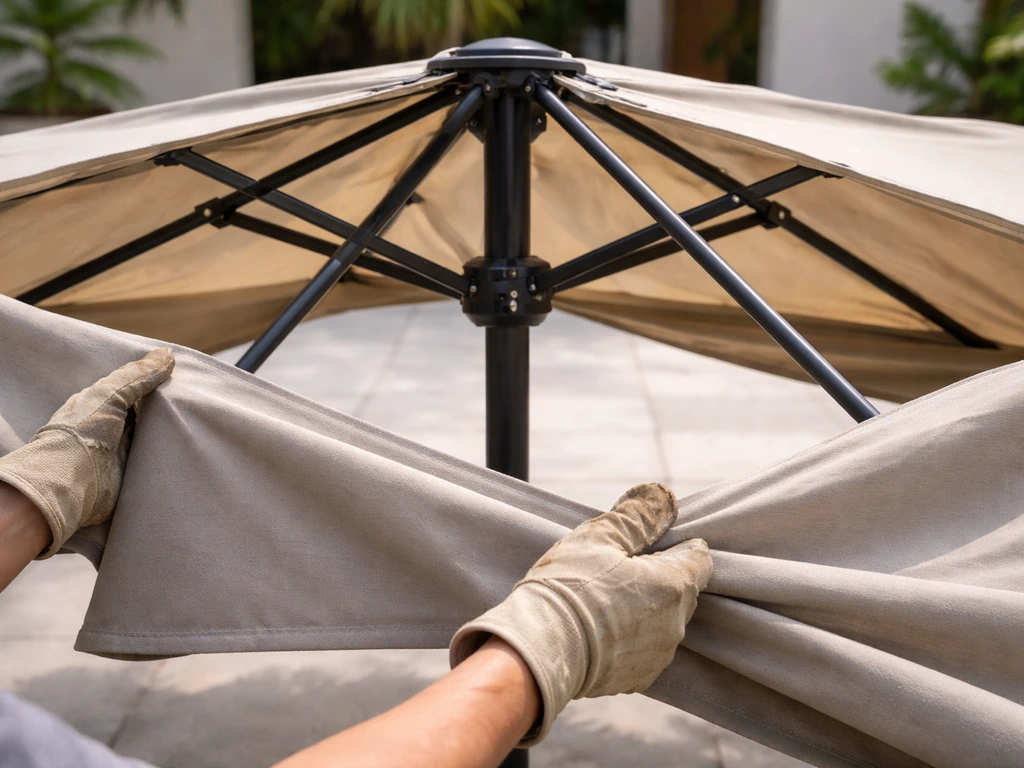
- Remove the canopy from the frame if possible. Most canopies attach at the hub (center) and at each rib tip with a small button or loop. Unhook all the rib tips first, then unscrew or unclip the center hub cover.
- Lay the canopy flat on a clean surface. Examine the full length of the torn seam so you know exactly where it starts and ends.
- If the old thread is still partially intact and tangled, use a seam ripper to remove just the damaged stitching. Don't rip out good stitches on either side.
- Fold the seam back to its original position and pin it with sewing pins to hold alignment while you work.
- Thread your curved upholstery needle with UV-resistant polyester thread (double strand for strength). Use a running stitch or a backstitch (backstitch is stronger) along the original seam line, staying within the existing needle holes as much as possible.
- At each end of your repair, tie off with at least three knots and push the tail inside the seam so it doesn't catch wind.
- For extra durability, run a bead of clear marine silicone along the seam on the underside and let it cure for 24 hours before reinstalling the canopy.
Panel tears in the middle of the fabric
A tear running across an open panel (not along a seam) is best handled with a combination of sewing and a reinforcement patch. The patch alone will hold short-term, but the stitch keeps the fabric from spreading further under tension.
- Clean the area around the tear with rubbing alcohol and let it dry completely. Any dirt, sunscreen residue, or mildew will prevent adhesive patches from bonding.
- Trim any ragged threads or frayed edges from the tear with scissors. A clean edge holds better than a jagged one.
- If the tear is under 3 inches, align the edges together by hand and hold them in place with masking tape on one side while you work.
- Sew the tear closed using a zigzag stitch if you have a machine, or a hand backstitch. Work from one end of the tear to the other, pulling the edges together firmly but not so tight that you pucker the fabric.
- Cut a patch of outdoor repair tape or a self-adhesive sail patch at least 1 inch larger than the tear on all sides. Round the corners of the patch (square corners peel up faster).
- Peel the backing and press the patch firmly over the closed tear on the underside of the canopy. Use a roller or the back of a spoon to press out any air bubbles.
- For tears over 3 inches, apply a matching patch to both sides of the fabric for double reinforcement.
- Leave the repair flat (don't fold or install the canopy) for at least 2 hours so the adhesive sets fully.
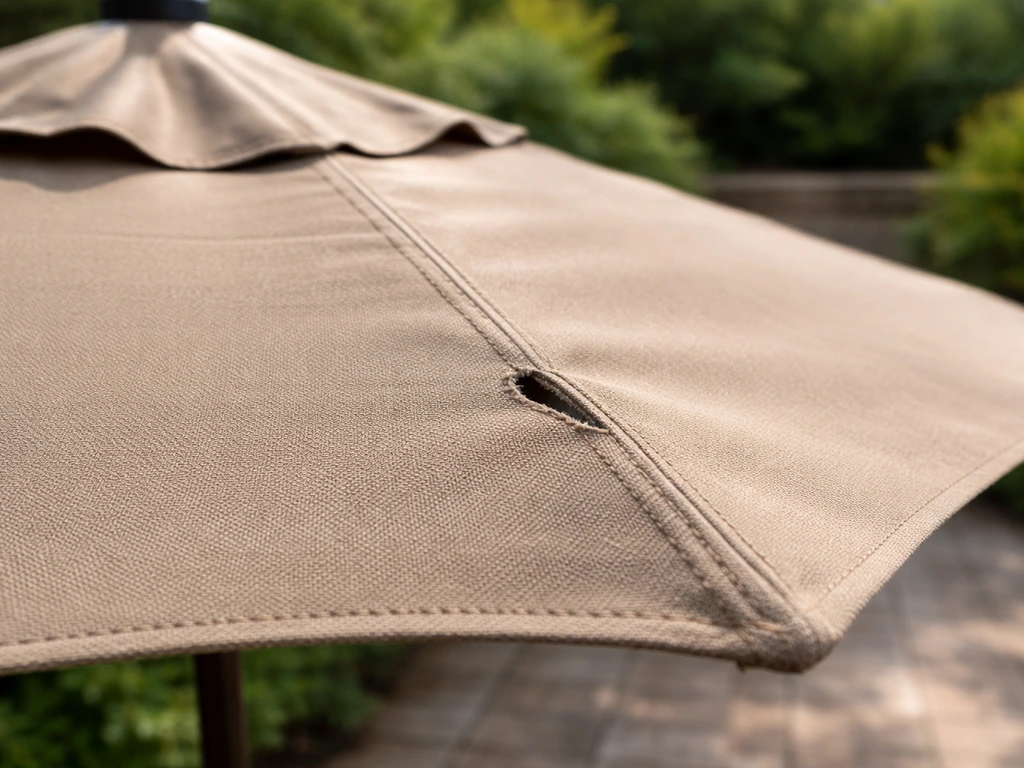
Repairing holes in patio umbrella fabric
Small holes (from UV brittleness, bird damage, or a rogue ember from a nearby fire pit) are actually easier to fix than long tears because you don't need to align two edges. The goal is to cover the hole with a patch that bonds to solid fabric on all sides.
- Clean the area with rubbing alcohol in a 3-inch radius around the hole. Let it dry for 5 minutes.
- If the edges of the hole are frayed or crumbling (common with UV-degraded acrylic fabric), trim them back to solid fabric with small scissors. You may end up with a slightly larger hole, but you need the patch to adhere to intact material.
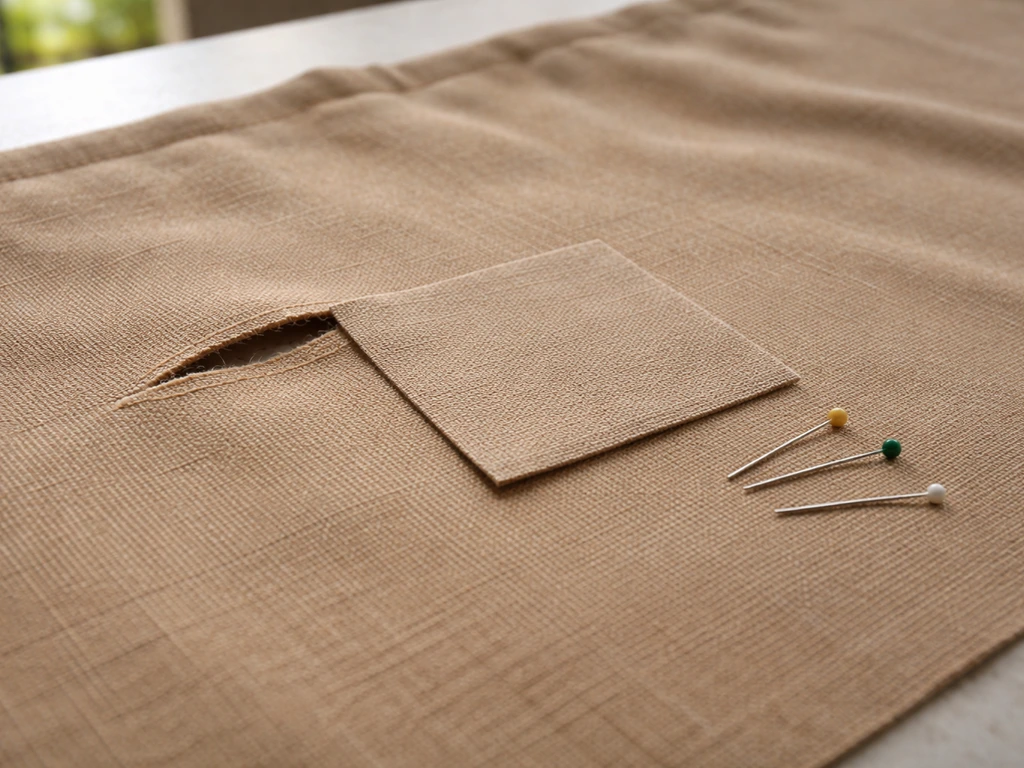
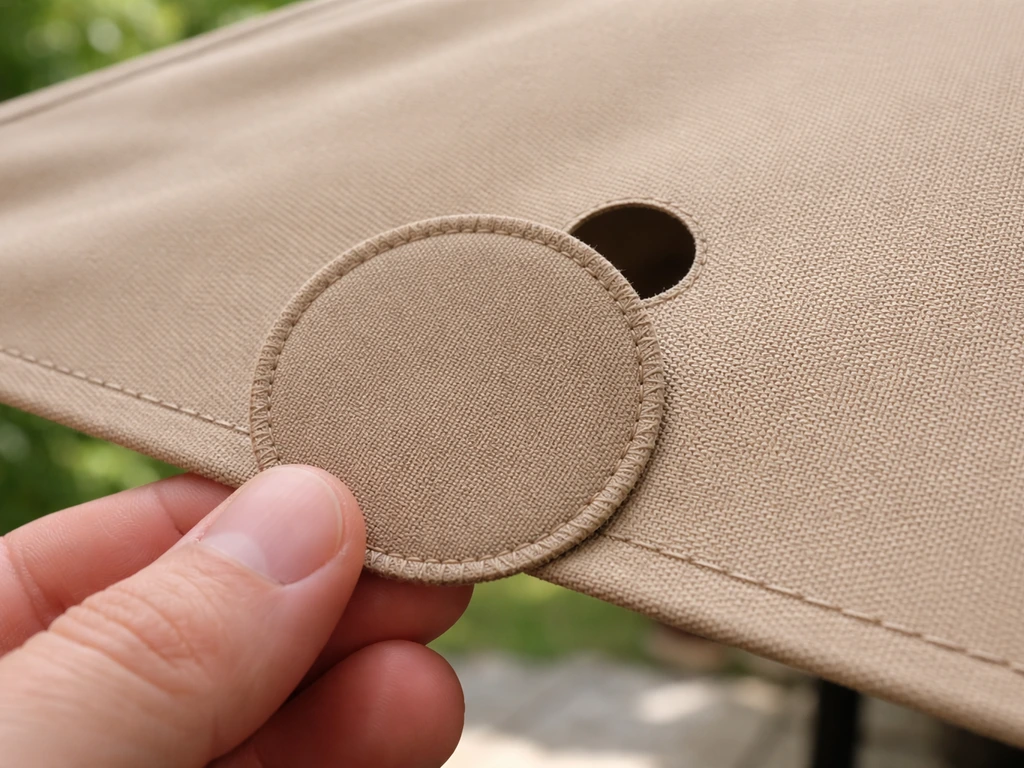
- Cut your patch material into a circle or oval at least 1.5 inches larger than the hole all the way around. Circular shapes distribute stress evenly and resist peeling much better than squares.
- For holes under half an inch, a single adhesive patch on the underside is usually enough. Press firmly, working from the center outward.
- For holes between half an inch and 2 inches, apply a patch on both the top and bottom surface of the canopy, centered on the hole. Press both together firmly so they bond to each other through the hole as well as to the surrounding fabric.
- For holes over 2 inches, treat them like a panel tear: sew the edges as close together as possible first, then patch both sides.
- Seal the perimeter of each patch with a thin bead of clear silicone sealant. This prevents water from wicking under the patch edge during rain.
If your canopy has multiple holes scattered across the same panel, that's usually a sign the fabric has reached the end of its UV life. Patching individual holes will work temporarily, but you'll likely be back for more repairs within a season. At that point, replacing just the canopy panel (or the whole canopy) is more cost-effective than playing whack-a-mole with patches. If you want to replace fabric on a patio umbrella, start by measuring the canopy and matching it to your umbrella’s fabric type and mounting style Replacing just the canopy panel (or the whole canopy). Replacing just the canopy is a straightforward project worth considering if the frame is still solid.
Cantilever (offset) umbrella: what's different and what breaks first
Cantilever umbrellas (also called offset umbrellas) have their pole off to the side rather than through the center of the canopy. That design puts a lot more stress on the arm and tilt mechanism than a center-pole umbrella experiences, and the failure points are different. If you have a cantilever, read this section before diving into the general repair steps.
Common cantilever failure points
- Rotation collar at the base of the arm: this is the pivot that lets you swing the canopy 360 degrees. Plastic collars crack; metal ones corrode and seize. If the canopy won't rotate or rotates sloppily, this is usually why.
- Cross-arm tilt joint: cantilevers use a multi-axis tilt (often a knuckle or pin-and-cam system) rather than the simple push-button tilt on center-pole umbrellas. Pins shear, cams strip, and joints loosen over time.
- The main support arm connection to the pole: this joint takes the full weight of the canopy plus wind load. Loose bolts here cause the canopy to droop or sway dangerously.
- Canopy rib attachment at the hub: cantilever hubs are often larger and more complex than center-pole hubs, and the rib runners (the sliding piece that opens the canopy) can crack or jam.
Repairing a cantilever tilt joint
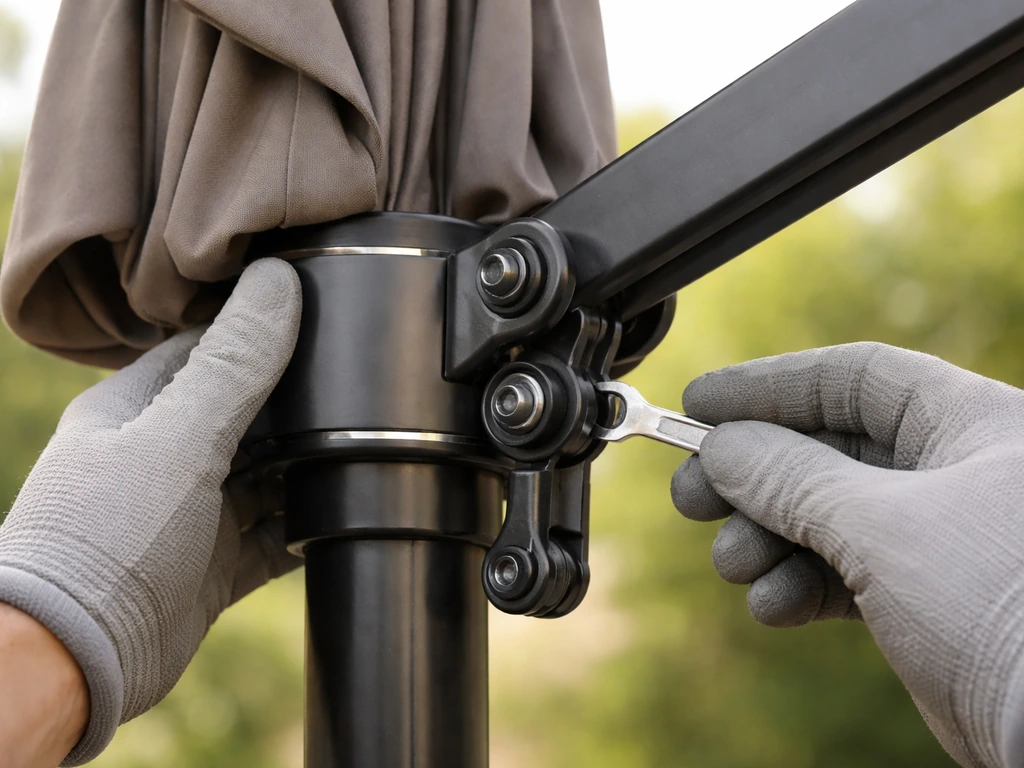
- Close the canopy fully before doing anything with the tilt mechanism. An open cantilever canopy is heavy and will shift suddenly if the joint gives way while you're working.
- Locate the tilt knuckle. On most cantilever umbrellas it's a visible knuckle joint partway along the support arm, secured by a bolt or a locking pin.
- If the joint is loose but the parts are intact: tighten the bolt with the correct wrench (usually 10mm or 13mm) or replace the locking pin with a new cotter pin of the same diameter. Check the manufacturer's spec for torque if it's listed in your manual.
- If the pin or cam is sheared: take photos of the assembly before disassembling anything. Order a replacement pin, cam, or full tilt assembly from the manufacturer using your model number. Generic replacements often don't fit the exact tolerances.
- Reassemble in reverse order, making sure all locking mechanisms engage before testing the tilt. Test tilt only with the canopy closed and in calm conditions.
When a cantilever is beyond repair
Because cantilever umbrellas carry a large canopy on an offset arm, structural damage to the main pole or arm is genuinely dangerous in a way that a bent rib on a center-pole umbrella isn't. If the main arm or pole is cracked, bent significantly, or if the base connection is compromised, replacement is the right call. These aren't fixes you want to patch and hope for the best, especially in a yard where kids or guests are nearby.
Fixing the crank, tilt, cord, and alignment
Mechanical failures feel intimidating but most of them are straightforward once you understand what's happening inside the mechanism. Here are the four most common ones and how to fix each.
Broken or slipping crank
The crank on a patio umbrella works by turning a spool that winds or unwinds a cord running through the pole. When the crank feels like it's turning but nothing happens, either the cord has snapped, the cord has slipped off the spool, or the spool's ratchet has stripped. One important note from product safety docs: never use excessive force on the crank handle. The Lowe’s product safety guidance for this umbrella also warns not to use excessive force on the crank handle to open or close it, since failing to follow the instructions can cause catastrophic damage never use excessive force on the crank handle. If it's genuinely stuck (not just stiff), forcing it causes the exact stripping damage you're now trying to fix.
- Remove the crank assembly cover. On most umbrellas, this is a plastic housing near the base of the pole held by one or two Phillips screws.
- Look at the spool. Is the cord still wound on it, or has it come loose? If it's loose but intact, re-thread it back onto the spool following the original winding direction (usually clockwise when viewed from the crank handle side).
- If the cord is frayed or broken, measure the cord diameter (usually 3mm braided polyester) and the length needed from the spool to the top of the pole, then double it for the full run. You can often order a replacement cord directly from the manufacturer. Cut the new cord to length and tie a figure-eight knot at the anchor point inside the housing.
- If the ratchet inside the crank housing is stripped (you'll see plastic debris or missing teeth), you'll need a replacement crank assembly. Search by your umbrella's brand and model number. Most replacement cranks run $10–$25.
- Reassemble the housing, then test the crank under no load first (canopy closed) before opening the umbrella.
Tilt mechanism not locking or releasing
The tilt on most center-pole umbrellas is either a push-button collar or a rotating collar. The push-button type clicks into notches; the rotating type uses a friction or cam system. Both fail in similar ways: they stop holding at the desired angle or they seize and won't release.
- Close the umbrella before touching the tilt collar. Tilting an open umbrella in any wind is a safety risk. Product documentation from multiple brands is explicit: never engage the tilt function in any wind, even a light breeze.
- For a push-button tilt that won't lock: the spring behind the button is often the culprit. Pop out the button with a flathead screwdriver, check that the spring is seated correctly, and reseat it. If the spring is broken, a small hardware store spring of the same diameter and length works as a replacement.
- For a rotating collar that won't hold: disassemble the collar (usually two halves held by screws) and look for a cracked cam or worn friction surface. Light sanding of a polished-smooth friction surface sometimes restores grip temporarily. A replacement collar is the better long-term fix.
- For a collar that's seized solid: apply a penetrating lubricant (silicone spray, not WD-40 which attracts grit) and let it sit for 30 minutes, then try gentle pressure. Don't force it. If it won't break loose with penetrating lube plus gentle effort, replace the collar.
Cord replacement on a pull-cord umbrella
Pull-cord umbrellas (where you grab a cord hanging from the pole and pull to open) are common on older or budget models. The cord frays and eventually snaps at the stress points near the top pulley or where it exits the pole.
- Tie a thin guide string to the old cord before pulling it out. This gives you a string already threaded through the pole to pull the new cord back through.
- If the old cord is already gone: you'll need to thread the new cord from the top. Remove the finial (the decorative cap at the top of the pole, usually a push-fit or screw-on) and drop the new cord down through the pole while a second person feeds it through the bottom opening.
- Use 3mm braided polyester cord. Thin paracord also works in a pinch and is easy to find.
- Thread through the pulley at the top of the pole, run down the center, and secure to the hub runner with the same knot style as the original (usually a barrel knot or figure-eight). Trim the excess and replace the finial.
- Test the pull-open action slowly before letting the canopy reach full extension.
Umbrella opening unevenly or ribs misaligned
If the canopy opens but one or two panels droop or one rib sticks out at the wrong angle, a rib or rib connection is damaged. Look at the hub runner (the sliding ring that pushes the ribs up) and each rib's connection point. A cracked runner, a bent rib, or a snapped ferrule (the small metal tip at the end of a rib) causes exactly this symptom.
- Close the umbrella and identify which rib is causing the problem by watching the opening motion slowly.
- Check the rib's connection at the hub: is the pin or rivet still in place? A missing or sheared rivet is easy to replace with a matching rivet from a hardware store and a rivet gun.
- If the rib itself is bent: aluminum ribs can sometimes be straightened carefully in a bench vise. Fiberglass ribs that have cracked cannot be reliably repaired and need replacing.
- Replacement ribs are available from most umbrella manufacturers for $5–$15 per rib. You'll need the pole diameter, rib length, and hub type when ordering.
- Swap the rib by removing the connecting pin or rivet at both ends (hub and the stretcher arm), sliding out the old rib, and reversing the process with the new one.
Test the repair, then protect your work
Don't skip the test. After any repair, run the umbrella through a full cycle before declaring it done.
- Do your test in calm conditions, no wind at all. This applies to both fabric and mechanism repairs.
- Open the umbrella slowly using the crank or pull-cord. Watch and listen for anything that catches, grinds, or feels wrong. Stop immediately if you feel unexpected resistance.
- If you repaired the tilt, test the tilt with the canopy open but only in zero wind. Lock it at each notch and give the frame a gentle push to confirm it holds.
- For fabric patches, lightly pull the patch edges to check adhesion. Any lifting edge needs to be pressed down firmly or resealed with silicone before the umbrella goes back into service.
- Leave the umbrella open in shade (not direct sun) for an hour to confirm the mechanism doesn't creep or the patches don't shift under tension.
Wind protection after repair
A freshly repaired umbrella is no stronger than a new one when it comes to wind. Close it any time you're not actively using it and whenever there's any wind in the forecast. This is not optional advice: the care documentation from every major brand I've seen explicitly states to close the umbrella and use tie-downs or weights in windy conditions. A repaired seam or a new patch doesn't need much force to fail again if the canopy catches a gust. Use umbrella tie-down straps at the canopy edge when the umbrella is closed, or weight the base with additional sandbags if it's a freestanding unit.
Seasonal storage to prevent repeat repairs
Most of the fabric damage and mechanical failures I see happen because umbrellas were left open through rain, stored wet, or left outside through winter. Before putting your umbrella away for the off-season: close it completely, let it dry in the sun for a full day (even if it looks dry), wipe the pole and hardware with a dry cloth, apply a UV protectant spray to the canopy fabric, and store it in a vented canvas or polyester storage bag rather than a sealed plastic bag (which traps moisture and causes mildew). If you store the canopy separately from the frame, make sure the ribs are fully retracted so the rib connections don't hold tension all winter. Doing this consistently is the single best thing you can do to avoid making these same repairs next season.
FAQ
How can I tell if a small tear is safe to patch or if I should replace the canopy panel?
If the tear is still along intact seams and the surrounding fabric is not brittle or thinning, patching plus sewing reinforcement is usually a good call. If you see multiple holes on the same panel, stiff or crunchy fabric, or the panel looks stretched, replacement of the affected panel is typically more cost-effective because patches fail when the base fabric is already UV-degraded.
What’s the right way to clean the canopy before applying outdoor repair tape or a patch?
Remove loose dirt first, then use mild soap and water, and let the fabric dry completely in direct sun before you apply anything. Repair products do not bond well to sunscreen residue, mildew spots, or trapped moisture, so if you have any mildew discoloration, treat it and confirm the fabric is dry and odor-free before sealing.
Can I use super glue, duct tape, or regular household glue for patio umbrella tears?
For outdoor canopies, avoid super glue and household adhesives, they can stiffen the fabric and fail under UV and water exposure. Regular duct tape and non-outdoor tapes tend to peel at the edges. Use outdoor self-adhesive repair tape or a UV-stable patching method designed for the umbrella’s fabric type (polyester, acrylic, or vinyl).
My crank turns but the umbrella won’t open. How do I diagnose cord vs spool vs ratchet?
First check for a snapped cord end or fraying near the pole opening. If the cord looks intact, try observing whether the cord actually winds or unwinds as you crank, if it does not move, the cord may have slipped off the spool. If the cord moves but you get no change in winding, the spool ratchet may be stripped. Avoid forcing the handle, forcing can worsen ratchet stripping and make the repair harder.
What should I do if the tilt won’t lock in place after a repair?
Reconfirm the collar type (push-button notches vs rotating friction/cam). If it clicks in but won’t hold, check for misalignment or worn internal surfaces, then inspect the spring or locking component for damage. If it still won’t hold after reassembly, do not keep using it, a loose tilt can shift suddenly in wind or during lowering.
How do I know whether a drooping panel problem is a bent rib or a broken connection like a ferrule or hub runner?
With the umbrella fully opened, look at each rib tip and the connection point where the rib seats into the hub runner. A bent rib usually shows a visual curve along the rib length, while a damaged ferrule often looks intact until you check the tip fit and alignment at the hub. A cracked runner or damaged slide component usually causes more than one rib to behave oddly, especially if panels nearest the runner area droop.
Is it okay to repair a cantilever umbrella’s arm or main pole with patches?
No, structural cracking or significant bending of the main arm or pole is a safety issue, these are not reliable patch jobs. If the arm or pole is cracked, bowed, or the base connection is compromised, replacement is the safer choice, especially around kids and guests or in yards that see moderate wind.
How long should I wait after patching before using the umbrella again?
Let the repaired area cure fully, keep it undisturbed while the adhesive sets and avoid opening under load immediately after application. If the repair kit directions specify a cure window, follow that, otherwise a conservative approach is to wait until the fabric is fully dry and give the adhesive several hours to set before a full open-close test.
After I fix it, what tests should I run before I consider the job done?
Run a full open-close cycle without forcing the mechanism. Then perform a slow tilt through its range and confirm each lock position holds. Finally, check canopy tension at the repaired points, look for any stitch pulling, edge lifting, or new creases that suggest the patch is not distributing tension properly.
What’s the safest way to store my umbrella to prevent the same problems next season?
Close it completely, let it dry in sun even if it looks dry, wipe the pole and hardware dry, and store in a vented fabric bag, not sealed plastic. Also ensure the ribs are fully retracted if you store the canopy separately, leaving connections under tension all winter can cause rib-related failures when you reopen.
If I only have a single small hole, should I stitch it or just patch it?
If the hole is small and the surrounding fabric is solid, patching alone is often sufficient. If the hole is in an area that experiences seam tension or is surrounded by fraying, adding a few stitches around the damaged area helps keep the fabric from spreading under stress before you apply the patch.
Can I keep using the umbrella in light wind after a repair?
No. Even if the repair looks secure, a gust can catch the canopy edge and create enough load to lift a patch or re-open stitches. Close it whenever you are not actively using it, and in any wind forecast, use tie-down straps or add weights to the base.
Step-by-step how to replace patio umbrella canopy, match attachment types, fix tension and fit issues, and test after.
DIY steps to fix a patio umbrella: diagnose crank, stand tilt, canopy tears, ribs, cords, and when to replace parts.

Step-by-step fixes for patio umbrellas that won’t open or close, with checks for jams, cords, latches, and lubricating t