Most patio umbrella base problems come down to four things: loose hardware, an unlevel surface, a cracked or warped base body, or corrosion eating away at metal parts. In almost every case you can fix it yourself in under an hour with basic tools, a handful of replacement fasteners, and maybe a tube of epoxy. Here is how to work through it from diagnosis to reassembly, and how to know when the base is genuinely done and needs replacing.
How to Fix Patio Umbrella Base: Step-by-Step Repairs

Luca Morrison
29 Apr 2026
When you are setting up a new base from scratch, start by choosing the right weight and a level installation so the umbrella stays stable in wind set up patio umbrella base. If you are starting from scratch, the process of building a patio umbrella base follows many of the same decisions about levelness and weight, just done in reverse how to make a base for patio umbrella.
Quick diagnosis: what's actually wrong with your base
Before you grab a wrench, spend two minutes figuring out exactly what failure you are dealing with. The fix for a stripped mounting bolt is completely different from the fix for a cracked plastic leg, and doing the wrong repair wastes time and money. Run through these checks first.
- Wobble or lean: Push the pole gently side to side. Does the wobble come from the pole moving inside the base sleeve, from the whole base rocking on the ground, or from a joint between sections of the base shifting? Each has a different fix.
- Loose pole connection: Crouch down and look at where the umbrella pole enters the base. Is the thumbscrew, knob, or bolt visibly loose or missing? Is the sleeve cracked around the entry point?
- Base rocking on the ground: Set a level on the patio surface. An unlevel surface is one of the most common and most overlooked reasons a cantilever or offset umbrella feels wobbly even when everything is tight.
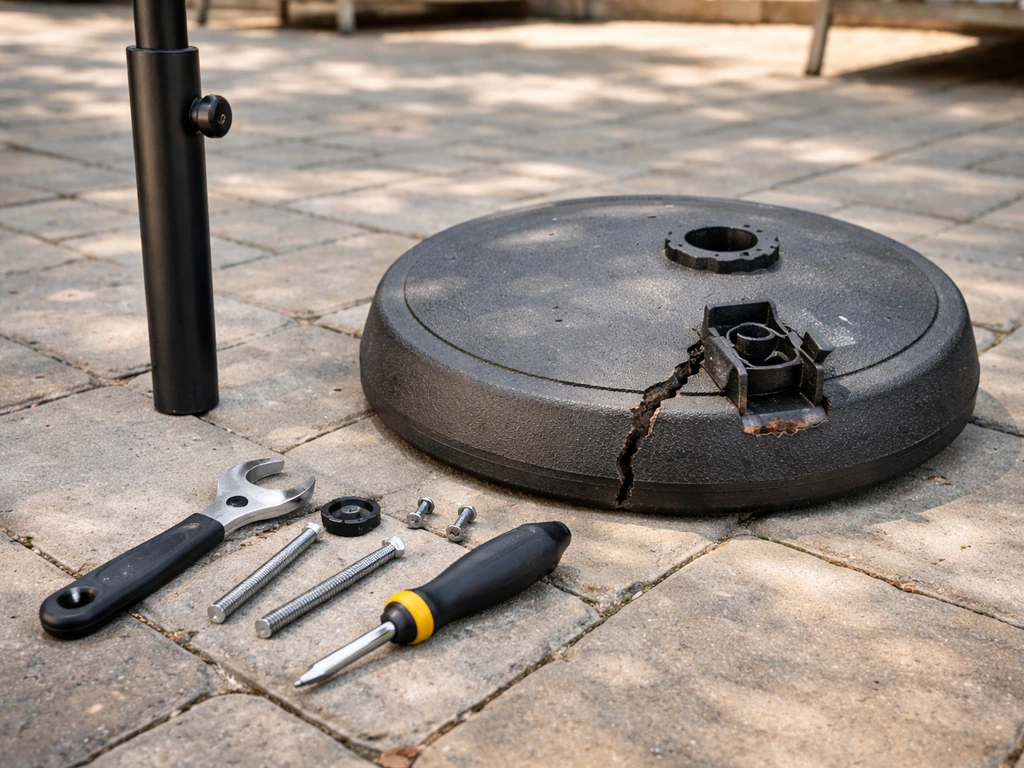
- Cracks or warping: Inspect every section of the base body. Plastic and resin bases crack from freeze-thaw cycles (especially when left water-filled through winter), UV degradation, and impact. Warped legs on a multi-arm offset base cause the whole assembly to sit unevenly.
- Corrosion or rust: Check any metal frame components, mounting plates, bolts, and the pole sleeve interior. Surface rust that hasn't pitted deeply is repairable; rust that has eaten through structural metal is a replacement signal.
- Broken or stripped connectors: Try tightening the main mounting bolt or thumbscrew. If it spins freely without gripping, the threads are stripped. If the bolt snapped off, you need a new fastener or a thread repair insert.
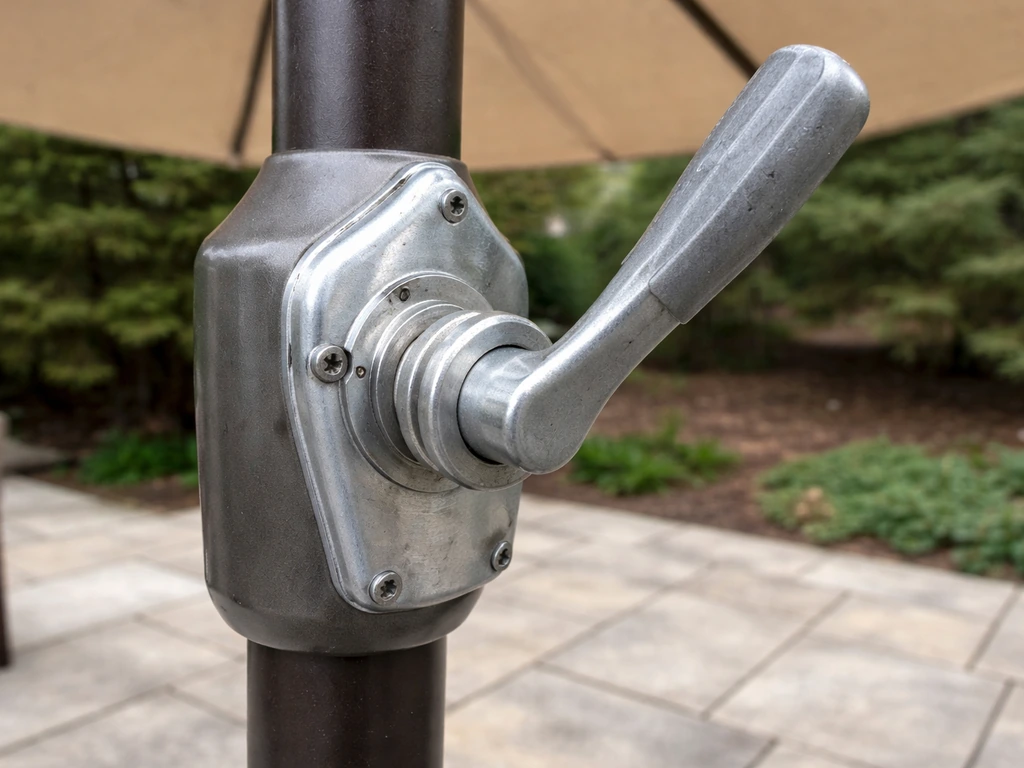
- Tilt or lock mechanism issues: If the umbrella tilts unexpectedly or the lock won't hold, the problem is sometimes at the base connection, not the canopy hardware. A loose collar at the base allows the pole to shift, which throws the tilt mechanism out of alignment.
Identify your base type so you pick the right repair path
Patio umbrella bases are not interchangeable, and the repair approach depends heavily on what type you have. Take thirty seconds to identify yours before moving on.
| Base Type | What It Looks Like | Common Failure Points |
|---|---|---|
| Weighted standalone base (center pole) | Single heavy disc or cross-shaped base, often cast iron, concrete, or dense resin. Pole slides into a center sleeve. | Loose thumbscrew/knob, cracked resin body, stripped sleeve threads, pole rocking in oversized sleeve |
| Fillable plastic base (center pole) | Hollow plastic form with a fill cap on top. Filled with water or sand for weight. | Cracks from freezing water, UV-brittleness, cracked fill cap, inadequate fill weight |
| Fillable multi-arm offset/cantilever base | Four separate plastic base legs connected to a central frame. Each leg has its own fill cap. | Cracked individual legs, loose frame-to-leg connectors, unlevel setup from partially filled legs, freeze cracks |
| Bolt-down flange/deck mount base | Metal plate bolted directly to a deck or concrete surface. Pole inserts into the plate receiver. | Stripped anchor bolts, loose mounting plate, corroded flange hardware, cracked deck joist under plate |
| Table umbrella base (through-table design) | Pole passes through a hole in a patio table into a weighted base underneath. | Pole wobble inside table hole, base shifting, stripped set screw on table bracket |
If you have a center-pole base with crank and tilt, know that the tilt mechanism is on the pole, not the base, but a sloppy pole-to-base connection absolutely affects how well tilt and lock work. Offset and cantilever designs put more leverage stress on the base than center-pole umbrellas do, which is why their bases need the most attention.
Tools and materials to gather before you start
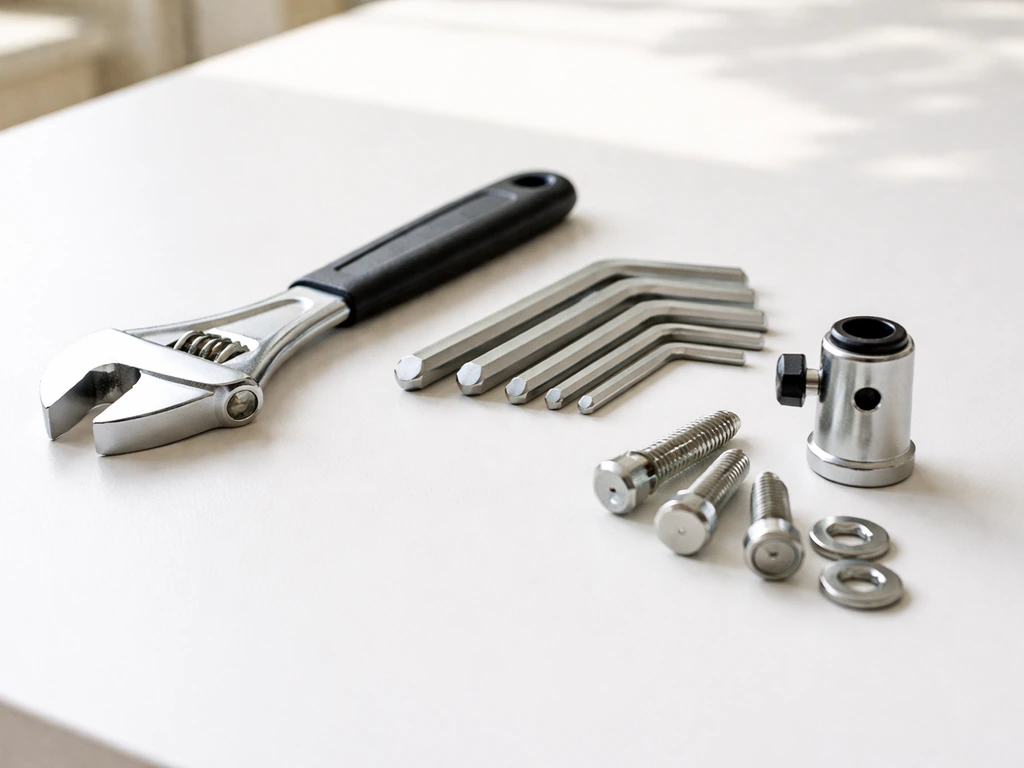
You probably have most of this already. Gather it all before you start so you are not hunting for a wrench with the umbrella half apart.
- Adjustable wrench and a set of hex/Allen keys (check your umbrella manual for the specific size; many offset bases use 4mm or 5mm hex bolts)
- Flathead and Phillips screwdrivers
- Bubble level (a smartphone level app works fine)
- Wire brush or wire-cup attachment for a drill (for rust removal)
- 80-grit and 150-grit sandpaper
- Rust-inhibiting metal primer and exterior-grade paint or clear coat
- Plastic/resin epoxy putty such as J-B Weld PlasticWeld (20-25 minute work life, functional cure in 2-3 hours) or Loctite's plastic repair adhesive
- Thread repair insert kit (E-Z LOK or similar) if you have stripped threads in metal components
- Replacement bolts, thumbscrews, or knobs that match your existing hardware (bring the stripped one to the hardware store or search the manufacturer part number)
- Rubber mallet
- Clean rags and isopropyl alcohol for surface prep
- Garden hose for cleaning
- Safety glasses and gloves, especially when wire-brushing rust or mixing epoxy
A safety note before anything else: if you find cracks running through a structural weld on a metal base, or corrosion that has eaten through the wall of a load-bearing tube, stop and assess whether the base is safe to repair at all. A base that collapses in a gust of wind can send a heavy pole or canopy flying. When in doubt on structural integrity, replacement is the right call, not a patch.
Fixing wobble, looseness, and alignment problems
This is the most common complaint and, fortunately, the easiest category to fix. Work through these steps in order from simplest to most involved. To keep your patio umbrella stable, focus on how to secure the umbrella base so it resists wobble and wind movement.
Step 1: Level the surface
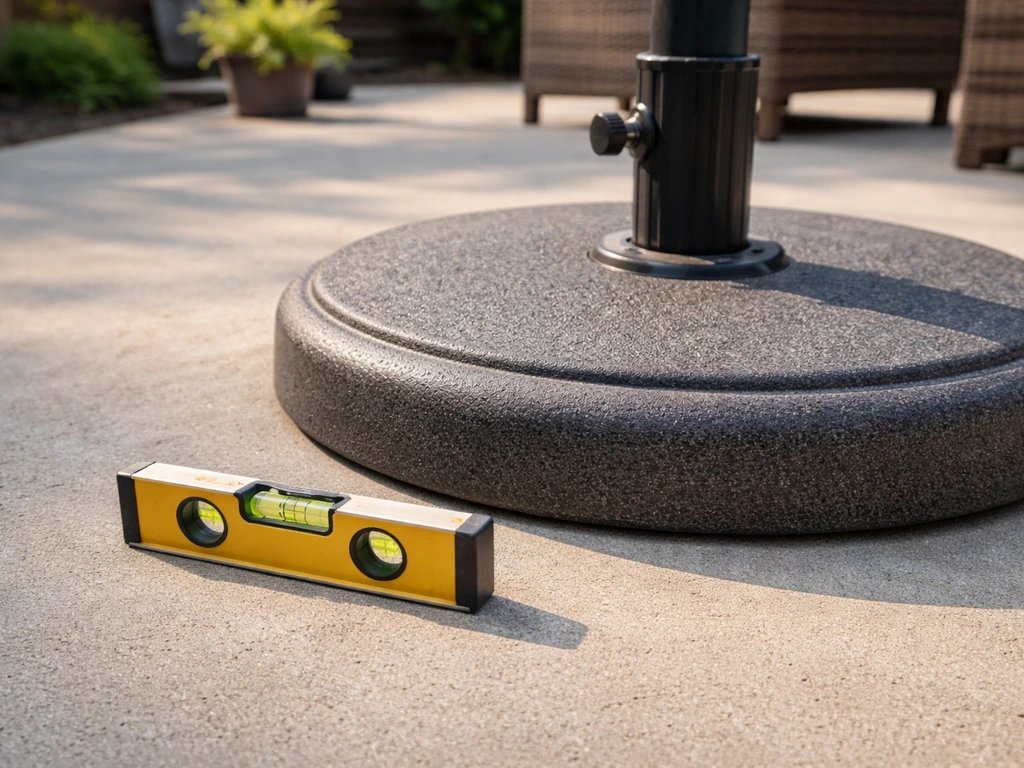
Place your bubble level on the patio surface where the base sits. For standalone bases and multi-arm cantilever bases, even a slight unlevel surface amplifies wobble because the weight of the canopy acts as a lever. If the surface is unlevel, try moving the base a foot in any direction, or use thin rubber shims under the low side of the base frame. This single step fixes a surprising number of 'broken base' complaints. After you level the patio and set the base in the right spot, you can move on to placing the patio umbrella base properly so it sits securely in the ground or on the surface.
Step 2: Tighten every bolt and fastener
With the umbrella pole removed, go around every bolt, thumbscrew, and knob on the base. Tighten each one firmly with the appropriate tool: an adjustable wrench for bolts, the provided hex wrench for recessed bolts, and hand-tight-plus-a-quarter-turn for thumbscrews and knobs. Manufacturers like Tropitone specifically call out fully seating and tightening these fasteners as a safety step, not just a preference. In Tropitone’s umbrella base assembly instructions, screws are “fully tightened” with a hex key during base assembly blank" rel="noopener noreferrer">Manufacturers like Tropitone specifically call out fully seating and tightening these fasteners as a safety step, not just a preference.. It is easy to underestimate how much a slightly loose bolt contributes to wobble when a 7-foot canopy is sitting on top.
Step 3: Reseat the pole correctly
Reinsert the umbrella pole and make sure it is fully seated in the sleeve before tightening the thumbscrew or bolt. The pole end should sit flush on the base plate inside the sleeve. If you have a base with a mounting pin or bolt-through design, align the pole's hole with the base's hole before inserting the pin. Tighten the knob or bolt firmly once the pole is properly aligned. A pole that is only halfway seated will rock even with the fastener fully tight.
Step 4: Check and increase base weight
If you have a fillable base and it still wobbles after leveling and tightening, the issue is almost certainly insufficient weight. Offset and cantilever umbrellas are especially demanding: the SunVilla 10-foot square offset umbrella, for example, requires all four base legs completely filled with water or sand to a combined weight of 90 kg (about 200 lbs). If you filled with water and are still short of that, switch to sand, which is denser.
Pour dry sand slowly through the fill cap and tap the base to settle it. If you need guidance on the filling process itself, the article on how to fill a patio umbrella base with sand covers it in detail. If you want to install the base directly into the patio or ground, follow the steps for putting a patio umbrella in the ground so the pole stays stable how to put patio umbrella in ground.
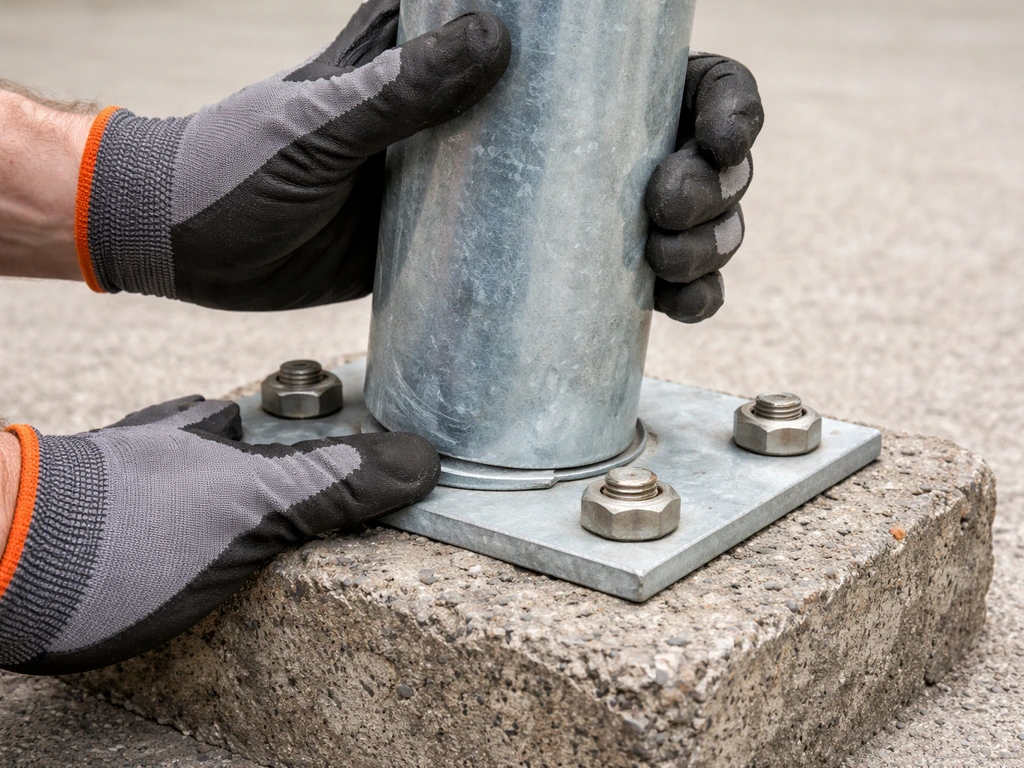
Step 5: Upgrade to a bolt-down mount (if wobble persists)
If your base continues to move despite being level, blank" rel="noopener noreferrer">fully tightened, and properly weighted, a bolt-down flange is the most reliable permanent fix for deck or concrete installations. Mark bolt hole positions above deck joists, drill pilot holes, and bolt the flange plate to the surface. This eliminates movement entirely, improves wind resistance, and removes a tripping hazard. It is more work than tightening a bolt, but it is a half-morning project that solves the problem for good.
Repairing physical damage: cracks, warping, broken connectors, and missing hardware
Cracked plastic or resin base
Small cracks in non-structural areas (like the sides of a fillable leg below the waterline) can be repaired with plastic epoxy putty. Clean the area thoroughly with isopropyl alcohol, let it dry completely, then mix the epoxy putty per the instructions. PlasticWeld epoxy putty gives you 20-25 minutes of working time, so prep everything before you mix.
Press the putty firmly into the crack, smooth it with a dampened finger, and let it cure for at least 2-3 hours before refilling the base. Keep in mind that temperature and humidity affect cure time, so in cold or damp weather give it longer.
Cracks that run through the base wall near the pole sleeve or through a structural mounting lug are a bigger problem: epoxy alone may not hold under load, and you should consider replacing that base section or the whole base.
Warped base legs
Warped plastic legs on a multi-arm offset base are usually caused by UV degradation or freeze-thaw stress. Minor warping that causes one leg to sit slightly off the ground can sometimes be shimmed level. Significant warping that causes the entire frame to twist is not practically repairable at home. In that case, check whether your manufacturer sells replacement base legs as spare parts before buying a whole new base.
Broken or stripped pole connector and mounting hardware
If a thumbscrew or knob just spins and won't grip, first check whether the threaded insert in the base has stripped or whether the thumbscrew itself is damaged. Try a new thumbscrew of the same diameter and thread pitch before assuming the base is ruined.
If the threaded hole in the base is stripped, a thread repair insert kit is the right fix for metal components: drill the hole out to the kit's specified size, tap it, and install the insert. The insert gives you fresh threads that are often stronger than the original.
For plastic base bodies where the threaded hole is stripped, you can sometimes use a slightly larger bolt with a new nut epoxied in place on the back side. If a bolt snapped off inside a metal component, use a screw extractor bit to remove the shank before repairing the threads.
Missing or damaged hardware
Bring the original part to the hardware store for a direct match, or find the model number on your umbrella or base and search the manufacturer's parts page. Most major brands (Tropitone, Coolaroo, SunVilla, and others) sell replacement hardware kits. Do not substitute a different bolt diameter or grade just because it fits loosely. An undersized bolt in a pole collar is a real safety risk once the canopy is under wind load.
Dealing with rust and corrosion
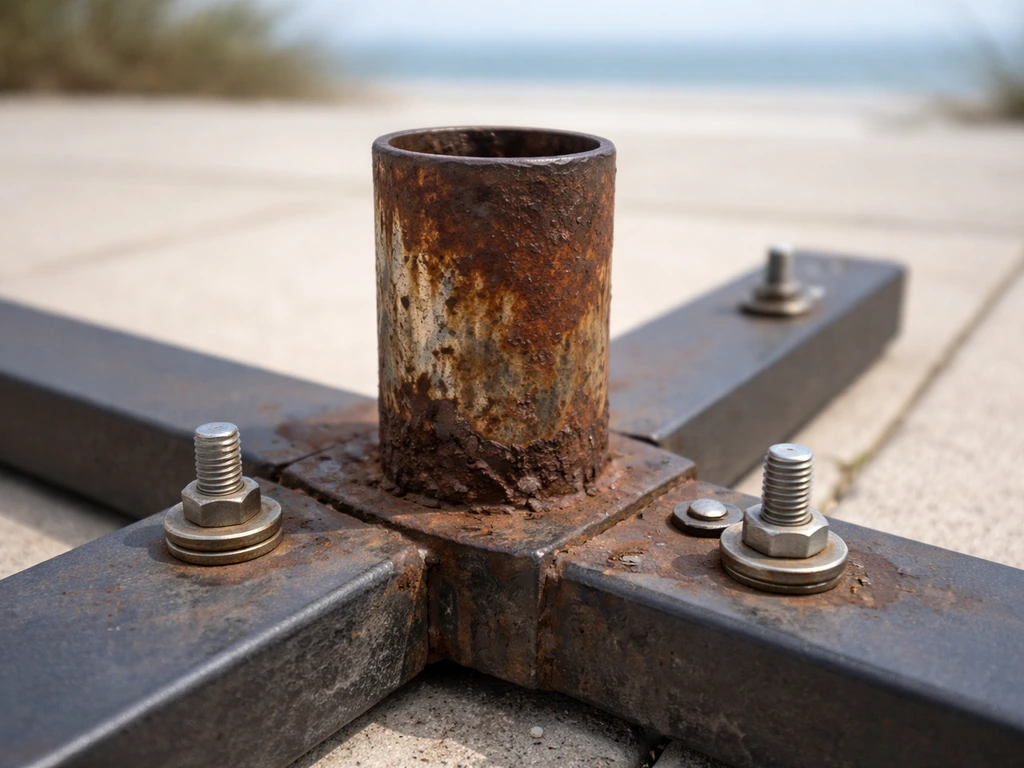
Metal base frames, pole sleeves, and mounting hardware all corrode over time, especially in coastal or high-humidity environments. Surface rust that hasn't compromised the metal's structural depth is absolutely fixable. Here is the process I use.
- Remove the umbrella pole and any detachable base components so you have clear access to the rusted area.
- Put on safety glasses and gloves. Use a wire brush or wire-cup drill attachment to knock off all loose rust scale. You want to get down to bare or lightly oxidized metal. Do not skip this step: primer applied over loose rust will peel within one season.
- Follow up with 80-grit sandpaper to remove remaining rust and feather the edges, then finish with 150-grit for a smoother surface.
- Wipe the area clean with a rag and isopropyl alcohol. Let it dry completely.
- Apply a rust-inhibiting metal primer within an hour of completing the sanding. The longer bare metal sits exposed to air, the more surface oxidation re-forms. Let the primer dry per its label instructions.
- Apply two thin coats of exterior-grade paint or clear coat matched to your base color. Let each coat dry fully between applications.
- For bolt holes and sleeve interiors where you cannot sand easily, use a rust-converting product that chemically neutralizes rust in place, then apply primer on top.
If corrosion has pitted or thinned the metal wall of a structural tube or frame section, do not try to paint over it and call it done. Pitted structural metal under load (especially on an offset base carrying a large canopy) can fail without warning. Replace the component or the whole base.
Reassembly, testing, and keeping your base in good shape going forward
Reassembly checklist
- Let all adhesives, epoxy, and coatings fully cure before reassembling. In moderate temperatures (65-75°F) that means at least 2-3 hours for PlasticWeld epoxy and 24 hours for most metal primers. In cooler or more humid conditions, add more time.
- Set the base on a level surface. Use your bubble level to confirm.
- Insert the pole fully into the sleeve so it rests on the base plate. Align any pin holes or bolt holes before inserting fasteners.
- Tighten all thumbscrews, knobs, and bolts firmly. Work in a pattern (opposite sides, then adjacent sides) rather than tightening one at a time, so you do not inadvertently torque the connection crooked.
- For fillable bases, refill with water or sand to the manufacturer's recommended weight. Cap all fill holes securely.
- For bolt-down installations, confirm all anchor bolts are fully torqued and the mounting plate sits flush against the surface with no gaps.
Test before you walk away
Open the umbrella fully and push the pole gently in multiple directions. There should be no perceptible movement at the base connection. Check the tilt and lock mechanism: if the pole was wobbling before, it may have caused the tilt collar to sit slightly off-center. Recheck that the lock engages cleanly in your desired tilt position. If the lock feels sticky or worn after all of this, the culprit might be a worn locking pin or a sticky pivot that just needs cleaning with a silicone-based lubricant.
Preventing the same problems from coming back
- Check and re-tighten all base hardware at the start of every outdoor season. Bolts loosen through vibration and thermal expansion over a winter in storage.
- If you have a water-filled plastic base, empty it completely before the first freeze of the year. Frozen water expands and will crack the base from the inside, sometimes without obvious external signs until the following spring when you refill it and it leaks.
- Store the base indoors or under a breathable cover for winter. UV exposure degrades plastic resin significantly faster when the base also sits through temperature extremes.
- Match your base weight to your umbrella size. An 11-foot offset canopy needs a fully weighted multi-arm base. Using an undersized or partially filled base is the number-one reason people end up with wobble problems year after year.
- For deck and concrete installations, consider the bolt-down upgrade once: it eliminates wind-related movement and reduces fastener stress caused by the umbrella rocking in gusts.
- Inspect the pole sleeve interior annually for rust pitting or debris that can cause the pole to sit unevenly and mimic a base wobble problem.
When replacing makes more sense than repairing
As a general rule: if the repair cost (parts plus your time) approaches 50% of a new base's cost, buy new. More specifically, replacement is the right call when you have structural cracks through load-bearing sections of a plastic or metal base, corrosion that has pitted or thinned a structural metal tube, multiple simultaneous failure points on an older base, or a base that has already been patched once and is failing again in the same area. Repair adhesives and thread inserts restore function but do not restore the original material strength, and some fixes are genuinely temporary. There is nothing wrong with patching a small crack to get through the current season while you budget for a new base, but go in with clear eyes about what the fix is buying you.
FAQ
How can I tell whether the problem is the pole connection or the base itself?
Before you buy any parts or apply epoxy, confirm whether the wobble comes from the base-to-pole joint or from the legs themselves. With the umbrella closed, grab the pole and push it side to side, then do the same with your hands on the base legs. If movement happens at the sleeve or mounting pin, focus on seating and alignment, not weight or surface leveling.
Can I just bolt down any patio umbrella base to stop wobbling?
Yes, but only for the right base type. Bolt-down flanges work best when the base is designed to accept mounting holes or uses a compatible flange pattern. If your base is meant to sit freely (no hole pattern, no flange adapter), drilling the patio can create leaks or damage and still won’t eliminate wobble unless the base model matches the mounting style.
Is water in a fillable base always the best weight, especially in cold weather?
If the base is fillable and you are using water, account for displacement limits and freeze risk. Water adds weight but expands in freezing temperatures, which can stress legs or seals. For climates with freezes, switching to sand, or using water only during warm months, is usually safer than repeated freeze-thaw cycles.
What should I look for if the thumbscrew is tight but the pole still rocks?
Don’t assume a “tight” thumbscrew is secure. Check that the pole end is fully seated inside the sleeve, flush on the base plate inside the sleeve, then tighten. If you can pull the pole up slightly by hand, the fastener is only clamping partly, and the connection will still rock.
How do I prevent an epoxy putty patch from failing after I refill the base?
For epoxy putty repairs, surface prep and timing matter more than the brand. Clean with isopropyl alcohol, let it fully dry, then avoid refilling until the cure window has passed at your actual temperature. If the crack is below the waterline and you refill early, the putty can delaminate and reopen.
My knob or thumbscrew won’t grip, what’s the safest first check to avoid making it worse?
If you suspect stripped threads, stop and test fit with the correct screw first. Try a replacement thumbscrew of the same diameter and thread pitch, without forcing it. Forcing the wrong thread can strip the threaded insert further and turn a solvable repair into a thread insert job.
What kind of shimming works best if the patio surface is slightly unlevel?
Use a shim that stays put, thin rubber is ideal, and keep it out of pinch points. Place the shim under the low side of the base frame, re-check with a bubble level, then retighten and confirm the legs do not rock when you press down at the corner.
When should I replace only warped legs instead of the entire base?
Replacement legs can be the best option when only one leg is warped, but only if your base design uses standard spare parts. If the frame twist is present across multiple connection points, or if the pole sleeve area is affected, individual leg replacement may not fix the geometry and the umbrella may still wobble.
How do I know whether corrosion is just surface rust or a structural failure risk?
When corrosion has pitted or thinned structural metal, paint and surface treatments are mostly cosmetic. A practical decision aid is to inspect the wall thickness near the load path, around the pole sleeve and support tubes. If you can feel a major depression or see through-wall damage, replacement is the safer move.
What’s the correct way to test the base after repairs, and how should the tilt lock behave?
Yes, but do it with the umbrella open only after you’ve verified the base won’t shift dangerously. Gently push the pole in multiple directions and watch for movement at the base connection, then check that the tilt lock engages the same as it did before. If the lock feels sticky after you re-seat the pole, lubricate the pivot mechanism with a silicone-based lubricant rather than adding grease to plastic threads.
Next Articles

How to Fix a Patio Umbrella That Won't Open or Close
Step-by-step fixes for patio umbrellas that won’t open or close, with checks for jams, cords, latches, and lubricating t
How Does a Patio Umbrella Work? Components, Use, and Fixes
Learn how patio umbrellas work: components, open close tilt, stability, and step by step troubleshooting common mechanic
Patio Umbrella Crank Not Working: DIY Fix Guide
Fix a patio umbrella crank that won’t work with safe step-by-step jam, gear, and base troubleshooting and repair tips.